Home » Caramel Mud Cake (Gluten free option)

Caramel Mud Cake (Gluten free option)

This post may contain affiliate links to products I recommend. I receive a small commission at no cost to you if you make a purchase using my link.

Rich, dark caramel mud cake made using real caramel sauce made from scratch. This is every caramel lover’s dream cake! Includes gluten free caramel mud cake option, too!
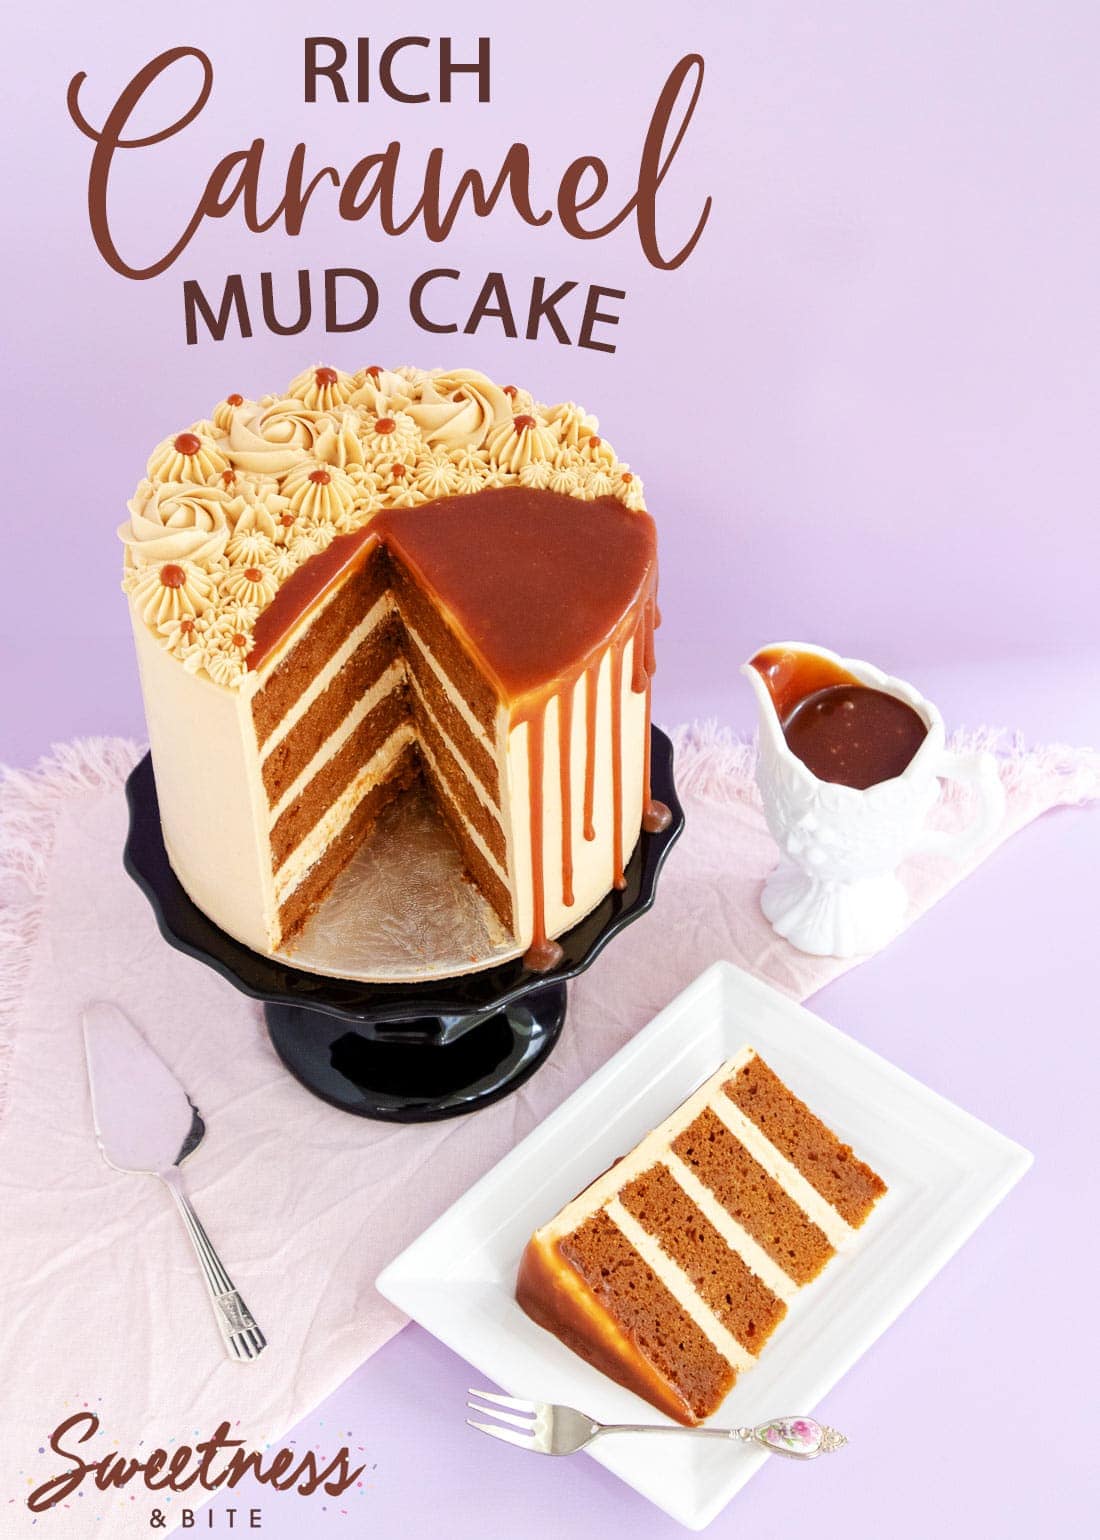
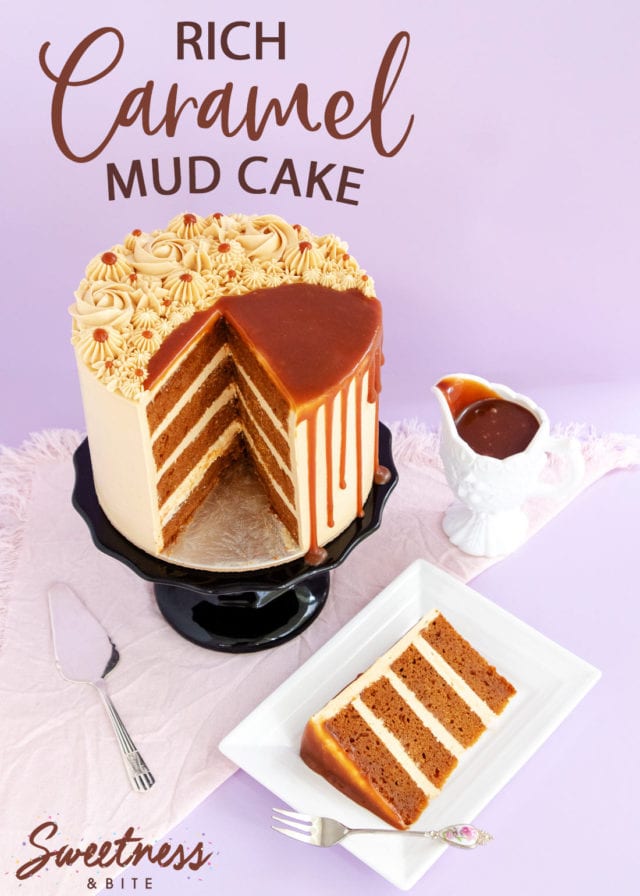
Caramel mud cake on a black cake stand, a slice of cake on a white plate, and a small jug of caramel sauce.

This cake is one of the most tested and tweaked cake recipes I’ve ever created.

A throwaway comment I made to my friend Loralee, about how it would be great to make a caramel mud cake with real caramel, turned into a baking day together, testing some theories, and then a bunch more testing once I got home.

What we’ve ended up with is a rich, moist cake with an intense caramel flavour.

Many “caramel” mud cakes are simply white chocolate mud cakes with brown sugar and/or golden syrup added. They’ll give you a caramel-y colour, but the flavour would more accurately be called butterscotch, rather than caramel.

This caramel cake recipe starts by making a real caramel sauce, which becomes the base for the whole cake, and gives you the richest caramel mud cake that you could ever imagine.

You can decorate this cake however you like, but I have included instructions below for how I decorated this cake with caramel buttercream and a caramel drip. It really is the perfect cake for caramel lovers.

  • FULL-ON CARAMEL FLAVOUR – Because this cake is made with real caramel as the base, it’s the most caramel-y cake you’ll ever taste.
  • SUPER MOIST – Like all mud cakes, this caramel mud cake is super moist, and stays that way for days. The cake has a dense texture that’s slightly fudgy, almost like a firm brownie.
  • SUPER STURDY – This cake is great for tiered cakes, and can also be used for carved cakes.
  • EASY TO MAKE GLUTEN FREE – With a small tweak, this makes a great gluten free caramel mud cake, which is every bit as moist, rich and delicious.
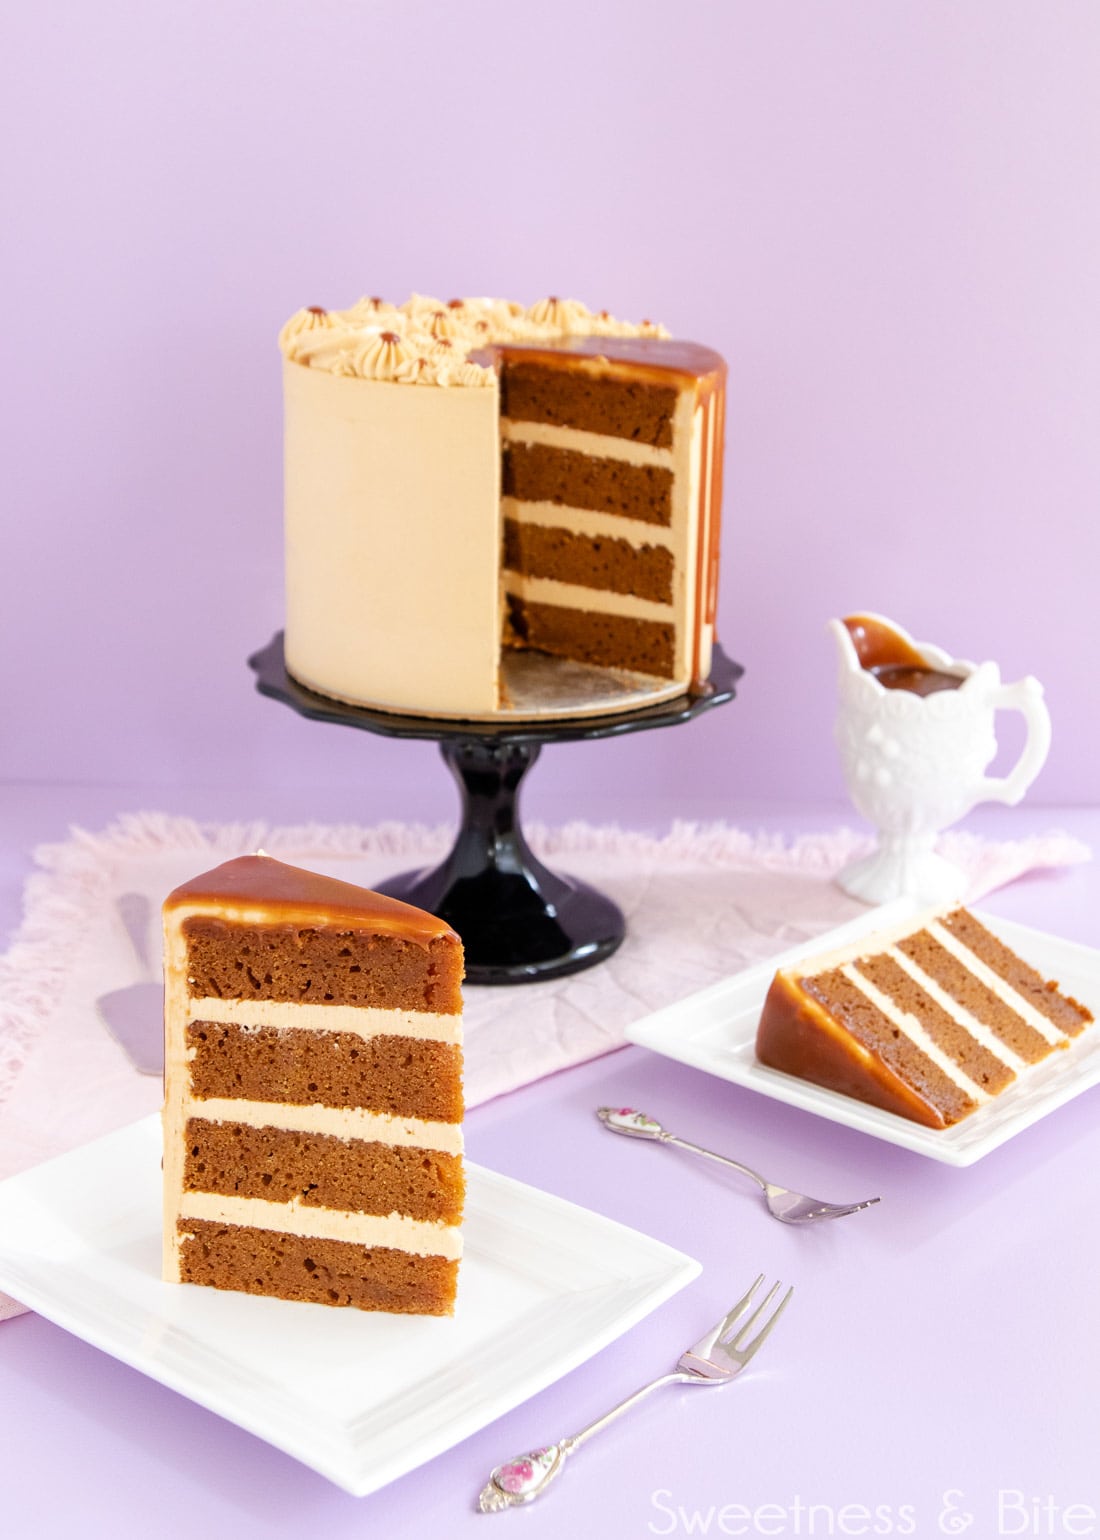
Slice of cake showing the layers of cake and caramel buttercream. Cake on the cake stand in the background.

Ingredients

Here’s what you’ll need to make this recipe:

  • Cream – The cream you need for this recipe is known by different names in different countries. Here in NZ it’s usually called standard cream or whipping cream, elsewhere it may also be known as single cream or full cream. Heavy cream will also work.
  • Sugar – Caster sugar (also known as superfine sugar) works best in this recipe as it dissolves more quickly than regular sugar, but if regular sugar is what you have, then that will work too.
  • Corn syrup or liquid glucose – Helps to stop the sugar in the caramel from re-crystallising. If you don’t have either, then you can leave it out.
  • Salt – Salt helps to balance the sweetness from the caramel to stop it from being too sickly. I use flaky sea salt. If using table salt, you will likely need slightly less.
  • Vanilla extract – Use a good quality vanilla extract. Vanilla paste will also work.
  • Milk – Full fat milk (also known as whole milk, and in NZ it’s blue-top milk) works best in this recipe.
  • Unsalted butter – If you only have salted butter on hand, then reduce the amount of salt added, or leave it out altogether.
  • White chocolate – It’s not mud cake without chocolate. In this it’s more for texture than flavour – the cake doesn’t have a strong white choc flavour.
  • All-purpose flour OR gluten-free flour blend – To make a gluten free caramel mud cake, I use my homemade gluten free flour blend, but you can also use a good quality store-bought gf flour blend. Check out my gluten-free cakes for decorating post for more information on baking gluten-free cakes, including some safety tips if you’re baking for someone with Coeliac disease.
  • Xanthan gum (if making gluten free) – This helps stop gluten free cakes from crumbling. If you’re using a store-bought GF flour blend that contains a gum ingredient (check the ingredient panel) then you can omit the xanthan gum from this recipe.
  • Baking powder – If making this cake gluten free, make sure you check that your baking powder is gluten free, as some are not.
  • Eggs – Use large eggs for this recipe.

To make ice and decorate the cake with caramel Swiss meringue buttercream as I have here, you’ll also need egg whites + more caster sugar, vanilla, unsalted butter and some homemade caramel sauce, or for a grown-up treat, why not try rum caramel sauce instead?
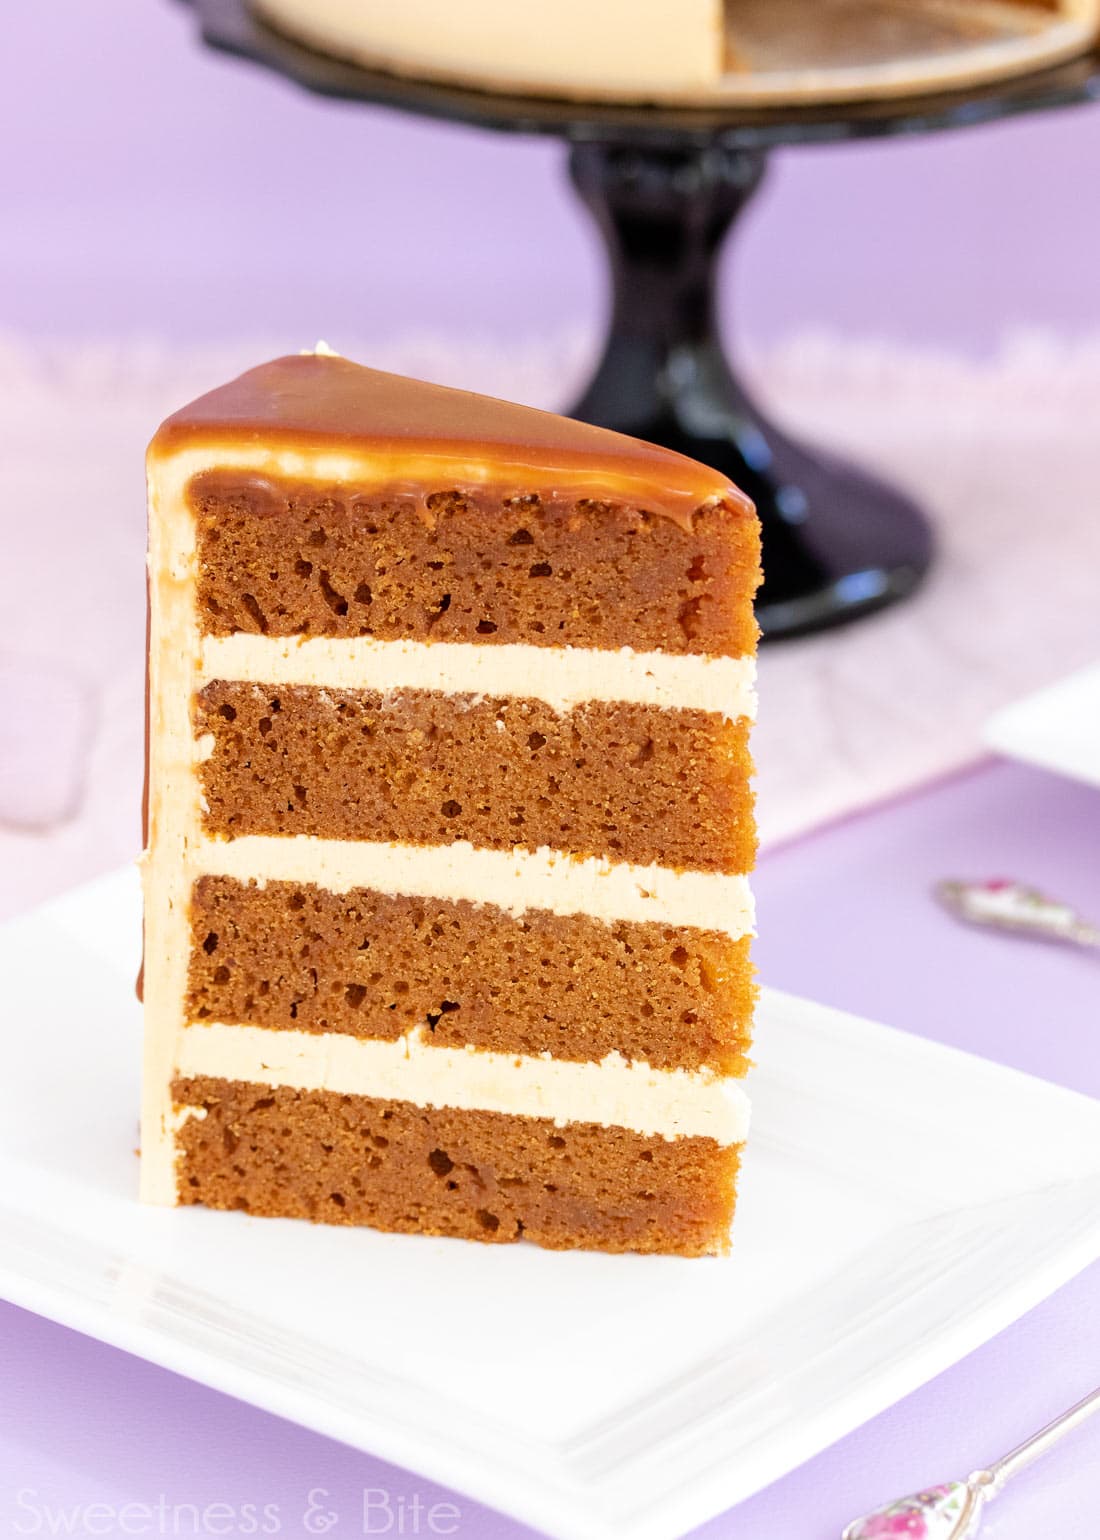
Close up of a slice of caramel mud cake with three layers of caramel buttercream.

How to Make Caramel Mud Cake

So we start with making what is essentially a caramel sauce. You’ll boil together the sugar and corn syrup or liquid glucose with some water until it becomes a lovely deep caramel colour. If you have a sugar thermometer, it should be about 160°C (320°F).

Then you’ll add the cream – being careful as it is HOT – then return it to the heat and cook again until it’s all smooth, and reaches it reaches 115°C (240°F). If not using the thermometer, just boil the caramel until it darkens a little more and smells even more delightful.

This is the colour we’re aiming for…
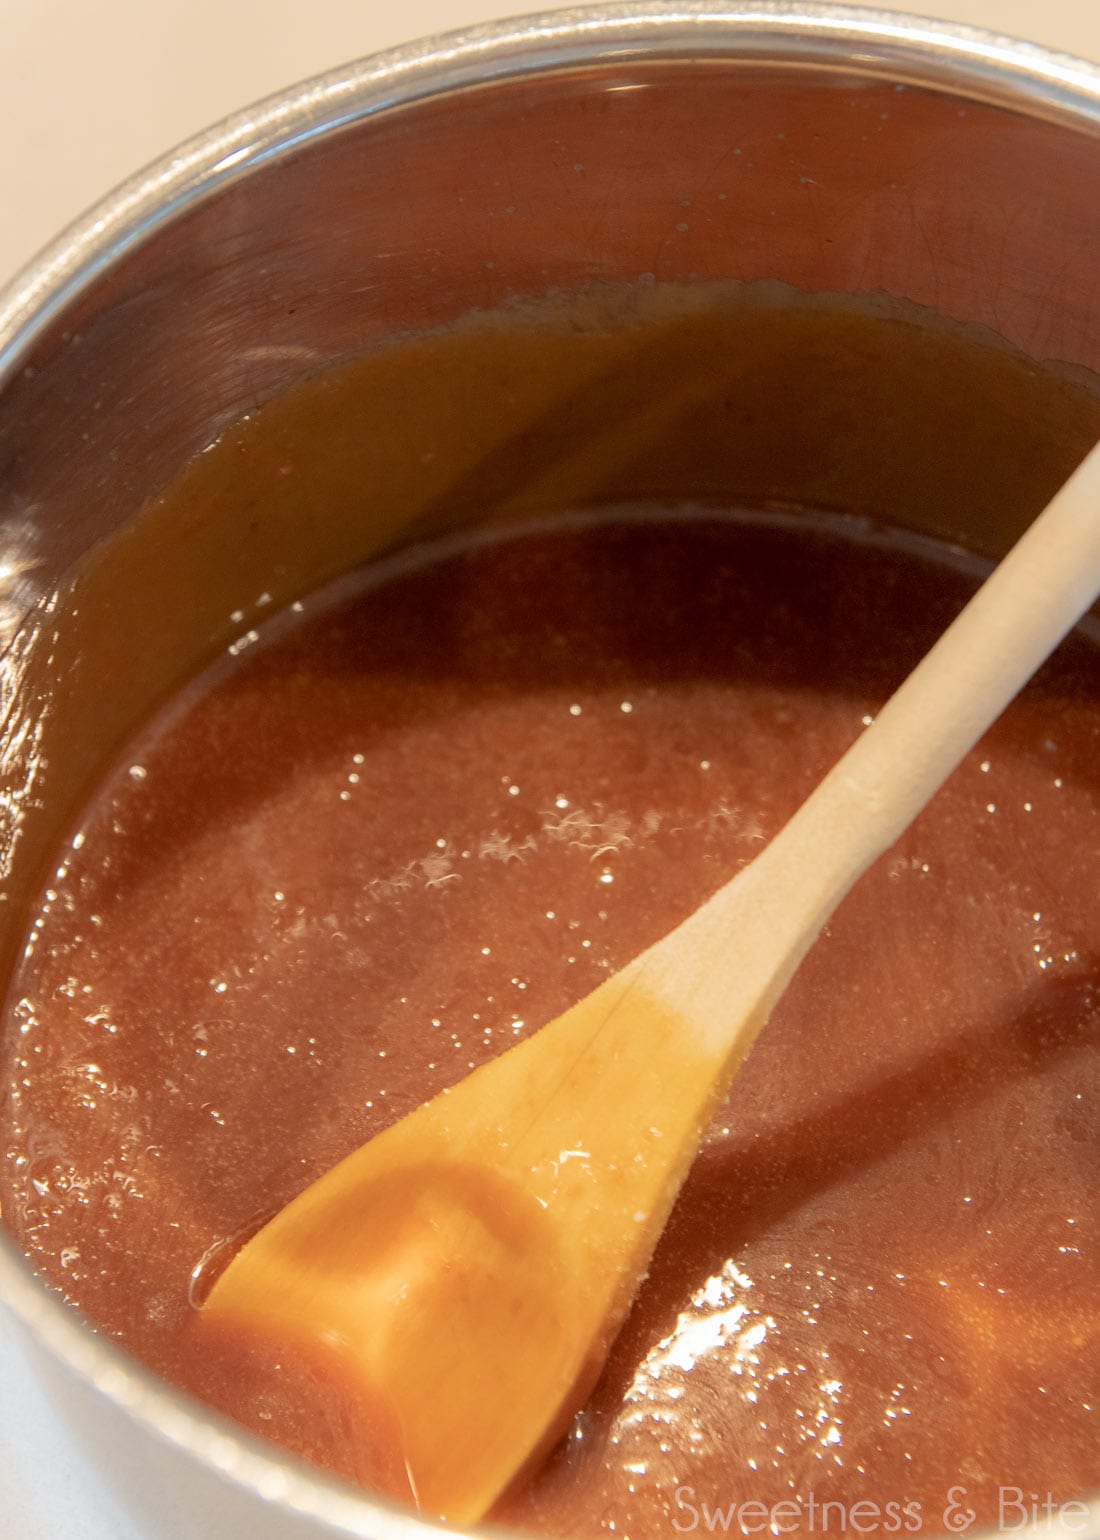
A saucepan with caramel sauce in it, with a wooden spoon.

Then you’ll warm the milk and melt the butter into it, and mix that together with the caramel. I know some people will ask why you can’t just add the milk and butter straight into the caramel and melt it that way, and I can tell you from experience that it’s because caramel is fickle, and it will split.

Adding cold ingredients to caramel is pretty much a handwritten invitation for it to turn into an irreparable chunky mess. But by melting the butter into the milk and warming it all up, we skip over that little trap, feeling pretty good about ourselves.

Then you’ll add in the chopped white chocolate, and stir until the chocolate melts.

The mixture needs a little time to cool down and then you can add in the dry ingredients and the eggs, pour the batter into your prepared cake pans, and pop ’em in the oven.
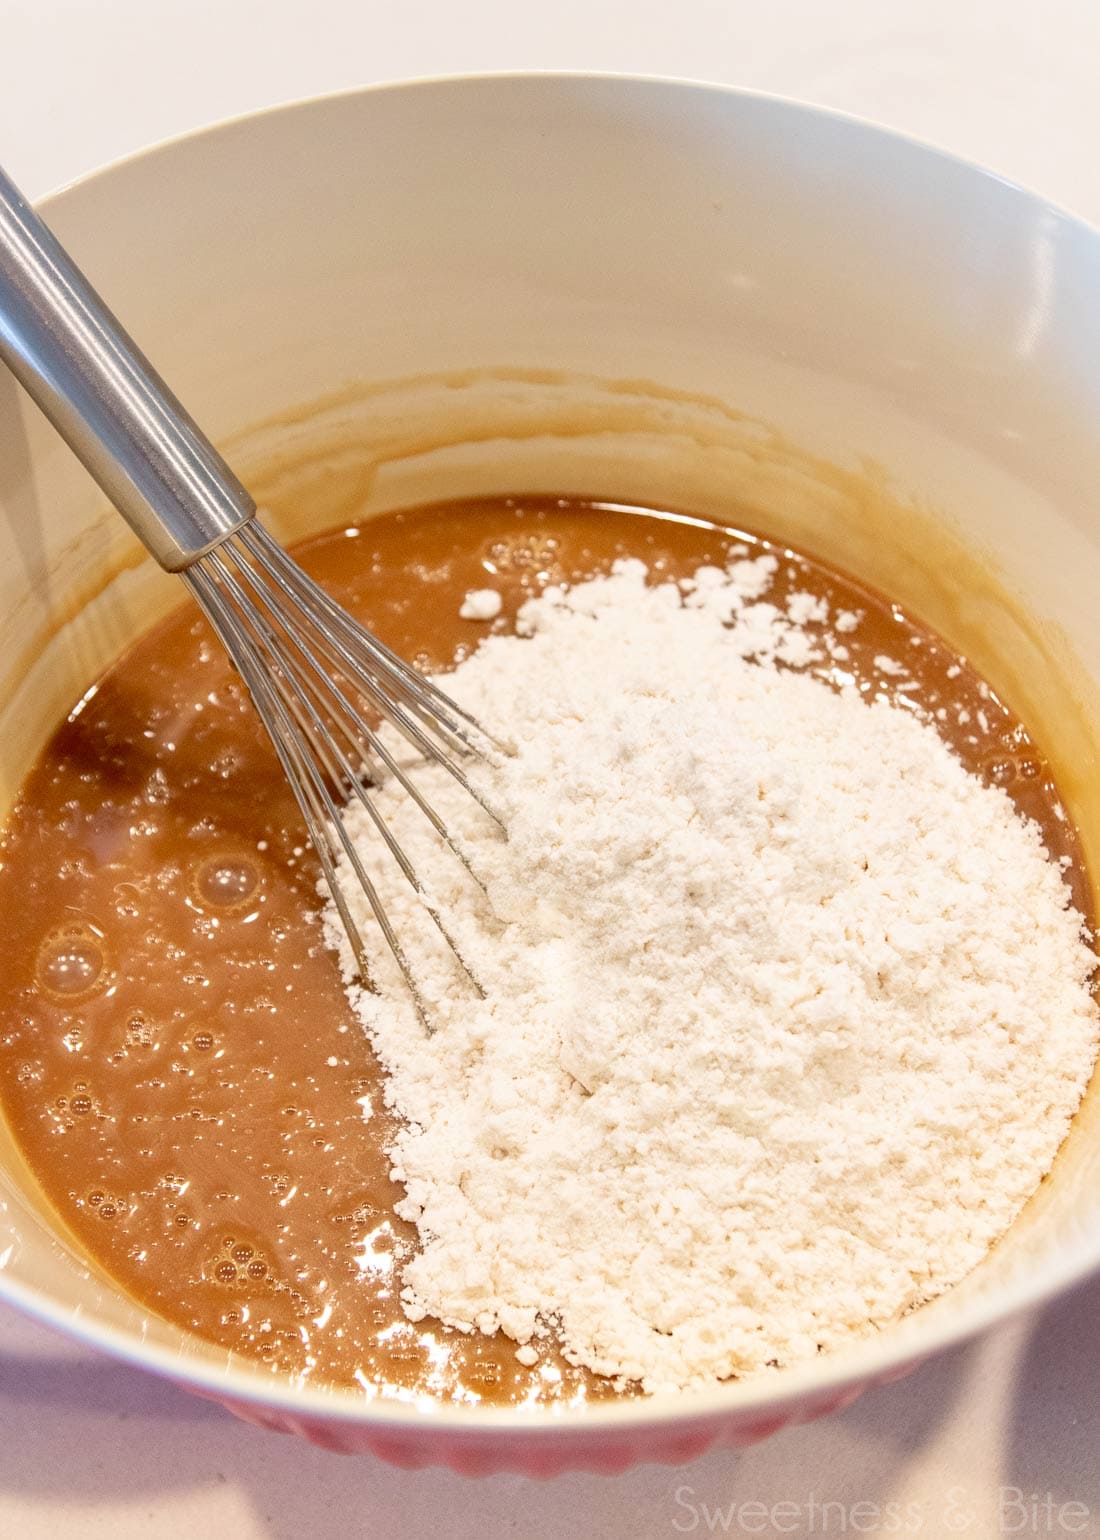
Large bowl with caramel mud cake batter and a balloon whisk.

The cakes do crack just a little on the top, but I found that the very small amount of top crust that I needed to remove to level the cake was just enough to cut off those cracks too. Perfect.
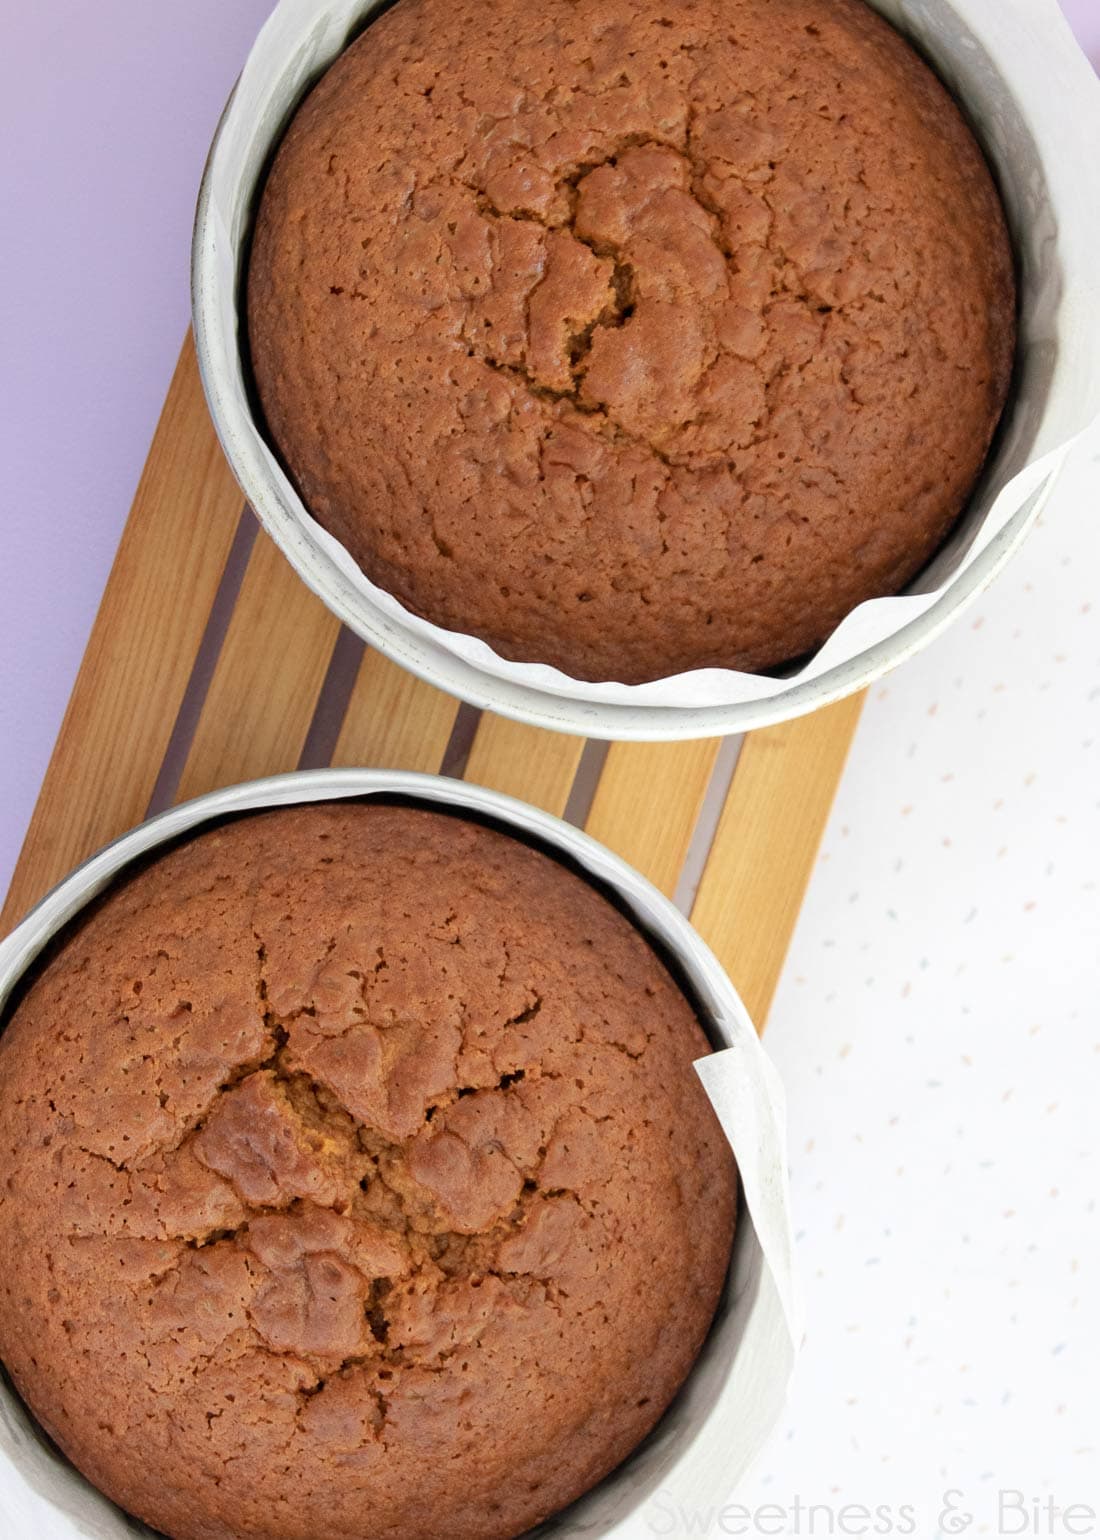
Two cakes in cake pans on a wooden cooling rack.

Caramel Mud Cake Tips

Making the Caramel

As I mentioned earlier, the whole reason this cake tastes so amazing is that we’re using real caramel sauce as a base. I know the idea of making caramel sauce can be daunting if you haven’t tried it, what with the boiling sugar and the fear of burning either yourself or the caramel. 

The best tip I can give you to get over your trepidation is perhaps a little blunt, but also the only way you’re going to get this caramel mud cake in your life (and in your mouth) – just try it.

The only way to get over a fear of making caramel is to make the caramel. Read through the recipe below and see what you should be looking for, get all your ingredients for the caramel measured and ready to go, and just do it. If you happen to have a candy thermometer, it does make the process a bit easier – it’s not essential, but it does help.

Baking Strips/Foil Lid

During the recipe tweaking process, I discovered that unlike my white chocolate and dark chocolate mud cakes, the caramel mud cake is actually much better when baked without baking strips and a foil lid.

Having a foil lid on kind of steams the cake, and makes the cake texture more like a steamed pudding. Which is cool if you’re after a steamed pudding cake. But I was not. Without the lid and strips, the cake ends up nicely cakey, dense and fudgy. 

It does develop slightly more of a crust than when I use baking strips, but as I trim the edges of all my cakes before decorating them, I’m ok with that. If you don’t like to trim your cakes much, then a quick brush with some freshly boiled water over the cake when it comes out of the oven will soften the edges up nicely.

Carving

This caramel mud cake is perfect for cake decorating, and you can carve both the gluten-y and non-gluten-y versions. I used this recipe a while back to carve a couple of little mandarin cakes to fool my Dad’s workmate and it’s a surprisingly easy cake to work with.

If you use different gluten free flours to mine and find your cake is a bit soft or isn’t carving easily, then I suggest chilling it for a bit in the fridge to firm it up, and as with all carved cakes, I recommend using chocolate ganache to fill and cover the cake, as it is much firmer and more stable than buttercream.

Storing the Cake

As with most mud cakes, this one keeps really well. When stored in an airtight container or once sealed with frosting and/or fondant, it will keep well for at least a week at cool room temperature. Or you can wrap it well and freeze it.

When decorating the cake, you can use a 3 or 4 day decorating timeline.

How to Decorate the Cake

Ok so let’s talk quickly about how I decorated this cake. You can decorate your caramel mud cake however you like, but if you want to do what I did here, read on.

I made a batch of my favourite lightly salted caramel sauce, which I used both to flavour my Swiss meringue buttercream and to drizzle a caramel drip down the side of the cake. Because what’s better than caramel? More caramel. You can make the sauce a week or so before you need to use it, if you want to get a head start.

I split my cakes into two layers each, filled them and smooth iced it all with the buttercream (check out my buttercream tutorial if you don’t already have a favourite method of doing this). Once the cake is iced and the buttercream has firmed up, you can transfer it to a cake stand or serving plate.

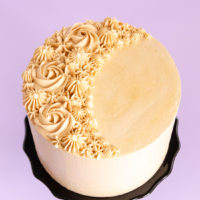
Then pop the leftover buttercream into a couple of piping bags, and pipe swirls and stars on the top of the cake. You can use pretty much any star/swirl tips that you like, but I’ll list the ones I used below in case you want to be my cake twin.

Wilton 1M (large star tip), Wilton 6B (extra large open star tip), 4B (same as the 6B but slightly smaller) – these three all fit a large coupler. Wilton 32 (same/same but even smaller) Ateco 34 (small star tip) – both used with a small coupler. I used two piping bags, and just switched the tips on and off with the couplers.

I piped a few rose swirls with the 1M tip, then filled in the rest of the crescent shape with the rest of the tips, starting with the bigger ones and working my way down, filling in the gaps with the smaller star tips.
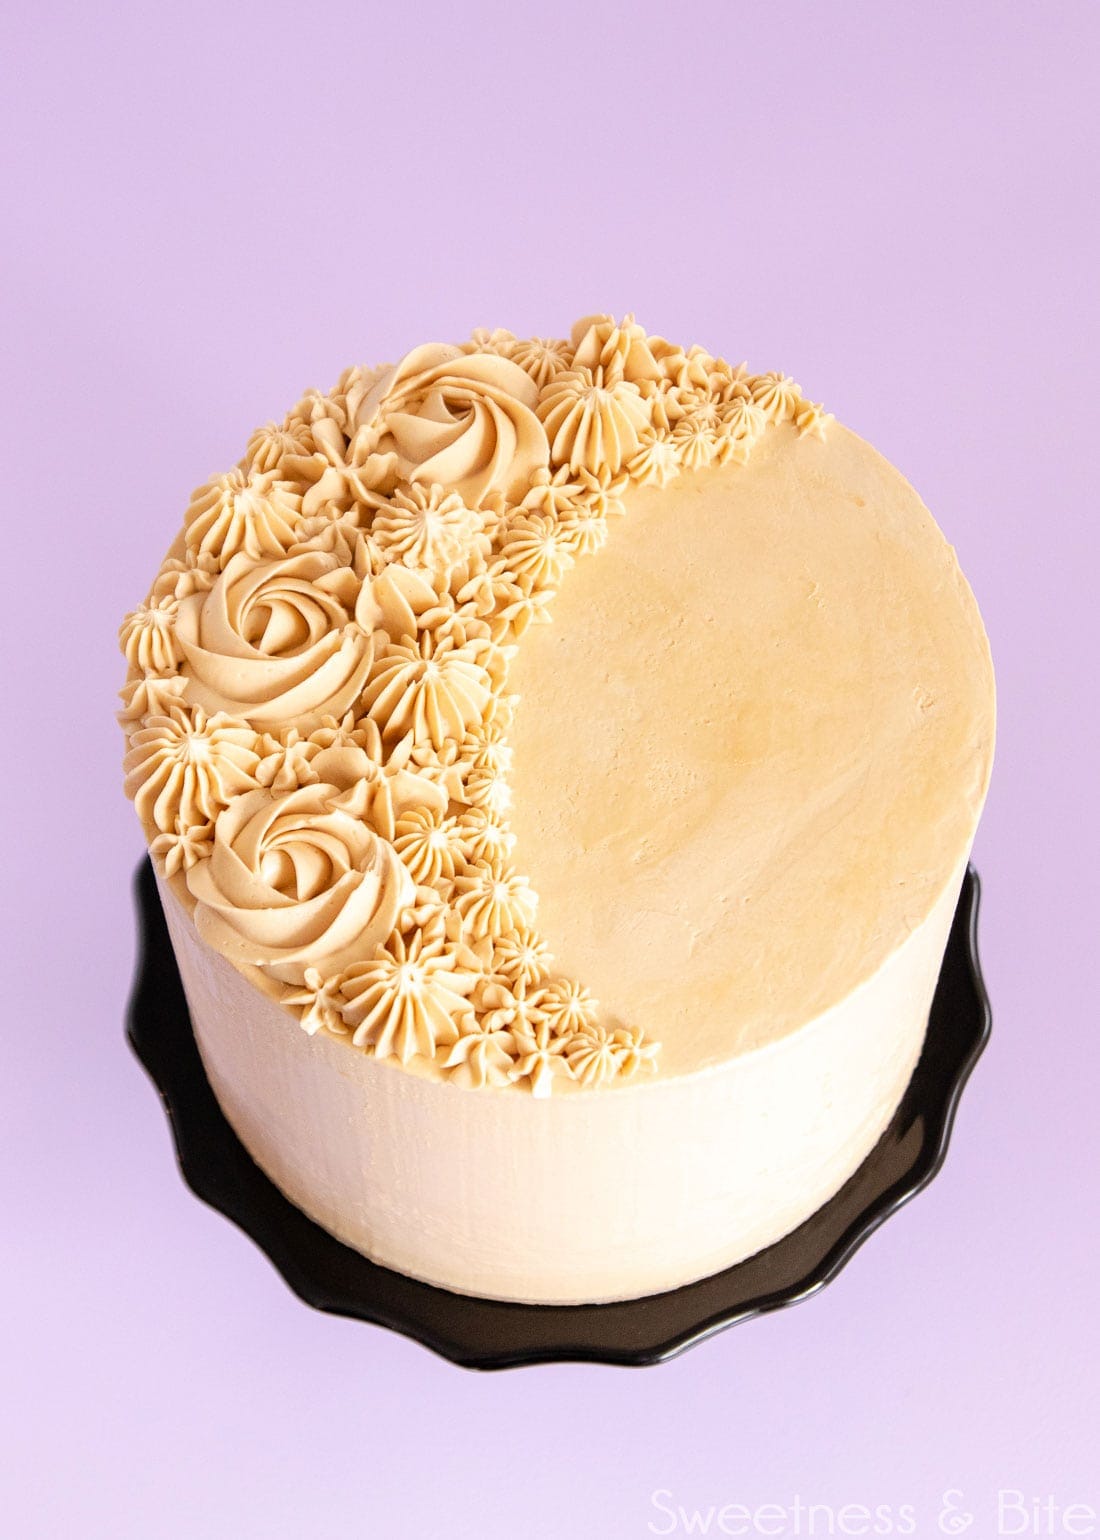
This is a great technique if you’re not confident in your piping skills because there is so much going on that no one will notice if something isn’t perfect.

Caramel Drip Tips

Then I spooned some caramel sauce over the rest of the top of the cake and added a drip down the side. I prefer to use a squeeze bottle to do the drips, but you can use a spoon if you like. I also used the bottle to add a few little dots of caramel sauce onto the piped stars.
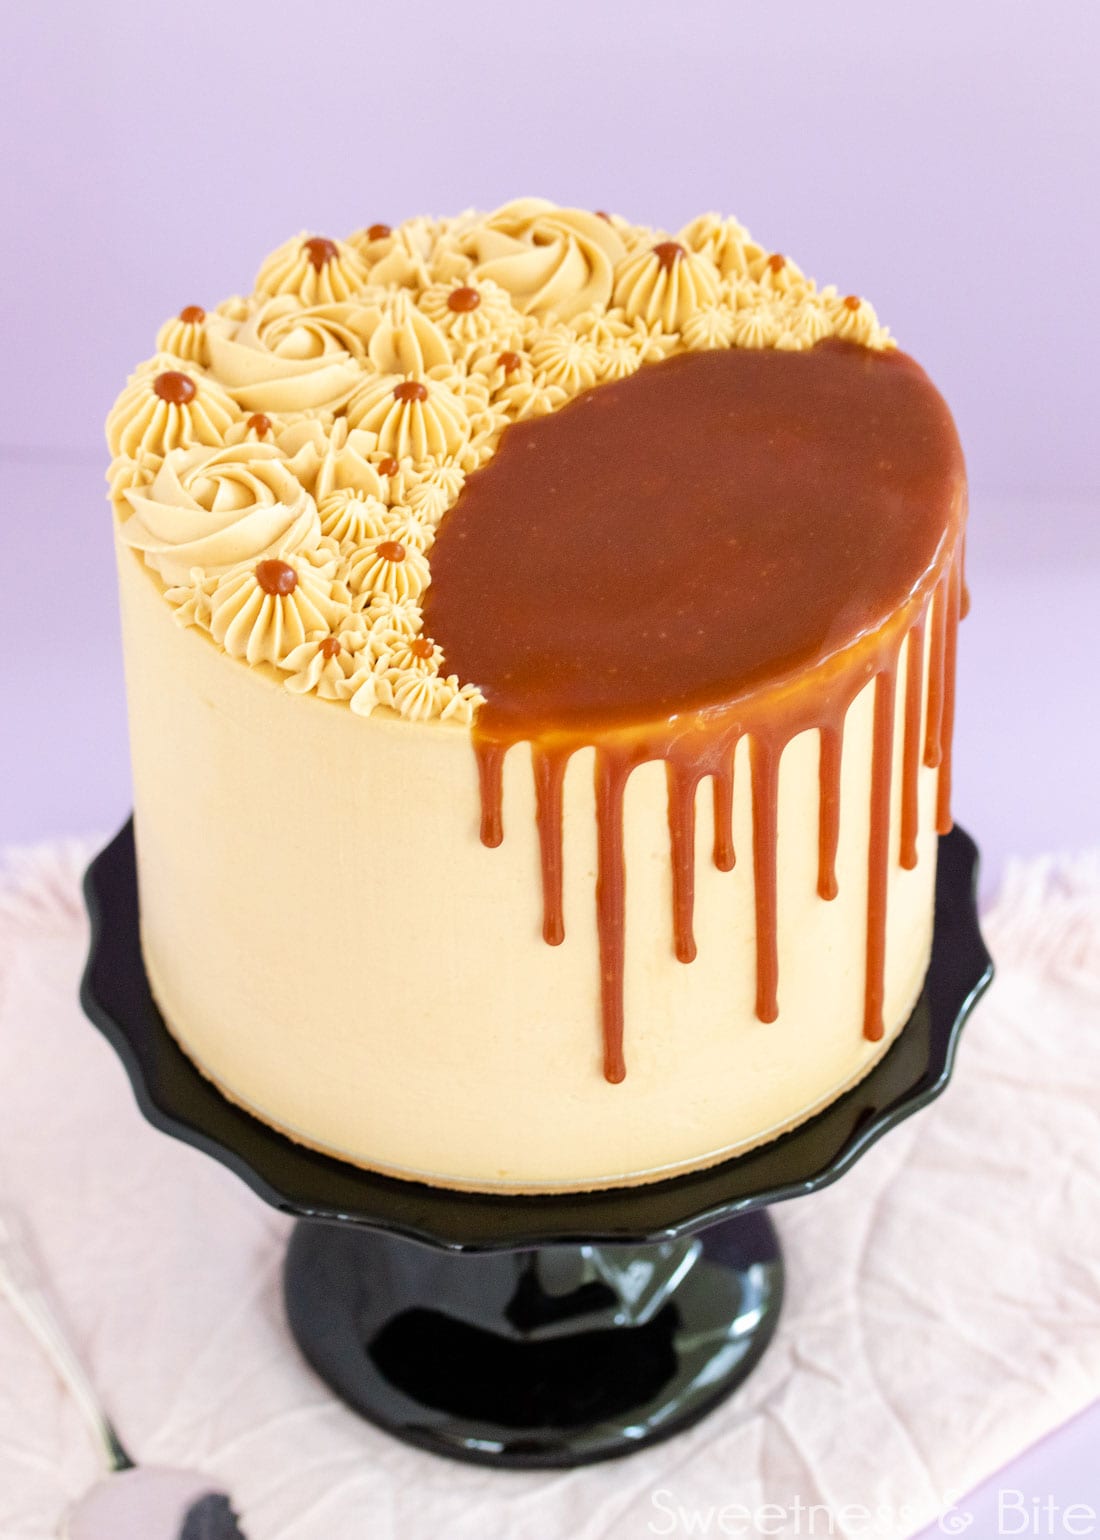
Caramel mud cake on a black cake stand, decorated with swirls of caramel buttercream on top, and a caramel sauce drip.

One important thing to note about using caramel for a drip is that it will continue to drip down the cake for a lot longer than a ganache drip does. Make sure your cake is chilled, and warm up the caramel just until it is pourable – don’t make it too runny. Try dripping some down the side of a glass to check if it is the right consistency before you add it to the cake.

It’s also best to do the drip on the day that you plan to serve the cake. Trust me on this one – because this cake I’m showing you is not the first cake I made for this post. Nope, I made one before this. I decorated it and started taking photos, only to lose the last of the natural light for the day (boo, Kiwi winter) and I left the cake ’til the next day to finish taking photos, hoping against hope that the cake would still be presentable the next morning.

“Haha!” laughed the cake gods, “we shall not grant her this wish!”, and so it was, that I walked into my studio the next morning to find a puddle of caramel under the cake stand. So much caramel. 

Don’t be like me. Pop your caramel drip on within an hour or so of when you plan to serve your cake. 

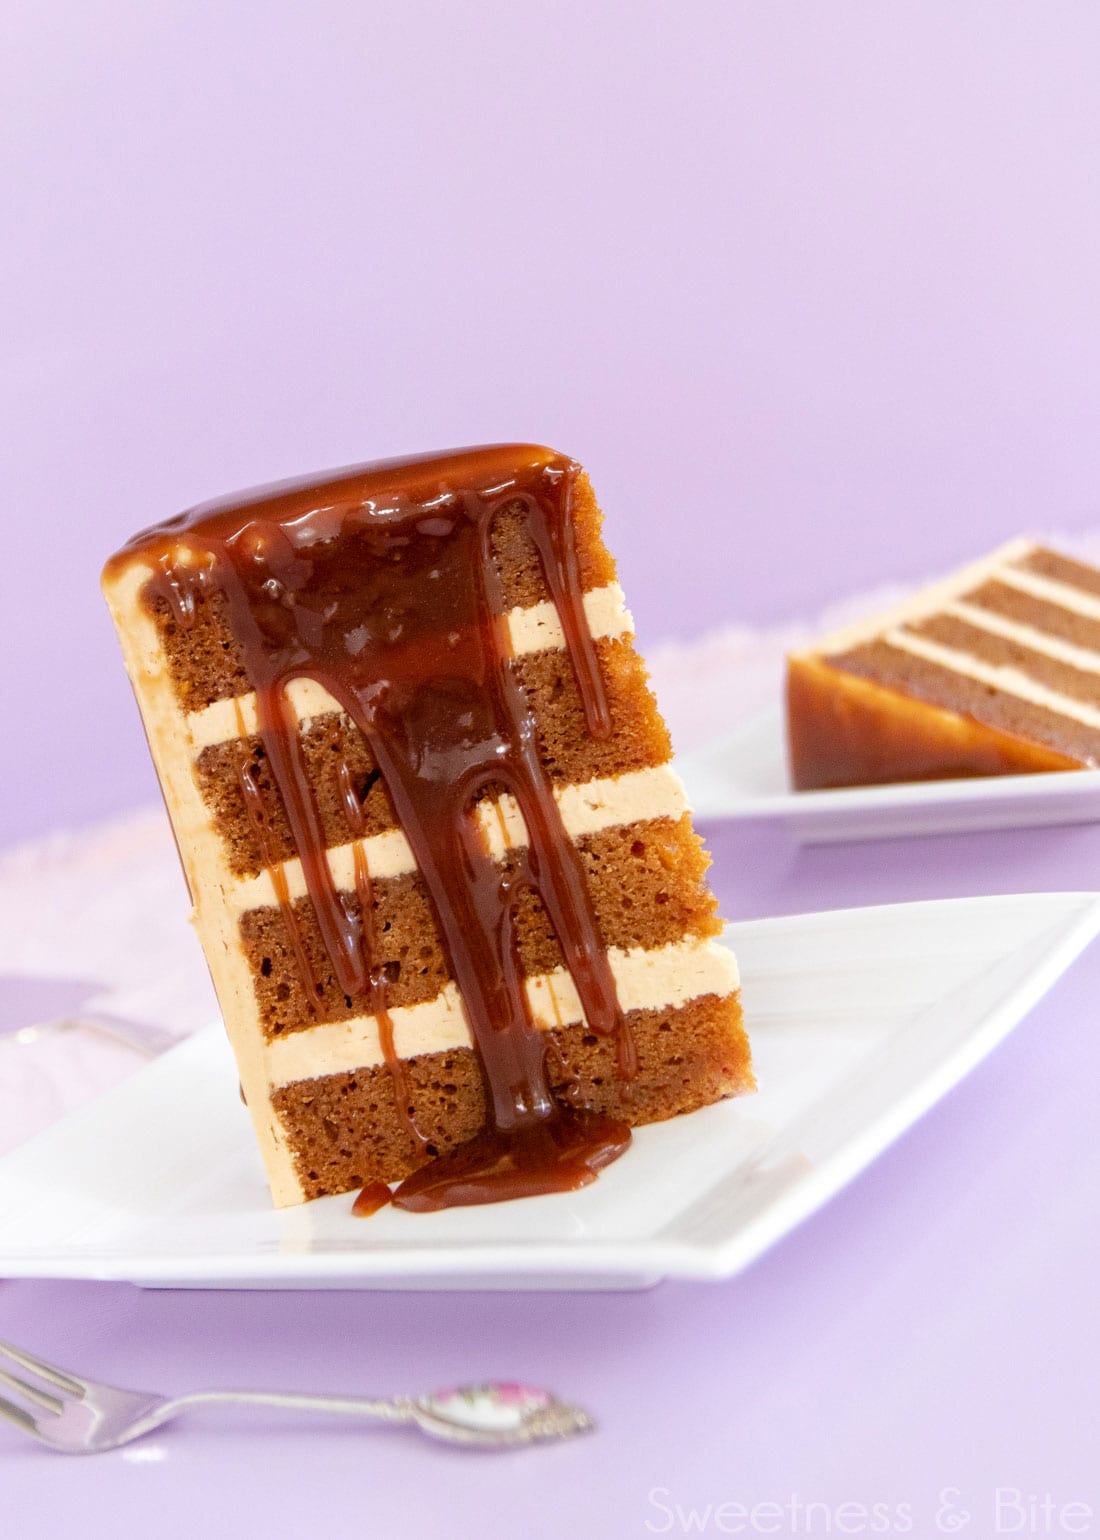
(And then pour some more on the slices of cake, if you’re feeling extra. When it comes to caramel, extra is always better).
Rich, dark caramel mud cake made using real caramel sauce. This is every caramel lover's dream cake! Includes recipe details for making the cake gluten free, and how to make the most amazing caramel Swiss meringue buttercream.
A slice of rich caramel mud cake with dripping caramel sauce on a white plate with a purple background.

Rich Caramel Mud Cake

Rich, dark caramel mud cake made using real caramel sauce. This is every caramel lover's dream cake! This cake works equally well when made with gluten-free flour or regular wheat flour. See notes below if making it gluten-free.
4.52 from 107 votes
Print Recipe Pin Recipe Save
Prep Time: 30 minutes
Cook Time: 1 hour 30 minutes
Total Time: 2 hours
Cuisine: American
Category: Cake Recipes
Makes: 12 people
Cake Size: Two 7″ round, 2″ high cakes

Ingredients

  • 125 ml whipping cream or heavy cream
  • 400 g sugar caster sugar works best
  • 3 tbsp corn syrup/ or liquid glucose
  • 125 ml water
  • 1 ½ tsp salt
  • 1 teaspoon vanilla extract
  • 375 ml milk full fat milk works best
  • 350 g unsalted butter
  • 180 g white chocolate
  • 375 g all purpose flour OR gluten free flour blend*
  • 2 teaspoons baking powder
  • ½ teaspoon Xanthan Gum* if making gluten free
  • 3 large eggs

Instructions

  • Line the base and sides of two 7” round (at least 3” high) cake pans.
  • Measure the cream into a microwave safe jug, and microwave until warm (around 30 sec, depending on your microwave power). The temperature isn’t too important, but warming the cream will help it splatter less when you add it to the caramel. Set aside.
  • Place the sugar, water and corn syrup in a medium saucepan and stir until all the sugar is moistened. Place over medium high heat. As it comes to a boil, use a pastry brush dipped in water to wash down any sugar crystals on the side of the pan.
  • Increase the heat to high and boil until the syrup turns a light amber colour. Keep an eye on it, you don’t want it so dark that it burns, but it needs a decent amount of colour to have a deep caramel flavour. It should be about 160°C (320°F) on a sugar thermometer if you have one.
  • Remove from the heat and carefully pour in the cream while stirring with a long-handled spoon or spatula. Be careful – it will splutter and there will be a lot of steam!
  • Clean the thermometer (if using) and clip it back on the pan. Return the caramel to medium heat and bring it back to a boil, stir gently until smooth and it reaches 115°C (240°F). If not using the thermometer, just boil the caramel until it darkens a little more. If at any point you get even a hint of a burning smell, remove it from the heat immediately. Remove from the heat, stir in the salt and vanilla and set aside.
  • In a large saucepan, heat the milk and butter together, whisking occasionally over medium heat until the butter is melted.
  • (Note: once you are comfortable making the caramel, you can have the milk/butter/chocolate mixture heating while you make the caramel. If you’re not comfortable making the caramel then it is better to keep your attention focussed on it without distraction.) 
  • Slowly whisk the caramel into the milk mixture, then add the white chocolate and whisk until melted and combined. Leave to cool until you can comfortably hold your hand against the pan, or your finger in the mixture without it feeling hot. To cool it faster, transfer the mixture to a large heatproof bowl. To speed things up even more, place the bowl in a sink full of cold water and add a few handfuls of ice to the water.
  • While you wait, heat the oven to 150°C (300°F).
  • Sift together the flour and baking powder (and Xanthan gum, if making gluten-free).
  • When the liquid ingredients have cooled, add the dry ingredients in 2-3 additions. Mix with the whisk, but use a folding rather than whipping motion to avoid air bubbles. Don't worry if there are still little lumps of flour.
  • Whisk the eggs together with a fork and add them to the batter, mixing again with the whisk.
  • Pour the batter into the prepared pans and bang them gently on the bench to remove any large air bubbles.
    Bake for 75 – 90 minutes, or until a skewer inserted into the middle of the cake comes out clean. When the skewer comes out clean, insert a thin-bladed knife into the middle of the cake. When that comes out clean or with only a few crumbs attached, the cake is done. If you have an instant-read probe thermometer, the centre of the cake should be at least 99°C. Mud cakes can be tricky to gauge for done-ness, so these are the best ways to tell for sure.
  • Allow the cakes to cool for half an hour, then cover the top with foil, securing around the edge of the pan. Leave the cakes in the pan overnight to cool completely and firm up before removing from the pans and decorating as desired.

Notes

Gluten Free – To make a gluten free caramel mud cake, you will need to use an all purpose gluten free flour blend. You can find my gluten free baking flour blend here, this is what I use for all my cakes.
*If you choose to use a purchased gluten free flour blend, check to see if it contains a gum ingredient (usually xanthan gum, guar gum or vegetable gum) – if it contains one of these then omit the Xanthan gum from the cake recipe.
Baking the cakes – If you find the cakes are browning too much on the top before they are cooked in the middle, cover the tops with foil for the remaining baking time.
When stored in an airtight container, or once sealed with frosting and/or fondant, it will keep well for at least a week at cool room temperature. For longer storage, before decorating you can wrap it well with plastic wrap, pop it in an airtight container and freeze it.

Nutritional Disclaimer: Any nutritional info provided is a computer generated estimate and is intended as a guide only.
Enjoyed this recipe?Tag @sweetness.and.bite on Instagram, and hashtag #sweetnessandbite so we can see it! ❤
Rich, dark caramel mud cake made using real caramel sauce. This is every caramel lover's dream cake! Includes recipe details for making the cake gluten free, and how to make the most amazing caramel Swiss meringue buttercream.

Lightly Salted Caramel Swiss Meringue Buttercream

4.23 from 31 votes
Print Recipe Pin Recipe Save
Prep Time: 5 minutes
Cook Time: 10 minutes
Inactive/Mixing Time: 20 minutes
Total Time: 35 minutes
Makes: 1 kg

Ingredients

Instructions

  • Thoroughly clean the whisk attachment and heatproof bowl of a stand mixer, and wipe with a paper towel dipped in lemon juice or vinegar to remove any traces of grease.
  • Combine the egg whites and sugar in the mixer bowl. Place the bowl over a pot of just-simmering water, making sure the water doesn’t touch the bottom of the bowl. Stir constantly until the sugar has dissolved and the mixture reaches 71°C/160°F.
  • Place the bowl on the mixer and whip on medium speed for one minute, then increase speed to medium-high and beat until the meringue is stiff and glossy. The mixer bowl should be cool to the touch.
  • Switch to the paddle attachment, and with the mixer on low speed add the butter a piece at a time until fully incorporated. If the mixture seems to curdle or separate, don’t panic! Just keep the mixer going on low speed until the buttercream becomes silky and smooth.
  • Warm the caramel sauce gently in the microwave until just slightly warm and pourable (don’t make it hot, or you’ll melt your buttercream). Add to the buttercream along with the vanilla extract and beat again to combine.
  • Give it a taste, if it could do with more caramel then add a bit more.
  • Split your cakes into layers (I split each cake into two layers, so my finished cake had four layers), fill, layer and cover your cake with the buttercream.
  • See post for how I used the buttercream to decorate my cake.

Notes

If your buttercream does split and is taking a long time to come back together, you can speed the process up. Touch the side of the bowl – if it still feels very warm, then pop the bowl into the fridge for 5-10 minutes, then beat again. Alternatively, if it feels like the mixture is too cold, then place the bowl back over the pan of simmering water for a couple of minutes, just until it begins to melt around the edges of the buttercream, then remove from the heat and beat again.

Nutritional Disclaimer: Any nutritional info provided is a computer generated estimate and is intended as a guide only.

Enjoyed this recipe?Tag @sweetness.and.bite on Instagram, and hashtag #sweetnessandbite so we can see it! ❤

Happy Baking!

Natalie
xx

More Recipes You May Like…

Leave a Reply

Your email address will not be published. Required fields are marked *

Recipe Rating


36 Comments

  1. Sounds yummy, could I use my own caramel sauce recipe and if so how much/cups would that be. Can’t wait to try it. Thank you

    1. Hey leana 🙂 You could try experimenting if you wanted, but I wouldn’t recommend it. The sugar in the caramel is the total amount of sugar used in the recipe, so it is a major component of the recipe turning out successfully. Other caramel sauces may have differing amounts of sugar, and possibly other ingredients not used in this cake recipe. So, you could try experimenting with it if you wanted to, but I can’t tell you how much to use, so I would just suggest following the recipe as it is written.

  2. Can you make these in to cupcakes?

    I love the recipe and would love to make it into cupcakes. But i’m not sure how they would turn out,

    1. Hey Charly. I haven’t tried this one as cupcakes yet but I know quite a few readers have used my white and dark chocolate mud cake recipes as cupcakes successfully, so I suspect this one will be much the same. I’m not sure exactly how long they would take, but I’d check them after about 25 minutes and go from there. You’d just want to be careful not over bake them as they’d be quite dry. If you give them a go I’ve love to know how you get on 🙂

  3. Hi, can the amount of butter in the “slightly salted caramel swiss meringue buttercream” be reduced?
    I put in 1 1/2 cups of caramel, but all we could taste was butter.

    1. Hi Naomi. I’m sorry to hear that, it’s really strange that the buttercream tasted so strongly of butter, especially after adding that much caramel sauce. Is there any chance you could have accidentally used salted butter rather than unsalted? The only time I’ve had a meringue buttercream end up super buttery is when I accidentally used salted butter, and it literally tasted like eating sweetened butter, it was awful! I then realised the importance of using unsalted butter 🤦‍♀️

      If that wasn’t the case, then yes you can reduce the butter a bit, but keep in mind that the buttercream will be a bit softer, as it’s obviously the butter that makes it firm up. You could also leave the butter out of the caramel sauce as well, to avoid adding extra butter to it. But I’ve never had it be a problem before with this recipe, so that may or may not make enough of a difference for you.

      Anyway, I hope that helps! 💜

  4. Winner winner chicken dinner!! I loved this caramel cake recipe!! Last year I made a “caramel” cake for my daughter’s birthday and I was sooo disappointed. It barely tasted of caramel-fail. So I searched high and low and found this one…yup. This was the one. Try it, eat it. It’s delicious! Thank you!

    1. Hey Meagan, thank you so much for your comment, I’m so glad you love this cake as much as I do!!! 💜😘

  5. Wooow.. Wonderful caramel cake recipe, I was looking for it for a long time and finally i found it on your blog, thanks for sharing

  6. Wow wow wow. I attempted this last night and it was a success (except the decorating, first time baker and have not excelled in that yet)
    Although my question to you is, how can this cake be stored? Definitely not in the fridge right and in the pantry covered?
    Thank you for the recipe !

    1. Hi Chalene! Yes I tend to always keep my cakes at room temperature, especially mud cakes as they can get a bit firm in the fridge. It will be fine at room temperature for a couple of days unless the weather is super hot. If you do end up needing to put it in the fridge, just make sure you take it out of the fridge for a bit before eating it, to give the cake and icing time to warm up a bit and soften 💜

  7. I have looked high and low for real caramel mud cake recipe. Thank you so much for taking the time to figure this one out in the kitchen. I have had a lot of compliments on the flavour of this cake. Xx

  8. Great recipe. I’ve made it twice now and turned out great Both times. Some of the people using more shallow pans may have baked too long. I had mine in for 35 minutes-7” round 2” deep and baked perfectly. My 7 inch deep pans took about an hour to be cooked through and still dense and moist. I find the baking time to be too long on this recipe but I’m always checking my cakes halfway through anyway so worked out fine.

    1. Hey Chelsea, that’s awesome, I’m so glad you enjoyed the recipe! 💜 I’m also always glad to hear when people check their cakes regularly, since ovens and the necessary baking times can vary so much 🙂

  9. Was so excited to make this for our engagement party (and hopefully still can!), but in the trial runs I’ve had no luck, so I’m wondering if you can help figure out where I’m going wrong? I’ve made caramels, fudge, sauces you name it before, but this one has split on me twice now (so I haven’t got to the cake part yet).

    The first time I thought perhaps my milk/butter wasn’t warm enough (butter was melted though), so the second time I got that to a simmer, let the caramel reduce in temp a little and then added the caramel to the milk slowly, whisking all the time. No luck, split again 🙁 The second time it split I put it back on the heat and added a little boiling water to try bring it together, but that didn’t work, so now I’m at a loss and hopeful for any ideas, thank you!

    1. Hi Courtney. I’m sorry to hear that, it’s very frustrating! Is there any chance you’re using low-fat milk? I had a bit of an issue with the mixture splitting when I first started writing this recipe because we tend to use low-fat milk at home so I just used that, but it seems to need the extra fat in the full-fat milk to help it emulsify. If you were using low-fat milk that could be the issue, but if not there are a couple of things I can think of that you could try next time if you’re still keen to persevere with the recipe. You could try adding the white chocolate to the milk/butter mixture first, letting it melt, and then add the caramel. Chocolate has emulsifiers in it that may help stop it from splitting. You could also try replacing a bit of the milk (maybe 1/4 cup or so) with cream, the added fat may help it emulsify more easily.

      As I said I had a few issues with it splitting when I first started working on the recipe, so I can sympathise with how disheartening it is to see it splitting! I was originally trying to add the cold milk to the caramel, which obviously didn’t go well, but once I started using this method and the full-fat milk I haven’t ever had it split again. Hopefully one of these things will help you 🤞 Best of luck!

      1. Thank you so much! I did use full cream milk, but will try both the chocolate and cream suggestions you mentioned next weekend and will see how I go, thanks again 🙂

        1. Ok cool, I really hope one of them does the trick! And I’d love to know how you get on, I’ll have my fingers crossed for you 🙂 🤞

  10. Hello, I’m hoping to use this recipe for a 10 inch, 2 layer cake, could you help me out with volume and cooking time? Thanks!

    1. Hi Anita. I would probably double the recipe for two 10″ cakes, and start checking them after around two hours baking time. I can’t guarantee the sizing will be right as I haven’t made that size with this recipe, but I hope that helps! 🙂

  11. Helloooo!
    I would love to try this recipe out for a friend who would like a caramel mud birthday cake.
    I’m just curious, it says 2x 7×2” pans
    I have 1x 7 1/2×2 1/2” pan, will the batter fit in that pan for one cake? I have a feeling I might have to get another pan before I start. Thoughts?
    Thanks in advance for your help

    1. Hey Calli! Yes, you would need a second cake pan for this, or to use one larger pan if you have one.

      Otherwise, you could bake it in two goes. You could make the caramel and mix up the liquid ingredients, then split that mixture in half and the dry ingredients in half, then mix half of each of those together and bake one cake in the pan you have, and then let that cake cool, remove it from the pan and repeat with the rest of the ingredients. Hopefully, that makes sense! But it will save you having to do the caramel mixture twice, which is the bit that takes the longest.

      If you wanted to just mix up the batter in one go, you can let the remaining batter sit while the first cake bakes in the pan, but it will likely affect the texture of the second cake when the batter has been left for a while. So my suggestion above for mixing the batter in two goes would alleviate that issue.

      Anyway, I hope that helps! 🙂

      1. Hi Natalie, I had a feeling that would be the case so I popped out and got another cake tin today
        I was considering leaving out the vanilla to cut out a little of the sweetness but being my first go I might just follow your well considered recipe
        Fingers crossed for me
        Thanks for your help!

        1. Hey Calli, if you give the batter a taste and it seems too sweet for you, you can always add a little pinch more salt to it, that can help cut through the sweetness a bit. But being caramel it is definitely one of the sweeter cakes that I’ve made. Also, if your cake pans are on the shorter side, make sure you pop a tall collar of baking paper around them. I just noticed in your original comment that the one you had is a little shorter than the 3″ tall ones I use. But the collar of baking paper will help stop any overflow if the cake rises above it.

          Good luck, I hope you enjoy the cake, and if there’s anything else I can help with just let me know 🙂

          1. Thanks so much for the advise Natalie, you’re very kind to answer all these questions
            I made the cake last night To the recipe with a few drops less of vanilla and apart from my cake tins leaking
            It turned out really well!

            I’ll post and tag you on insta
            🙂

            1. Woohoo!! Thanks so much for tagging me, I loved seeing it! Looked so good 💜 I’m really happy that it worked out for you. Bummer about the cake tins though! Are they springform/loose-bottom ones? You could maybe wrap some foil around them next time so at least it won’t leak onto your oven. No one likes cleaning ovens (or maybe they do, but I don’t think I’d have much in common with people who like cleaning ovens 😂😂) Anyway thanks again for letting me know how it went, I really appreciate it! xx

  12. Hi, can I use food colouring to colour the caramel buttercream eg red white and blue? Or will the slightly brown colour of the buttercream affect the colour?

    1. Hi Patricia. The brown colour from the caramel will make the colours a bit muddy-looking, so I would suggest just adding the caramel to enough buttercream to fill the cake, then you can colour the rest of the buttercream as you wish and use that to decorate the outside. If you want the buttercream to be properly white, you will need to add some white gel food colouring to it, to counteract the yellow from the butter. You can also whip the butter for a while with an electric mixer before you add it to the meringue to make the buttercream, as whipping the butter will help to whiten it and make the finished icing whiter. I hope that helps 🙂

  13. Hi,

    The recipe sounds delicious, looking forward to trying it. Before I do I have a couple of questions!

    I see the caramel mud cake is for a 2 x 7” cake tins.
    Do you foresee any issues if I were to use 2 x 6” cake tins? The height of each cake will obviously increase, do you think this will take longer to cook in the middle? And if so should I Cooke at slightly lower temp to avoid edges getting overcooked.

    Any concerns on using white chocolate ganache for decorating? I’m thinking salted caramel and white ganache in the layers and white ganache on the outside.

    Thanks in advance!
    Brodie

    1. Hi Brodie! Yes, if you bake this in 6″ pans then the cakes will be taller, so you’ll want to make sure your tins are at least 3″ tall, and also do a nice tall collar of baking paper around the tins to make sure they’ve got that bit of extra height protection if they rise above the edge of the tin. I would probably bake them for a similar amount of time to the 7″ ones, but yes maybe drop the temp by 10 degrees if you like, just to make sure the edges don’t get too dry. These cakes are pretty forgiving, so I sometimes just wait until I can smell them and then check them 😂 They don’t tend to sink if you check them before they’re set, so it’s safe open the door and give them a poke once they’ve been in there for a while.

      And yes, white choc ganache is lovely with caramel muds, and a salted caramel one would be great, too 💜 Hope that helps! x

      1. Hello, I just made the cake and it turned like a fudge texture. Not sure what I did wrong. It still tastes amazing though!! If I can get it be more of a cake texture, this recipe would be perfect!

        1. Hey Lily, I’m so sorry to hear that, it’s such a bummer! Happy to try and help you troubleshoot though, if you’d like.

          Was it definitely cooked in the middle when it came out of the oven? Mud cakes can be notoriously tricky to test for done-ness so I often check mine with a knife and then a probe thermometer if I’m not 100% sure. Also, did you make the gluten-free version or make it with wheat flour? Some brands of pre-made gluten-free flours can do strange things to cakes. If you followed the recipe exactly then those are the first things, off the top of my head, that I can guess could have affected it. Mud cakes are definitely denser than other cakes, but shouldn’t be a super fudgy texture at all. xx

  14. 5 stars
    Beautiful recipe, flavour is just divine. Definitely a keeper recipe thankyou so much for sharing.

    1. Hi Kylie, you’re so very welcome, and I’m really glad you enjoyed the cake! 💜