Easter Egg Rocky Road
This post may contain affiliate links to products I recommend. I receive a small commission at no cost to you if you make a purchase using my link.
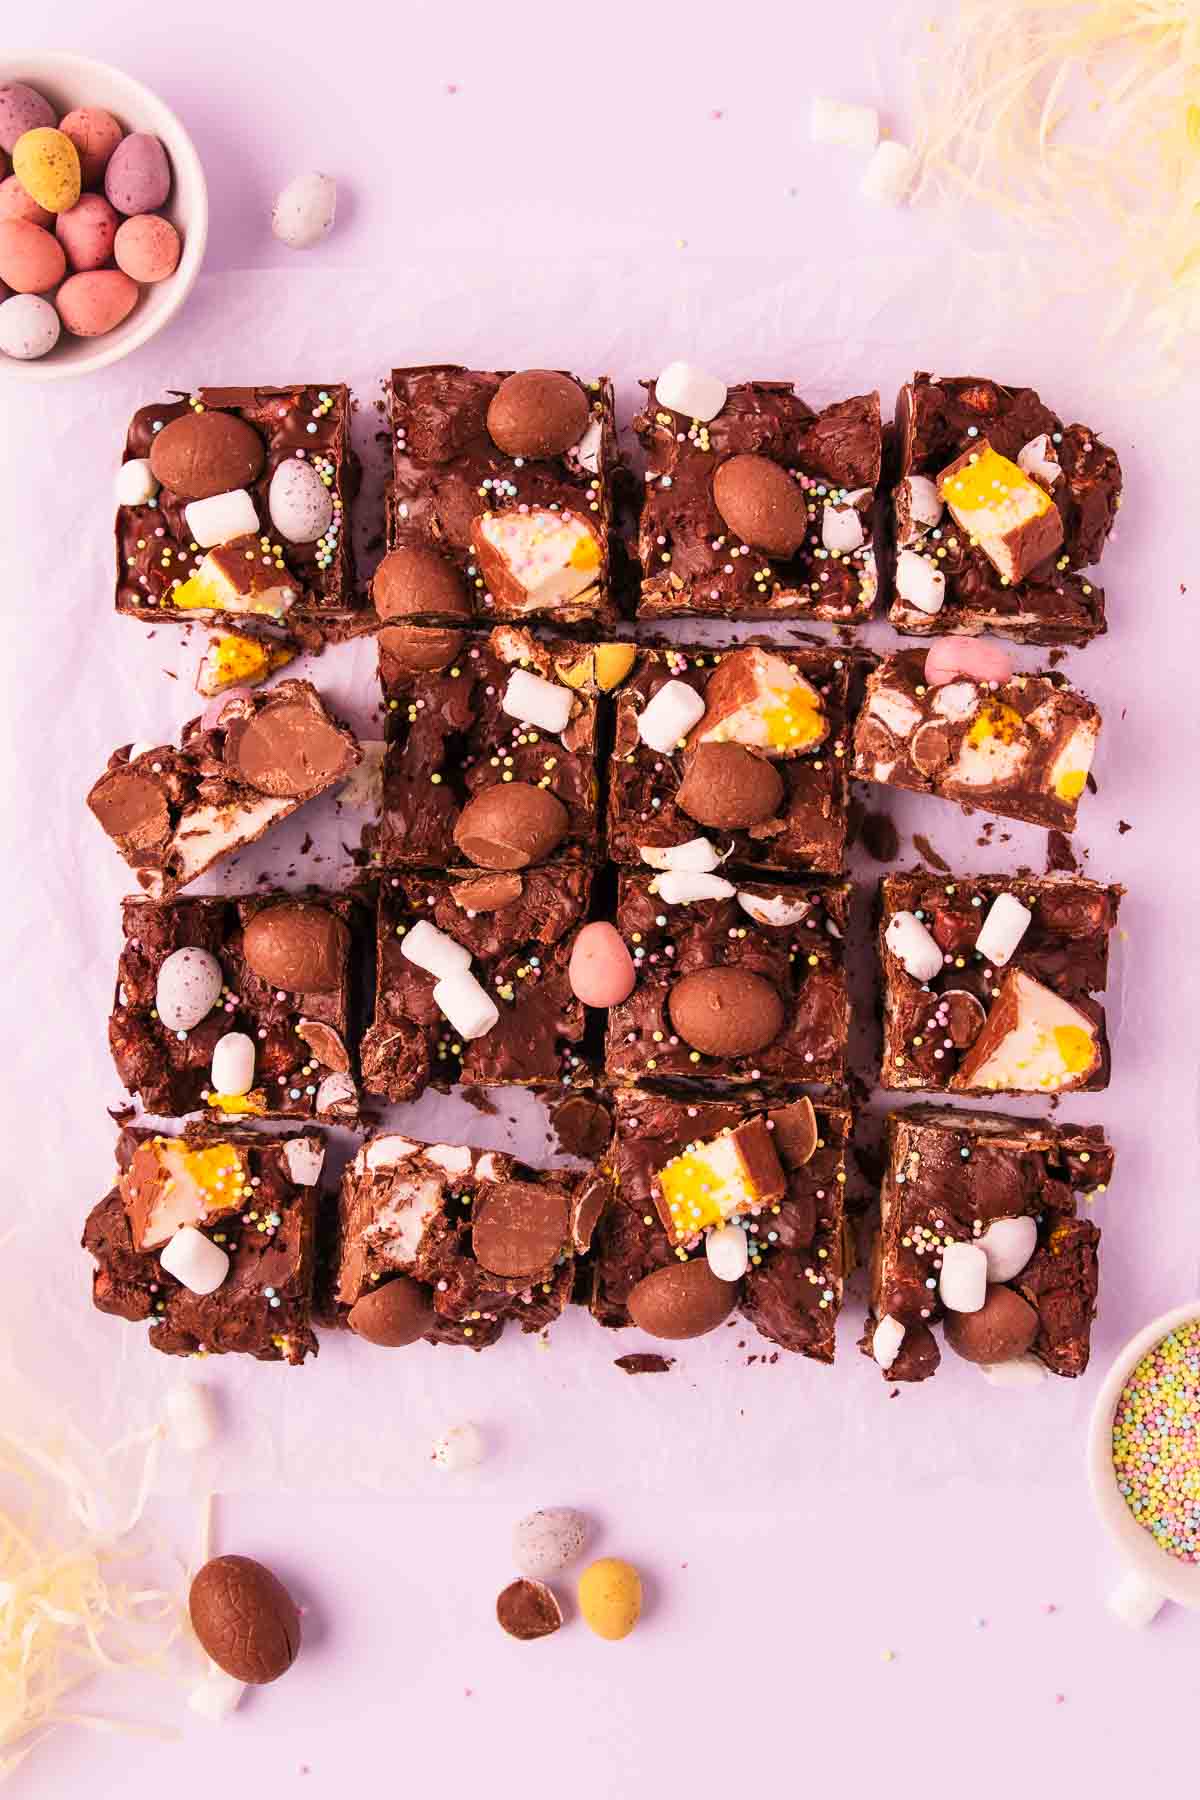
This irresistible Easter rocky road is a fun way to use up leftover Easter eggs. With pillowy soft marshmallows and chunks of crunchy mini eggs, it’s a simple no-bake recipe that can be made in half an hour!

So apparently, there is a thing called “leftover Easter chocolate”. This is not a concept I am familiar with, as to me, it’s not leftover chocolate, it’s just patiently waiting to be eaten.
However, if you do happen to find yourself in the position of having leftover Easter eggs, or just want a way to make Easter chocolates a bit cuter and fancier, then this Easter Egg Rocky Road recipe is for you.

It’s super simple to make this no-bake treat, and the recipe is so versatile.
You can use any Easter eggs you have on hand, and any type of chocolate. Keep it simple, or add in your own favourite mix-ins to really make it your own.
Scroll down to the recipe card for the full ingredient quantities and printable recipe, or keep reading for ingredient tips and process photos.
Ingredient Notes

- Chocolate – I like to use a combination of milk and dark chocolate to make rocky road, but you can just use one or the other if you prefer, or even use white chocolate. Choose blocks of good-quality chocolate, or you can use chocolate melts or melting chips – but don’t use baking chips as they have a coating that stops them from melting.
- Candy-coated mini eggs or M&Ms – I’ve used Cadbury mini eggs here, but you can use any candy-coated eggs, any kind of M&Ms or similar candy.
- Small chocolate Easter eggs – Again, any kind of mini chocolate eggs will work, or even broken-up pieces of hollow egg or bunny. I used plain chocolate eggs and a few Caramilk eggs that I had, but white chocolate eggs, mini creme eggs or caramel-filled eggs would be great too.
- Marshmallows and/or marshmallow Easter eggs – Rocky Road isn’t rocky road with marshmallows, and here I’ve used a combination of marshmallow easter eggs and mini marshmallows. I know marshmallow eggs aren’t a thing in all countries, so if you can’t use them, you can use any kind of marshmallows that you can find.
- Sprinkles – I also added some pastel sprinkles to decorate the top of the rocky road, but this is optional.
Other ingredient ideas
The best thing about rocky road is that you can throw anything you like into it. Any other kind of Easter eggs, nuts, dried fruit, freeze-dried fruit, biscuit/cookie pieces. If you like the whole sweet/salty vibe, honey-roasted peanuts would be reeeally good in this!
Making Rocky Road Gluten Free
If you need this recipe to be gluten free, use gluten free marshmallows and make sure your Easter eggs are gluten free. Avoid anything with biscuit pieces or wafers. I have a post all about gluten free Easter eggs and treats over on my other website if you want to check that out for ideas. It also talks about how to read ingredient labels to make sure they’re gluten free.

How to Make Easter Rocky Road
Just like a classic rocky road, this Easter version is simple and quick to make.
Start by chopping up your Easter eggs. Chop the marshmallow eggs with a lightly greased knife – I just spritz it with a bit of cooking oil spray, which helps to stop them from sticking. I like to have some large pieces and some small pieces.
The mini eggs can be crushed with the side of a knife – it’s much safer than trying to chop them, or pop them into a plastic bag and crush them lightly with a rolling pin. I left the plain chocolate eggs whole, but set aside a few to cut in half for the top.
Pop all of the Easter eggs into the fridge to chill while you melt the chocolate – this stops them from melting into the warm chocolate later. Don’t put them in the freezer, though – I made that mistake the first time, and it made the chocolate set too fast when I mixed them in!

Next, chop the chocolate (if you’re using bars of chocolate). The finer you chop it, the faster the chocolate will melt.
You can melt the chocolate however you like – in the microwave or over a double boiler. I use the microwave and do a bit of a cheat’s tempering method, which helps to prevent the chocolate from “blooming” after it sets. Here’s how I do that:

Start by melting roughly two-thirds of the chocolate in a large bowl in the microwave. Use 50% power and short bursts, stirring between each one, until fully melted.

Add the remaining chocolate, and stir until melted. This usually takes a couple of minutes. If there are still a few pieces of unmelted chocolate, that’s fine, don’t worry about it.

Set aside some of the marshmallows and pieces of Easter eggs for decorating the top, then mix the rest into the melted chocolate.

Tip the rocky road mixture into an 8″ square tin lined with non-stick baking paper (parchment paper), and sprinkle with the remaining eggs and marshmallows, plus some sprinkles if you like.
Leave the rocky road to set – because the mix-ins have been chilled, it doesn’t take that long to set. 20 minutes or so at room temperature, but if it’s hot where you live you may want to pop it in the fridge.
How to Cut Rocky Road Neatly
You don’t – rocky road is designed to be rough and chunky, so don’t worry if it doesn’t cut neatly. Just use a large, sharp knife to cut it, and do the best you can.
It will be easier to cut at room temperature, so if you’ve chilled it in the fridge then take it out and let it sit on the bench for a bit before you cut it.
Keep the Easter rocky road in an airtight container at room temperature, or in the fridge if you live somewhere warm.
More Easter Recipes
Here are some more chocolate Easter treats you may like…
- Easter Rice Krispie Treats – Cute and crunchy little rice krispie nests filled with chocolate eggs.
- Mini Egg Fudge – Super easy condensed milk fudge stuffed with crunchy cookie pieces and mini eggs.
- Easter Nests – Crispy rice cereal and shredded coconut mixed with rice chocolate make the cutest little bird’s nests.
- Milk Chocolate Mousse Easter Eggs – What’s better than a hollow chocolate egg? A hollow chocolate egg filled with the world’s easiest chocolate mousse, of course.

Easter Egg Rocky Road
Ingredients
- 400-500 g chocolate Easter eggs any kind you like – see notes
- 250 g marshmallow Easter eggs and/or marshmallows see notes
- 250 g milk chocolate
- 250 g dark chocolate
- sprinkles, to decorate optional
Instructions
- Line an 8" (20cm) square cake pan with baking paper (parchment).
- Chop up the Easter eggs. Marshmallow eggs can be cut with a lightly greased knife or scissors, to stop them from sticking. Crush mini candy-coated eggs with the side of a large knife, or pop them into a plastic bag and crush lightly with a rolling pin. Small chocolate eggs can be left whole, or cut in half.Pop the Easter eggs into the fridge to chill while you melt the chocolate.
- Finely chop the milk and/or dark chocolate. Place roughly two-thirds of the chocolate into a large microwave safe bowl and microwave on 50% power in 30-second increments, stirring in between, until melted. Add the remaining chocolate and stir until melted and smooth, although if a few unmelted pieces remain, that's fine.
- Alternatively, you can melt the chocolate in a heatproof bowl over a saucepan of simmering water. Make sure the water doesn't touch the bottom of the bowl, and that no water gets into the chocolate, or it will seize.
- Set aside some of the eggs and marshmallows to decorate the top. Stir the marshmallow eggs and/or marshmallows into the melted chocolate, and then add in the chocolate eggs, and stir until well combined.
- Press the mixture into the prepared cake pan in a roughly even layer, then decorate with the remaining Easter eggs, and add some sprinkles if you like.
- Leave to set – about 20 minutes at room temperature, or you can pop it into the fridge.
- Cut into pieces (bring it to room temperature first if you have chilled it).
- Store the rocky road in an airtight container at room temperature or in the fridge. It will keep well for at least a week, although the marshmallow may start to soften after a few days.
Notes
- Chocolate – I used milk and dark chocolate, however you can use one or the other, or use white chocolate instead. Make sure no water gets into the chocolate when you’re melting it, or it will seize and become unusable.
- Marshmallow – You can use marshmallow Easter eggs, marshmallows (mini or regular-sized) or a combination of the two. I used 150g marshmallow eggs (6 half-eggs) and 100g mini marshmallows.
- Eggs – Any Easter eggs will work in this recipe. Chopped-up larger eggs or hollow eggs would work too. I used two 125g bags of Cadbury mini eggs and two 114g bags of small chocolate eggs. The amounts aren’t super important though – use what you have. If it’s a little more or less, it doesn’t matter.
- Other mix-ins – You can add any other kinds of mix-ins that you like, for example, nuts, dried fruit, freeze dried fruit or crushed biscuits/cookies.