How To Cover a Cake With Fondant Using the Wrap Method
This post may contain affiliate links to products I recommend. I receive a small commission at no cost to you if you make a purchase using my link.
Learn how to cover a cake with fondant using my favourite technique – the upside-down wrap method. If you’ve ever struggled to cover a cake with fondant the traditional way – this is the perfect post for you! Full step-by-step tutorial showing how to wrap a cake with fondant to achieve sharp edges, and smooth sides!
If you’d asked me when I started this blog, “what is the one thing you will never do a cake decorating tutorial on?” I wouldn’t have hesitated – my answer would be “showing how to cover a cake with fondant!”
Fondant and I have issues. Like serious, personal issues. For years, fondant hated me. Hated me. I don’t know what I ever did to it to make it feel that way, but it did. So there it is.
Every time I would try and put fondant on a cake, something would go wrong. The fondant would be too dry. It would be too soft and sticky. There would be air bubbles. Holes. It would stretch. It would tear. There would be tears (my tears, because of the tears). And that’s just on round cakes, don’t even get me started on square cakes!
I know some of my cake preferences make things harder on me. I love sharp-edged cakes, and I love tall cakes. Both of which can make it harder to cover a cake. The sharp edges can tear the fondant, and the height of a cake can mean that before you’ve finished easing out the pleats in the fondant and smoothing it all the way down the cake, the fondant can dry out and give you the dreaded ‘elephant skin’.
Sure, there are magnificent cake decorators out there that can cover a cake in five minutes flat with no rips, no flaws and no swear words. I have no idea whether they are magicians, ninjas, or just purely brilliant decorators, but all I know is that I’m not one of them. There are probably also a lot of decorators who aren’t as ridiculously fussy as I am and don’t lose sleep over minor imperfections, but I do. I care. Too much, probably. But it’s a character flaw that I’m learning to live with.
I’ve never been to a cake class, I’ve learnt what I know from the internet, books and from a hell of a lot of trial, error, bad language and meltdowns. And it’s that trial and error that led me to realise that sometimes, you just have to do things differently.
And in this case, “different” for me is wrapping a cake in fondant instead of covering it in one piece. Sure, you do end up with seams, but the way I wrap my cakes now results in seams that are neat, clean and barely visible unless you’re specifically looking for them. See?
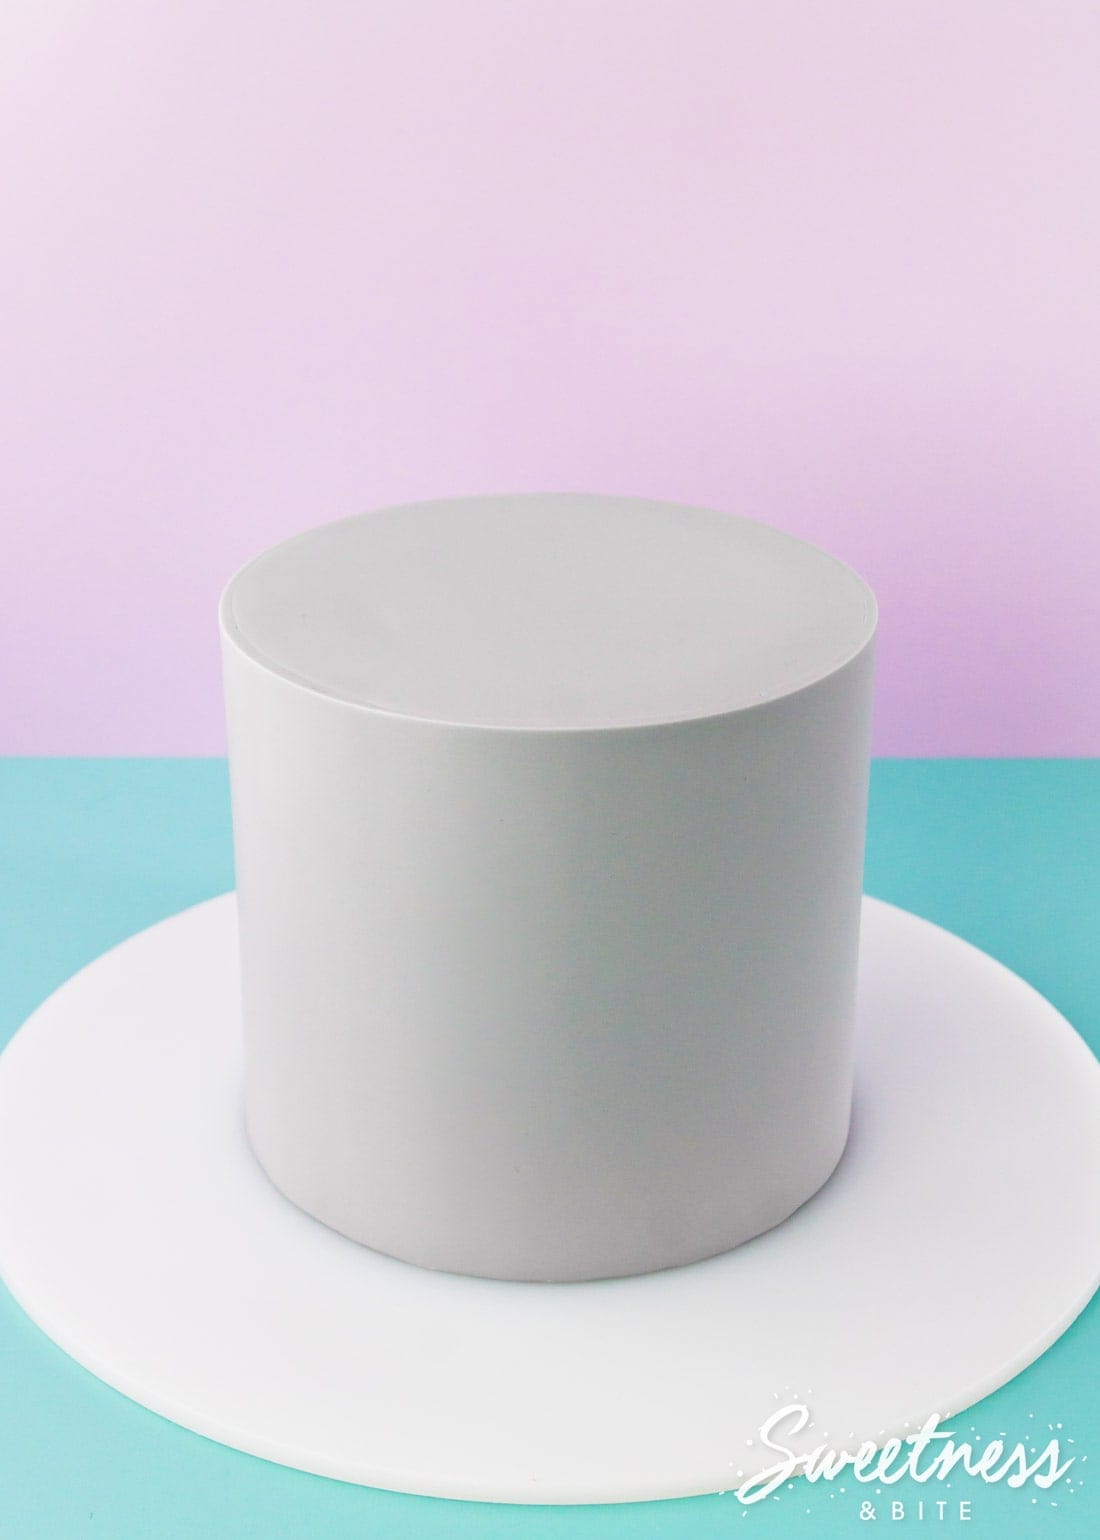
Wrapping a cake has always been recommended as the best way to cover tall cakes with fondant (double/triple barrel cakes, etc.) but I have to admit that these days I wrap most of my cakes, regardless of whether they are super tall or not. I find it much less stressful, and now that I have done it many times, I always end up with a good result. With a little practice, maybe you’ll find this technique a little less stressful too.
When I was first experimenting with wrapping a cake with fondant, I followed a few online tutorials which had various ways of covering the top of the cake, but most of them involved a lot of messy trimming, which made the seams, well, messy. Or they wrapped the cake with cut-to-size pieces of fondant, which could stretch and/or distort, ending up too big or too small, leaving either pieces that needed trimming or unsightly unfixable gaps. Frankly, I found it all a bit hard, a bit imperfect, and almost as stressful as the all-in-one method.
Then one day, while flipping a cake upside down to ganache it, I thought, why don’t I do that to cover it with fondant?! And as it turns out, it wasn’t a stupid idea.
Check out this cake from my watercolour cake tutorial which I covered using this technique, if you look close enough you’ll see the seam around the top edge, but on this cake, it was barely noticeable.

My basic process for wrapping a cake in fondant is to cover the top first, then flip the cake upside down and wrap one long strip of fondant around the side of the cake.
Having the cake upside down means that you don’t have to trim the fondant at all along the top seam (this will make more sense once you read the steps below) which in turn means your seam will be much neater and you won’t risk damaging your perfect sharp edge by having to trim it.
Using this method means that the top seam of the fondant will be on top of the cake, rather than around the side. I prefer it this way as the seam is less visible from the front. If, for the purposes of your cake design, you want to have the seam on the side, you’ll need to skip the first step of covering the top and flip your cake upside down straight away. Then follow the steps to wrap and trim the cake. Once that’s done, flip the cake back over then follow the steps to cover the top, flip the cake over again (onto another waxed paper-covered board) and very carefully trim the excess.
Table of contents
My Top Three Keys to Neatly Covering a Cake with Fondant
- A good ganache base. Having a nicely ganached cake will give you a great base for covering it with fondant. In order to get that glorious sharp edge on your fondant, you need a sharp edge on your ganache. Check out my ganache tutorial if you need tips.
This can be done with buttercream but it is a lot trickier. You will need to make sure your buttercream is super chilled and firm, and then work quickly to get the cake wrapped and smoothed before the buttercream softens. If you’re not confident, then I recommand go with the ganache, or fill your cake layers with buttercream and then use ganache on the outside (best of both worlds!). - Thin fondant. The thinner you roll your fondant, the neater your top seam will look. 3-4mm is ideal, thinner if your fondant allows. If you happen to have a rolling pin with spacers, that will make it a whole lot easier to make sure your fondant is evenly rolled. I use the orange spacers on my large Wilton rolling pin.
- Neat cuts. Using a pizza cutter to cut out your strip of fondant will help keep the bottom edge clean (and this edge will be on the top of your cake). Using a super sharp knife or scalpel to trim the seam at the back will make that seam neat too.
One tool that probably needs an extra mention before we start is the one you’ll use to roll your fondant around. I have a plastic rolling pin that is perfect for this as it has flat rather than rounded ends (you can see it in the first image below). You can use a rolling pin with rounded ends (obviously you cannot use one that has handles) but you will need to be very careful when you roll your fondant around it that you line up the edge as you roll. You could also use a piece of PVC pipe (the kind used for drinking water plumbing) with the end cut straight.
So, whether you’re making a 12” tall triple barrel cake, or a 4” tall 4” cake, soon you’ll know…
How to Wrap a Cake With Fondant
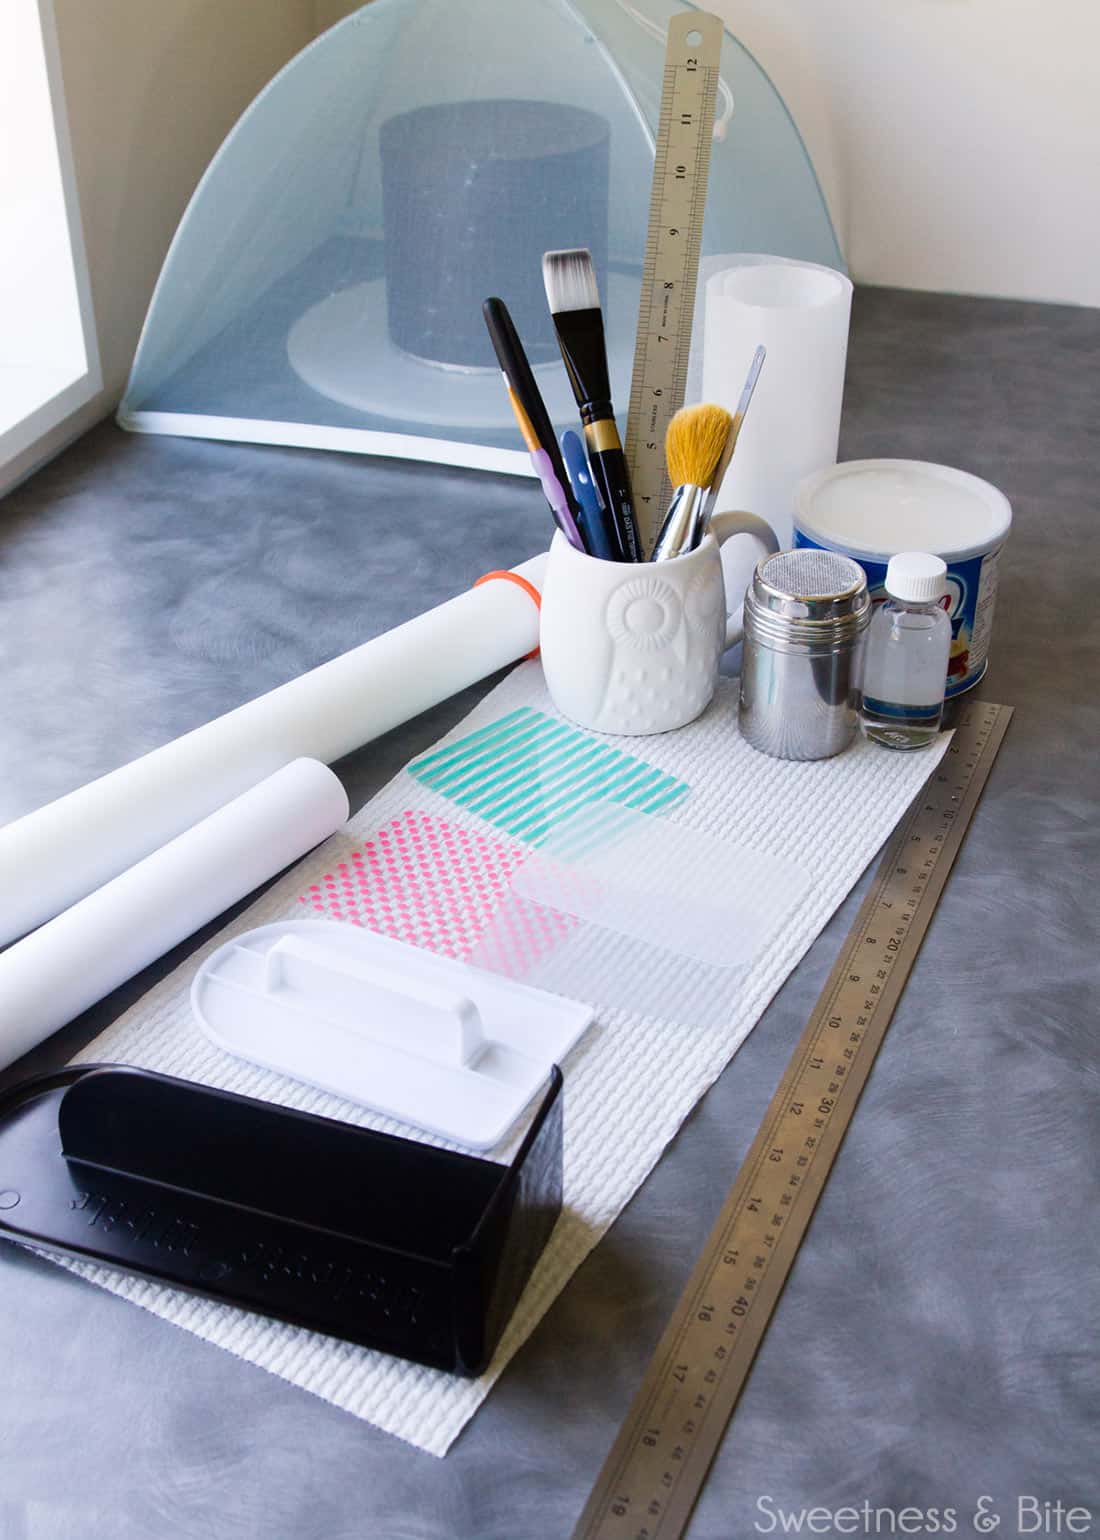
What You’ll Need
- Ganached cake – make sure you ganache your cake the day before, and leave it overnight to fully set.
- Fondant (if colouring your fondant, do so the day before and let the fondant rest overnight) I used Satin Ice here but have also done this with Bakels Pettinice. Any good quality fondant should work.
- Vodka or cake decorator’s alcohol
- Vegetable Shortening / Crisco – this is what I like to use to stick my fondant to ganache, see this post for more info.
- Cornstarch or icing sugar/powdered sugar – for dusting. I prefer to use cornstarch.
- Waxed paper – Edit: Waxed paper seems to be a bit trickier to find now than it was when I started using this technique. If you can’t find waxed paper you can use regular non-stick baking paper, just keep in mind that you can’t tape it to the board (because it’s non-stick) so you will need to be more careful when you flip the cake over, as the paper can slip. Using a slightly bigger board to flip the cake onto will help.
- Long metal ruler, pencil, craft knife or scalpel and cutting mat
- Rolling pin
- Plastic fondant smoother – I use a ‘smedger’, but any rigid plastic fondant smoother will work.
- Flexible fondant smoothers – Learn how to make your own flexible fondant smoothers here.
- Sharp knife and/or scalpel
- Pizza cutter/wheel
- Pin or acupuncture needle– For removing air bubbles
- Two setup boards – I use acrylic boards, but if you don’t have those you can use masonite cake boards. One should be square, if possible. Both boards need to be at least 3-4” wider than your cake.
- Paintbrushes – I like to have one flat brush for painting vodka or water onto the top of the cake (you could use a pastry brush for this), one fluffy brush for dusting cornstarch, one large flat one for un-sticking fondant (that’ll make sense once you read that step in the tutorial) plus one little one for painting vodka into seams that haven’t stuck down.
- Grippy/non-slip mat –cut into a circle slightly smaller than the cake width.
You’ll also need to excuse any photos below that are a little blurry, I basically threw the camera at my mother and asked her to quickly take shots as I was working, and we had some technical difficulties with the camera focusing. (I had the problems before I threw the camera at her, so it wasn’t that… 😉 )
The Prep
Start by covering a square cake board with waxed paper. Place the paper waxed side down on the bench, put the board on top and tape along one edge. Pull tightly and tape on the opposite edge. Then tape along the other two edges, again pulling tightly. The fondant on the top of your cake will be on this paper, so the smoother it is, the smoother your fondant will be.
If you can’t find waxed paper, then you’ll just place down a piece of non-stick baking paper roughly the same size as the board. It won’t stick if you try to tape it, so just pop it on top of the board.
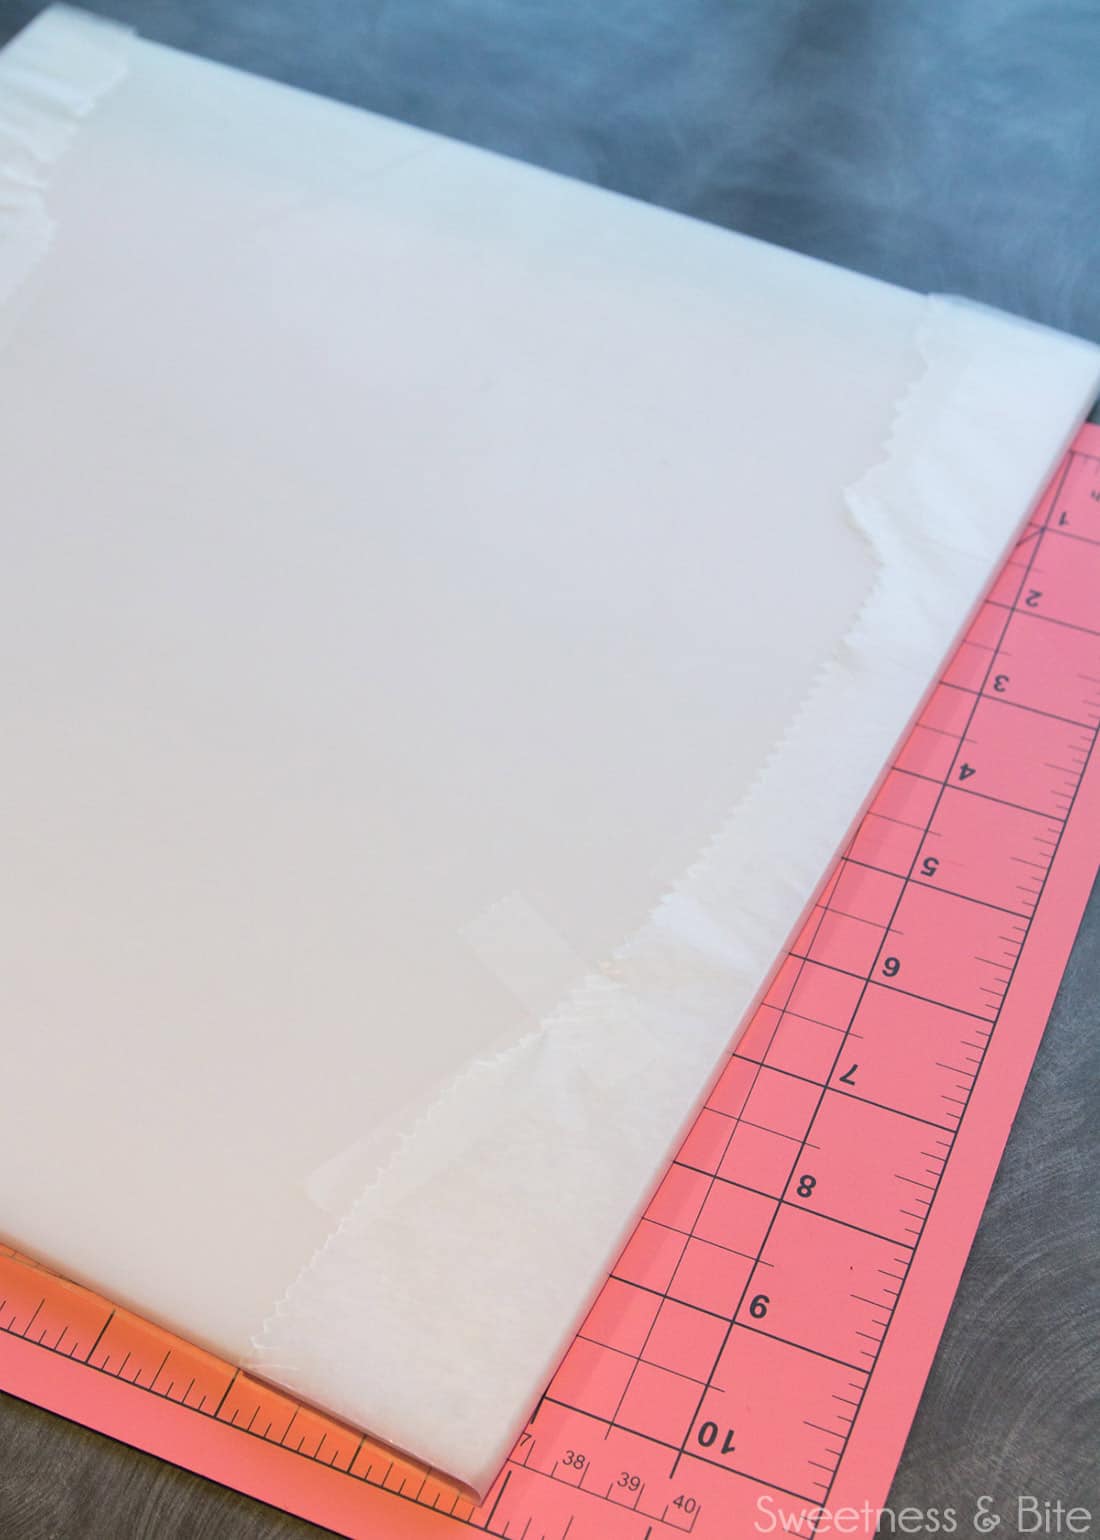
Now you’ll need to cut out a rectangular template for the fondant you’ll wrap around the cake.
I like to use a template because it is really important that one edge of the fondant is cut perfectly straight (this will be the edge that is on the top of the cake) and this is the easiest way to make sure it’s straight. The template will be just slightly bigger than the cake, so that we can still trim along the bottom edge.
Also, I find it easier to have a rectangular template and be able to just place it onto my rolled out fondant and cut around it, than faff about with a tape measure/ruler making sure the fondant is long enough to go around the cake, and having the fondant sitting there drying out while you measure. Anything we can do to reduce the time the fondant is exposed to the air is worth doing.
To make the template, measure the circumference and height of your cake. You will need to add 2-3” to the circumference, and 1” to the height.
As an example, my cake was a 6” high, 6” round cake. The circumference was (almost) 19”, so my template was 22” x 7”.
Mark the measurements onto waxed paper or baking paper, and then use the ruler and craft knife to cut it out. Carefully roll this up and set it aside.
If you prefer, you can skip the template and just measure your rolled-out fondant with a ruler and cut your rectangle that way, but to start with I recommend the template as it will help you work faster before the fondant dries out.
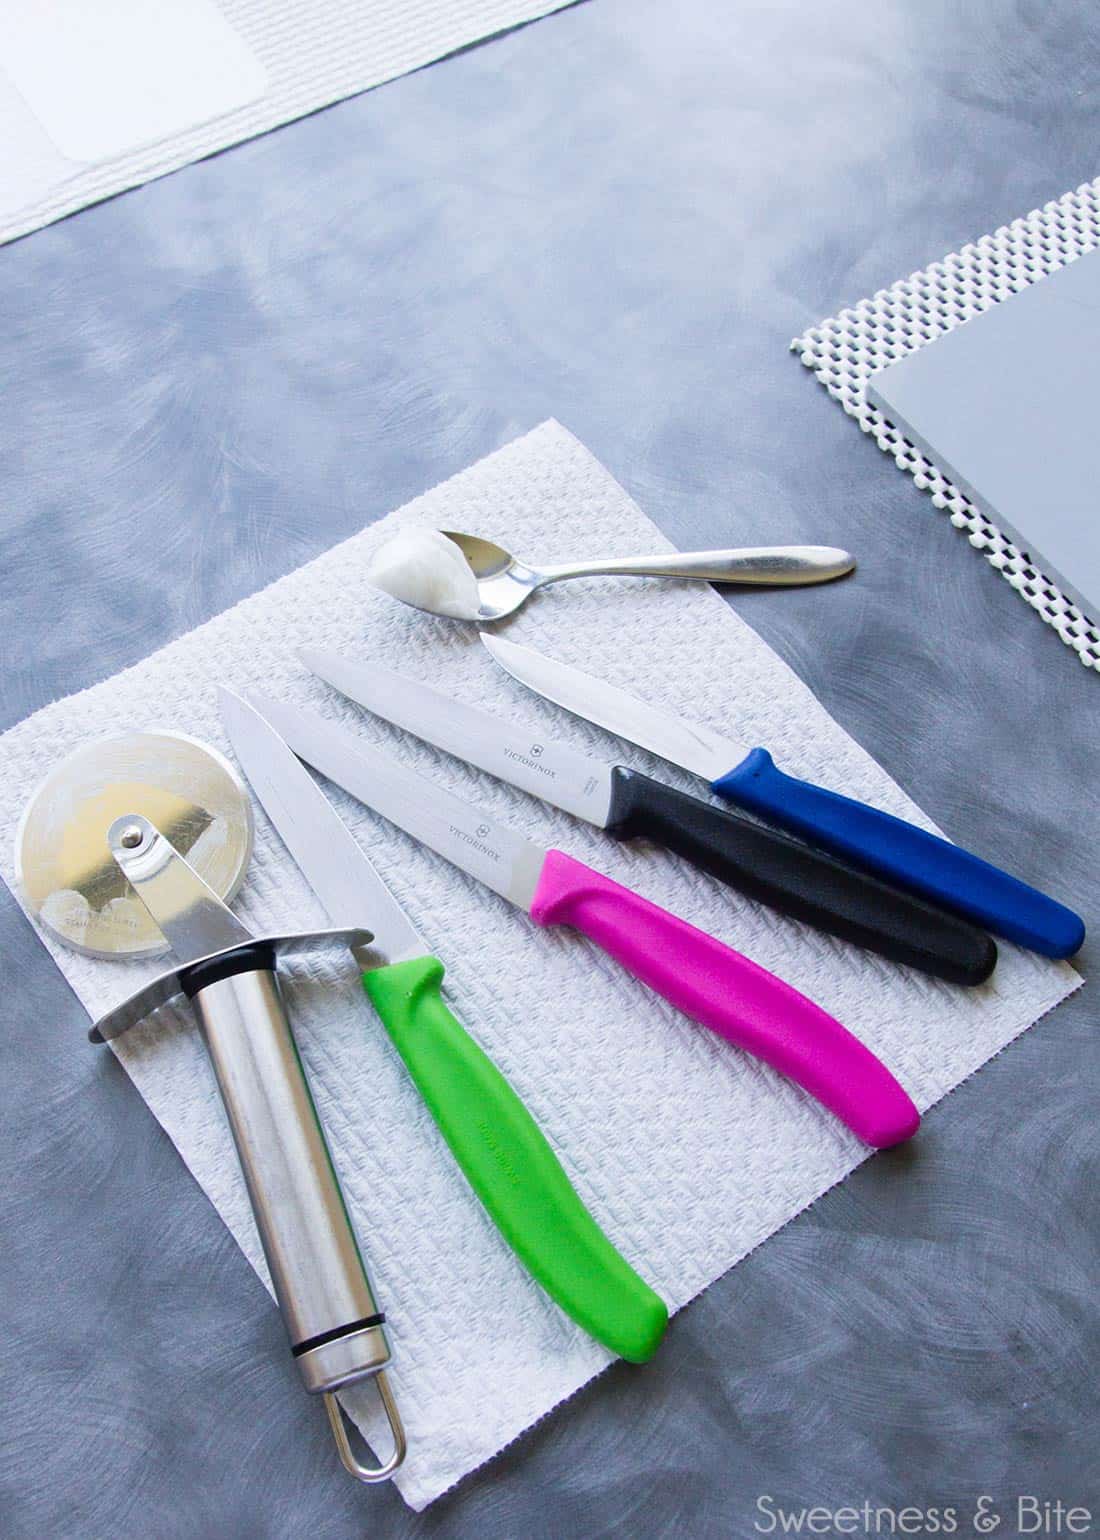
While I’m in prep mode, I like to get all of my tools and stuff set out. There’s nothing worse than groping around for a knife and realising they’re all half a kitchen away.
Oh, and on the subject of knives, I like to rub mine with a little Crisco shortening (same goes for the pizza wheel), this stops the fondant from sticking and helps keep each cut clean and neat.
Wrapping the Cake
Start by giving your fondant a good knead. The amount of time you’ll need to knead (sorry, couldn’t help myself) will vary by brand, but basically, you want the fondant warm and pliable but not too soft, and not sticky. I find with Satin Ice, I don’t need anything to stop it sticking to the bench or my hands as I knead, but if you do then I suggest using a little shortening rather than cornstarch or icing sugar, you really don’t want your fondant drying out.
(If you don’t want to cover the top first, because you want the top seam on the side of the cake as I mentioned above, then skip this next bit, and move straight onto flipping the cake upside down and covering the sides).
Paint some vodka or water onto the top of the cake.
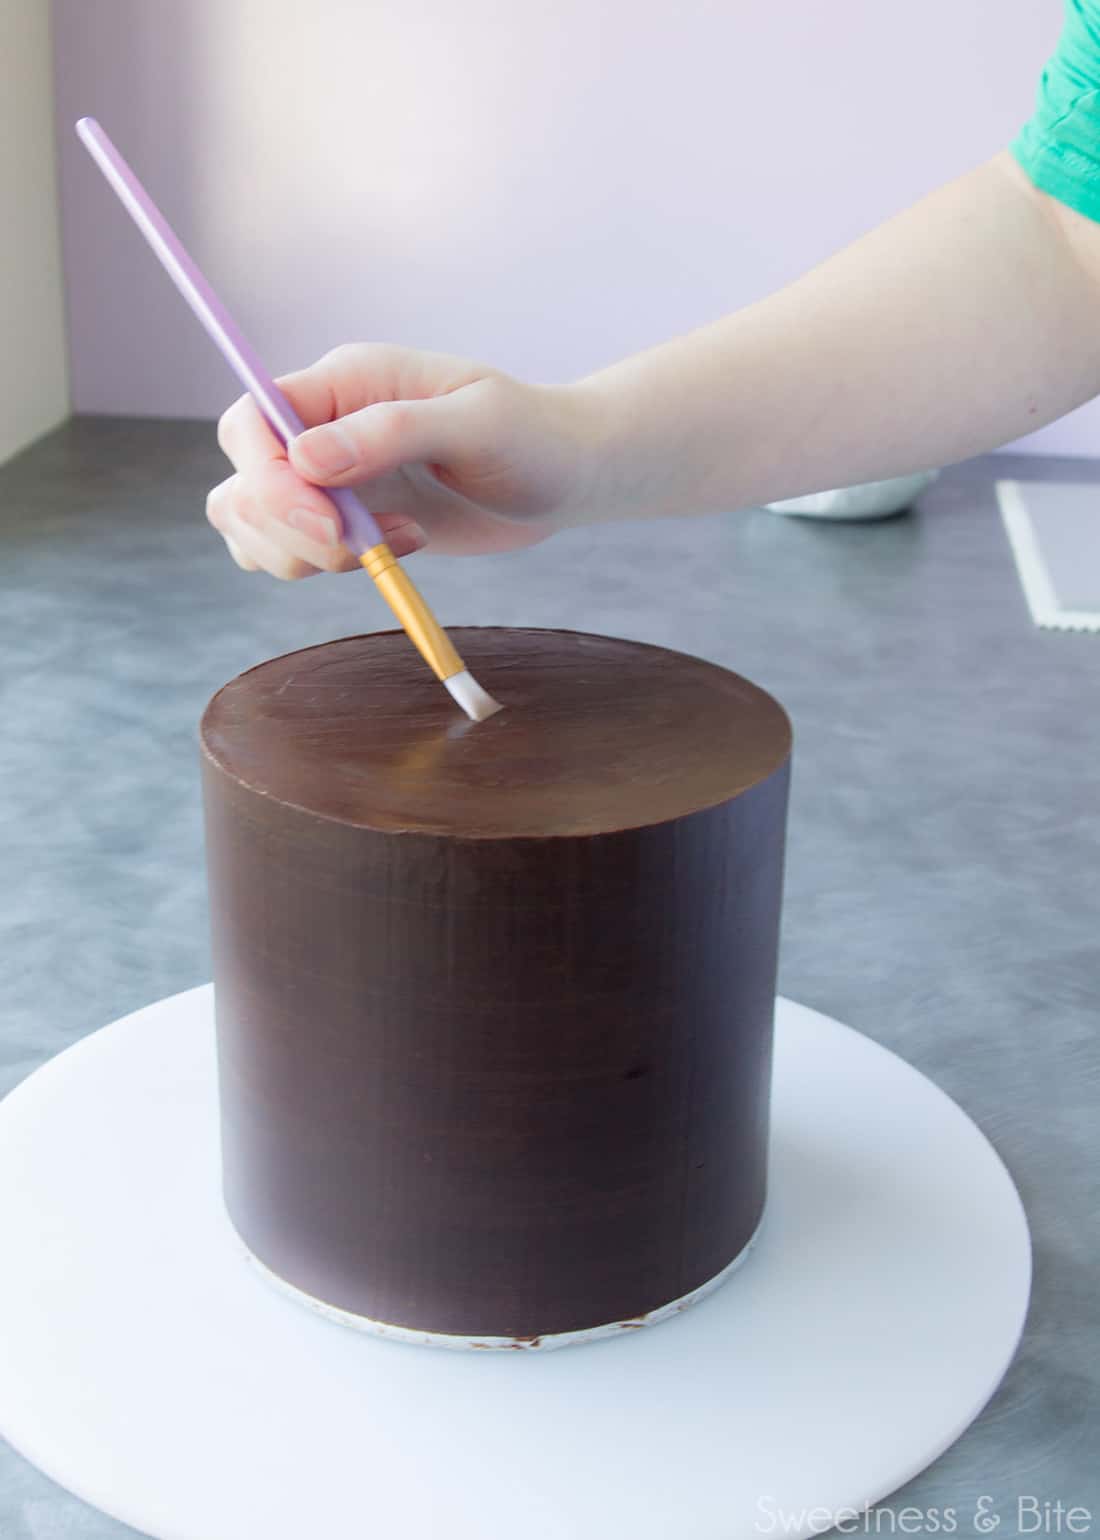
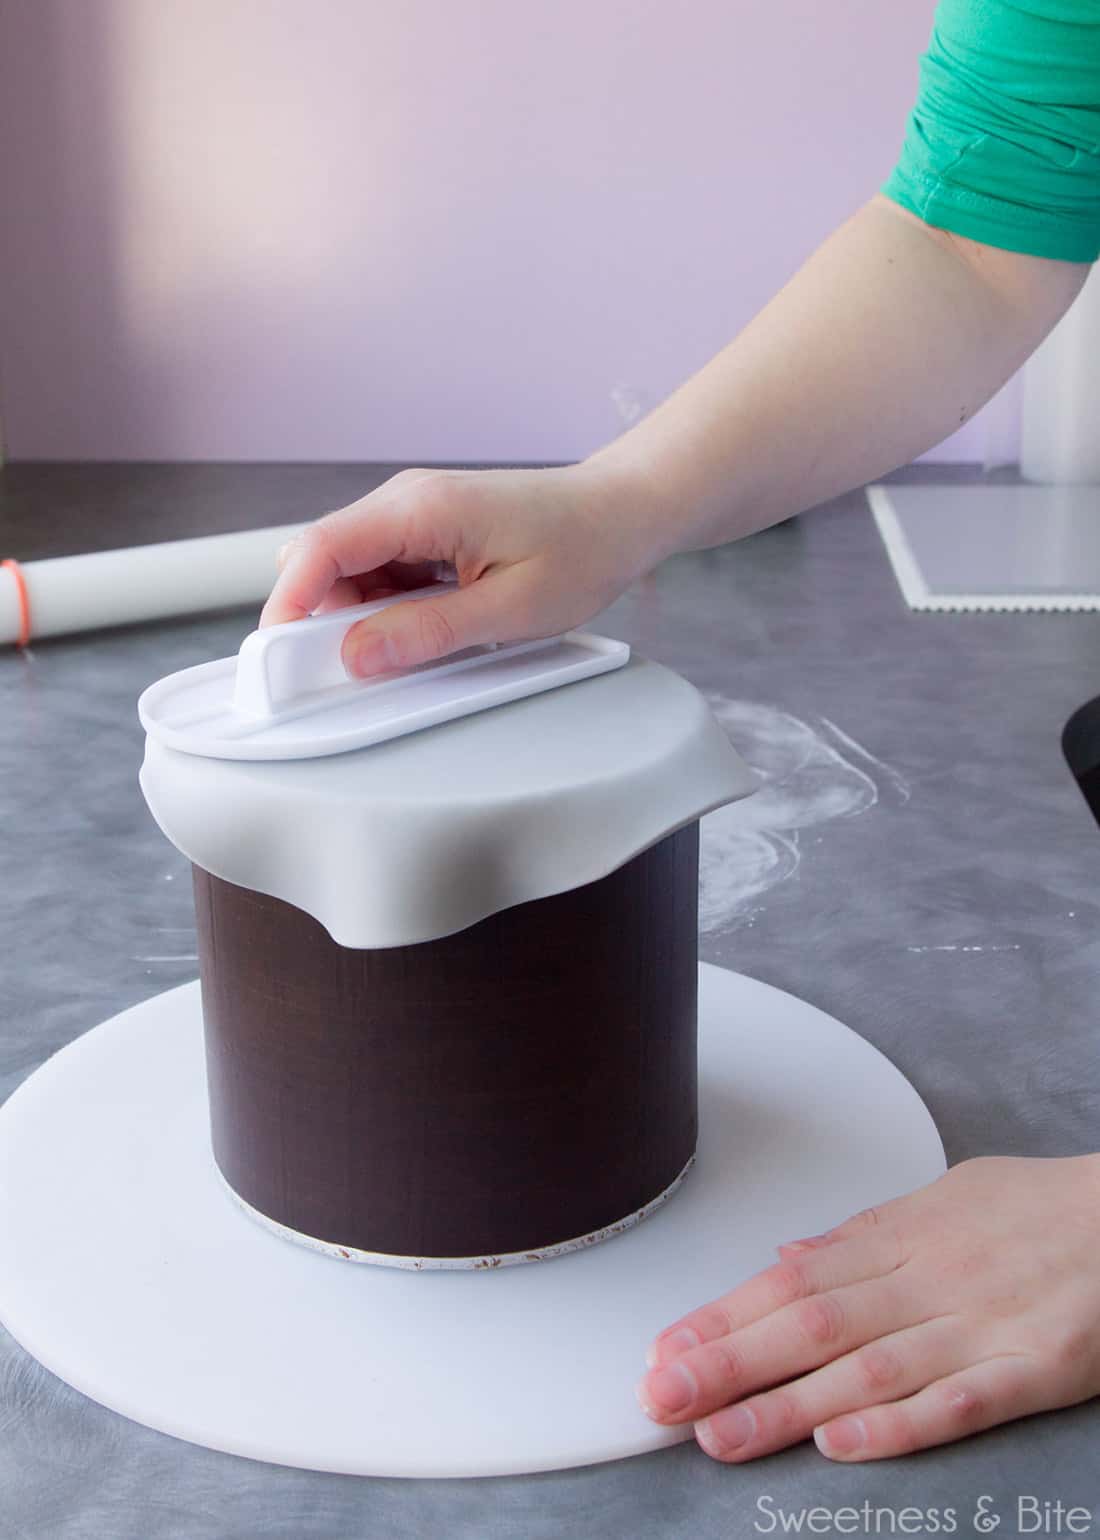
Roll out a small piece of the fondant, aiming for a thickness of 3-4mm. Place it onto the top of the cake, smoothing out any air bubbles.
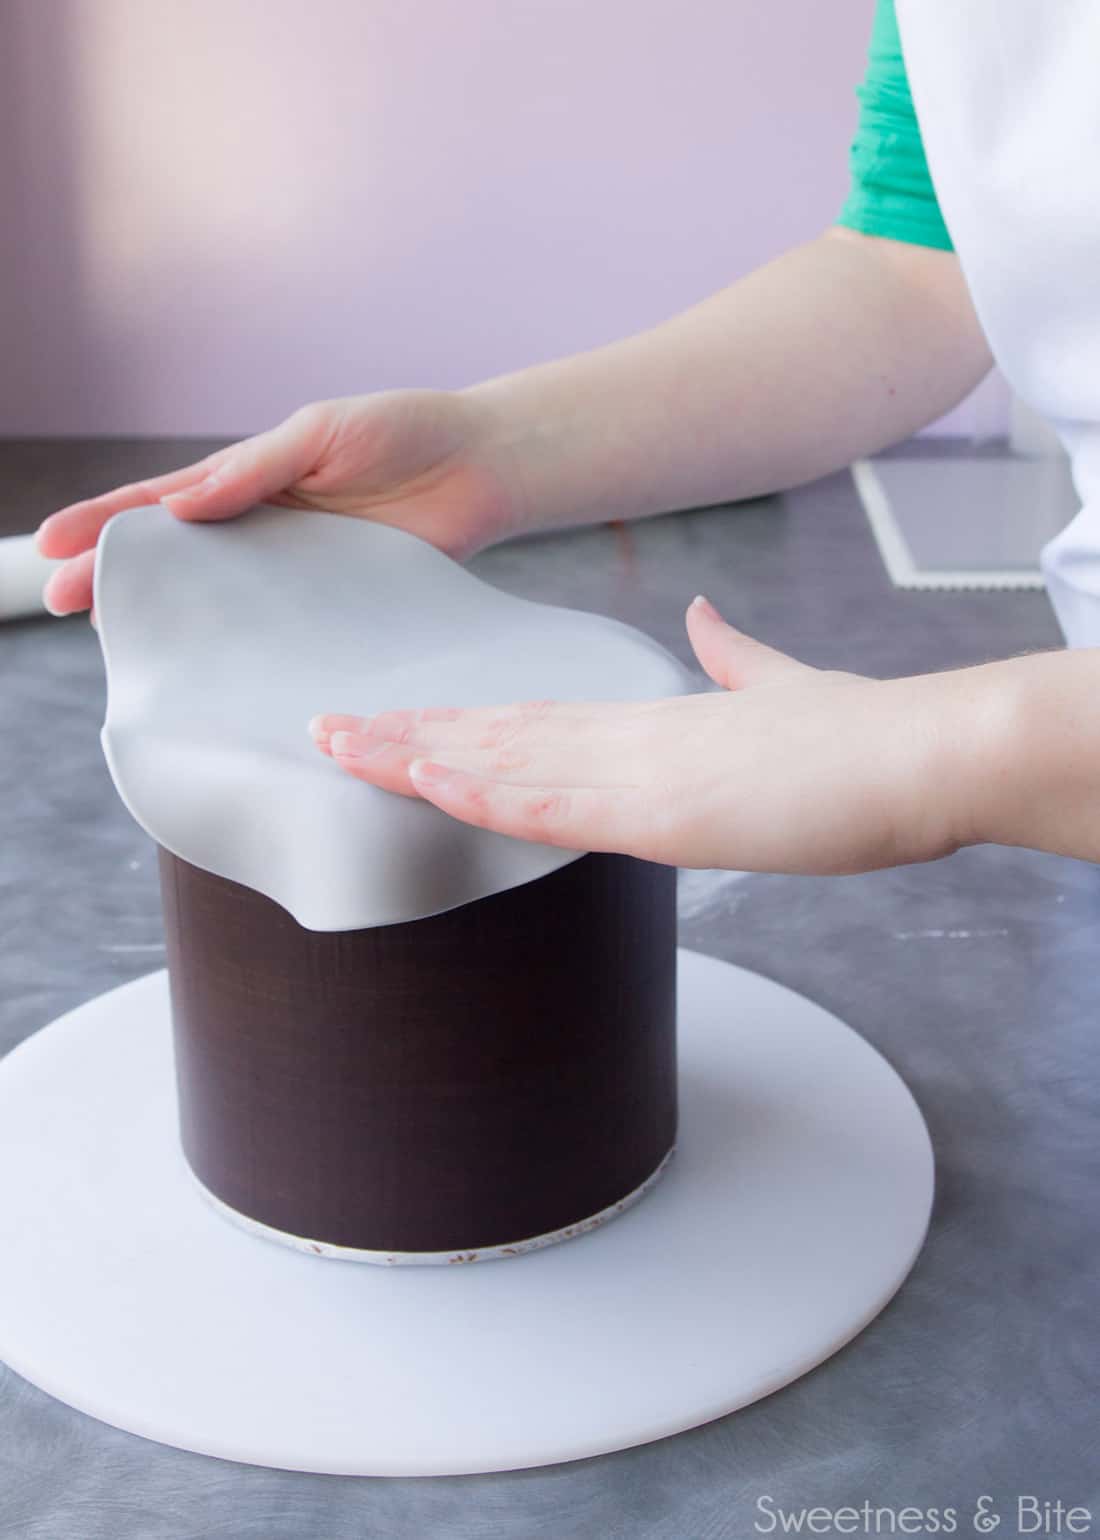
Give it a rub with a fondant smoother…
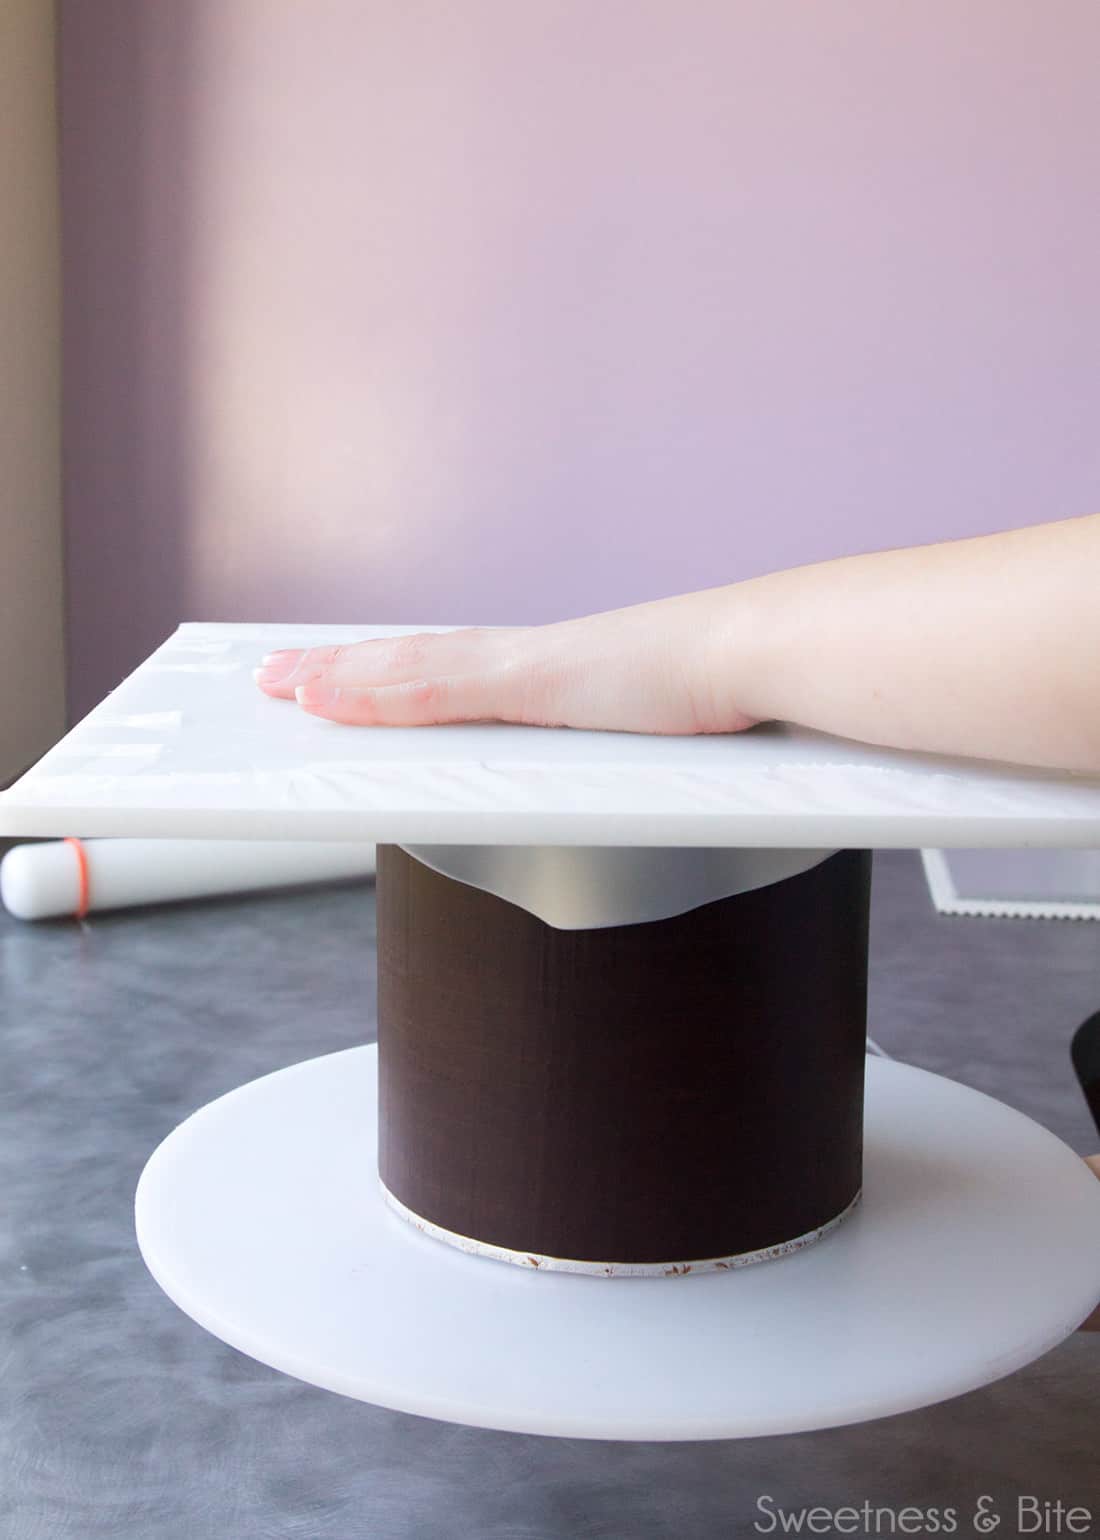
…then place your waxed paper-covered board on top, and flip the cake upside down.
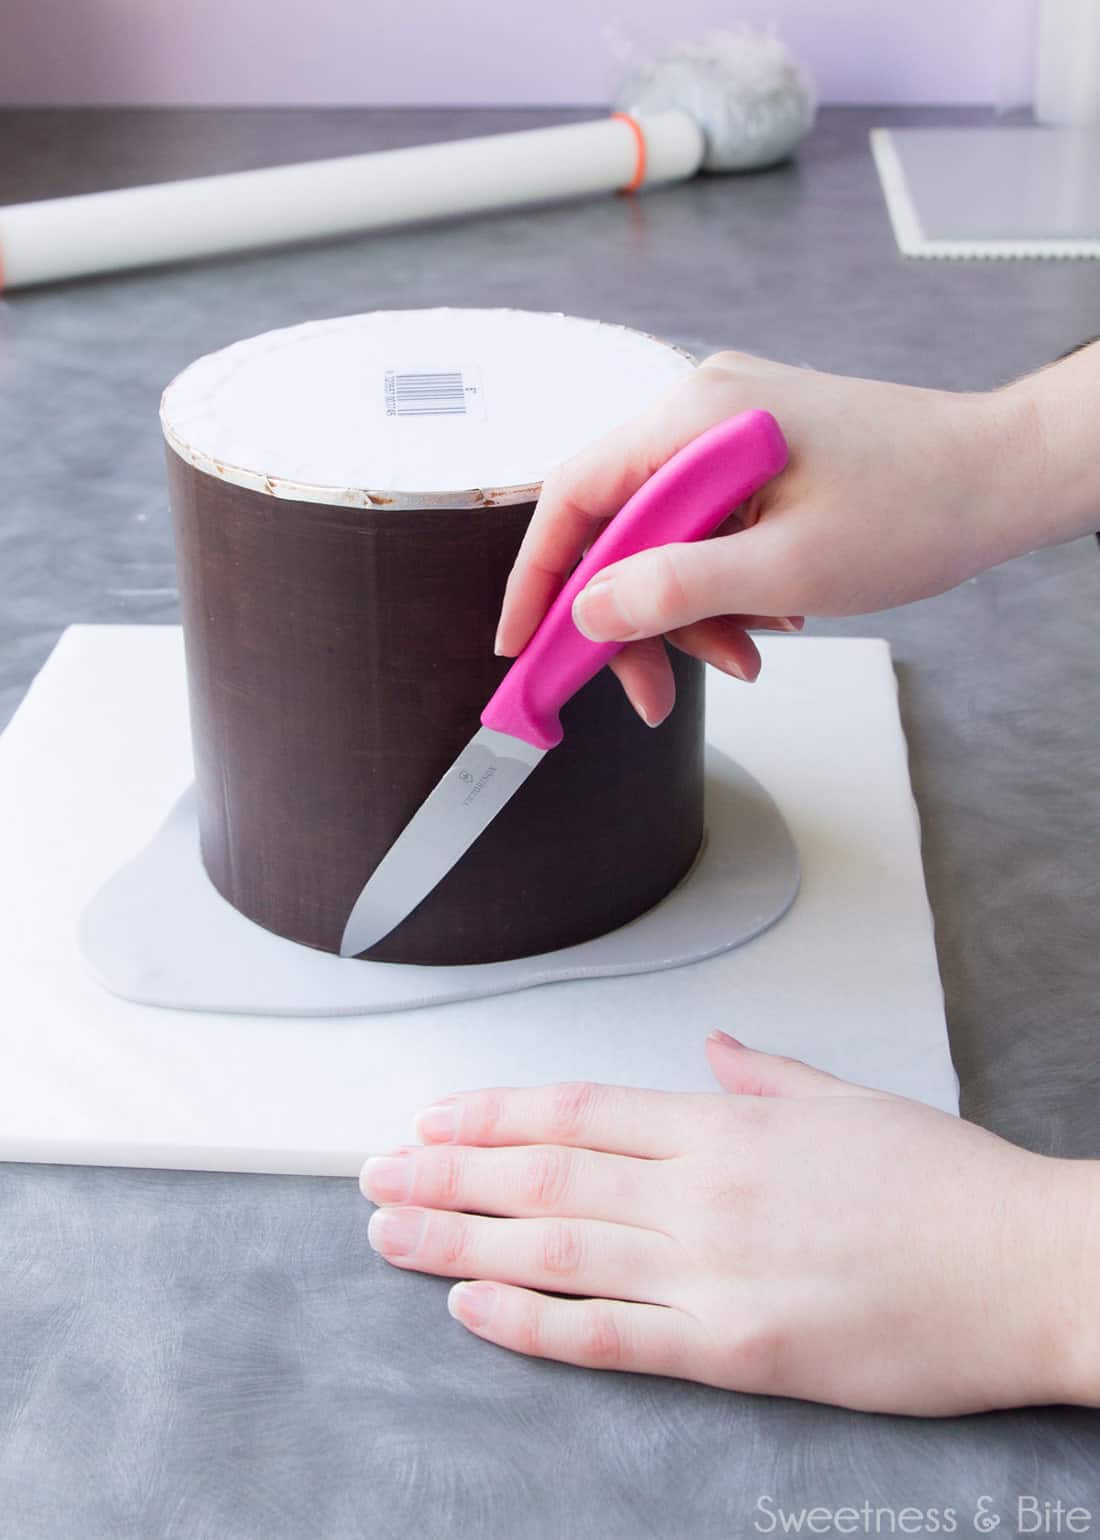
The fondant will flop down onto the board. You can then use a knife to carefully trim around the cake and remove the excess fondant.
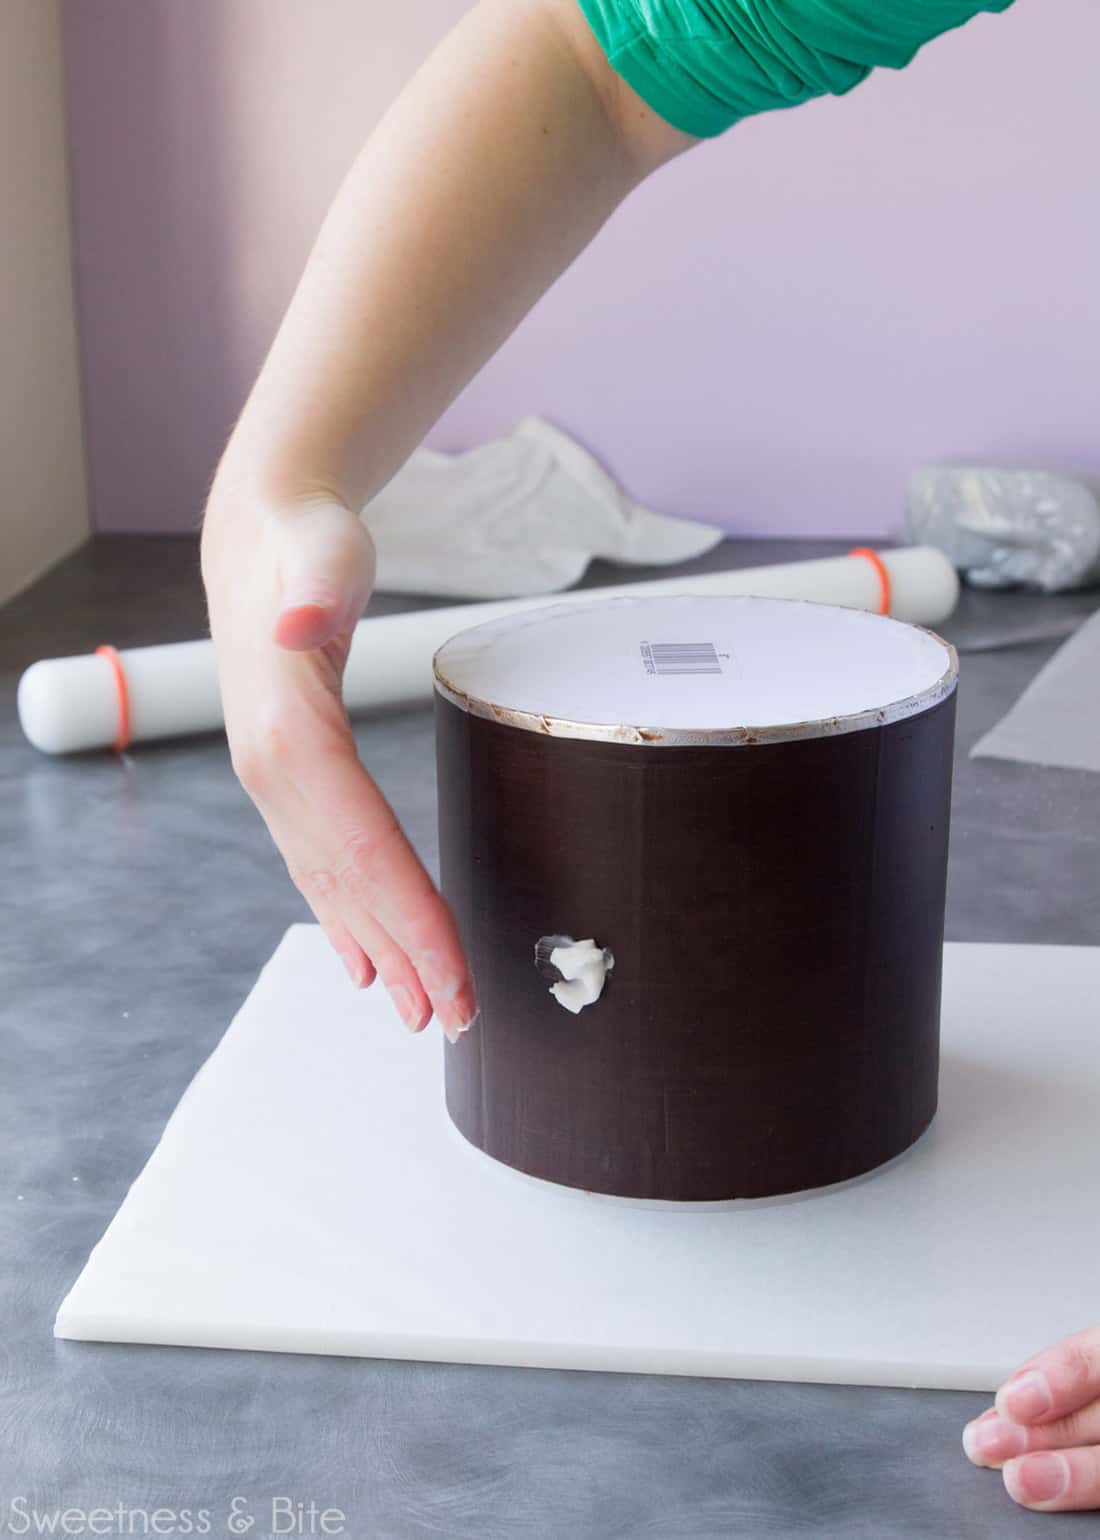
Rub the sides of the cake with a thin layer of shortening, trying to avoid the edge of the fondant.
I didn’t get a shot of this, but you basically want just enough shortening to cover the ganache – it will look shiny but it shouldn’t be too white. Set the cake aside (and give your hands a good wash!)
Give the rest of your fondant another brief knead, then dust the bench with cornstarch, shape the fondant into a sausage and flatten it out onto the cornstarch (starting with a sausage shape makes it easier to roll the fondant out in a rectangular shape).
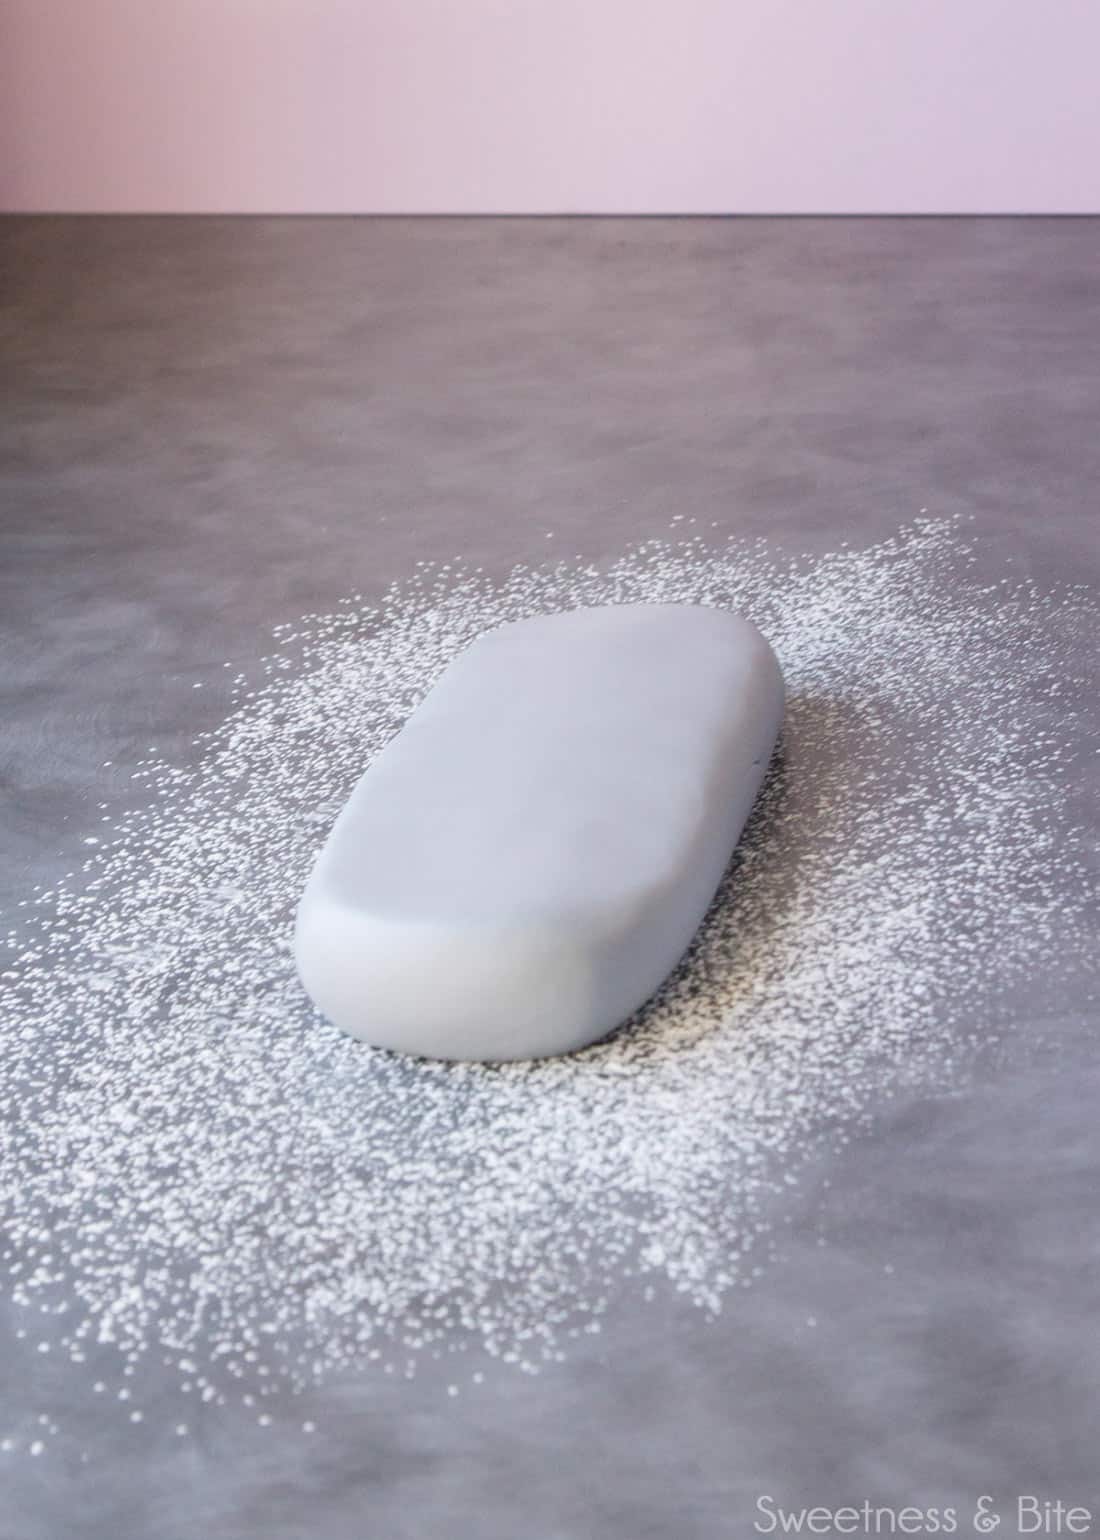
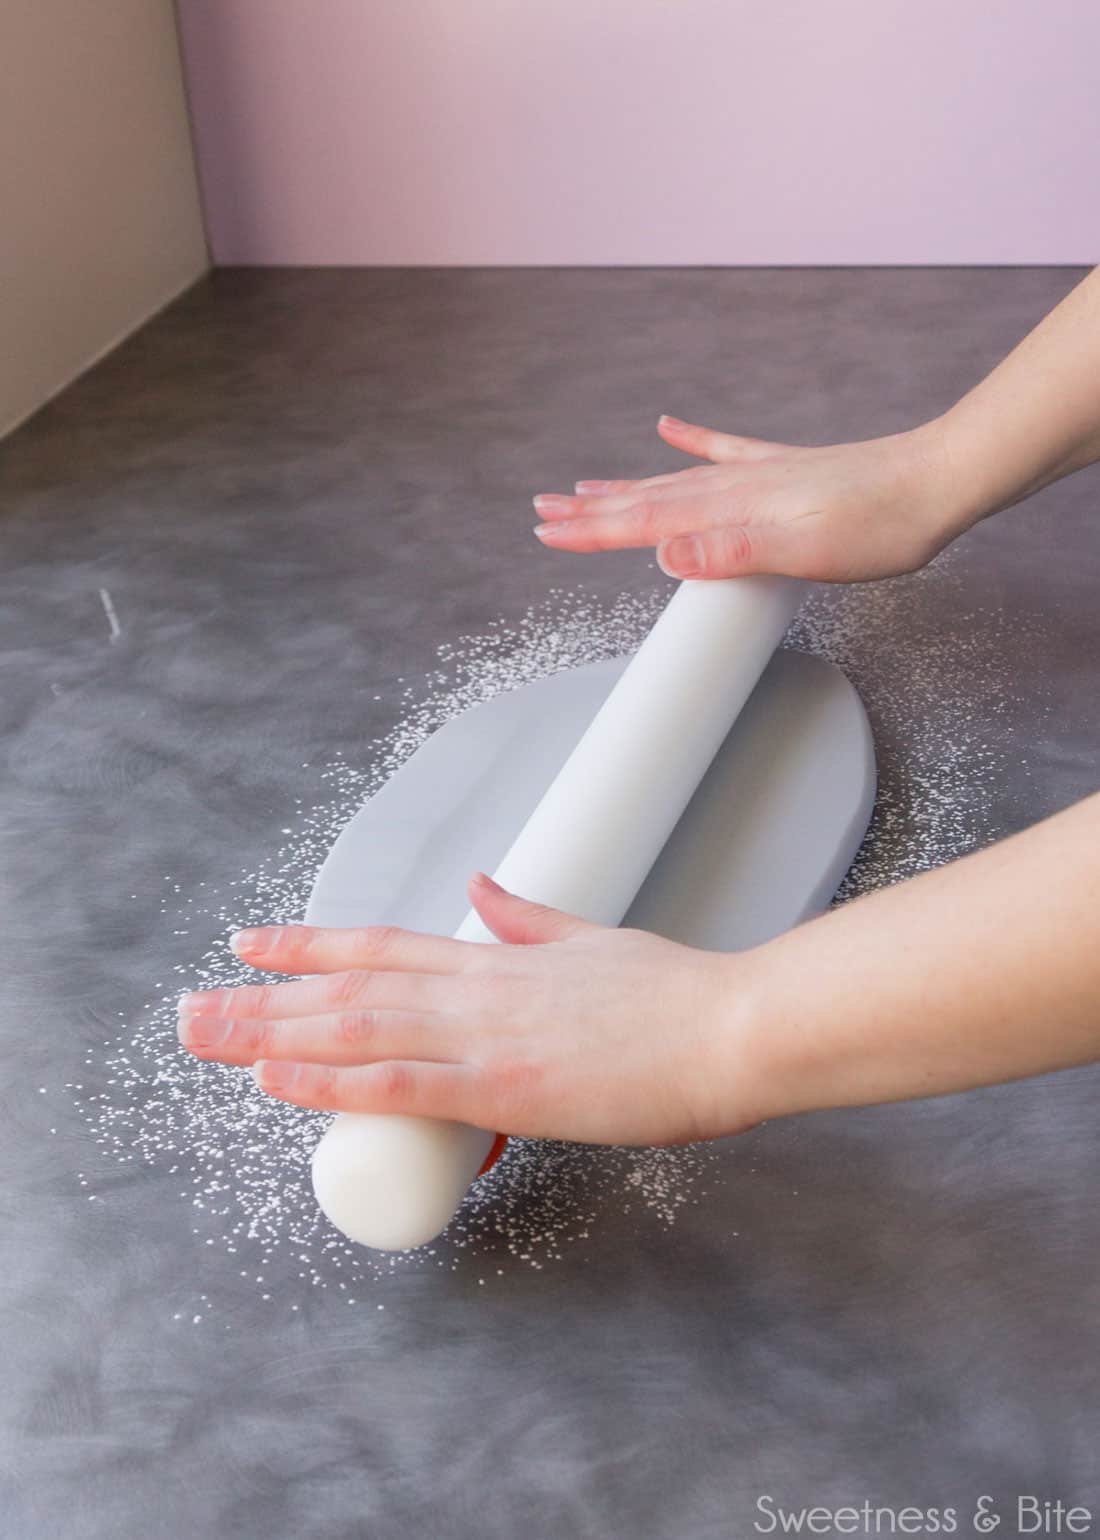
Start rolling it out, trying to keep the rectangular shape. Keep an eye on the thickness of the fondant as you roll – remember, getting the fondant even and thin is one of the keys to getting a neat seam on your cake.
Aim again for 3-4mm in thickness, thinner if your fondant is capable of it. Make sure you move the fondant around as you roll, and add a bit more cornstarch underneath if the fondant is sticking. Try to avoid dusting cornstarch on the top surface of the fondant unless it is really sticky.
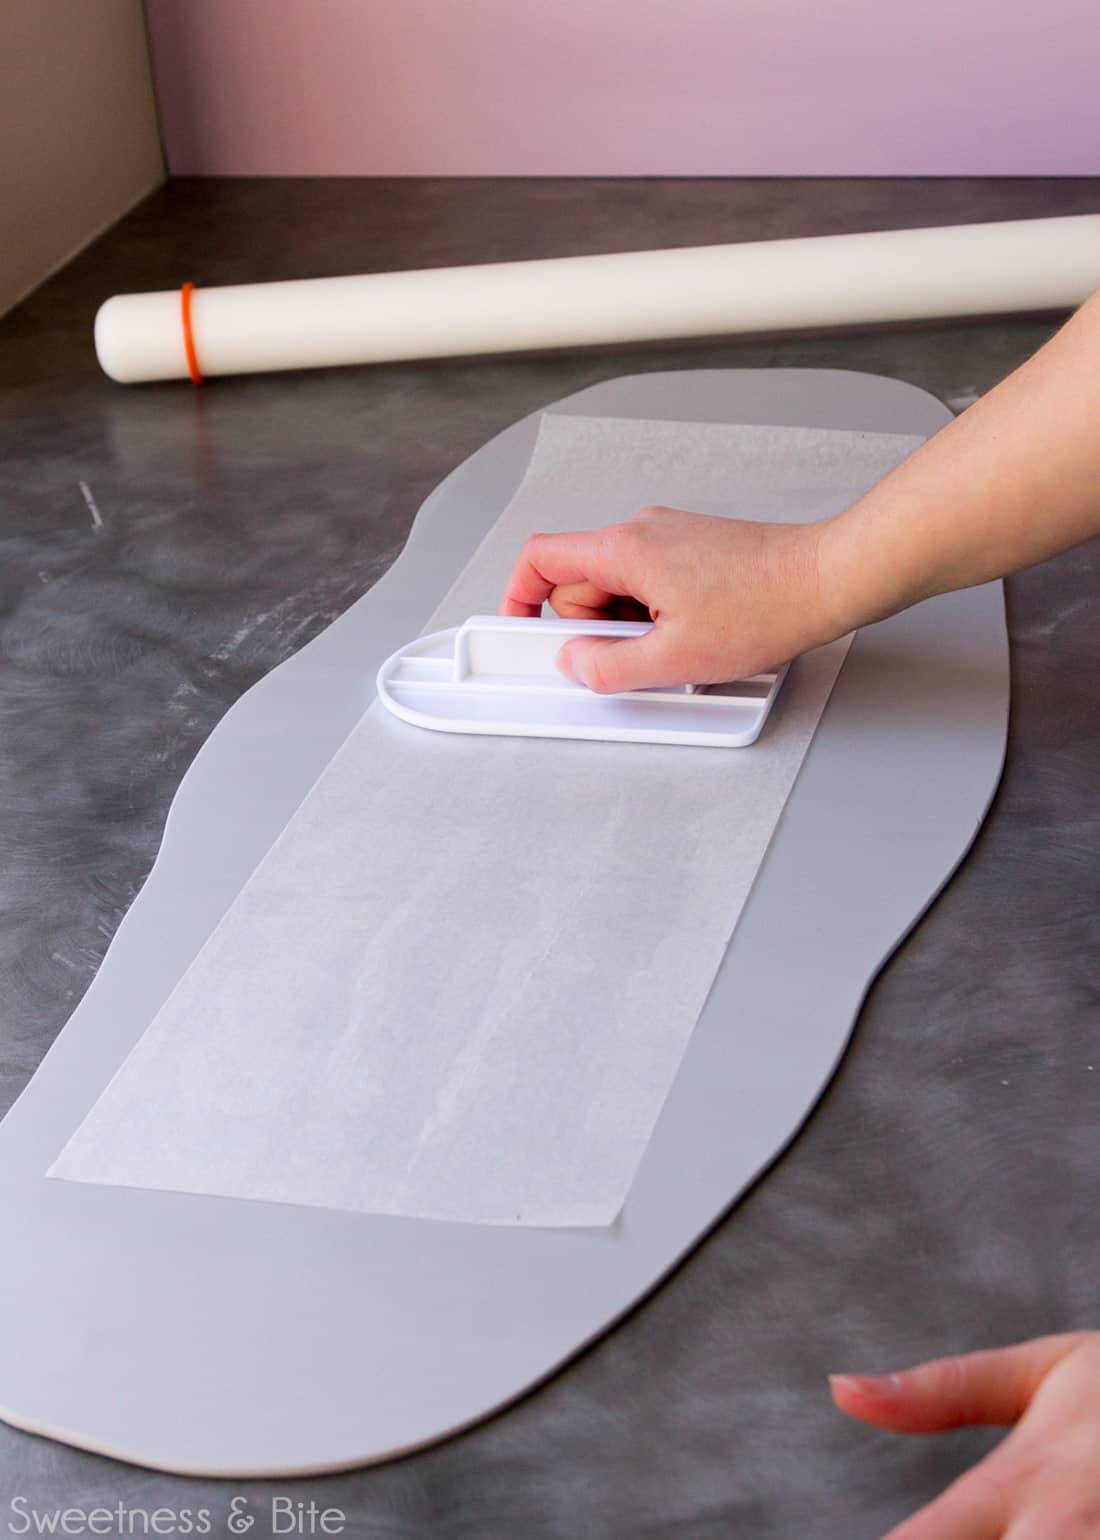
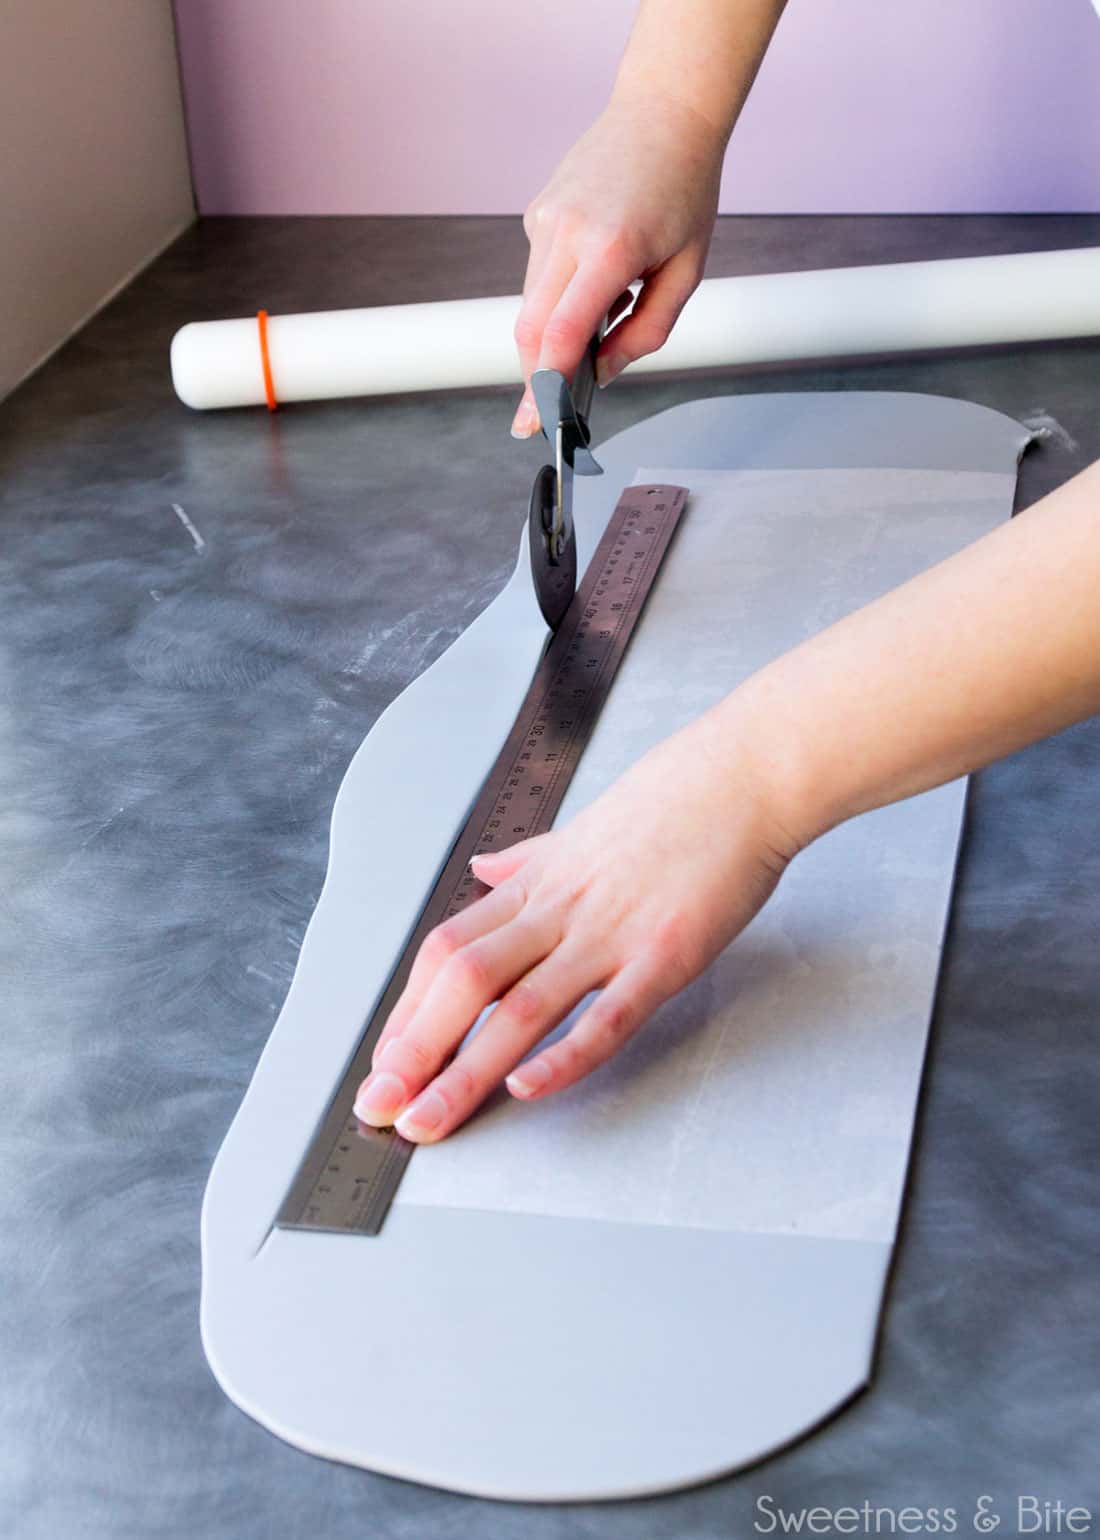
Lay your template onto the fondant, and press it down gently with a fondant smoother.
Use the ruler and pizza wheel or sharp knife to cut the shape out. Make your first cut on the long side closest to you, and be super careful with this cut, making sure it is neat as it will be the top edge of your cake.
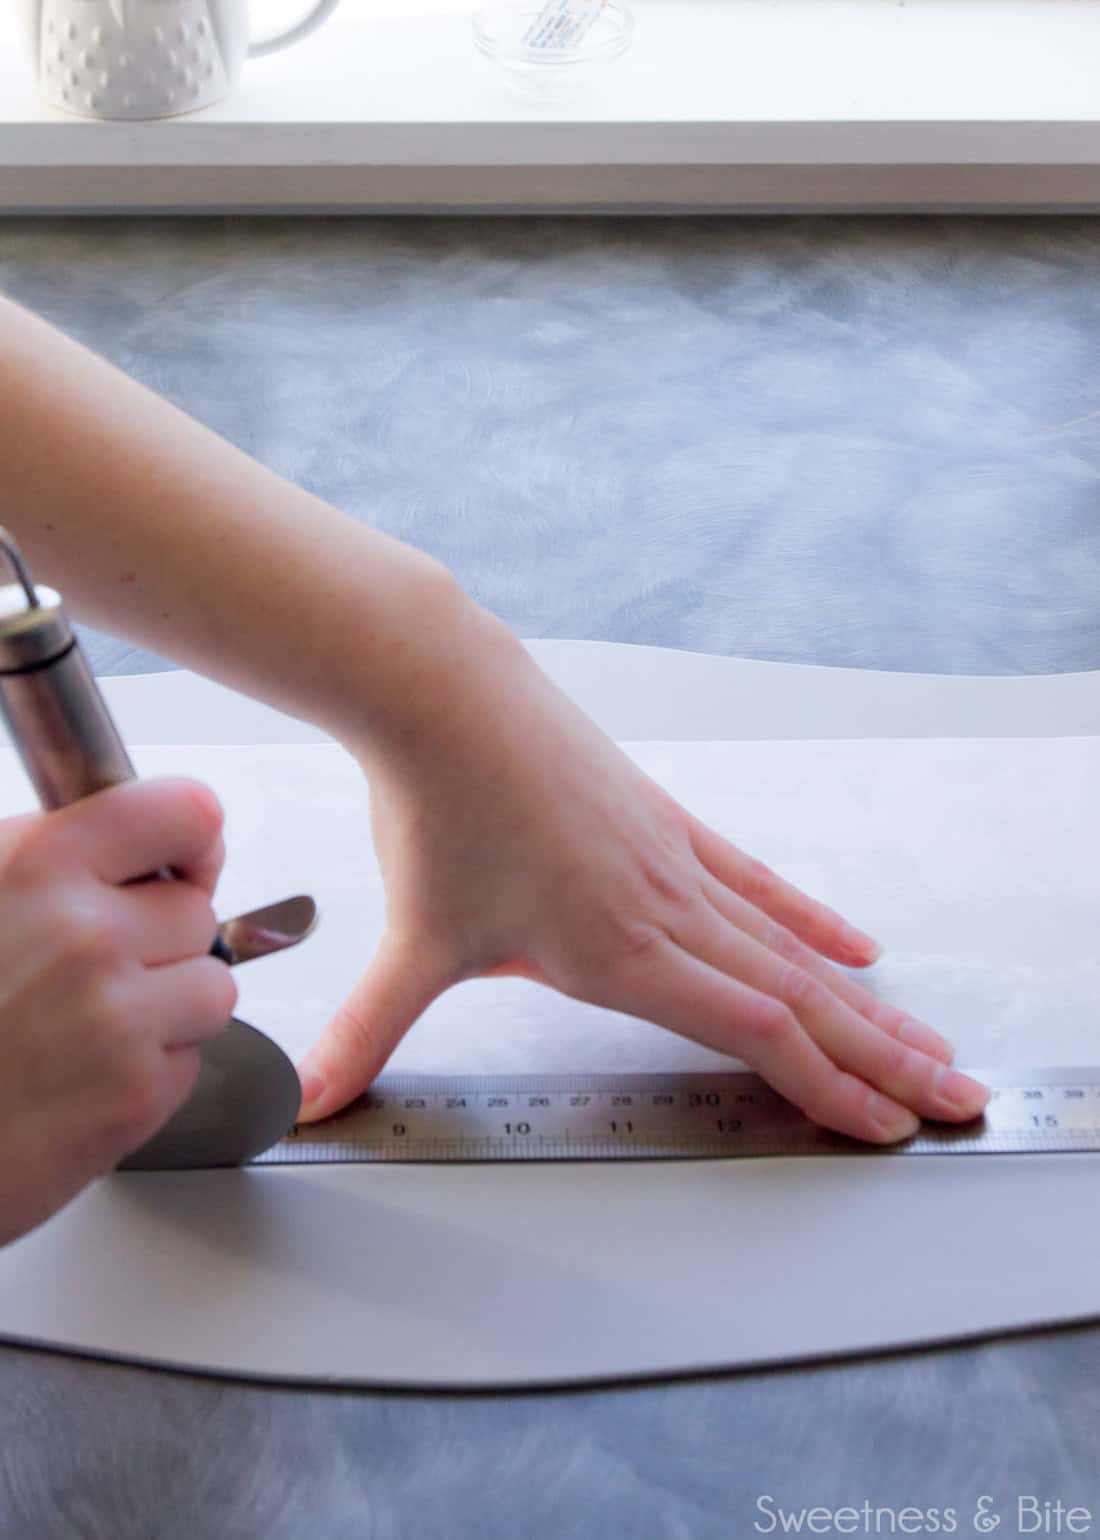
You can be a little lazier/faster with the other three sides, but that first one will be the star of the sharp-edged-cake show, so be gentle with it.
The way you roll your fondant around the rolling pin will depend on which hand is dominant. I’m right-handed and like to hold the roll of fondant in my right hand and smooth it onto the cake with my left. This means that I start rolling the fondant from the right-hand edge. If you prefer to go the other way, then obviously you’ll need to do the opposite of what I do.
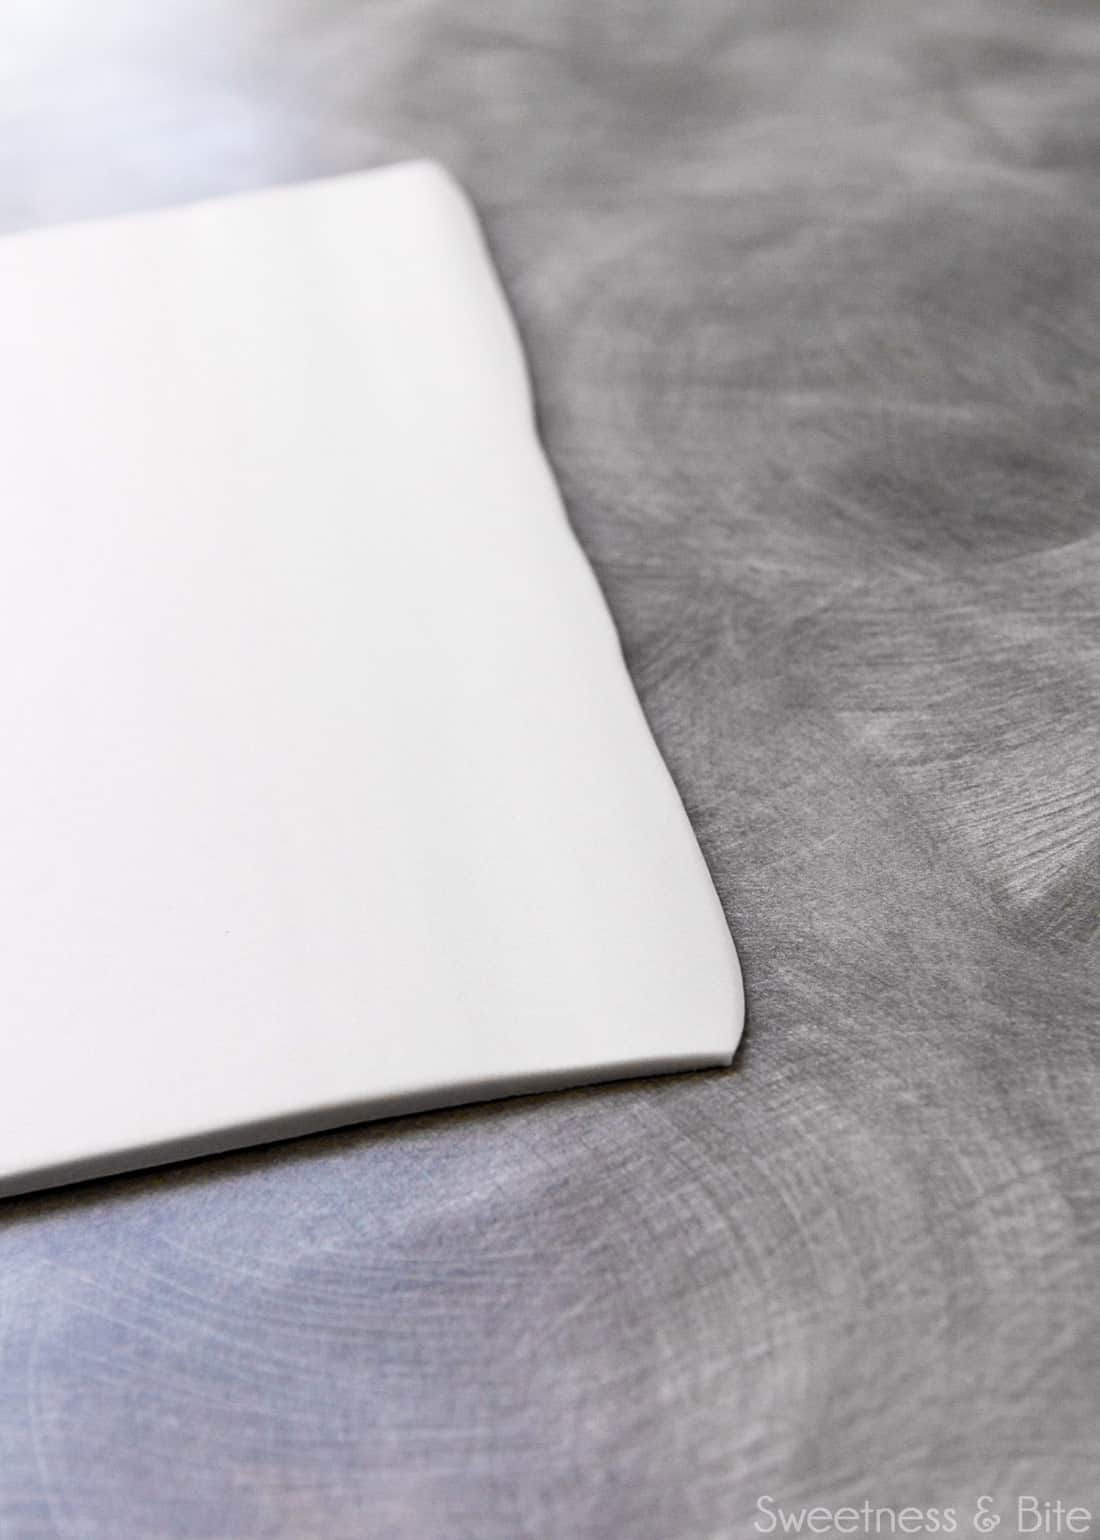
Gently roll the very edge of the fondant flat with the rolling pin, this will stop it from indenting too much into the rest of the fondant as you roll.
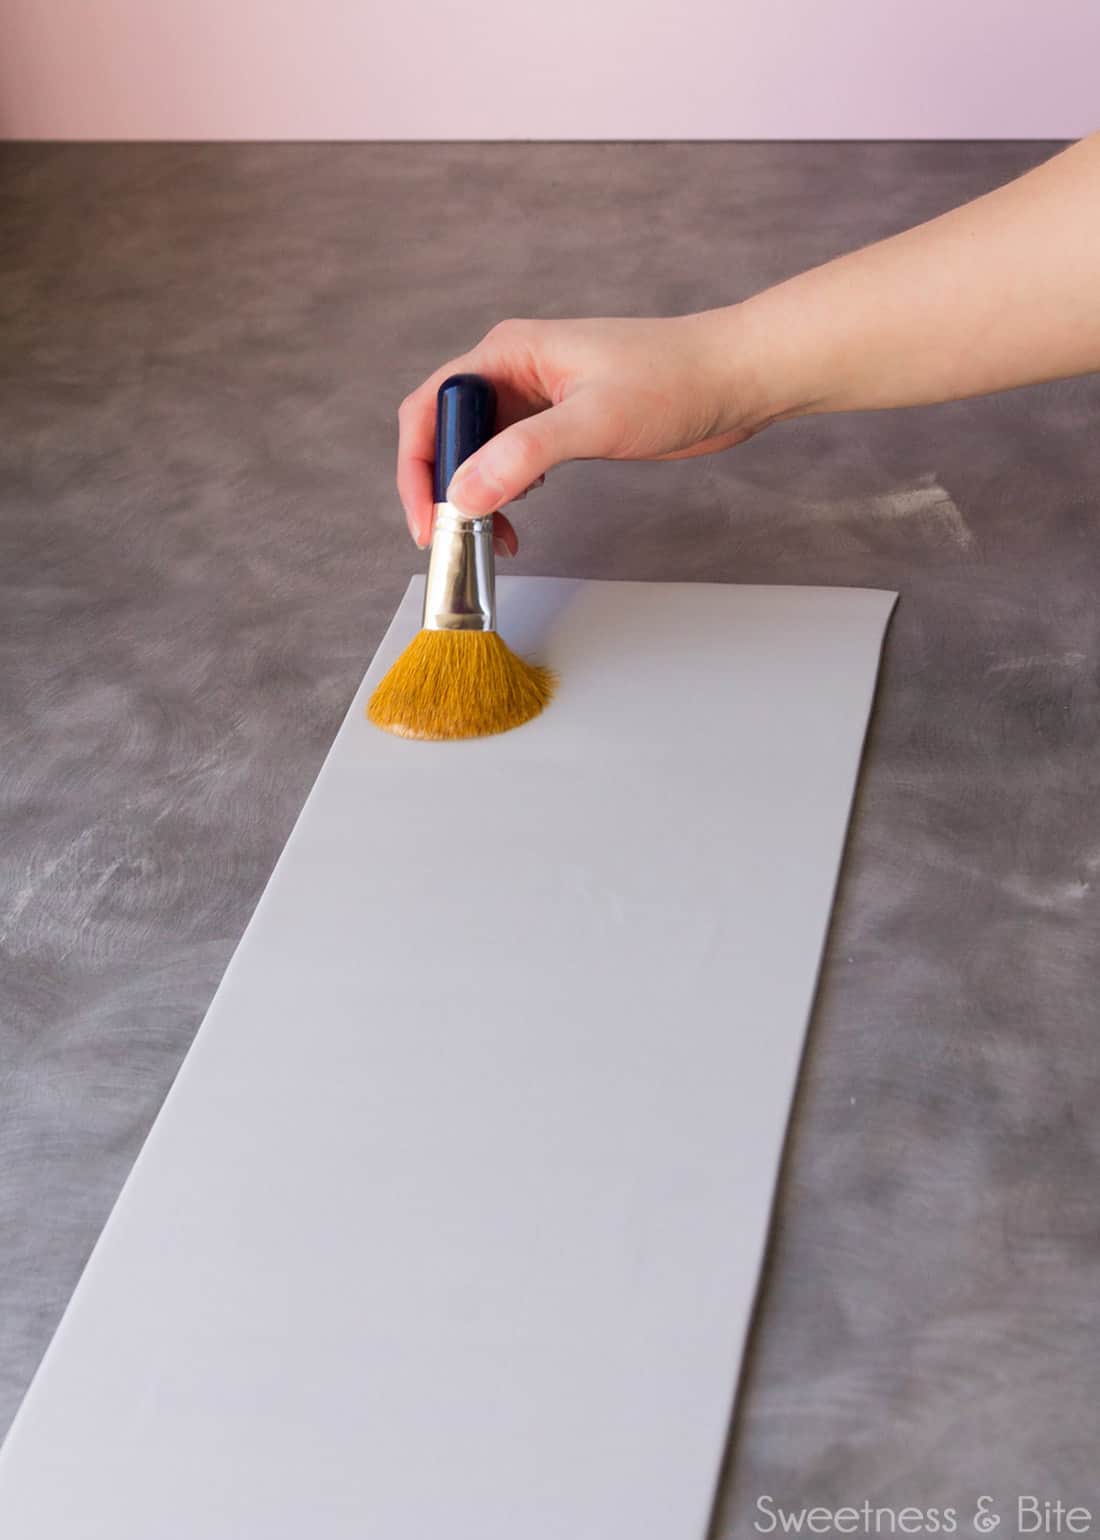
Very, very lightly dust the surface of the fondant with cornstarch. You really don’t want too much here, just enough to remove any tackiness from the fondant, so it doesn’t stick to itself when you roll it up. I usually just use any excess cornstarch that’s on the bench from rolling the fondant, and dust that over the surface.
I know I said up there that you don’t want too much cornstarch on the surface as it dries the fondant out, but this single light dusting here is very important. Keep this brush nearby for the next step.
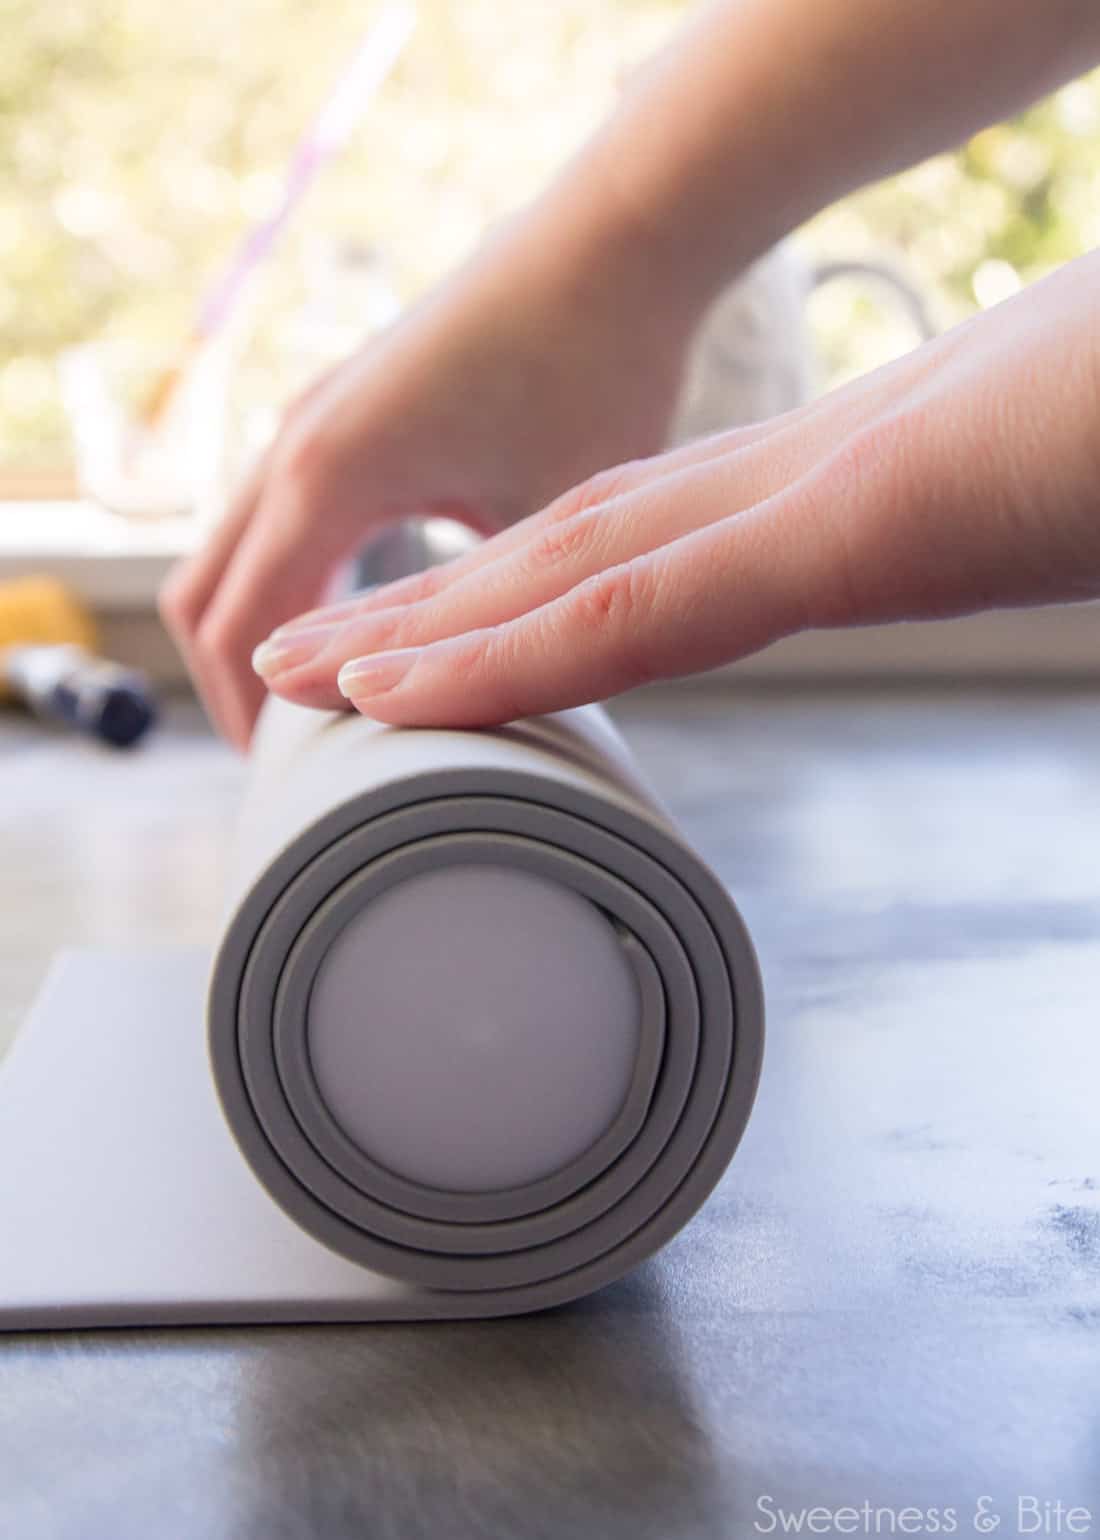
Carefully line up the end of the rolling pin with the edge of the fondant. Start rolling the fondant around the rolling pin, keeping a careful eye on the edge closest to you, to make sure it is flush with the end of the rolling pin.
If you’ve used too much cornflour as you rolled the fondant out, you may need to use the fluffy brush to dust the excess off the underside as you roll it up. Too much excess cornstarch under the fondant will stop it from sticking well to the cake, and in turn, cause air bubbles and other nasty you-really-don’t-want-thats.
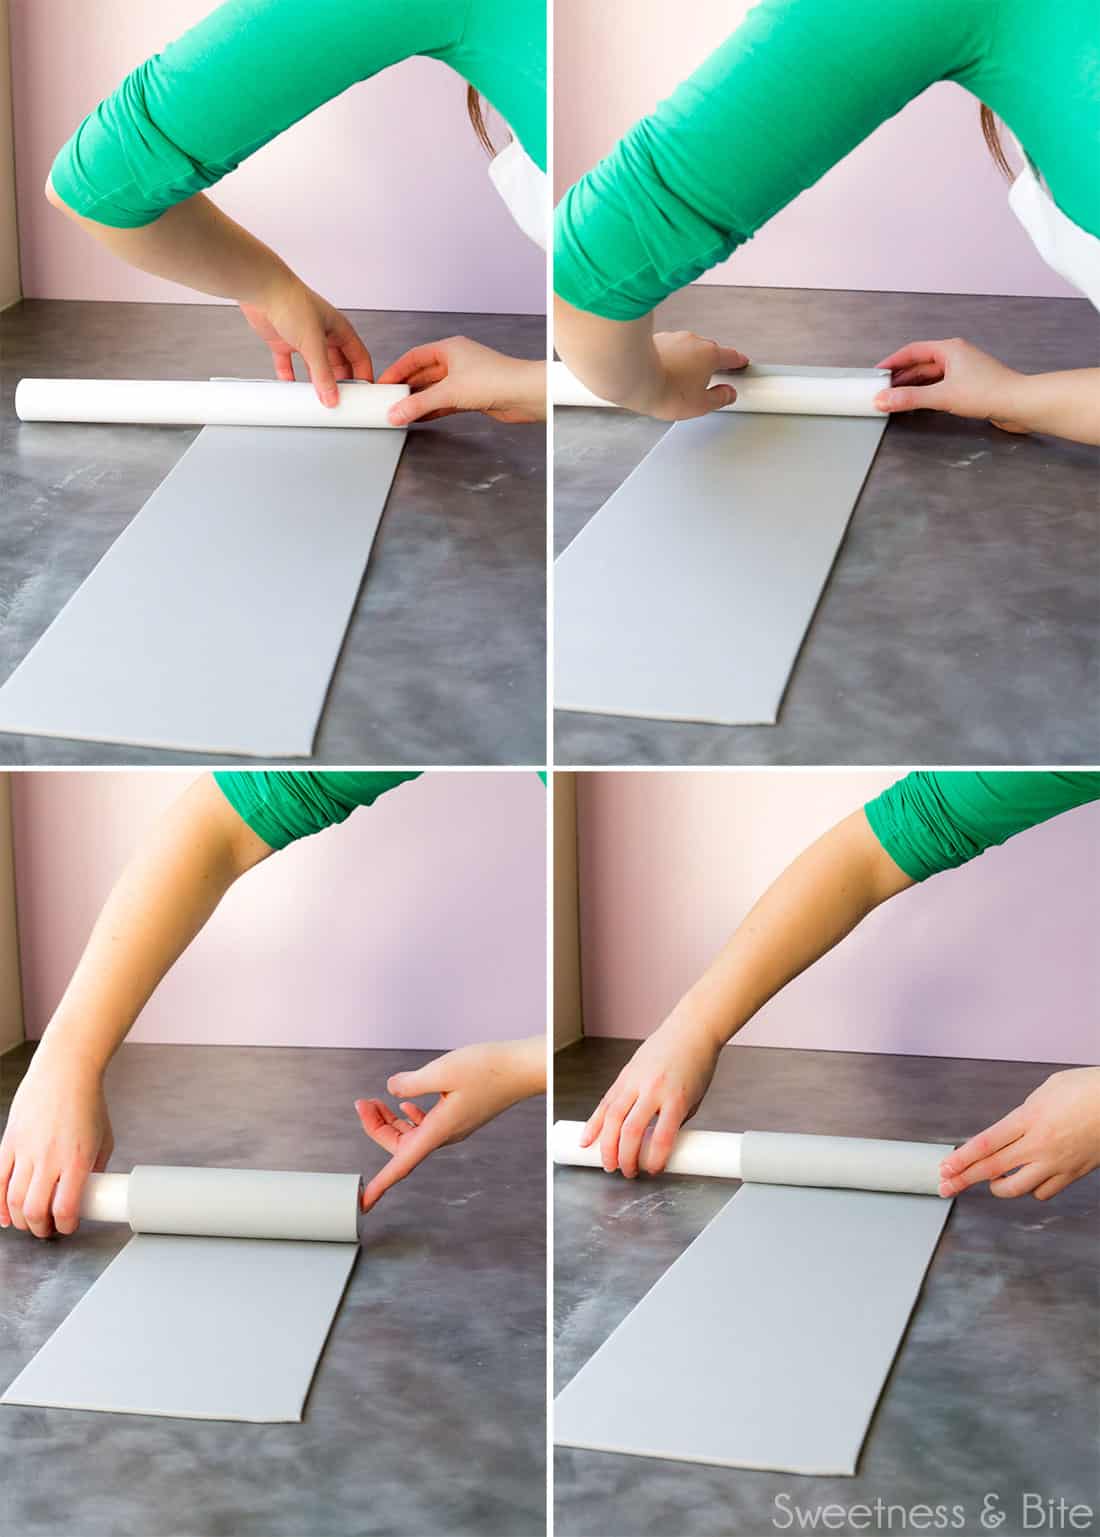
Have a good look at the picture below, that’s how you want the edge of the rolled fondant to look, even and flush through the whole roll.
Gently lift the rolling pin up to the cake, and press the end of the fondant against the cake, making sure it is well adhered.
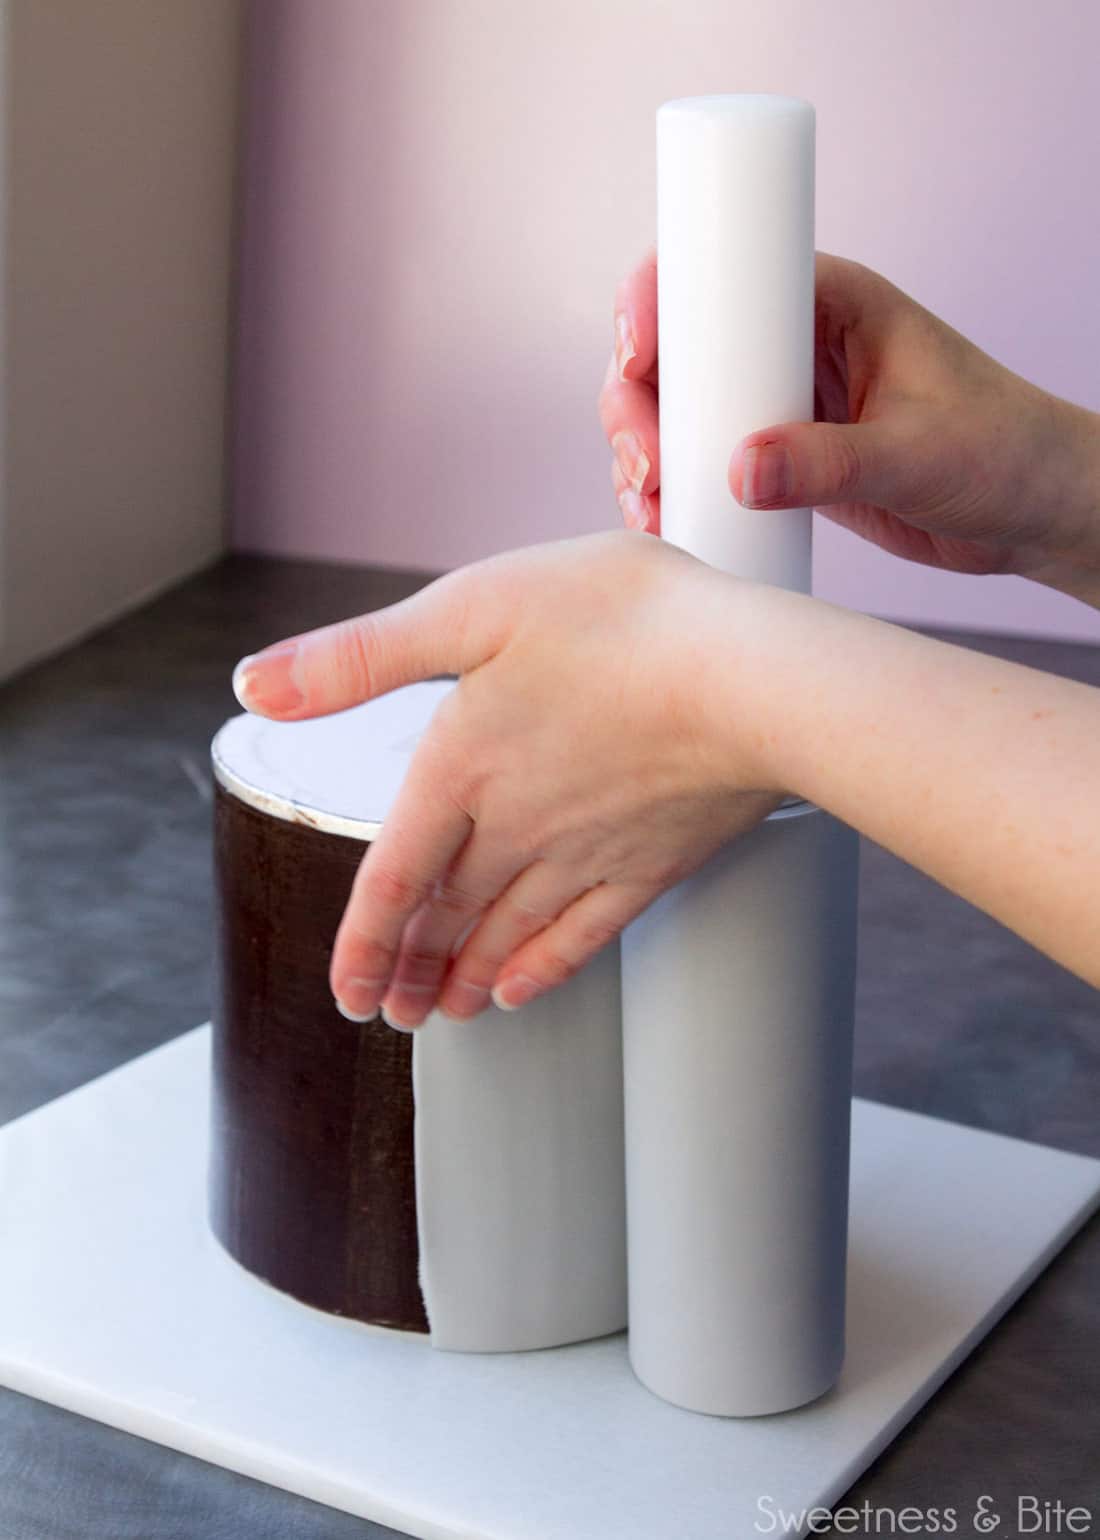
Slowly unroll the fondant around the cake, smoothing with your hand as you go. Make sure you keep checking the bottom edge, to make sure it sits flush against the board.
If you find the fondant is rising up – this could be due to the fondant not quite being rolled flush around the rolling pin, or the roll could be riding up like a pair of ill-fitting pants as you unroll it. You can very, very gently pull it away from the cake and let the fondant sink down a bit.
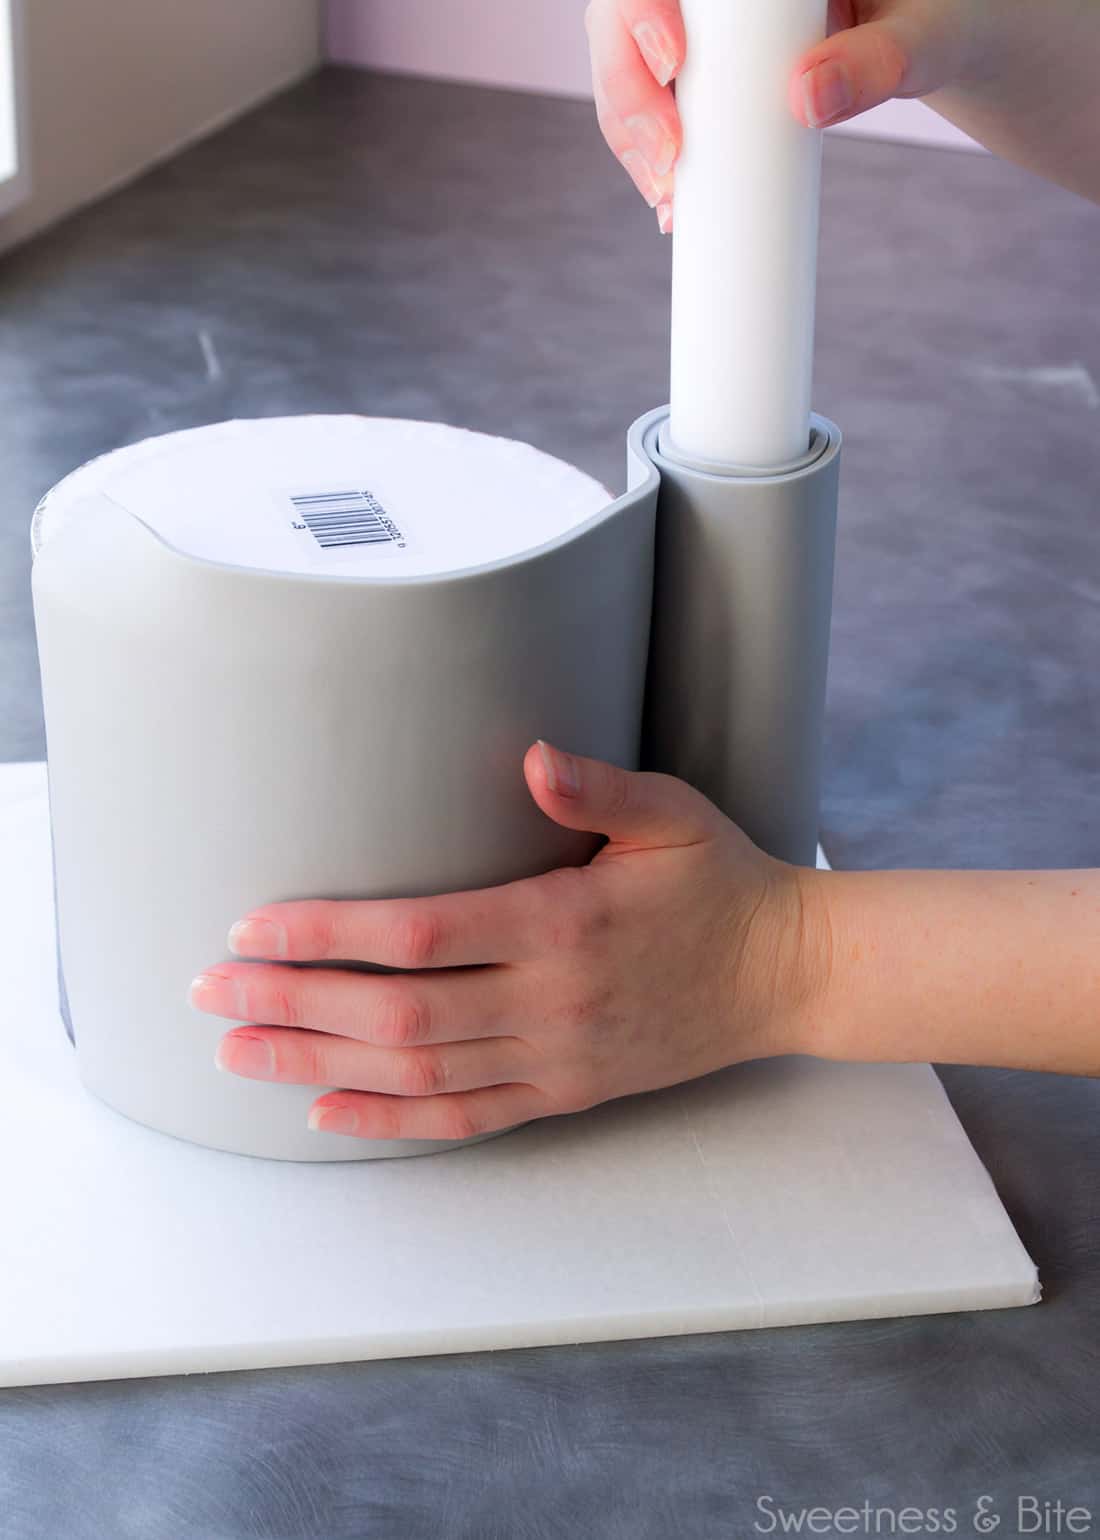
Now, if your fondant is a bit sticky, then it may, at any stage (but I find it tends to be as I get to the end of the roll) stick to itself. If you have a look where my blurry finger is pointing in this photo, you’ll see where the fondant is sticking to itself a little…
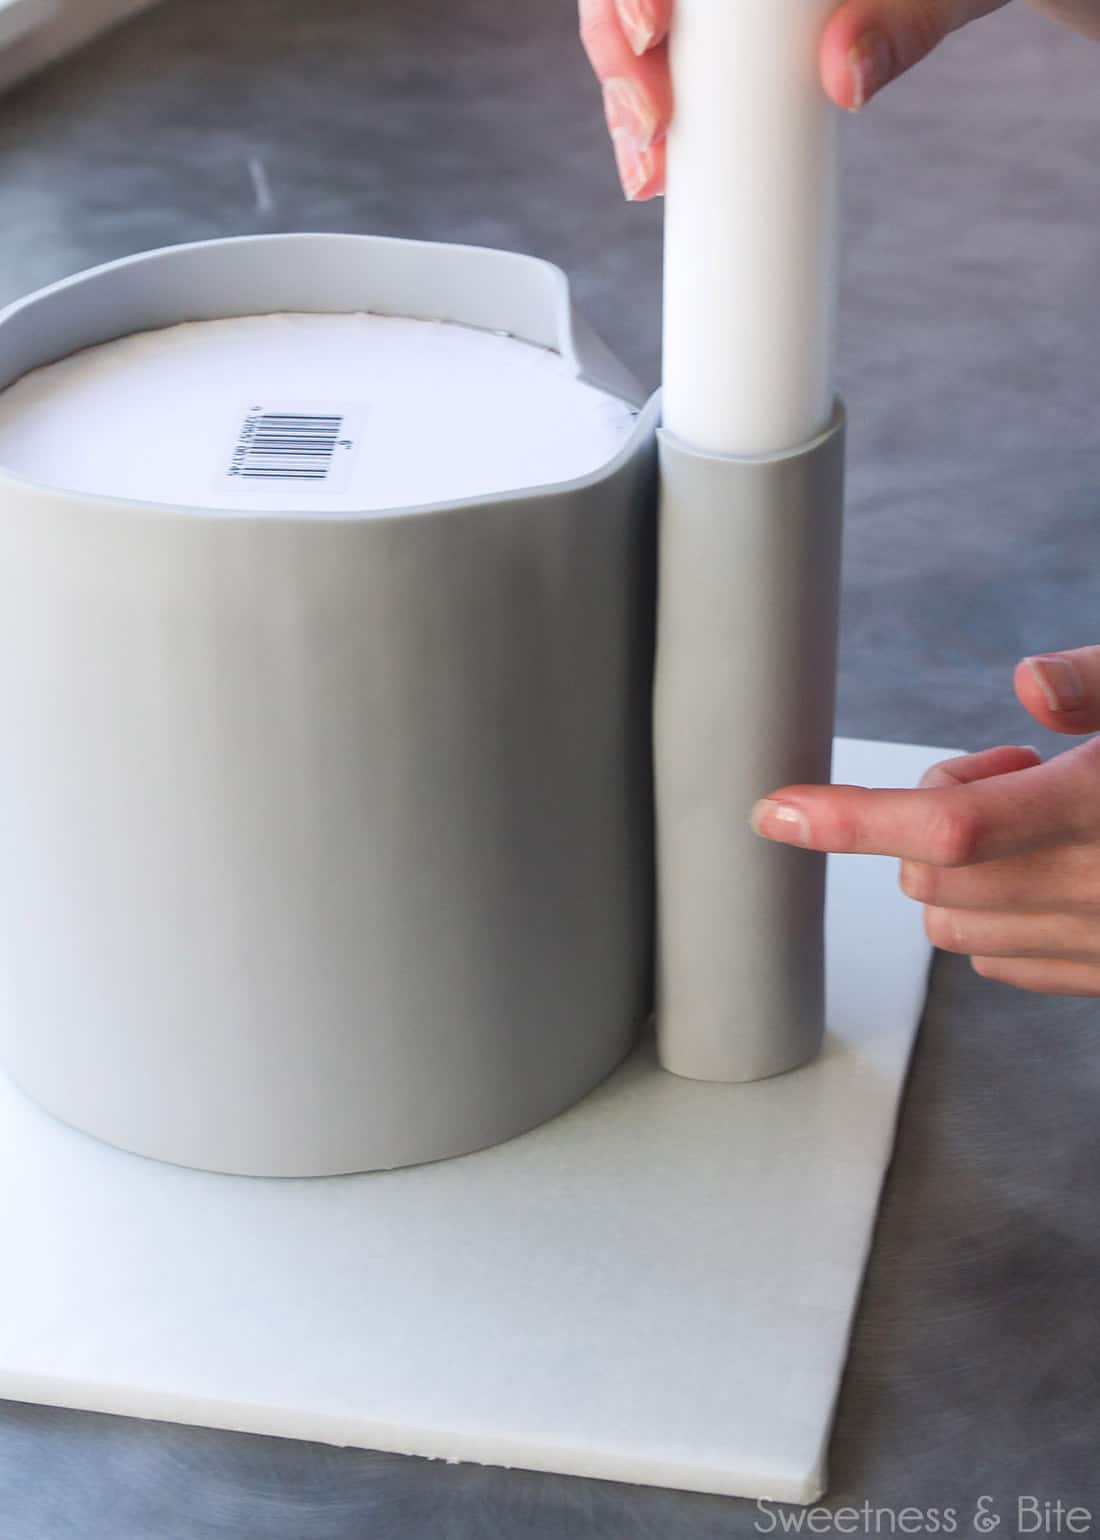
Don’t panic if this happens, in most cases, you can fix it. Just whatever you do, don’t pull on the fondant roll to try and unstick it. Grab your flat paintbrush, and use it to gently run up and down the fondant, easing it apart.
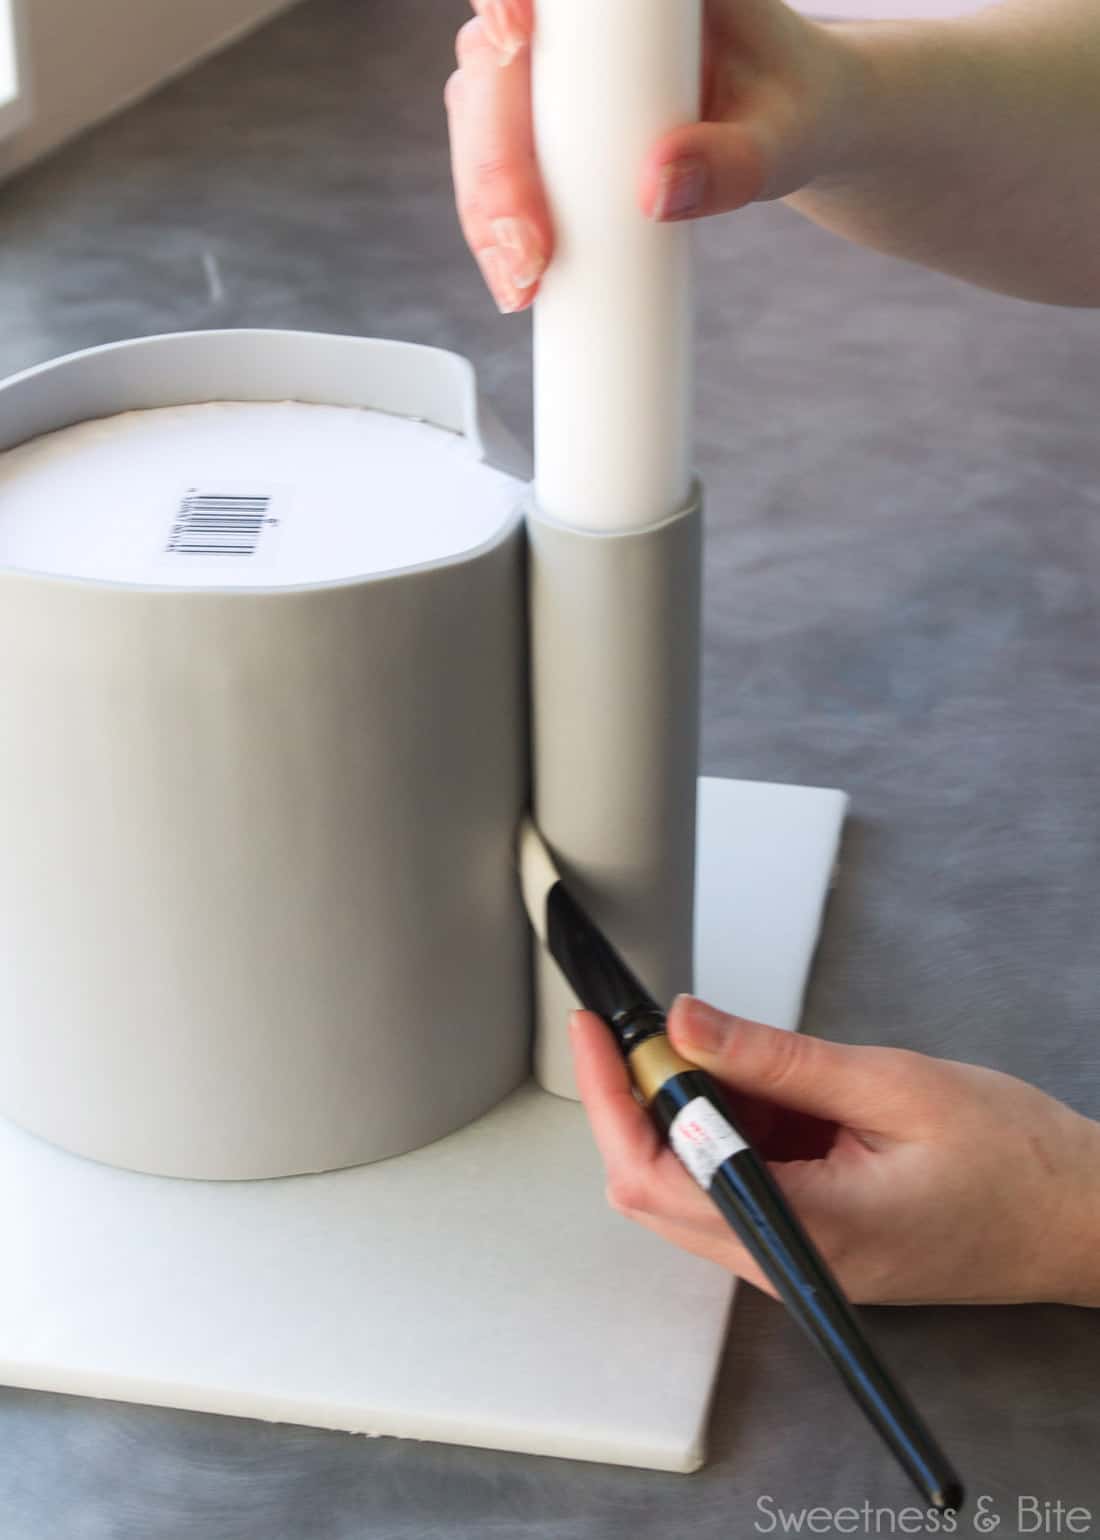
You can put a bit of cornstarch on the brush if you need to, but just the brush tends to be enough. I’m not going to lie to you, sometimes it gets so stuck that you cannot fix it. But you should know that in all likelihood, it’s not your fault, it’s because the damned fondant is sticky. That may only make you feel slightly better as you remove the fondant and try again.
Things you need to keep an eye on while wrapping: the bottom edge, the fondant sticking to itself.
Things that don’t matter right now: air bubbles (we’ll get ’em later), bumps, anything to do with the excess fondant around the top, we’re trimming it off in a minute anyway.
Once you get to the end of the fondant, place a ruler against the cake, in the middle of the overlapped fondant. Try to just lightly rest it against the fondant, so you don’t dent the fondant with the edge of the ruler. Use a scalpel to cut down through both layers of fondant.
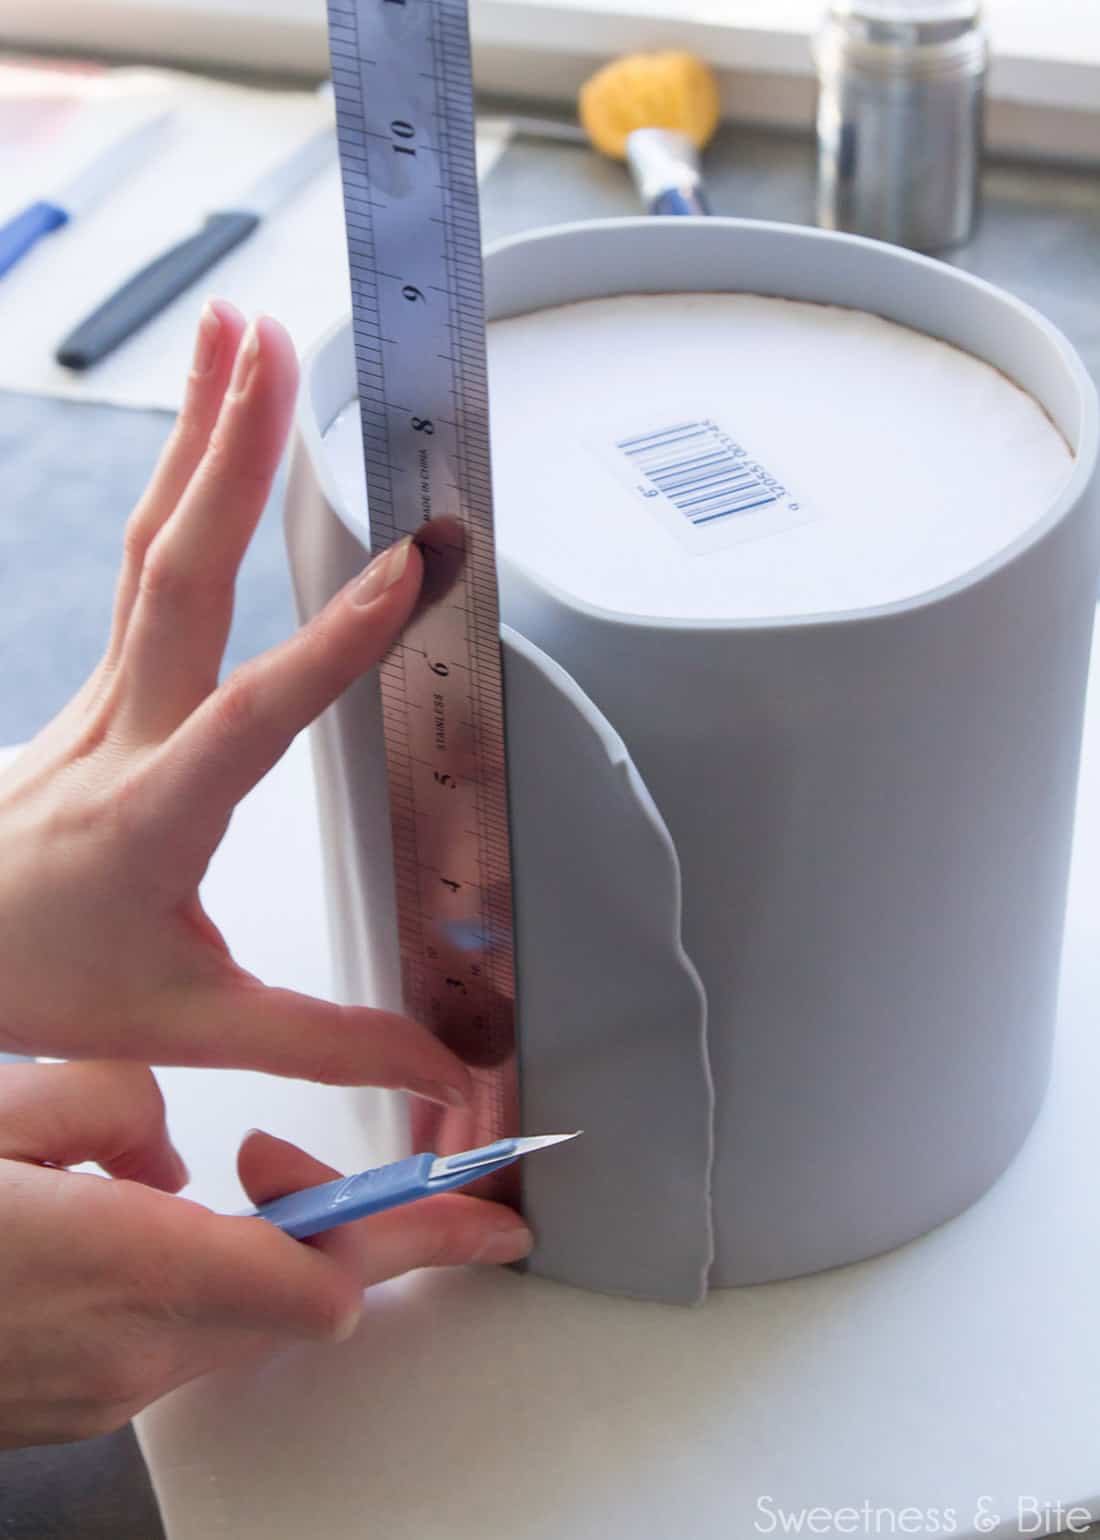
The loose outside piece will fall away, and you can ease back the opposite edge and remove the cut section from underneath. Be gentle as you do it, sometimes you may not have cut all the way through both layers of fondant and you don’t want to tear it. Cut it again with the scalpel if necessary and pull it away.
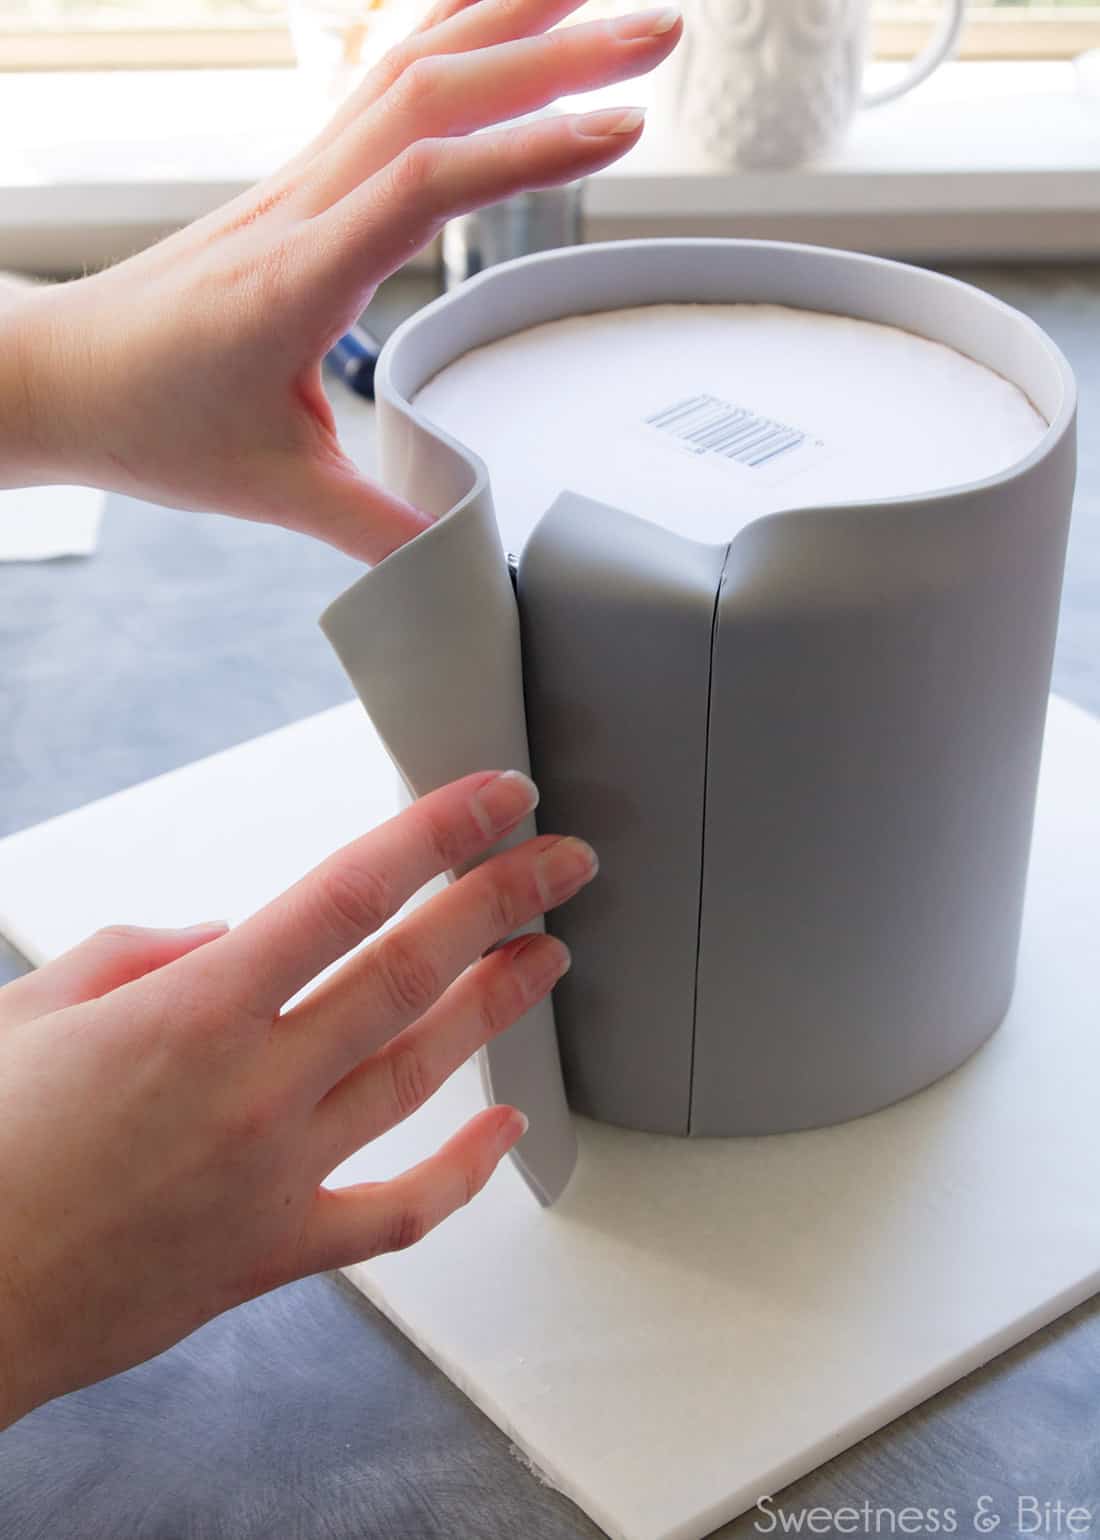
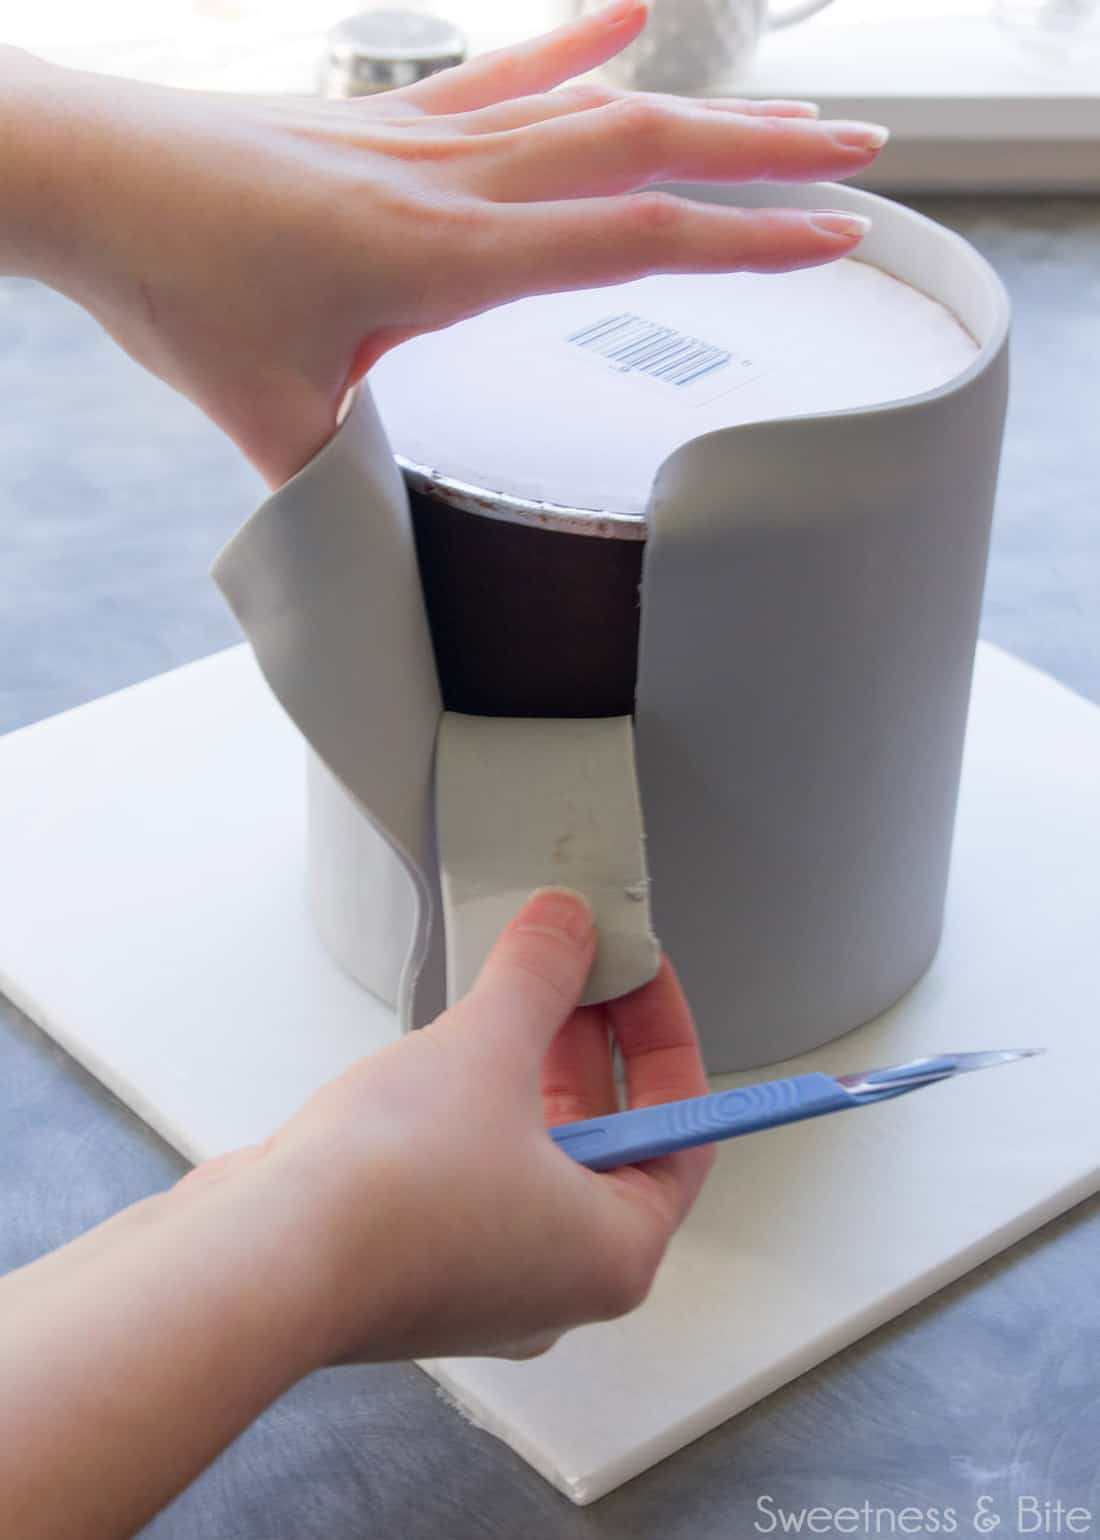
Very gently press the edges of the fondant together with your fingers. Don’t overlap them – make the cut edges sit flush together. If the edges are slightly dry and they don’t stick, you can use a small paintbrush dipped in vodka or water (vodka is better as it dries faster and doesn’t mark the fondant) to dampen the edges so they’ll stick. Use your fingers to rub up and down the seam until it has fully stuck together.
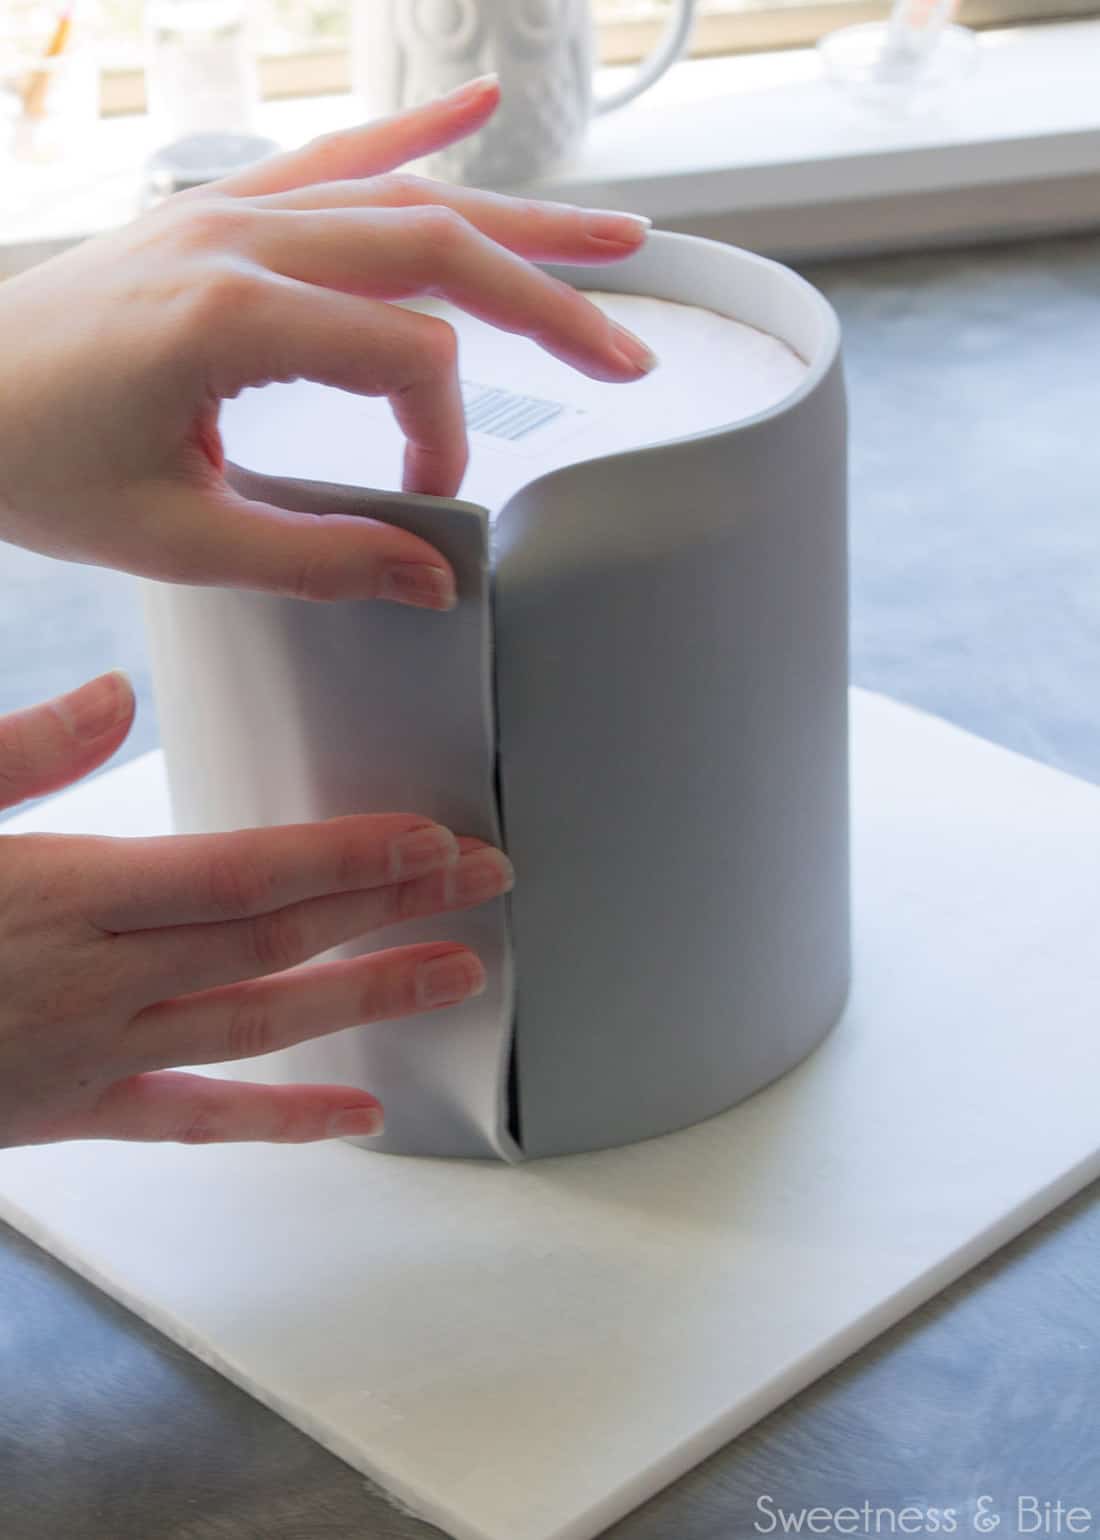
Then grab one of your thicker flexible fondant smoothers and use it to buff the seam. Use the smoother in a super gentle circular motion. The reason you need to be gentle is so you don’t distort the line. If the line does start looking a little wonky, then use the smoother or your fingers to gently coax it back into line, so to speak.
“A straight line looks neater than a squiggly one” – Old New Zealand proverb*.
*Not really.
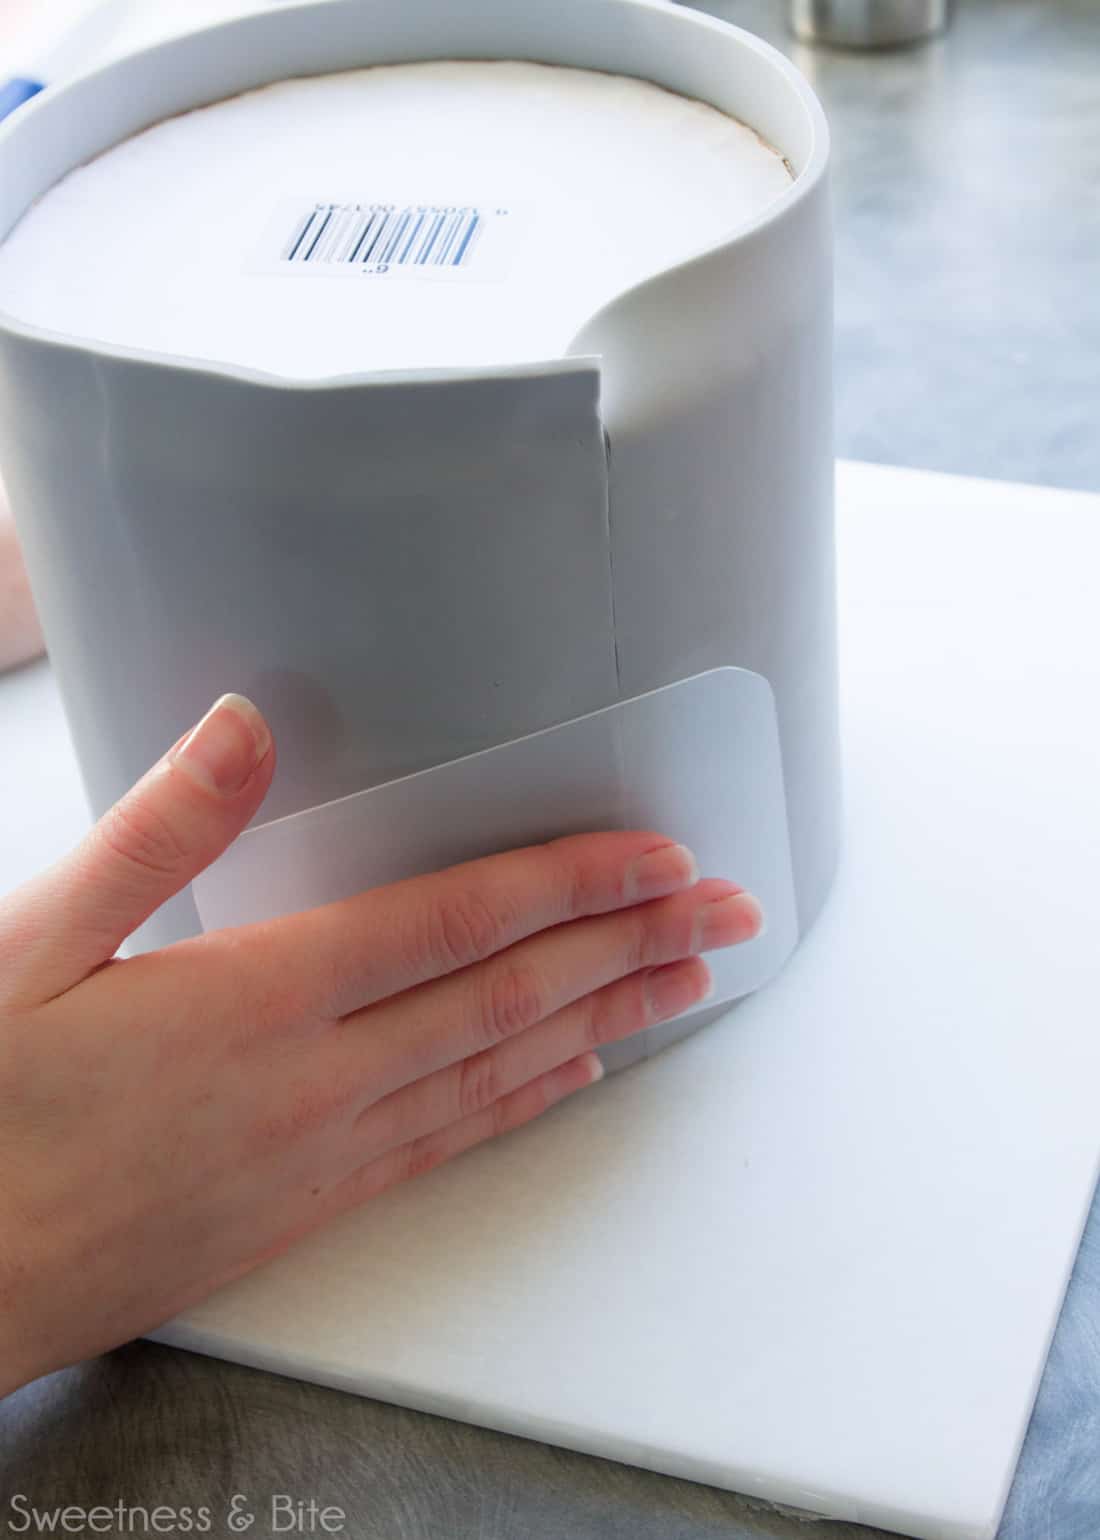
Once you’re pretty happy with the seam (you can work on it a little more later), continue to use the fondant smoother around the cake, buffing out any obvious bumps. Check for air bubbles as you go. Often, if they are towards the top of the cake, you can use the fondant smoother or your hand to gently ease them up so they release the air at the top. Other bubbles you may need to prick with a fine pin or needle (acupuncture needles are great for this) and smooth them out.
Check around the bottom (remember, that’ll be the top of the finished cake) and make sure the fondant is sitting flush against the setup board. If there is a little gap, you can use the fondant smoother to very gently smooth the fondant down to fill the gap.
When you’re mostly happy with the sides of the cake, trim the fondant from the top of the cake. Run the knife along the cake board as you cut, making sure the knife stays flush against the board, to get a perfectly straight cut.
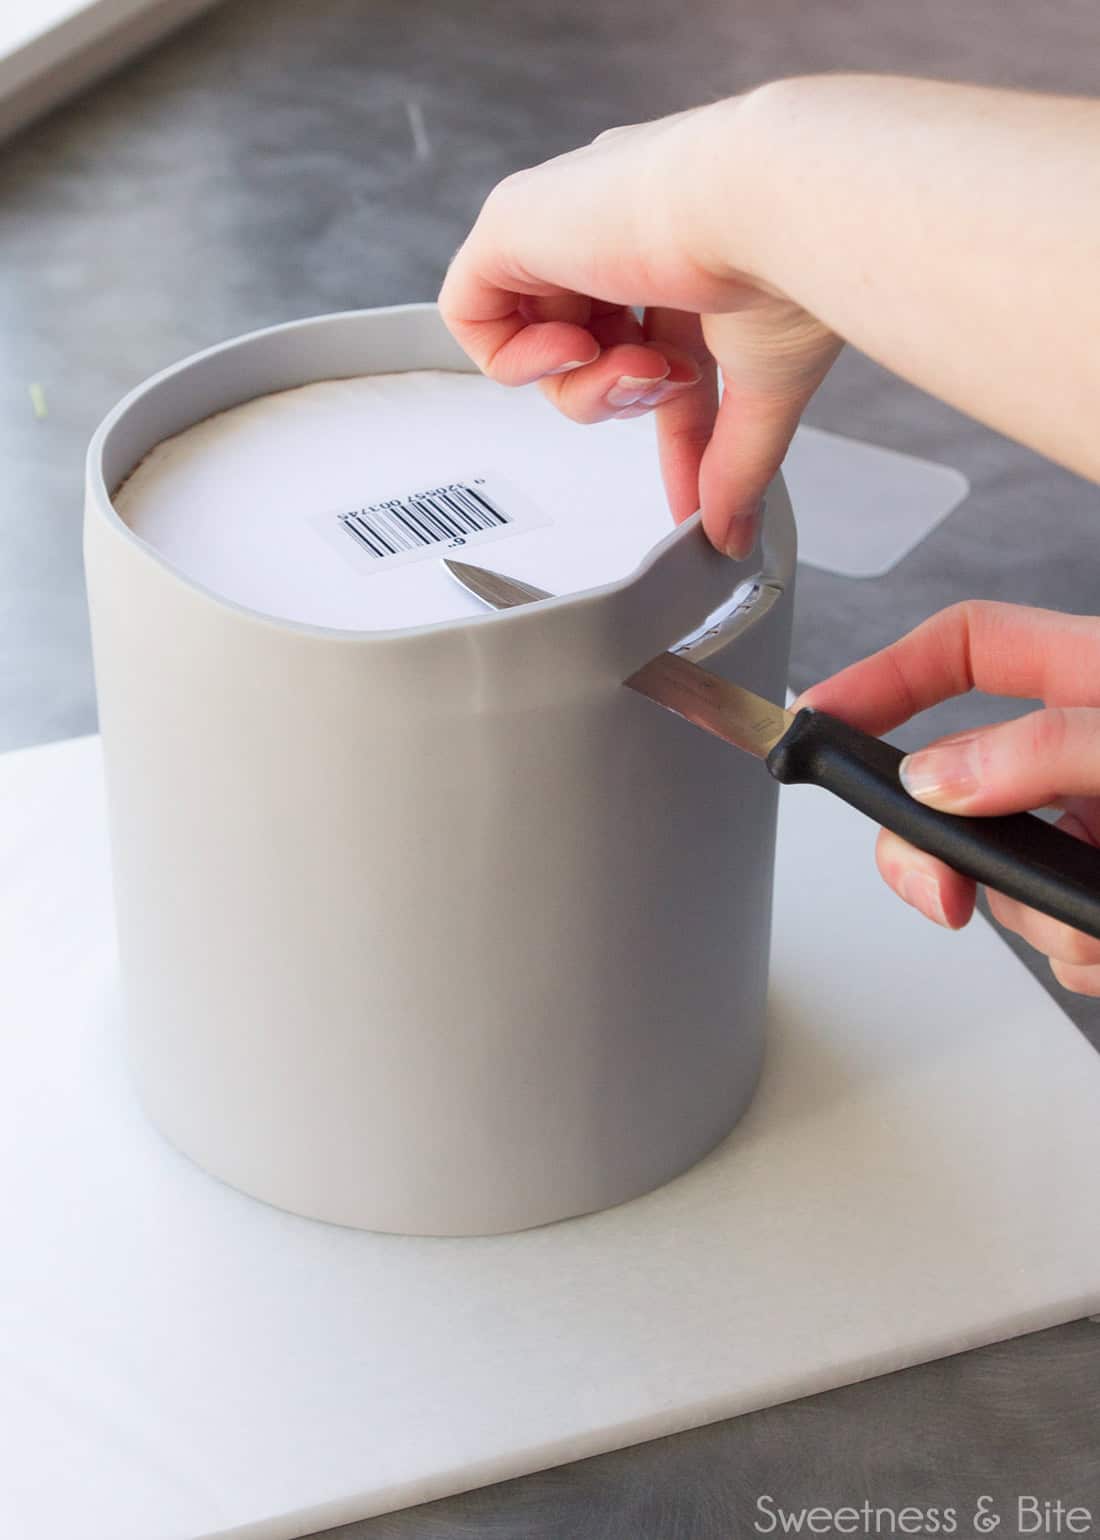
Pop a piece of non-slip/grippy mat onto the top of the board…
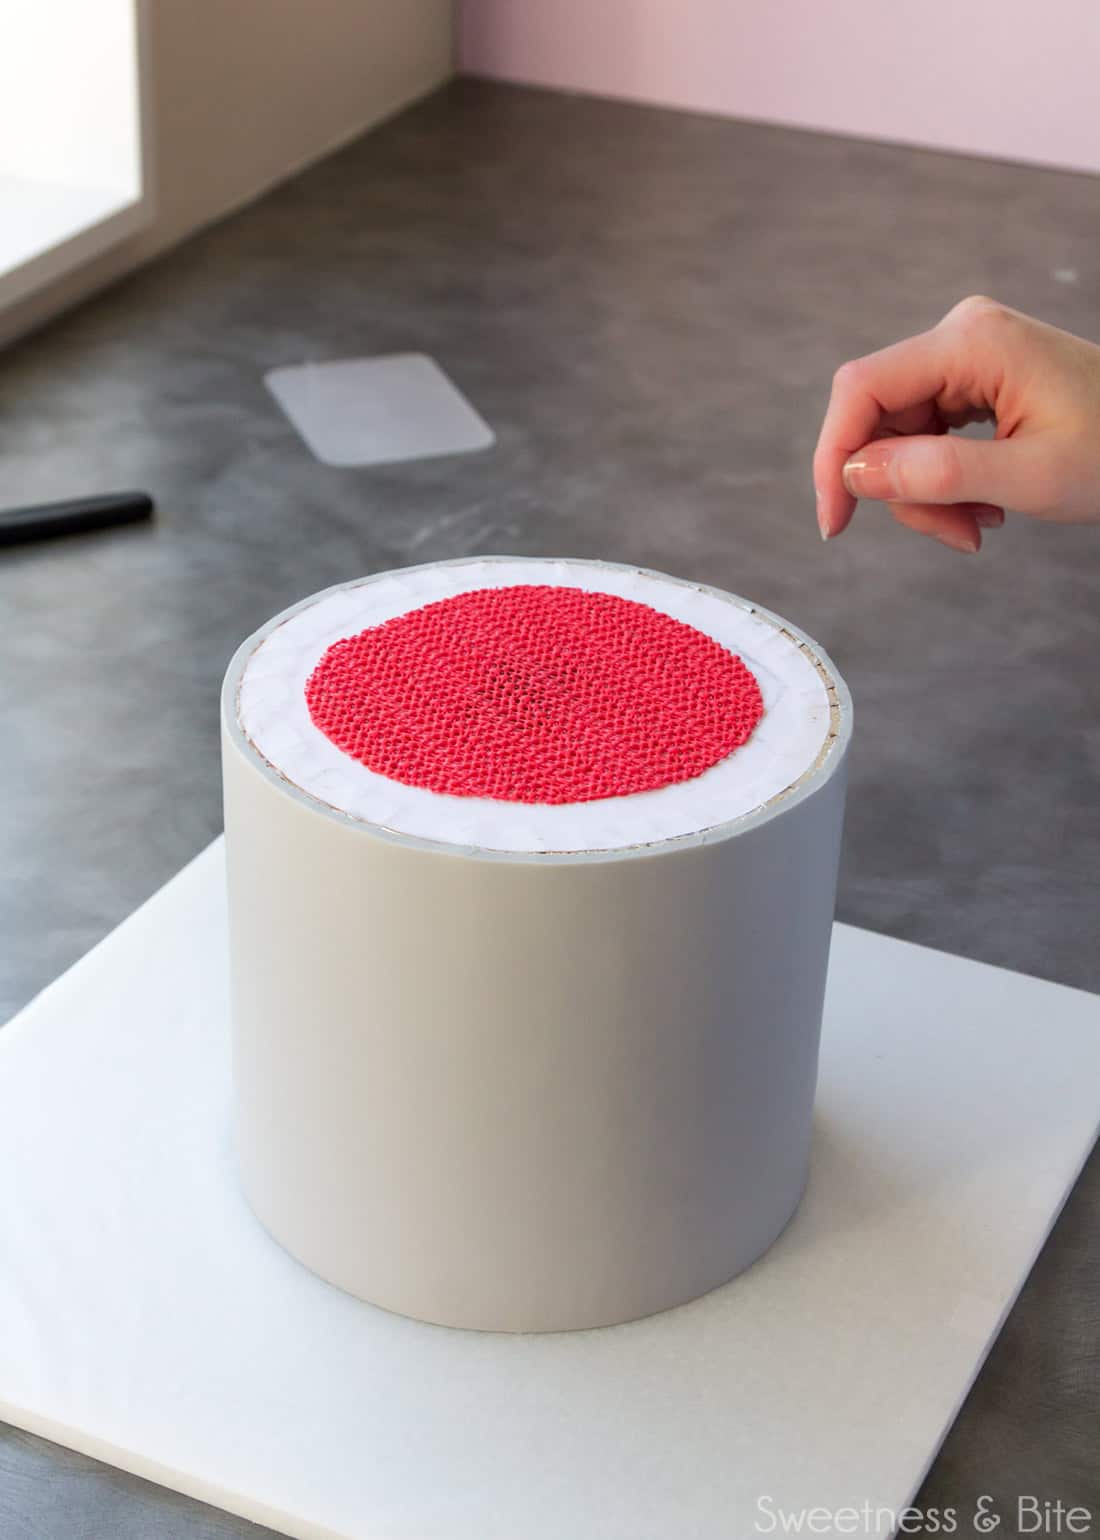
…then put your original setup board on top…
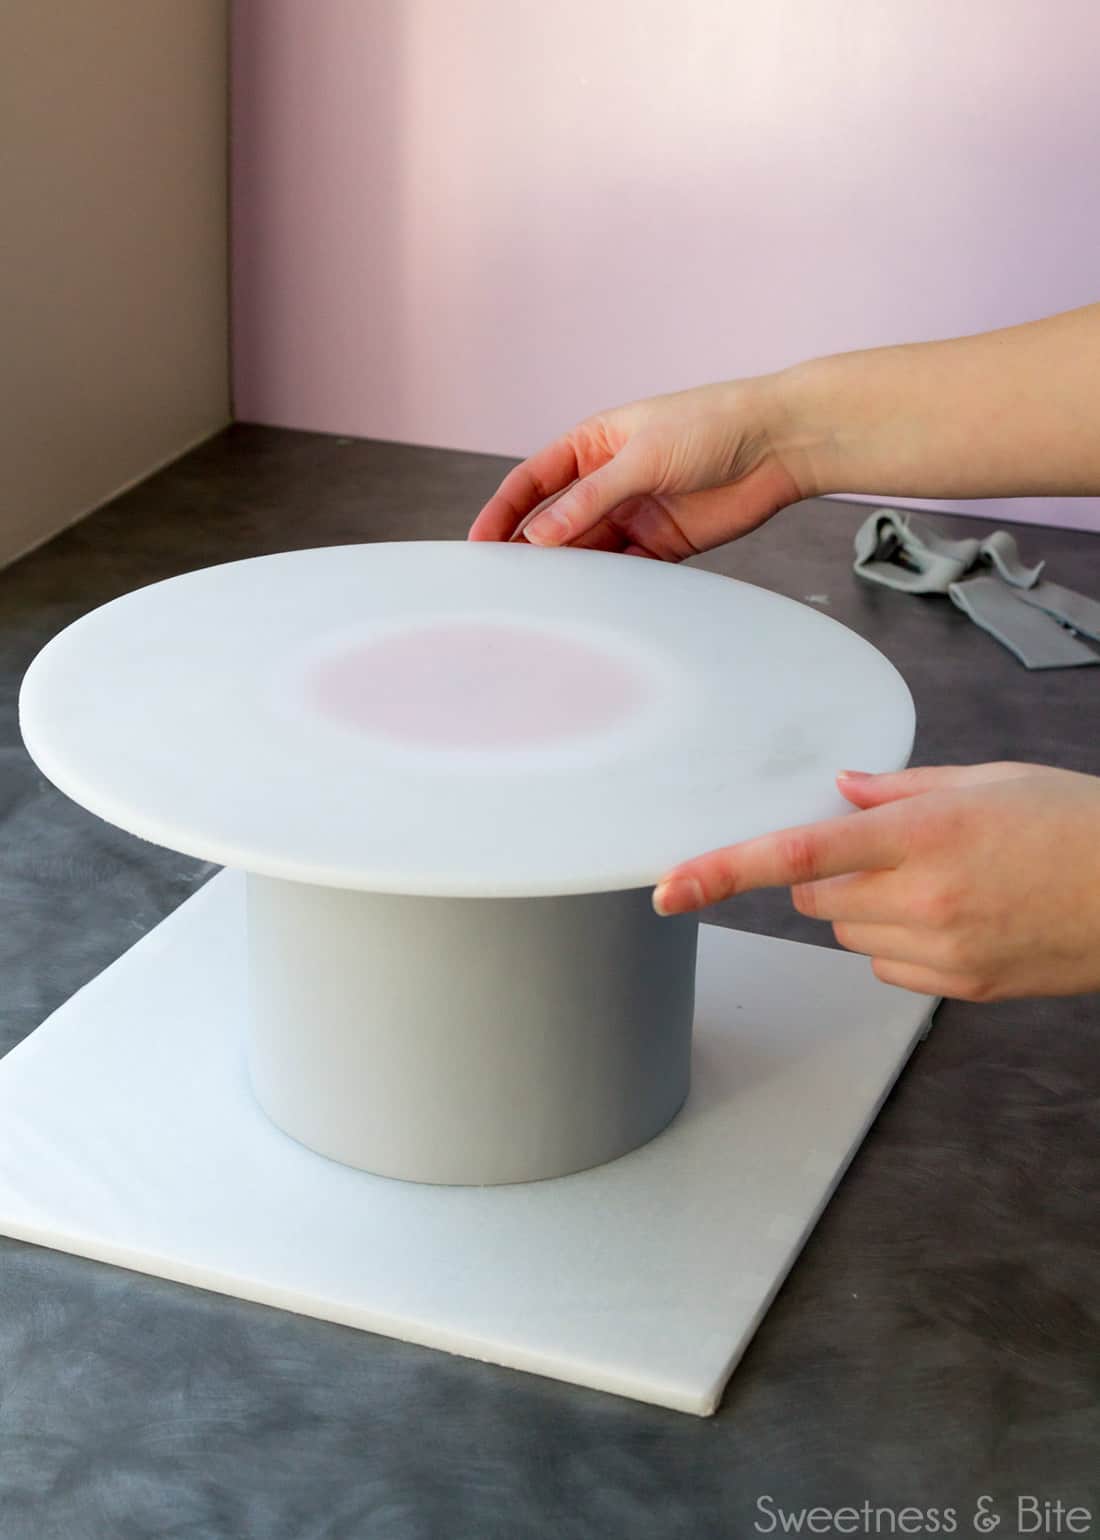
…and flip the cake back over, right-side-up. If the paper on your board isn’t taped down, be super careful when you flip the cake back, to make sure it doesn’t slide off the board as you flip.
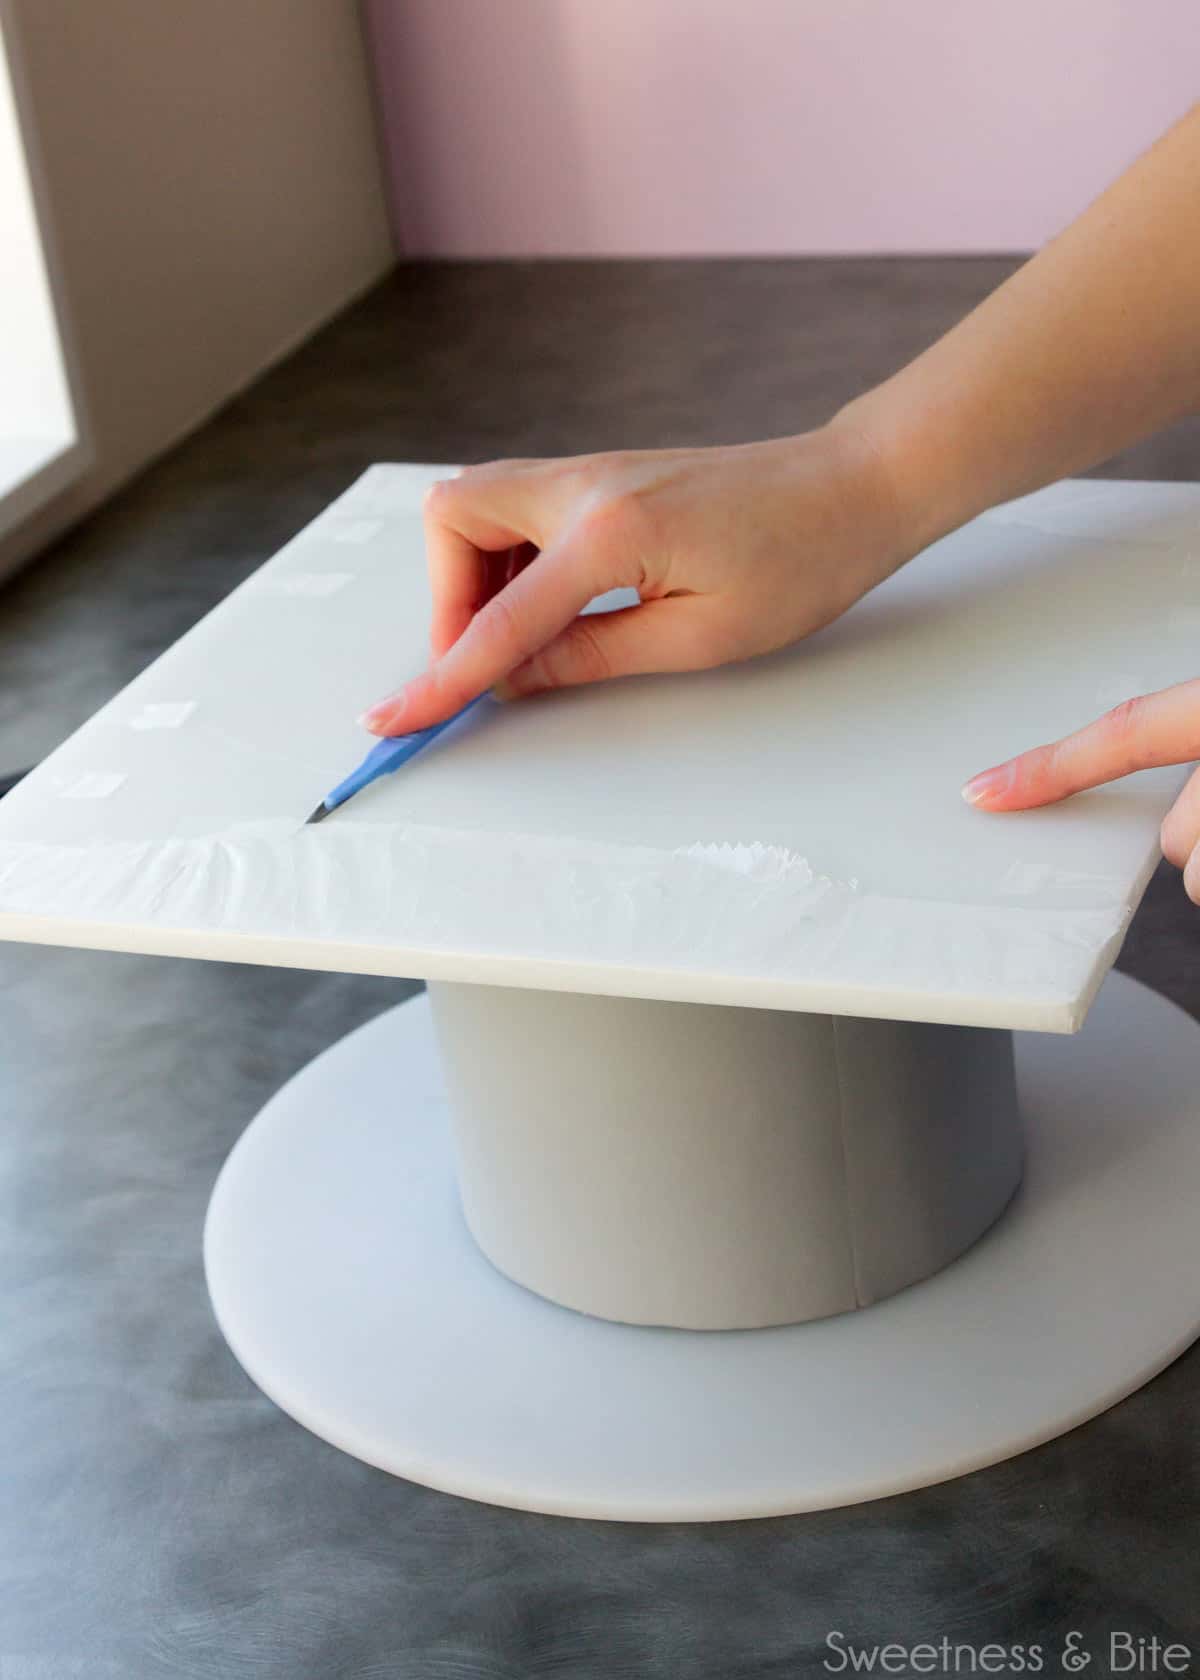
If your paper is taped, use a knife or scalpel to cut through the tape holding the waxed paper onto the board, and remove the board.
Carefully peel the paper off the cake.
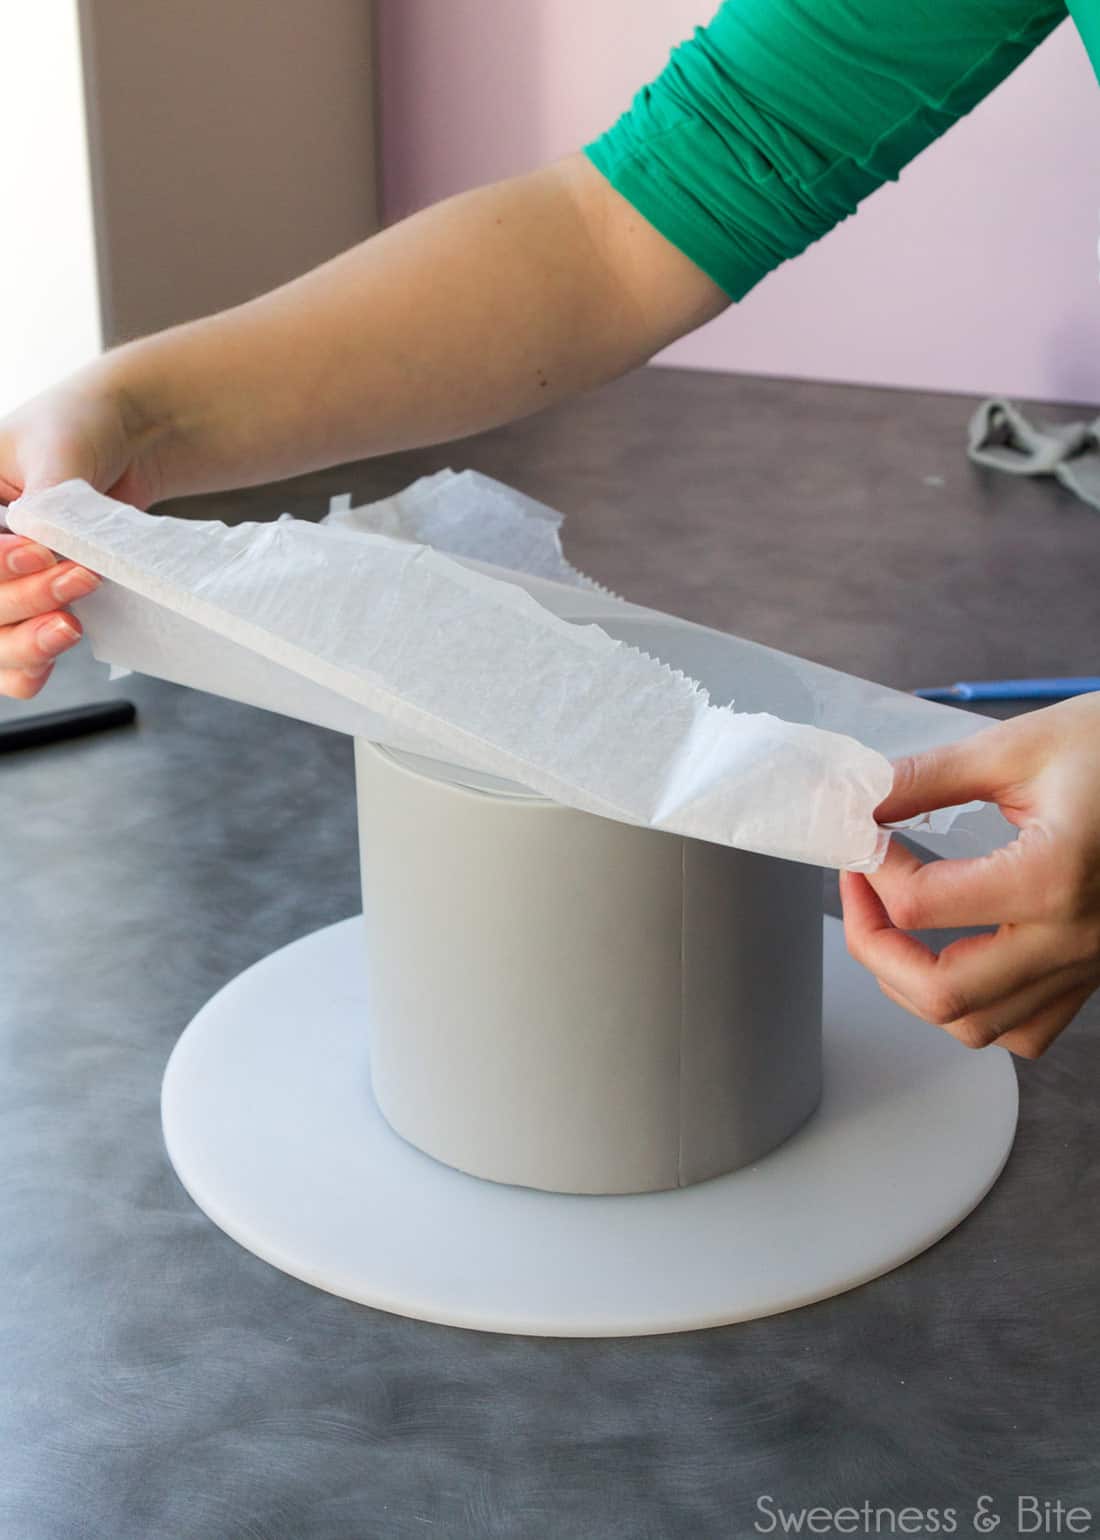
(If you’re covering the top of the cake now so the seam is on the side, then do this now and follow the instructions for flipping and trimming the cake)
Run a smoother around the cake, and then check out your top seam.
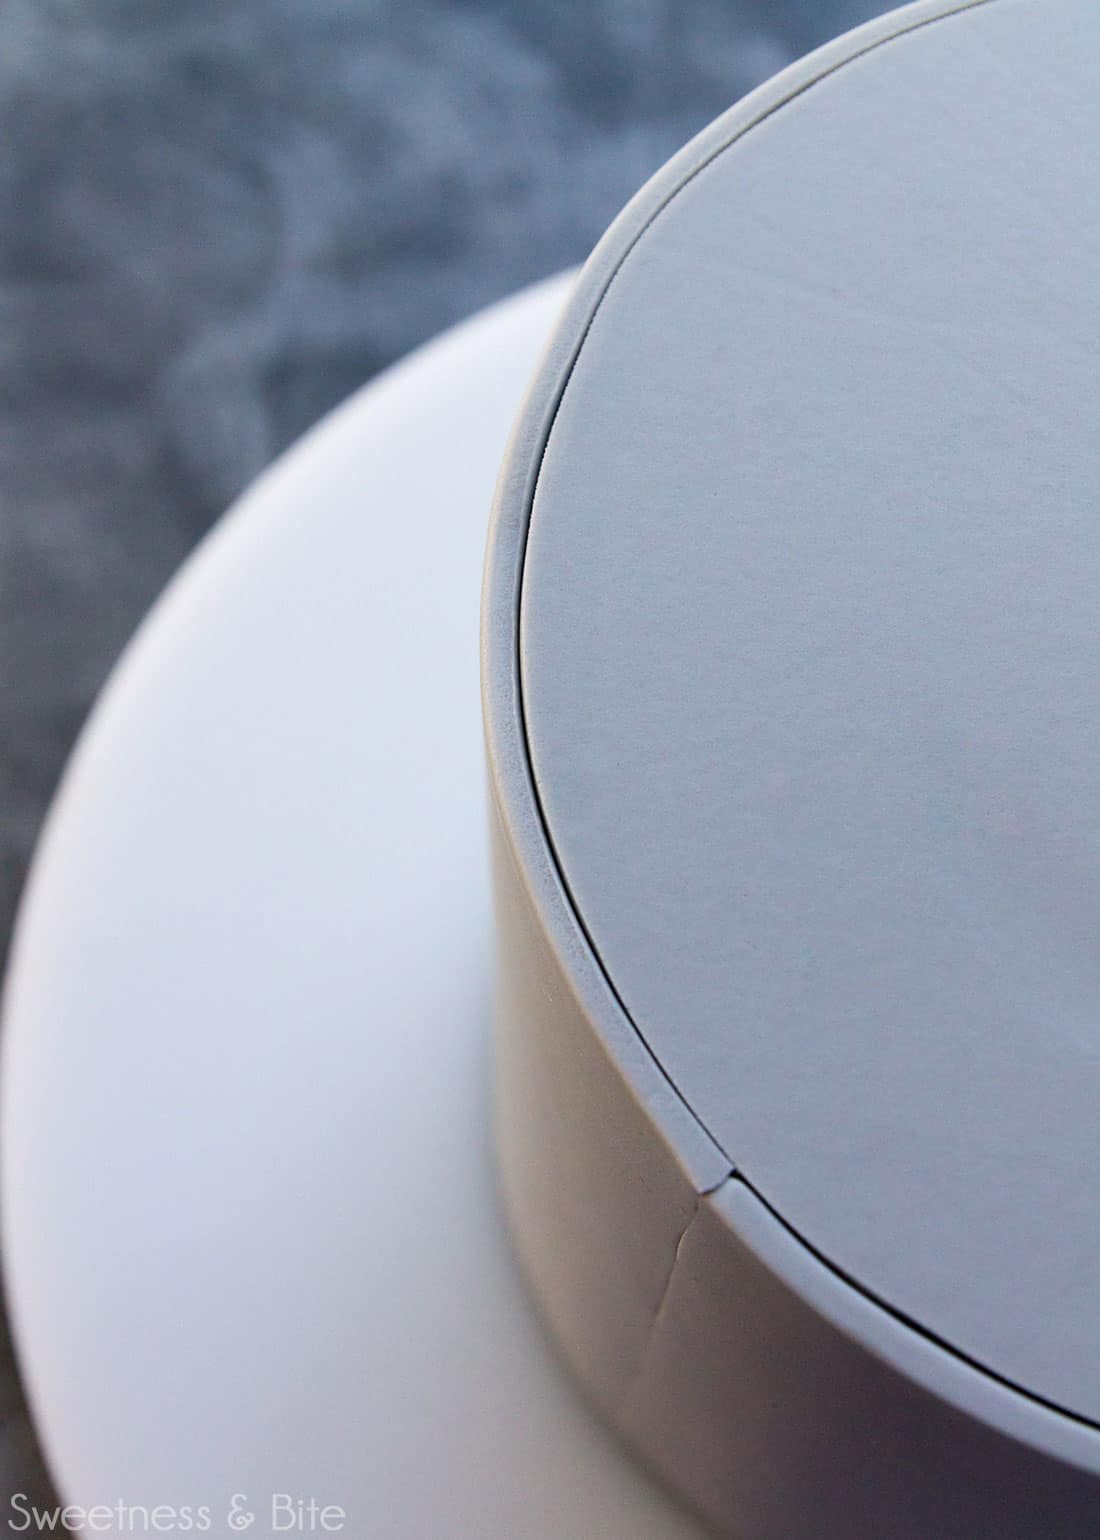
If the fondant hasn’t joined together well (as you can see in the picture above, mine hadn’t – totally planned it that way to show you.. you’re welcome!) you can use a paintbrush dipped in vodka to moisten it (argh, moist)…
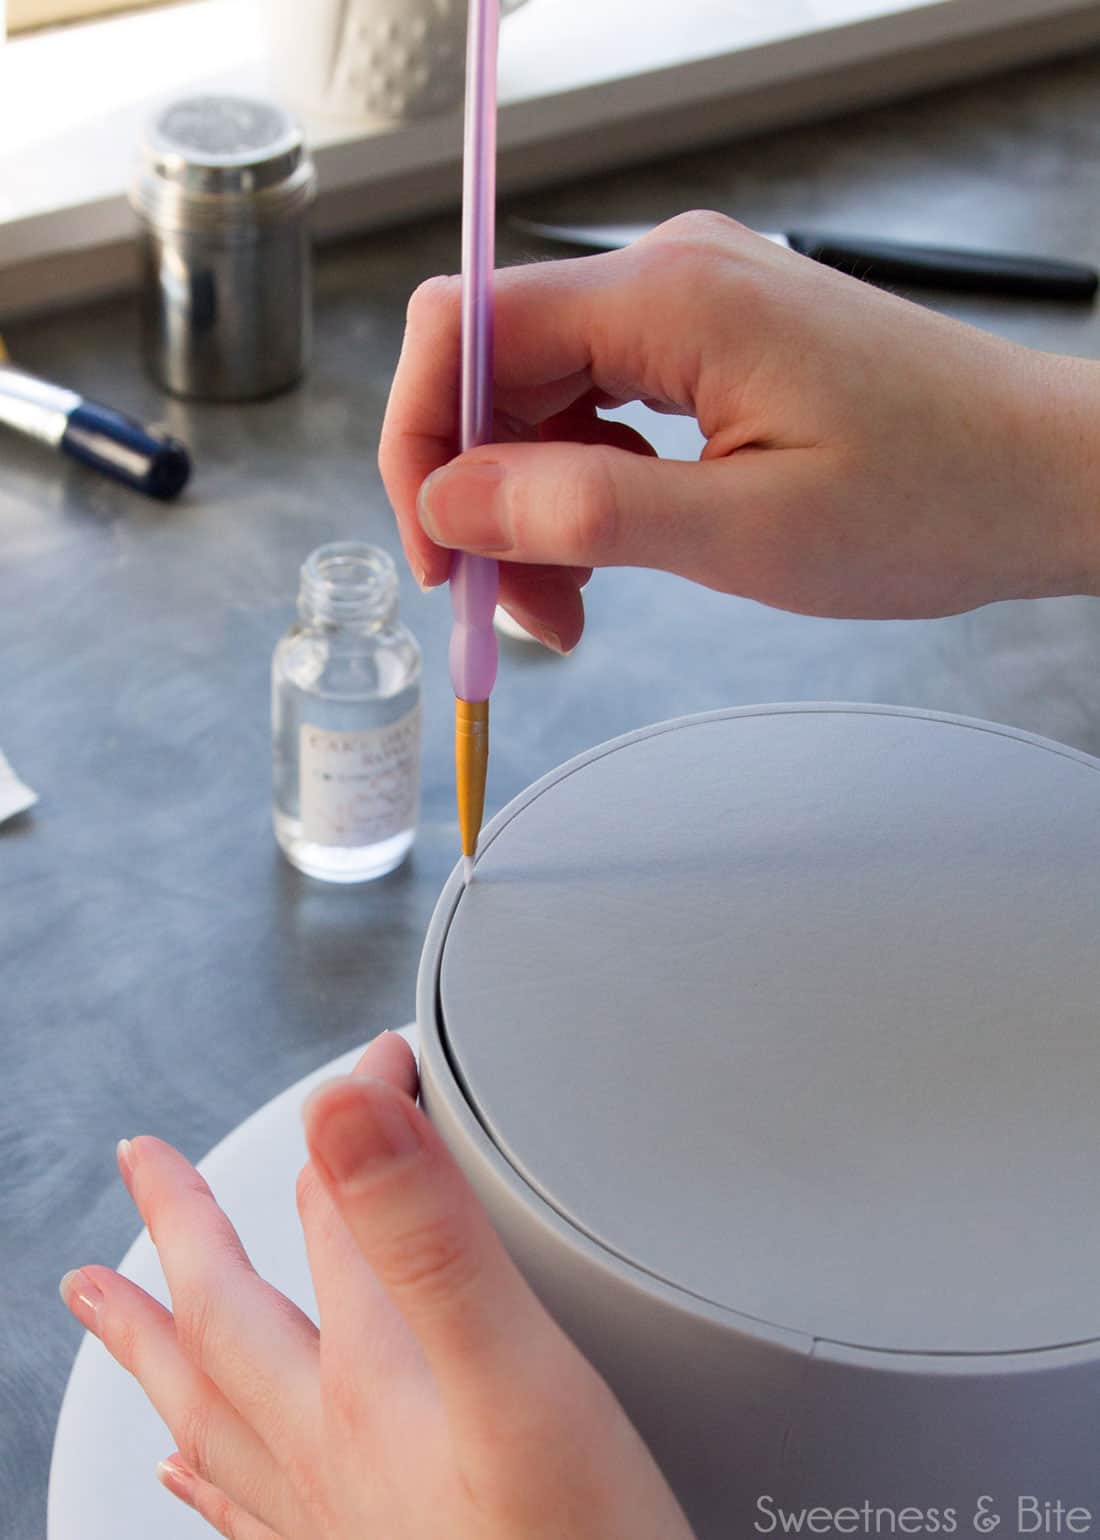
…and then smooth the fondant together with your fingers. Hey, even though it hadn’t fully joined up yet, you can see how neat the seam is already, right?!
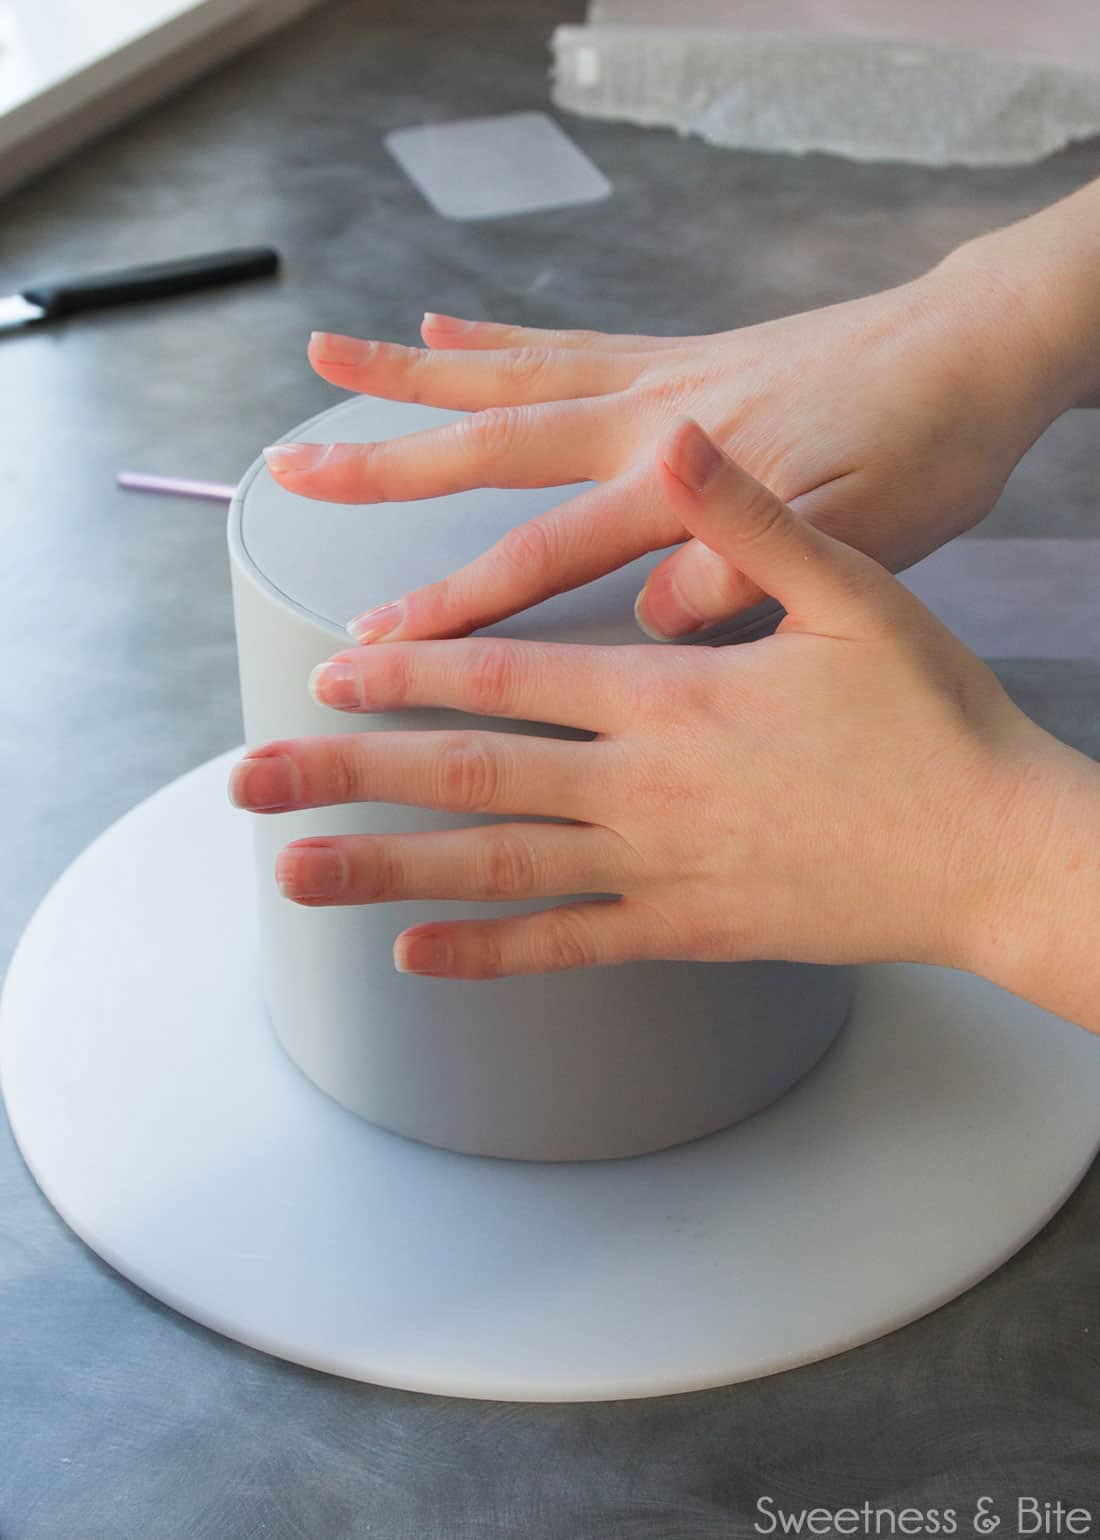
You can also use your fingers again to gently rub around the seam, the heat from your fingers will help to blend the seam. If your cake moves around as you’re smoothing, you can pop another piece of non-slip mat under the setup board to hold it in place.
Place a rigid cake smoother against the side of the cake, and the thick flexible smoother on the top, and gently run around the top edge with the smoother. This will press the fondant together and make the seam less obvious (as a side note, this is also the same technique I use to get sharp edges on a cake when I cover it in fondant in one piece).
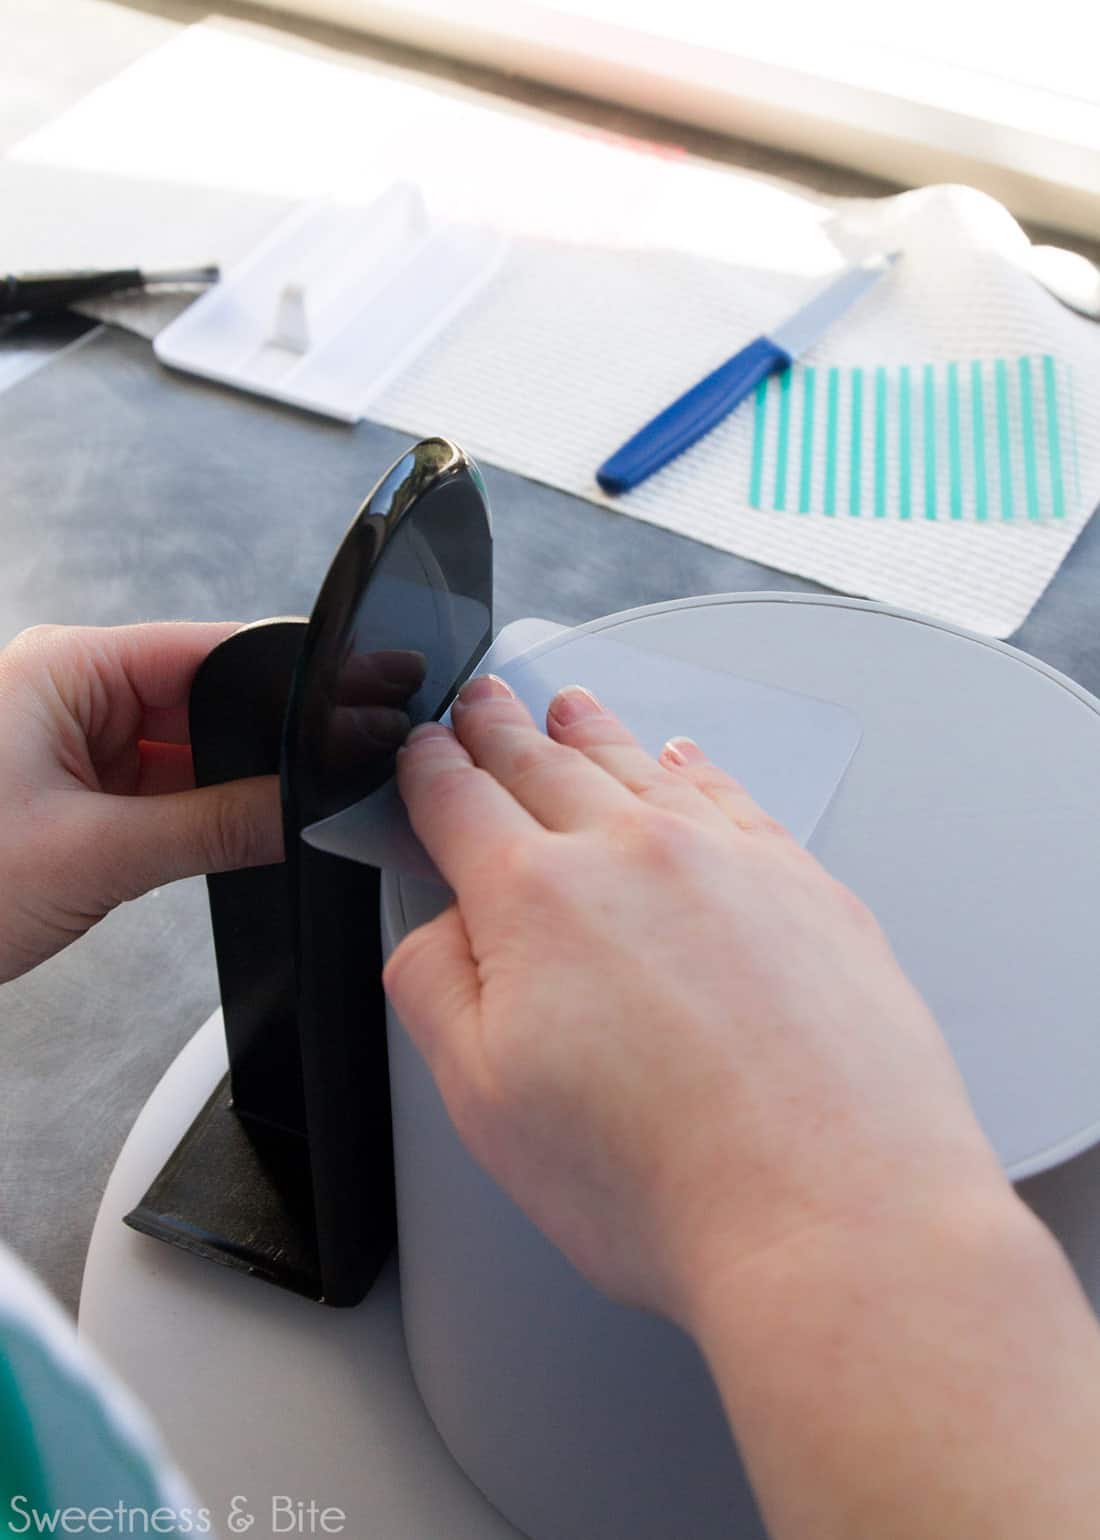
Check out the video to see this in action.
Once I’m happy with the edge, I like to go around the whole cake again with the thinner flexible smoother. Using the thinner one means you can feel any little lumps or bumps and work on smoothing them out. I usually do a bit more work on smoothing the back seam as well (although if the back of your cake won’t be seen, you may not want to waste time smoothing it further).
This is the back seam of my cake. No Photoshopping here! Hopefully, you can tell that by the fact it’s not totally perfect or completely invisible (if I was going to Photoshop it, I’d have made it invisible. But we’re friends, so I don’t lie to you) but it is pretty neat and tidy, and when you’re doing this at home (or work) and not stopping to take photos, you’ll have more time before the fondant dries so you can make the seam nearly invisible.
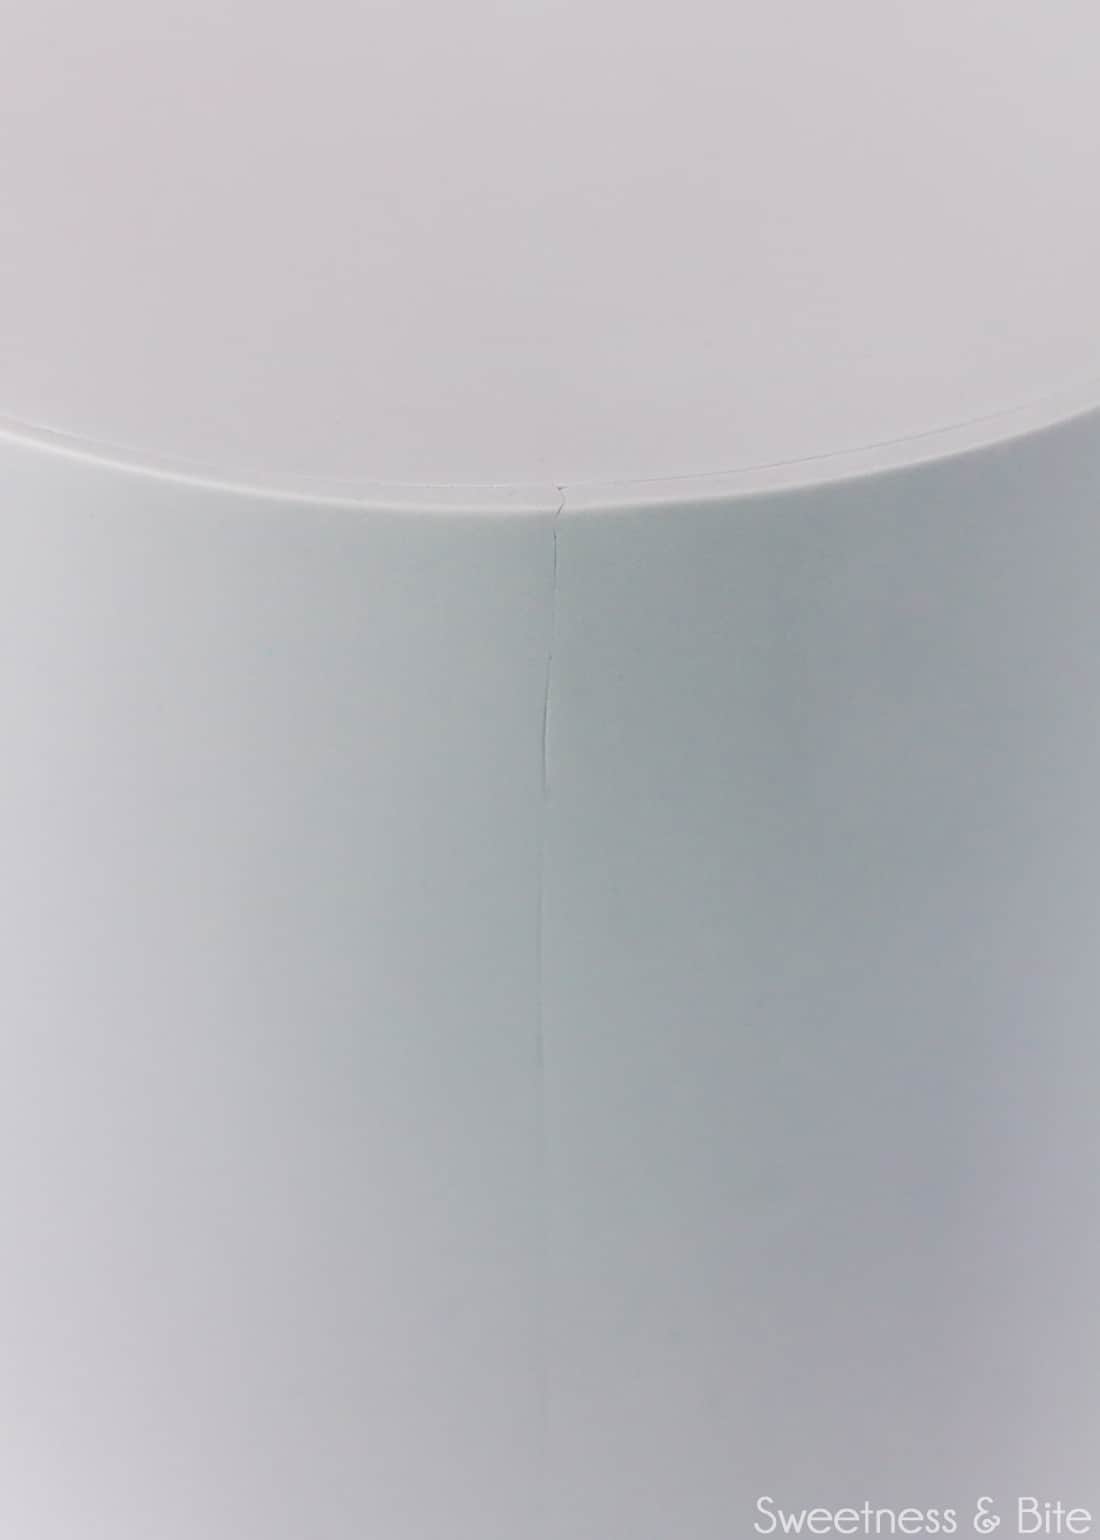
And then, you get to step back and look at your beautiful fondant covered cake and give yourself a pat on the back. If you can, I usually have a sore arm after kneading all that fondant. But I’m a weakling like that. So the back-patting is optional.
How to Store a Fondant Cake
This will depend on whether your cake has a perishable filling.
If your cake is filled and covered with ganache before fondant, then the cake will be perfectly fine when left at cool room temperature for 2-3 days. Keep it away from light if possible, either in a cupboard or in a clean cardboard box or cake box. Cakes filled with buttercream but covered with ganache can be stored the same way.
Cakes that are filled and covered with buttercream should be fine stored as above at cool room temperature for a day or so. Any longer and you may wish to refrigerate it. It’s best to put the cake into a clean cardboard box or cake box first, as the box will absorb moisture from the fridge and protect the cake from any smells from other foods. The cake will need to come to room temperature before serving, and it’s best to let it do that while still in the box, to prevent condensation from forming on the fondant. If the fondant does become wet and sticky from condensation, avoid touching it, and if possible, direct a fan onto the cake to dry the surface. (This risk of sticky fondant is one reason I prefer to use ganache, so I don’t need to refrigerate the cake.)
Cakes with perishable fillings like fresh fruit should be stored in the fridge as above.
If you run a cake business, you should check what the rules and regulations are in your area as to how you are allowed to store your cakes.
Fondant FAQs
If you’re a beginner cake decorator, I suggest first trying the all-in-one method of covering a cake in fondant. If you find you’re not getting a result you’re happy with, or you encounter the problems I mentioned above, then definitely give this a go. You may find this works more successfully for you. Either way, when covering a cake in fondant the first few times, leave yourself plenty of time so you’re not rushed, read through the instructions thoroughly first, and make sure you have all your tools on hand. These things will all help the process go more smoothly.
As I touched on briefly above, yes, you can, but you will need to make sure your cake has been well chilled and is super firm before you wrap it. You will then need to work quickly to get the cake wrapped and your fondant smoothed and trimmed before the buttercream starts to soften.
My recommendation for best results is to fill your cake with buttercream, but cover the outside in ganache. The ganache will be firm at room temperature, and it will be easier to cover in fondant. It’s the best of both worlds.
I wrap square cakes pretty much the same way I do round ones. You will need to choose whether you want your back seam on a corner or in the middle of the back side. Start wrapping there, making sure to smooth the fondant around the corners gently, pressing out the air to avoid bubbles. When you’re ready to smooth the fondant, you can sharpen the corners of your cake using the fondant smoothers the same way as I demonstrated doing on the top edge, just have one smoother on each side of the cake.
This is tricky to answer because it depends on a lot of things. Some types of fondant icing work better in different environments than others, and you will likely need to test out a few and see what works best for you. It’s best to avoid fondants that are too soft and sticky, as you won’t get a good result with them.
When wrapping a cake with fondant I find it easier to use a more firm fondant than a soft one. My own personal preference is Satin Ice. I haven’t tested this technique with homemade fondant or marshmallow fondant.
There are a few things you can do to try and limit how much the fondant dries out while you’re using it.
Firstly (and maybe most obviously) the faster you work, the less time it will have to dry out. You will naturally get faster at this the more practice you get. But also, make sure you have everything you need on hand so you don’t have to leave your fondant uncovered while you go looking for something.
Secondly, try not to use too much cornstarch or icing sugar when kneading and rolling out your fondant. It’s better to use a little shortening when kneading to stop the fondant from sticking to the bench. When rolling out the fondant try to only put cornstarch on your work surface, and only use a small amount on the top of the fondant if you really need it. The less you have on the surface of the fondant, the less dry it will be.
Thirdly, if your fondant is particularly dry, you can knead a little more shortening into it, or knead in some food-grade glycerine. Be careful not to add too much glycerine, as it can go the other way and make the fondant sticky.
Now you know how to wrap a cake with fondant. As always, if you have any questions about this technique, you can ask them in the comments below.
Happy wrapping!
~Natalie

