Ganache FAQ
This post may contain affiliate links to products I recommend. I receive a small commission at no cost to you if you make a purchase using my link.
A collection of frequently asked questions about making and using ganache on a cake.
Once upon a time, I wrote a tutorial on how to ganache a cake. I hoped people might find it useful, but never in a million years would I have realised how popular it has become. It’s one of the most viewed pages on Sweetness and Bite, and also has by far the largest number of comments on it.
In those comments were questions about certain parts of the tutorial, some of which I had left out of the tutorial in order to stop it from becoming too long, so I thought I would combine those questions with a few other tidbits of information and write this Ganache FAQ post.
Table of contents
- Making Ganache
- What kind of chocolate should I use?
- What kind of cream should I use to make ganache?
- Can I Measure the Ingredients in Cups? / Why Do I Have To Weigh the Ingredients?
- What’s a Ratio? What Does the Recipe Mean By “Parts”.
- Can I make ganache in the microwave instead?
- My ganache split, what do I do?!
- My ganache didn’t set/is too runny, what do I do?!
- Ganache Equipment
- Applying Ganache
- I get air bubbles under the baking paper when I flip my cake, how can I stop that?
- What do I do if my cake is too heavy/big/tall to flip upside down?
- My cake got ripples/bumps/bulges when I covered it in fondant, what went wrong?!
- How do I make my fondant stick to the ganache?
- Can I freeze my ganache covered cake?
- I suck at this, why can’t a magic ganache fairy just come in and do it for me?
- You Might Also Like…
Making Ganache
What kind of chocolate should I use?
I covered this (pun intended) a little in my ganache tutorial, but we can talk about it a little more here too. I generally recommend you buy the best quality chocolate you can afford. However, having said that, I have a confession to make: I’ve always used good quality chocolate with high cocoa butter percentage because I freakin’ love the taste. But I was having a lot of trouble with my ganache splitting when I reheated it to use.
I could always fix it by reheating and stirring until it came back together, but it was a nuisance to have to do that every time.
I decided that for my cake tutorials here on the blog I would try using compound chocolate, for convenience, and because it’s cheaper and I was going through a lot of it. And happily enough, I discovered that the compound chocolate ganache didn’t split as my usual ganache did.
The oil used in compound chocolate is far less temperamental than the cocoa butter used in ‘real’ chocolate. Unfortunately, the compound chocolate doesn’t tend to taste that great, and everything I make for the blog gets eaten in our house.
So for a happy medium, I started mixing the two chocolates together, half good-quality, high cocoa butter chocolate, and half compound chocolate. It tastes much better than the compound chocolate on its own but is much more stable than the good quality chocolate.
I’ve been doing about 1/4 compound to 3/4 chocolate (sometimes 50/50), which helps stabilise the ganache but it still mostly tastes like ‘real’ chocolate. It’s working well for me and I think it’s what I’m going to stick with for the time being.
Whatever you do, though, do not use chocolate chips that are made for baking. The chips that are designed not to melt in the oven will not work properly for making ganache. Whenever I see people saying their chocolate didn’t melt properly in their ganache, these chips are usually the culprit!
Long story short: buy why you enjoy eating and using, but be prepared to experiment.
What kind of cream should I use to make ganache?
Well, that’s kinda hard for me to say. Not because I’m trying to be difficult, but because various countries have various names for various types of cream, which is, quite frankly, darn unhelpful!
I use standard single cream here in New Zealand, which is about 35% fat. You could use a cream with a slightly higher fat content, but I wouldn’t go any lower or you’ll possibly have problems with the ganache splitting.
I know in Australia, “thickened” cream seems to be more common than single or pure cream, and this has a similar fat content (but is thickened with gelatine). You can use this for ganache as the gelatine breaks down when the cream is heated. Just keep in mind that you can’t use this for cakes for vegetarians/vegans or for people of some religions who can’t eat gelatine from certain sources.
Using the guide on Wikipedia’s page on cream, these are a few different names for cream that is suitable for ganache, in different countries:
New Zealand: “standard cream” or “single cream” (slang: “regular cream”).
USA: “whipping cream” (“heavy cream” should also work).
Australia: “single cream” or “thickened cream”.
UK: “whipping cream”.
Canada: “whipping cream”.
Switzerland: “full cream” or “whipping cream”.
France: “crème fraîche liquide”.
Russia: “whipping cream”.
Sweden: “vispgrädde” (whipping cream).
Long story short? You need a pourable, unwhipped cream that is around 35% fat.
Can I Measure the Ingredients in Cups? / Why Do I Have To Weigh the Ingredients?
I’ve been asked this question a few times lately so I thought I’d talk about it a little bit.
All the ingredients in our ganache are measured by weight. Ganache needs the cream and chocolate to be in certain ratios in order for it to set. If you have too little chocolate or too much cream, it may not set. You will not get a consistent and predictable result if you measure your ingredients in cups. Unless it’s chocolate chips being added to cookies or something and the amount doesn’t need to be precise, chocolate is not an ingredient that should be measured in cups.
Imagine you have a cup of chocolate chips and a cup of chocolate that has been roughly chopped into pieces from a large block. The chips and the pieces will not be the same size. Heck, one brand of chocolate chips will not be the same size as another brand of chocolate chips. If you were to take those two cups of chocolate and weigh each of them, they would be a different weight. Most likely, the chocolate chips would weigh more, as they are smaller and can fit more tightly together in the cup.
Now imagine you made separate batches of ganache with the two kinds of chocolate, using the exact same amount of cream for each. One of them will have more chocolate, so it will set more firmly than the other.
And to top it all off, different countries use different sized “standard” cups, so we could even be starting out with different sized cups to measure our different sized pieces of chocolate.
If I was to give you a recipe with cup measurements, I wouldn’t know what kind of chocolate you were going to use, or what kind of cups you were using. You’d possibly be using something different to what I was using, and therefore the recipe that would set for me, may not set for you. And I want your ganache to set. I didn’t start a baking blog to have my readers fail at making my recipes. We’re in this together.
That’s why weight measurements are the way to go. A gram is a gram is a gram no matter what you’re weighing, what size the pieces are, or where you live.
What’s a Ratio? What Does the Recipe Mean By “Parts”.
If you really don’t know much about ratios, then probably you’d be better off learning from someone other than me – maths and I have a love/hate relationship, but I can try and explain how we use ratios for making ganache.
When we talk about ratios for ganache, it’s really just the fact that you need a total amount of ganache to fill/cover your cake, you have two ingredients (chocolate and cream) and you’re figuring out what part of that total needs to be chocolate and what needs to be cream.
When making ganache for filling and covering a cake, you will always need more chocolate than cream, otherwise, the ganache won’t set.
The reason that I give you ratios instead of an actual amount of ganache is that I have no idea what size cake you’re making, and I can’t give you the exact amount needed for every sized cake that every reader may wish to make. The total amount of ganache you need will depend on the size of your cake, the number of layers of cake you have (and therefore how many layers of ganache you will be doing) and how high the cake will be.
By using ratios, you can scale the ganache ‘recipe’ to suit the cake you’re making. If that sounds hard, don’t panic! There is a tool to do all the hard work for you and we’ll talk about it below. Feel free to skip to the next section and read about it there if this all seems too hard.
You’ll want to head back to the main ganache post for the full recipe, but in short, the ratios are:
Dark chocolate ganache: 2:1
Milk chocolate ganache: 3:1
White chocolate ganache: 3:1
These ratios are for cooler weather, in summer you may need to increase the ratios to make sure the ganache sets firmly. In summer I usually do at least 4:1 for white chocolate ganache, as it is the softest for all the chocolates. And no one wants ganache melting off their cakes. It makes for sad, sad people.
As mentioned in the main ganache post, I use the Ganacherator calculator. I input the dimensions of the cake and how many cake layers etc, and use it to tell me the total amount of ganache needed, then I use that amount to calculate how much chocolate and cream I need. (The ratios used by the calculator don’t take into account warm weather etc. so it’s best to work out the chocolate and cream amounts yourself using the right ratio for the conditions.)
EXAMPLE: If you were making an 8″ round cake with four layers of cake (and therefore 3 layers of ganache filling) you would need approximately 1800g (1.8kg) of ganache to fill and cover it.
Dark chocolate ganache is a 2:1 ratio, which is 3 ‘parts’ in total. To work out how much chocolate and cream you need, you just divide 1800g by 3, which is 600g, so that is how much cream you need (one ‘part’ cream) and you need twice as much chocolate (2 ‘parts’ chocolate), so 600g times two 1200g.
Can I make ganache in the microwave instead?
Yes, you can. Some decorators do. I don’t though, for a couple of reasons.
Reason #1: I like to know that my cream has boiled, to kill any bacteria that may be lurking. In all likelihood, there isn’t any, but it gives me peace of mind.
Reason #2 is that because microwaves don’t always heat evenly – if the cream and chocolate are heated together in the microwave (instead of heating the cream and pouring it over the chocolate) there is more risk of the chocolate burning in places before all of the chocolate is melted.
Having said all that, if you really don’t want to use the stove, you can make the ganache as I do but boil the cream in the microwave instead of on the stove, just keep a close eye on it to make sure it doesn’t boil over!
My ganache split, what do I do?!
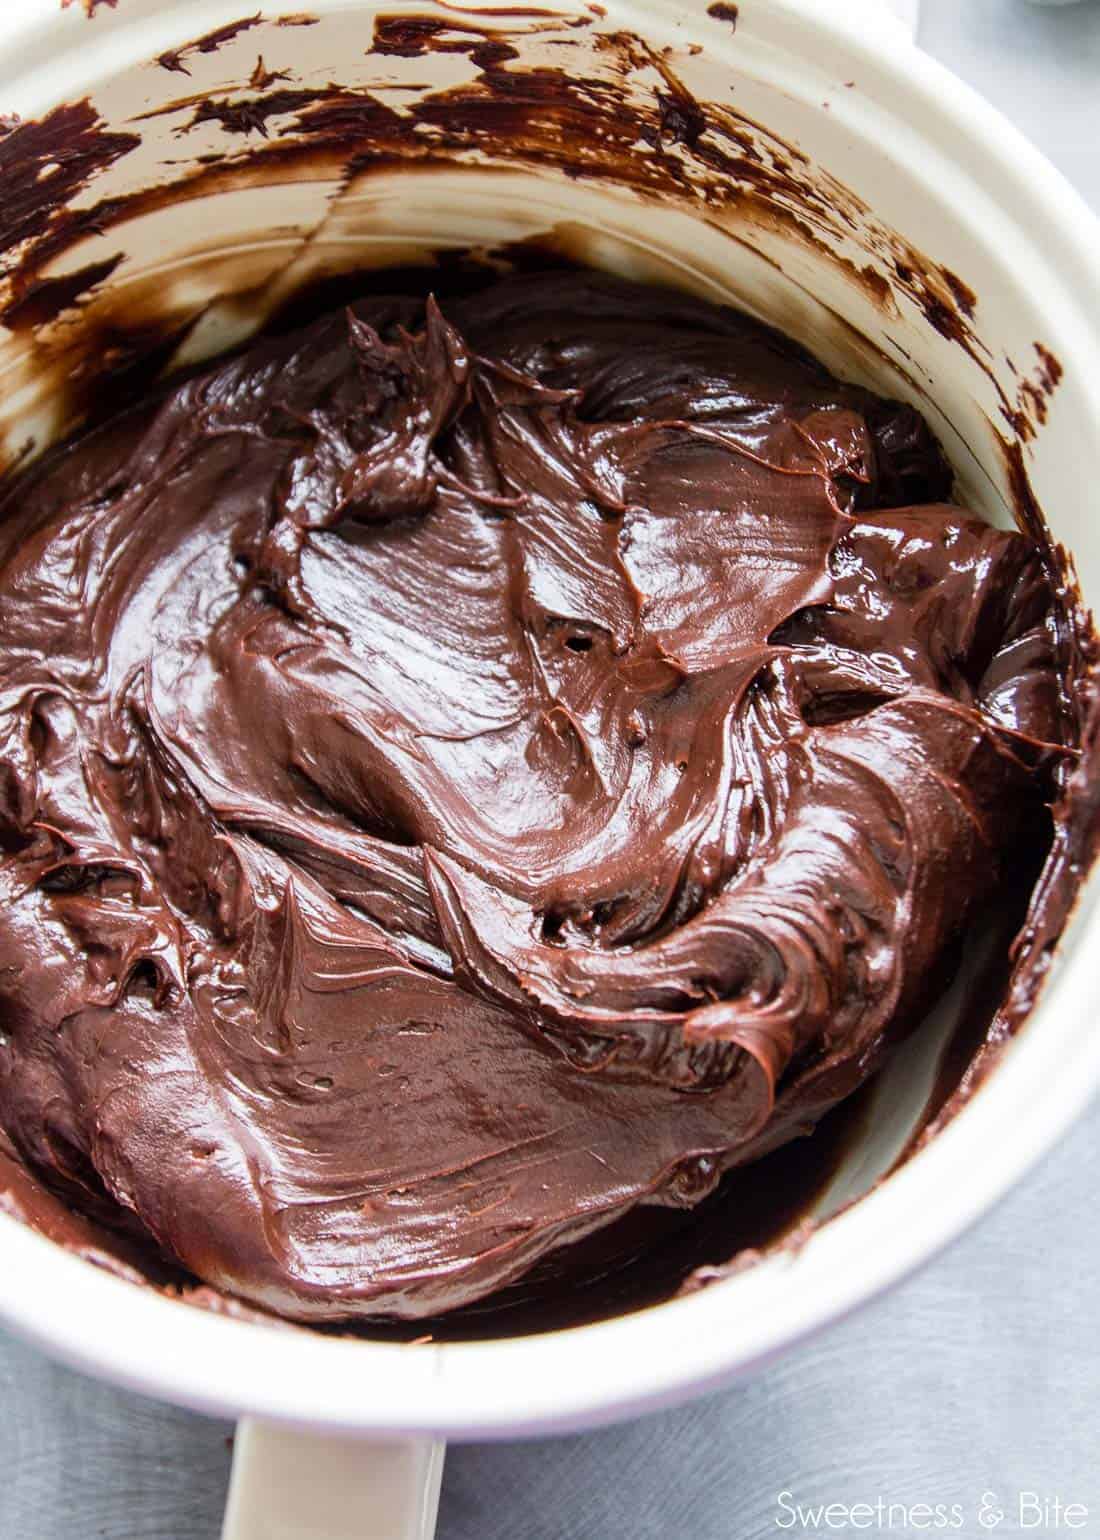
Ugh, split ganache is a pain, innit?! With pictures like that one up there of gorgeously glossy ganache, I may look like I know what I’m doing, but don’t be fooled, my ganache splits. Frequently. In fact, more frequently than I would even like to admit.
Luckily in most cases, it comes back together well, it just takes a bit of elbow grease. Not literally, because ew. It’s just a bit of extra stirring.
The reason ganache splits is that the emulsion you’re making with fat (in the chocolate and the cream) and water (in the cream) has broken. This can either happen when you’re first making the ganache, or when you’re heating it to soften before using
Emulsions are technical and whatnot so I won’t get into the whole thing (because let’s face it, I’ll have to Google the technical terms and then write them all out to pretend I know what I’m saying, and I don’t have the energy for that) but suffice to say, ganache needs to be emulsified smoothly to be useable.
There are a couple of things you can try in order to save your split ganache. The first (one that a lot of decorators swear by) is to stir in a little cold cream a tablespoon at a time until it comes back together. This has worked for me before, although I don’t do it often because I like to boil the cream for my ganache to kill any bacteria, so adding unboiled cream to it seems counterproductive. And to boil more cream and wait for it to cool is a bit of a pain.
I prefer to just stir the ganache continuously over very low heat until it comes back together. This can take quite a while, and sometimes it looks like it’s just getting worse, a lot of the oil from the chocolate can come out and it looks like it will never come together again. But I’ve yet to have a batch that didn’t. It just takes time… and a strong arm.
You can also use a handheld blender/stick mixer to do this, although not so much for white chocolate ganache as it’s generally too thick to blend.
My ganache didn’t set/is too runny, what do I do?!
Chocolate by its very nature is a fickle beast, and the ratios are more like guidelines anyway (a bit like the pirate code). The consistency varies with the type of chocolate used, and the room temperature that you are working in.
The basic ratios I use (2:1 for dark chocolate, 2.5 or 3:1 for milk chocolate and 3:1 for white chocolate) are a good place for you to start, but if you live somewhere very hot, then you may need to increase the amount of chocolate in order to get your ganache to set firmly.
Likewise, if you live somewhere cold, you may need to increase the amount of cream so your ganache doesn’t set too hard and make it difficult to cut the cake.
If you prefer to use compound chocolate (made with oil) rather than ‘real’ chocolate (made with cocoa butter) then you may also need to increase the amount of chocolate you use. I wish I could give you the magic answer of exactly what ratio you need to use, but it’s the kind of thing you will need to experiment with to find the perfect ratio for you.
If you have made your ganache, left it to set, and it’s still too soft to work with, then you can very gently reheat the ganache to a warm, stir-able consistency, and then add in some extra melted chocolate, and let the ganache set again. Another option is to use this softer ganache as a filling only and make some more ganache at a higher chocolate ratio to use on the outside of the cake.
Ganache Equipment
Where did you get your ganache scraper?
The stainless steel scraper I used in this tutorial was one I got from a friend several years ago, and I’m not sure where she got it from. But there are now many scrapers on the market, and a quick google for “stainless steel ganache scraper” should find you one near you.
Acrylic ganache scrapers are also a good option. There are a lot of people making them now, so a quick Google should do the trick there, too. Stacey at Design @ 409 is now making sets of acrylic scrapers, and they are fab. It includes a super tall one for double barrel cakes that makes life so much easier.
Where can I buy some acrylic ganache boards?
I have to say that out of all my cake tools, my acrylic boards (aka ganache boards, aka ganache lids) are most definitely one of my most-loved. Those things are worth their weight in gold.
The white ones I used in my original tutorial were a gift from a friend in Aussie (yep, the same one I got the scraper from, she’s a gem) ages ago, so I can’t tell you where to get them from. The good news is, I know some other places you can get some from.
If you’re in NZ (or happy to pay postage from NZ) then Design @ 409 is the place to buy them from, they’re great quality and Stacey will also ship overseas if you can’t find any where you live. I have a set and they are awesome. I now tend to use the older white boards as setup boards, and my 409 boards to actually ganache with.
This is one of the boards on top of this cake, they’re clear, rigid acrylic and have super smooth edges…
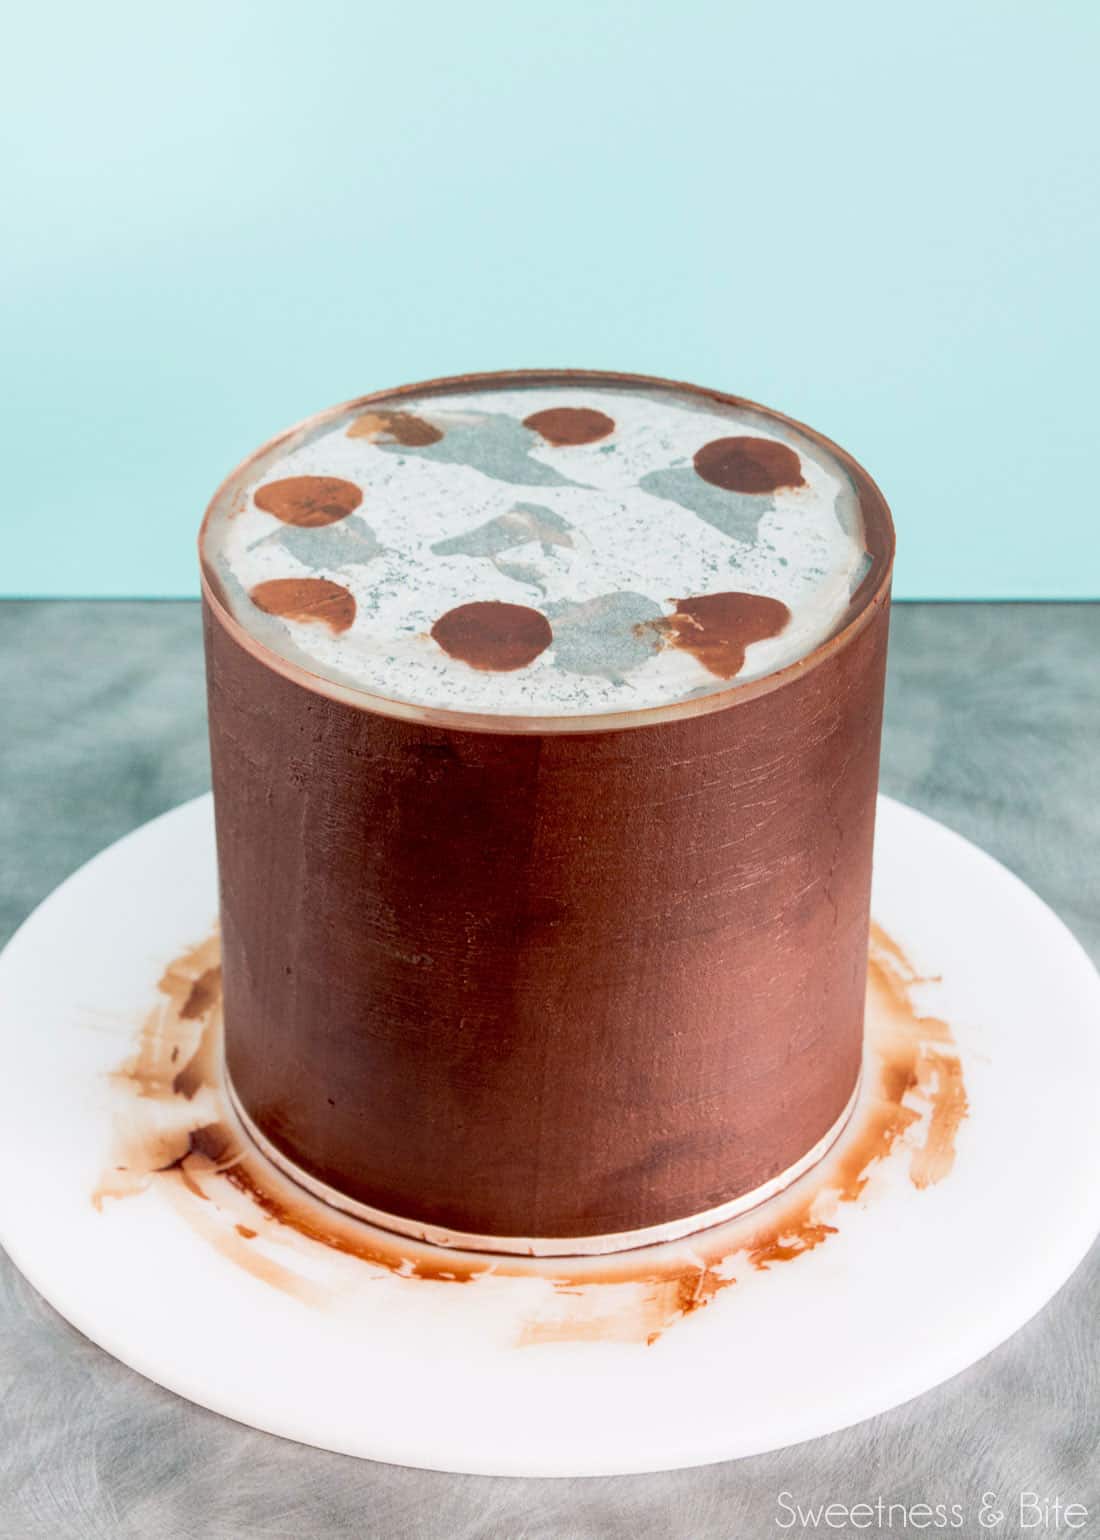
I know a lot of cake decorating suppliers are selling ganache boards now, so it shouldn’t be too hard to track some down locally to you.
If you happen to know of other places around the world that sell boards like this, please let me know and I’ll update this for other readers.
But if you can’t get your hands on acrylic boards then don’t despair, you can always just use a second cake board/card like the one you’re using under the cake.
Applying Ganache
I get air bubbles under the baking paper when I flip my cake, how can I stop that?
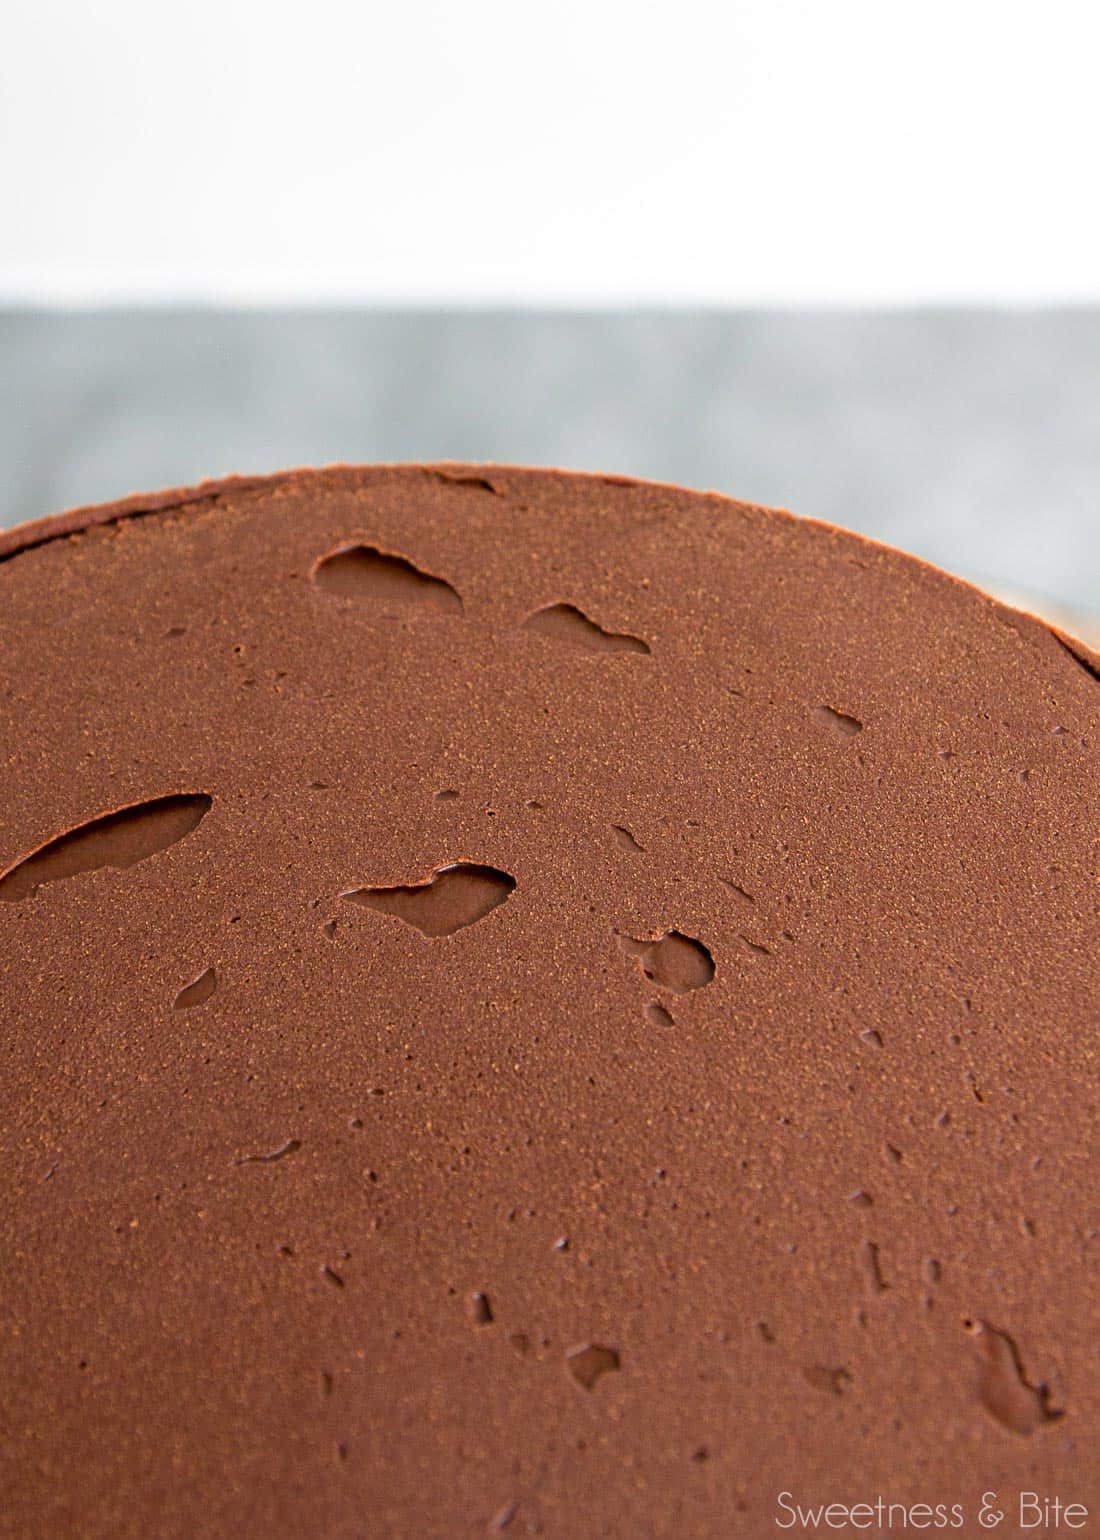
The only way to stop air bubbles altogether is to get the ganache on top of the cake as smooth and even as possible, and then very slowly press the baking paper onto the cake, starting on one side and smoothing out the air bubbles as you go. You can even use a fondant smoother to do this.
But before you get too pedantic about it (which is ironic for me to say, since I’m the queen of being pedantic) most small holes caused by air bubbles can be easily filled in once the ganache has set in the fridge.
What do I do if my cake is too heavy/big/tall to flip upside down?
The bit I love most about this way of ganaching cakes is that flipping the cake over makes it so easy to get a level cake and sharp top edge. But some cakes are just too ridiculously heavy to flip upside down, unless you happen to have a rugby player or bodybuilder nearby.
So what can you do if you just can’t flip a cake? I’m not gonna lie to you, doing things without flipping the cake makes it more fiddly and you do have to work a bit harder for your sharp edge, but it’s still perfectly doable. Just make sure you allow yourself a little extra time to finish it.
The fact I no longer make big cakes means you’re going to have to try and follow along with written instructions only since I have no pictures to show you, but hopefully, it will make sense.
You’ll need to follow my ganache tutorial right up to just before the part where the cake gets flipped. So the sides of the cake have been ganached, the cake has been chilled until the ganache is firm, the top of the cake has been spread with ganache right to (and over) the edges, the paper has been smoothed onto the cake, and a board has been placed on top. But don’t flip it, sweet?
Now pop your spirit level onto the board, and press around the board until the cake seems level, much like we do when the cake is flipped. Take the board off, and put the cake into the fridge until the ganache is firm.
Once it’s firm, peel the paper off. You should have a rim of ganache that extends out the side, over the top edge of the cake. Warm up your ganache scraper until it’s very warm, and use that to scrape around the cake, removing the rim of ganache. In all likelihood, some of the ganache will get pushed up onto the top of the cake, but don’t worry about that yet, just keep scraping until that side ridge is gone. Put the cake back into the fridge. (I said there was no flipping, but I couldn’t make it so that you didn’t need to lug the cake back and forth from the fridge, sorry).
Now you can deal with any ganache that has formed a ridge on top of the cake. Use a warm metal offset spatula to carefully spread that ganache from the edge back towards the centre of the cake. Try to keep the spatula level with the top surface of the cake, so you don’t damage the edge.
Again, I’m not going to lie, this could take a little bit of practice to get good at, and in the meantime, you may need to go back and add a bit more ganache into any little dips in the edge, and you may need to smooth back around the edges with the ganache scraper.
It’s a good idea to check the top of the cake again with the level. If it isn’t level now, you should be able to build the top of the cake up a little with extra ganache, scrape around the edge and then smooth the ridge back towards the centre of the cake. In case that didn’t fully make sense – don’t panic, I can almost guarantee that if you read it while you’re actually doing the steps, it will make a lot more sense.
If not, tell me in the comments that I make no sense (wouldn’t be the first time!), and I’ll try and clear it up for you.
My cake got ripples/bumps/bulges when I covered it in fondant, what went wrong?!
There are a couple of things that can cause this, but let’s narrow down what’s happened so we can address it.
If the bumps are air bubbles between the fondant and the ganache (you can press it with your finger and it has little resistance, that means it’s air):
This is usually because the fondant hasn’t adhered properly to the ganache. If you accidentally missed a spot when applying whatever you use to stick your fondant to the ganache, then the trapped air can expand and cause a bubble in the fondant.
You can prick the bubble with a fine pin or needle and gently release the air, smoothing it back with a fondant smoother. It is easiest if you catch this issue before the fondant has dried too much on the surface. Be aware though that sometimes the air bubble will return since there isn’t really a way to get that fondant to stick. If the bubble appears more than twice, I would suggest removing the fondant and starting over, especially if the cake is for a client, as you can’t guarantee that the bubble won’t re-appear.
Also, sometimes this can be caused by the cake being squished a little by the weight of the fondant. To help stop this, after I have filled the cake and attached the top ganache board, but before I cover the outside in ganache, I like to place some weight onto my cake to help it ‘settle’ and push out any trapped air.
I don’t use anything high tech for this – I just place a couple of plates onto the board on top of the cake. Dinner plates for big cakes, and side plates for small cakes. I leave the plates on while the cake chills in the fridge to set the filling before I cover the outside. Since I started doing this I have had far fewer incidents of bulges once the fondant has been applied.
If the bumps are firmer, and you can feel something squishy under there:
There can be a few causes of this, one of which is probably pretty obvious – if your ganache didn’t set firm enough, and is now oozing out of the cake, pushing the fondant out.
The only way to truly fix this is to remove the fondant, remove the ganache and re-ganache the cake with firmer ganache. Alternatively, if you catch it before the fondant is fully dried and set, you can try smoothing the fondant back with a fondant smoother and refrigerating the cake to keep the ganache firm. Be aware that you’ll have to deal with the condensation issues that chilling a cake can have.
Another thing that can cause this is if you’ve used a softer filling for your cake (like buttercream) and not made sure there is a sufficient layer of ganache around the edge. That filling can start to squish out through any thin areas of ganache, and cause the bulges under the fondant.
If the filling is very soft, you should also pipe a dam/rim of ganache around the edge of each cake layer and fill inside that with the filling, which will make sure it doesn’t ooze out.
How do I make my fondant stick to the ganache?
I wrote a handy post on just that very topic, check it out here: How To Make Fondant Stick To Ganache.
Can I freeze my ganache covered cake?
This is a semi-hypothetical answer because I’ve never needed to freeze a cake already covered in ganache. But I have seen other decorators talking about it, so I can pass on the knowledge I have gleaned from them.
Basically, yes you can freeze a ganache covered cake. You’ll need to let the ganache set fully, then wrap really, really thoroughly in plastic wrap, and place the wrapped cake into an airtight container or resealable plastic bag before popping it into the freezer.
When you’re ready to defrost the cake, remove it from the freezer and leave it fully wrapped until the cake is totally defrosted. This will ensure that any condensation that forms does so on the outside of the wrappings, rather than on the cake itself.
One thing that I’ve seen mentioned a bunch of times is that there is a possibility when the cake is thawed that moisture can get trapped between the cake board and the cake, and cause mould to grow. And ain’t nobody want a mouldy cake. So, you should remove the cake board before wrapping and freezing the cake. Once the ganache has set, run a metal spatula between the cake and the board and pop the board off. Then wrap and freeze the cake. Once the cake has defrosted and you’re ready to decorate, use a dab of ganache to attach a new cake board under the cake.
When it comes to how long you can leave your cake in the freezer for, you’re probably going to have to use your own best judgement here. They should be fine for up to a few months, but I personally wouldn’t leave it for longer than a few weeks, for my own peace of mind. The only real way you’re going to know how well a particular kind of cake will last in your particular freezer is to test it and see – but if you don’t have time for that, then I suggest keep the freezing time as short as practically possible.
I suck at this, why can’t a magic ganache fairy just come in and do it for me?
I’m not going to tell you that ganache fairies aren’t real (even though I’ve never seen one, I choose to believe they exist somewhere) but until one lands in your kitchen, hands you a glass of wine/cup of coffee/truck-sized slab of chocolate and tells you to sit down while she sprinkles glitter on your cakes and magically enrobes them in chocolate, you’re gonna have to suck it up and do it yourself.
All jokes aside (well hopefully, I make no guarantees) that old, infuriating saying “practice makes perfect” is as true here as it is for most other things, you can’t expect to be perfect overnight. Well, you can expect it, but in all likelihood, it won’t happen.
I never believed I would be any good at it, when I first started it would take me hours and hours to ganache one cake. I’m not exaggerating here to make you feel better. I’m a perfectionist, and often in trying to fix one small imperfection, I would make it worse, and then in trying to fix the worse bit, I’d make it even worse (I think you get the picture).
Once I had the technique sorted, I knew how to get it looking pretty good, and I knew how to tell which imperfections wouldn’t cause problems when it came time to put fondant on, and which ones did really need to be fixed. And once I learned how to recognise what consistency I needed the ganache to be for each part, things just fell into place.
And then they were so into place that I had the audacity to write a tutorial on it, even though I had no idea if people would like it, or find it useful. But lo and behold, it’s been viewed over 240,000 times, and I’ve had countless messages and comments from readers about how well the technique works for them. And that right there makes me gosh darn happy.
If you have any other questions that aren’t covered either here or in my tutorial, then let me know in the comments and I’ll do my best to answer them for you.
~Natalie
xx

