Crème Brûlée Fudge
This post may contain affiliate links to products I recommend. I receive a small commission at no cost to you if you make a purchase using my link.
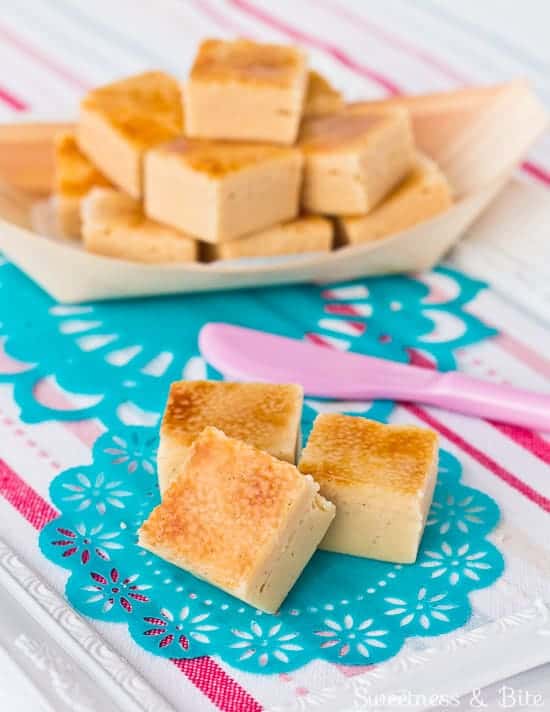
Crème Brûlée Fudge – smooth, creamy vanilla fudge with a golden and crunchy caramel top. This recipe is made from scratch with step-by-step instructions and troubleshooting tips!
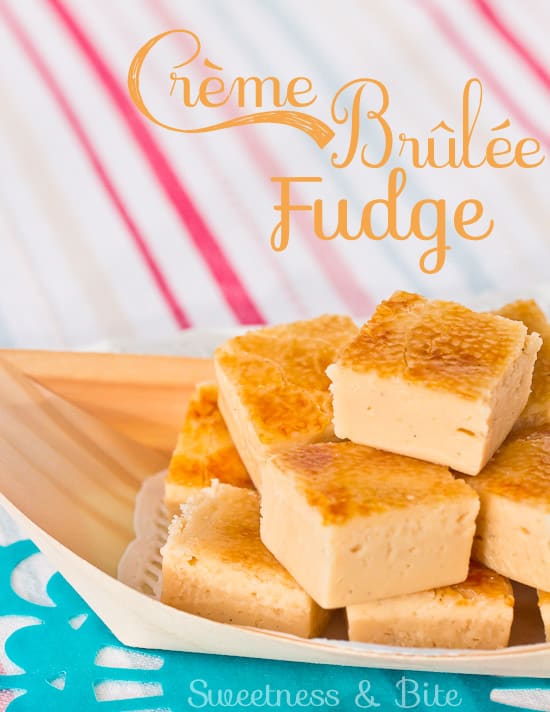
Fudge.
Just the word makes me feel all happy. Unless I’m using the word as a replacement for another ‘f’ word when I hurt myself. But generally, when I say fudge, I’m talking about this….
My favourite of allll the fudges is most definitely crème brûlée fudge, which is available from a few places around here. Unfortunately, it’s around $5.50 per 100g, and even a few hundred grams sure doesn’t go very far in our house.
My aunty bought me a culinary torch a while back that I hadn’t had a chance to burn myself with use yet, so I decided to give this fudge thing a crack, and then scorch the top into crispy caramelly goodness.
I think people fall into two camps, crumbly fudge lovers or smooth fudge lovers. Since the whole point of crème brulee is the silky smooth custard with crunchy caramel on top, this crème brulee fudge needs to be smooth and melt in your mouth. And it is.
Making the Fudge
I actually hadn’t made traditional fudge before making this, and the whole process kinda freaked me out. Especially since I’m a ridiculous perfectionist and I was worried I would cry if it turned out all grainy.
Some perusing of the internet and the fabulous book Sugar Baby provided me with three important things to remember…
- Make absolutely sure all of the sugar has dissolved before you bring the syrup to a boil.
- Make absolutely sure you do not stir the mixture until the temperature has dropped below 140°F/60°C. The range given in Sugar Baby is between 43°C-60°C (110°F-140°F). I split the difference and started beating it when it reached about 52°C.
- If the worst happens and your fudge turns out crumbly, you can either learn to love crumbly fudge or put the whole thing back in the pot with a few tablespoons of cream and start again, reheating it back to 114°C/237°F and following the steps to cool and beat it again.
You can beat the fudge by hand, but as soon as I read that it could take up to 20 minutes for the fudge to thicken, I got out my lazy girl’s best friend (aka my KitchenAid mixer).
When you start mixing it will look pretty slimy and gross. Since you’ve remembered not to stir it at all yet, all the butter (and vanilla) is sitting on the top.
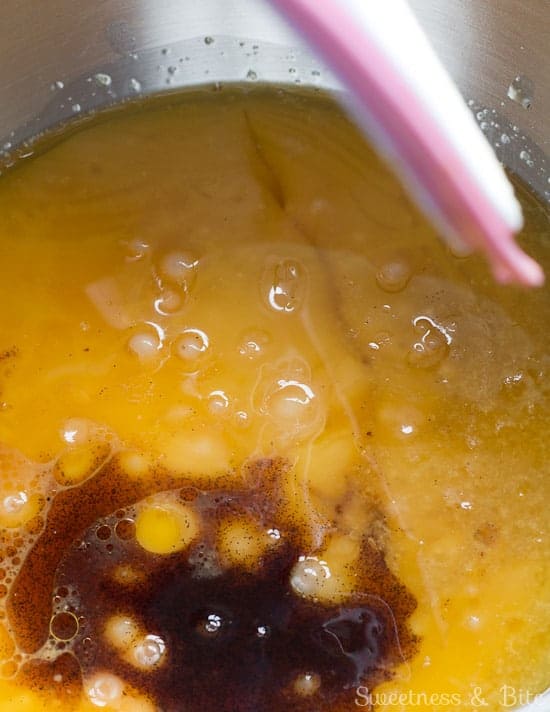
Then after a few minutes mixing it will look a bit like shiny cake batter.

When it loses its shine and looks more like soft cookie dough then it’s done.

What you’re aiming for to keep your fudge smooth is to create the smallest possible sugar crystals. Adding the corn syrup or liquid glucose helps to stop the sugar from crystallising before you want it to.
The recipe I used first called for 1/4 cup of corn syrup, and I had trouble getting the fudge to set, I’m guessing because all that corn syrup was preventing enough crystals from forming to help it set. So I ended up reducing the corn syrup and tinkering with the amount of butter, and it set perfectly. Not too soft, not too firm, lovely and creamy.
To caramelise the top you’ll need a culinary/brûlée torch. Simply sprinkle the top of the fudge with more caster sugar and heat it with the torch until the sugar melts, bubbles and browns. Look Mum, fire (actually she knew, she was holding the torch for me while I snapped a pic.)
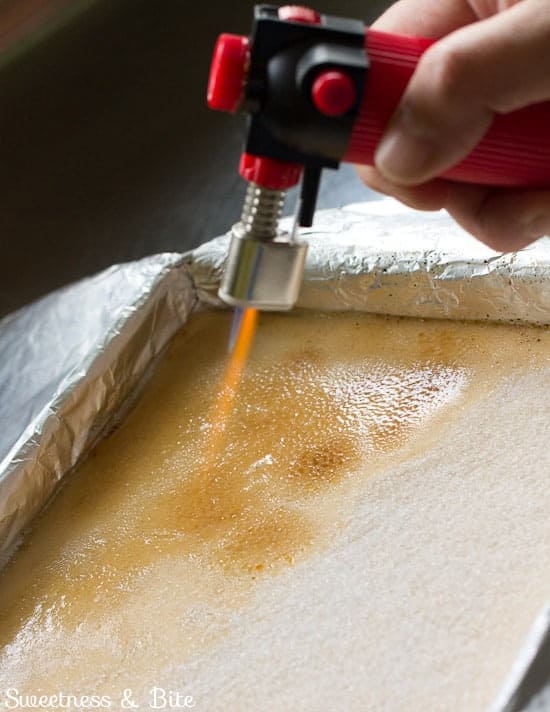
Y’know what excited me the most when I made this? That I didn’t accidentally set myself on fire. That, followed by eating the end product… yep, I class that as a good day.

Crème Brûlée Fudge
Ingredients
- 350 ml cream
- 60 g corn syrup or liquid glucose
- ¼ teaspoon salt
- 675 g caster sugar
- 30 g butter
- 2 teaspoons vanilla bean paste
- 1 teaspoon vanilla extract
- 1 Tablespoon caster sugar
Instructions
- Line an 8” square cake pan with non-stick foil (or use regular foil and grease it with butter).
- Combine the cream, corn syrup and salt in a medium large saucepan and heat gently over medium-low heat. Add the sugar in 3-4 additions, whisking gently to combine and trying not to splash the mixture up the sides of the pan. Continue stirring until all of the sugar has dissolved. Be patient, it will take around 10 minutes.
- Brush down the sides of the pan with a pastry brush dipped in warm water. Increase the heat to medium high, clip on a candy thermometer and cook without stirring until the mixture reaches 114°C/237°F.
- Leaving the thermometer in place, remove the pan from the heat and place it on a cooling rack. Drop in the cubes of butter, but don’t stir it yet.
- When the thermometer shows that the mixture has cooled to 52°C/125°F, transfer it to the bowl of an electric mixer fitted with the paddle attachment, add the vanilla and beat on low speed until it loses its shine and thickens.It will look a bit slimy to start off with, and then it will look like cake batter. What you want is for it to look more like soft cookie dough.Scrape the fudge into the cake pan and smooth the top with a spatula.
- Leave at room temperature for several hours or overnight until firm.
- Place the tin onto a heatproof surface and sprinkle the top of the fudge with the extra tablespoon of caster sugar. Shake the tin to distribute the sugar evenly. Heat with a culinary torch until the sugar bubbles and caramelises. Allow the fudge to cool and become firm again.
- Turn the fudge out onto a baking paper covered cutting board (leave the fudge caramel side down to make cutting neater) and cut into 1” squares.Store fudge in an airtight container at room temperature for up to one week.
Notes
- If your fudge doesn’t thicken after beating, then you may need to try again and reduce the amount of corn syrup you use (by a tablespoon or so), in order to get a few more crystals forming.
- If the opposite happens and your fudge turns out too grainy, then next time increase the corn syrup slightly.
- Once you’ve successfully made the fudge, make sure you write down what you changed (and what time of year / what the temperature and humidity were like) so you’ll know for next time.
Nutritional Disclaimer: Any nutritional info provided is a computer generated estimate and is intended as a guide only.
Natalie
xx

