Chocolate and Vanilla Honey Cheesecake Layer Cake {Gluten Free, Or Not}
This post may contain affiliate links to products I recommend. I receive a small commission at no cost to you if you make a purchase using my link.
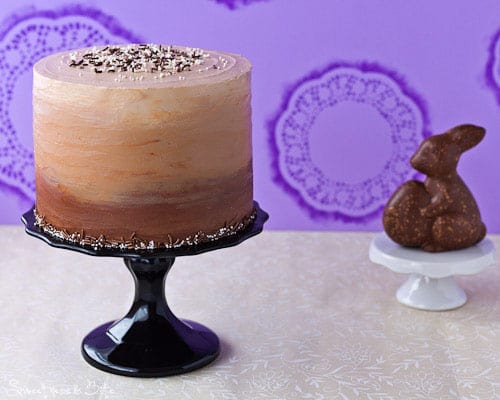
I hope one day I can grow up to be one of those super organised bloggers who can show you something a week or two before a holiday and say “here’s something you should make for (insert holiday/special occasion here) It’s colour coded and decorated perfectly to suit said occasion!”
But so far I’m not a grown up… and I am not organised.
So instead of posting this a week ago and saying “you should totally make this chocolate and vanilla honey cheesecake layer cake for Easter, my friend! Your family will love you for it and throw you in the air in delight!” … Yeah I’m just gonna say “this is what I made my family for Easter, and if at some stage you have an occasion where you can’t possibly choose between cheesecake and chocolate cake, I’ll just leave this recipe right here for when you need it.”
I’m nice like that. Nice, but just not organised. I hope you can forgive me.
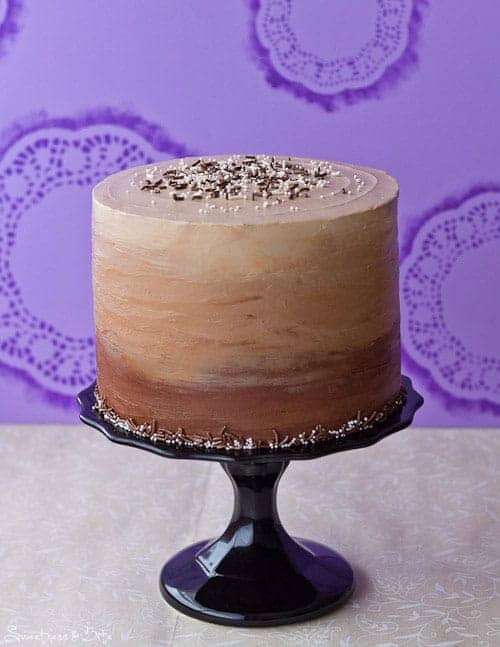
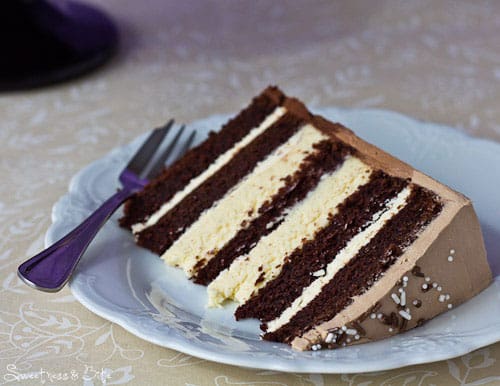
Cakes with a layer of cheesecake have been floating around all over Pinterest for a while now, but most of them only have one layer of cheesecake. I have no idea why. If there is room for more cheesecake, why would you only have one layer? Why?! It’s cheesecake. So I shoved another layer in there. Plus a couple of layers of buttercream. I really like Italian meringue buttercream. Can you tell?
I made a similar version to this cake last year for my Dad’s birthday, five layers of lemon cake, a couple of layers of coconut cheesecake and a couple of layers of buttercream. Yum.
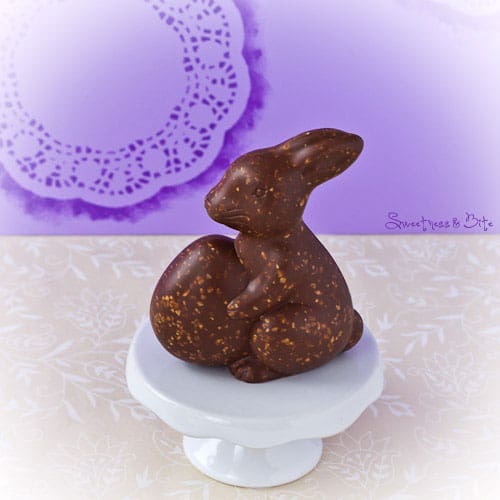
Since we’re not a particularly religious family (Roman Catholic Nonna excluded) to us Easter is mostly about the chocolate. And hanging out as a family. And eating chocolate. As a family. Chocolate.
Chocolate & vanilla honey cheesecake layer cake it is.
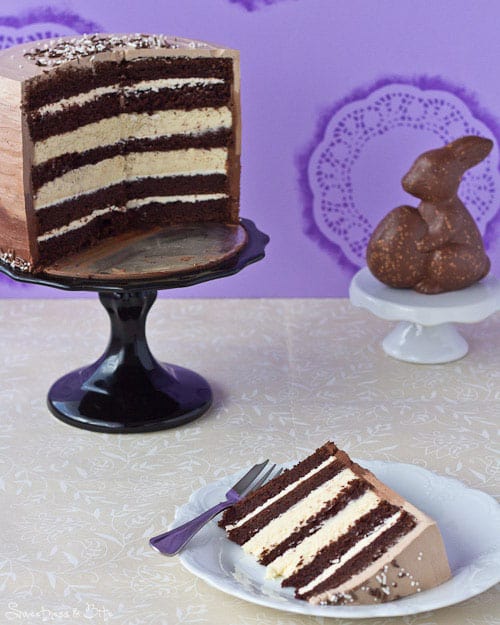
To keep things interesting and make the cake extra pretty when it’s sliced, I decided to make a baked vanilla cheesecake filling. Based on a recipe from Tea With Bea, I tripled the recipe for two layers, added mascarpone for extra creaminess and replaced a bit of the sugar with some honey. It doesn’t end up honey flavoured as such, but the honey adds an extra depth of flavour to an otherwise very vanilla cheesecake. I used a light flavoured squeezy honey, but you can use any kind of honey you want. I can’t wait to try this as a regular cheesecake on a biscuit crumb base, maybe with a slightly stronger flavoured honey. I could do it midwinter and use manuka honey, y’know, for its medicinal properties. Yes, that’s why.
The good thing about this cake is that while there are a few different components, you can knock the various parts out over a few days. No last-minute rushing (unless you’re like me and screw something up and end up baking another cake layer the day you want to put it together. Don’t be like me if you can possibly help it.)
The cake can be baked up to three days in advance, the buttercream can be made a week or two before (you can store it at room temperature for a few days, unless you live in the desert, but any longer than that just pop it in the fridge. Then bring it back to room temperature and give it a quick mix before using). The cheesecakes can be made the day before and kept in the fridge. Leave them uncovered in the fridge until they’re chilled, then put them (tin and all) in an airtight container(s).
I baked the cheesecakes in a bigger tin than my cakes because the last time I did this the edges of cheesecake got a little brown and I had to cut them off. This time I baked them in a water bath, and didn’t have brown edges. So it’s up to you if you want to bake them in bigger tins and cut the edges off (and eat them) or if you have 7” springform tins then you could just bake the cheesecakes in them and thicker layers. Nothing wrong with that. Or bake everything in 8” tins and have a slightly shorter but wider cake. Don’t tell me I never give you options.
Or you can ignore all the options and do exactly as I did. And then you get to wear your “quality control” hat and eat the off-cuts.
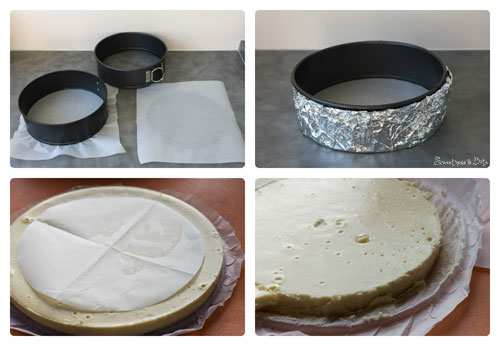
When lining the base of your springform pans with baking paper, place a square of paper over the base, then press the ring down over the top and close it. Then line the sides of the tin. I forgot to do this. Turns out the non stick actually works, but just in case, don’t be like me – line the sides. Once your tin is all lined, if you’re going to bake your cheesecakes in a water bath, tear off two long pieces of foil and place them in a cross shape. Put the tin in the middle, and pull the foil up around the tins. You want to make the tin as watertight as possible to stop any water seeping into your cheesecake.
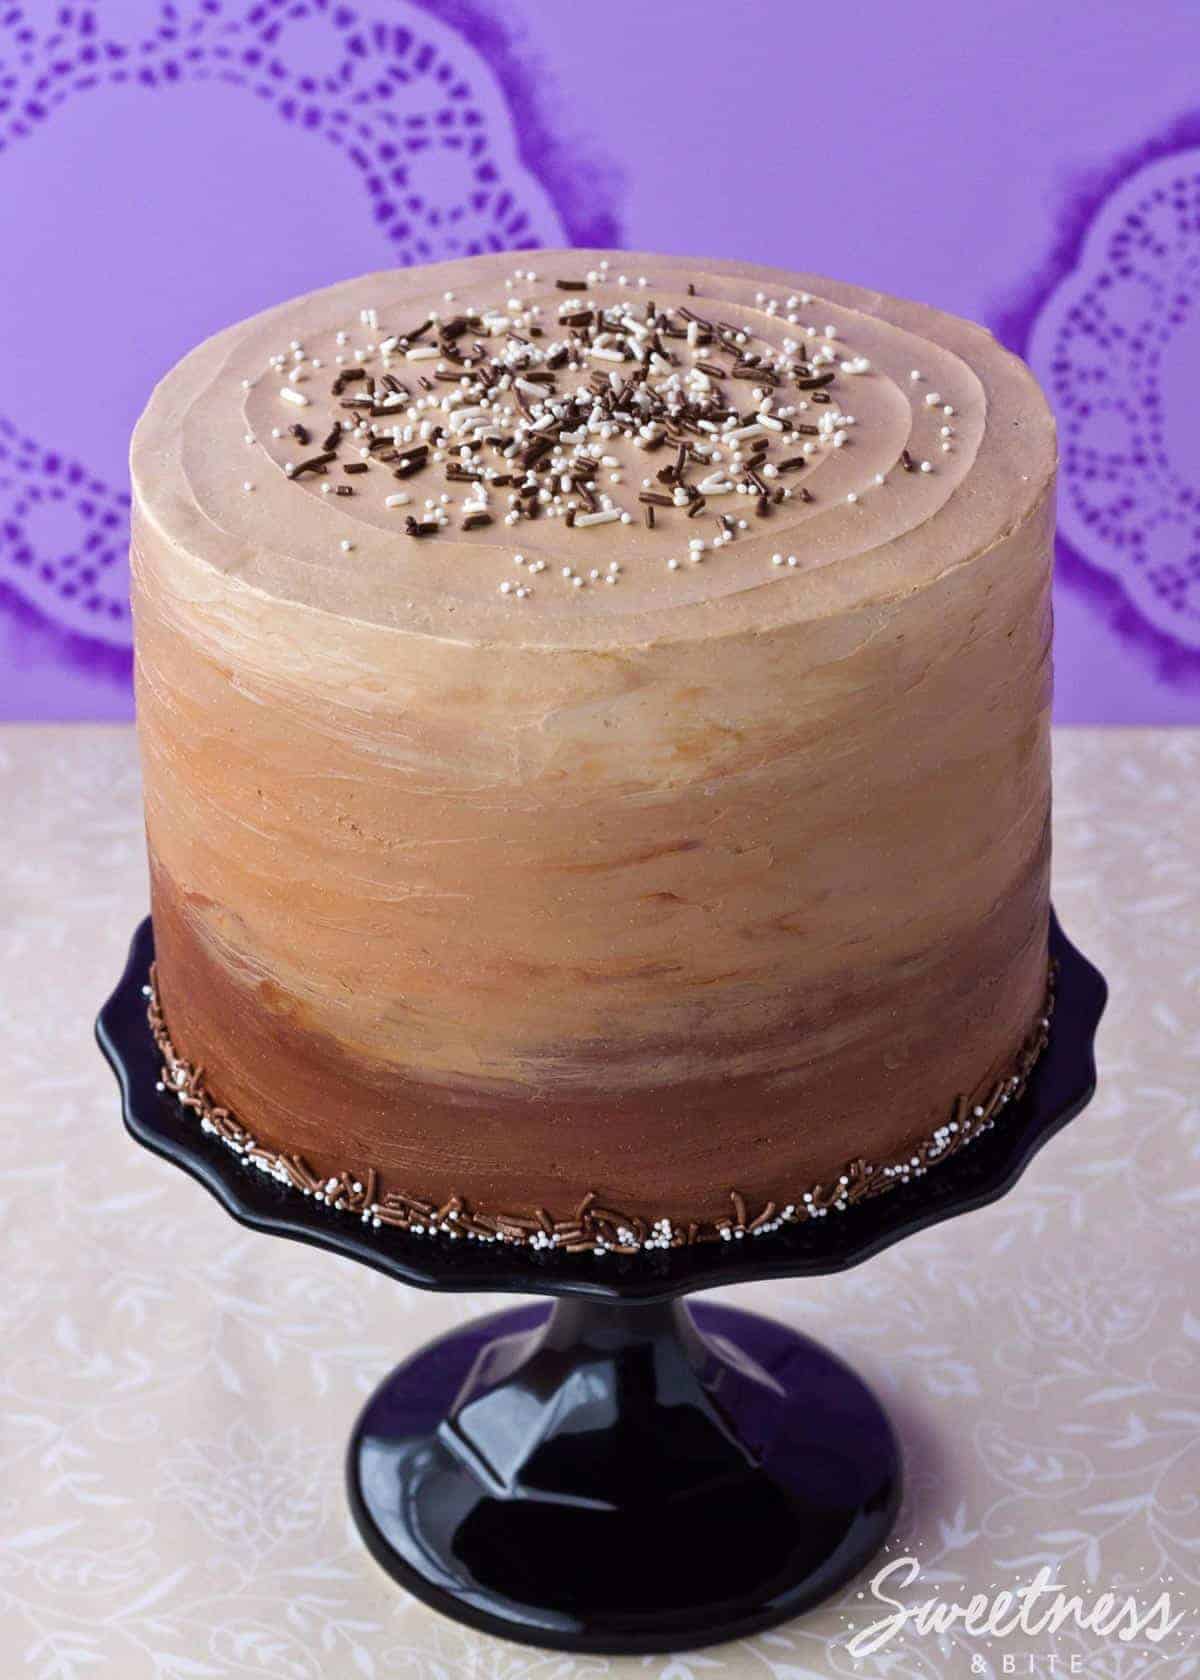
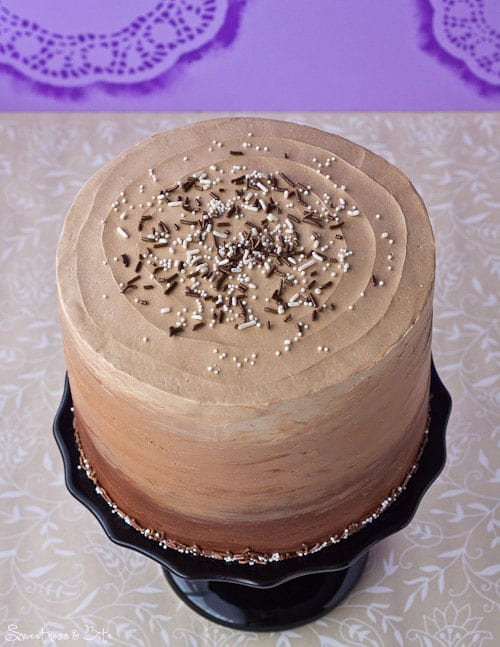
The graduating chocolate buttercream is inspired totally by Sweetapolita’s Pastel Swirl Cake, check out the video on how to do this technique. Mine didn’t come out quite as gorgeous as hers, the darker chocolate buttercream started to set a bit fast due to all the chocolate, which made it harder to swirl. The great thing about this technique though is you don’t have to be tooooo fussy about smoothing it out, it looks perfect with a bit of swirly texture. But if you ask my mother (who wanted to use her kitchen), she’ll tell you I spent ages trying to get that “effortlessly smooth-but-textured” finish. And she’d be telling the truth.
Maybe when I’m grown up enough to be organised, I’ll be grown up enough not to be such a fussy pants. I kinda hope I never grow up.
Chocolate & Vanilla Honey Cheesecake Layer Cake
Ingredients
For the chocolate cake layers:
- 150 g dark chocolate at least 50% cocoa solids
- 2 teaspoons instant coffee optional
- 265 ml boiling water
- 425 g gluten free flour blend or all purpose wheat flour - see notes
- 1 ½ teaspoons Xanthan gum omit if not making gluten free
- 25 g cocoa
- 2 ½ teaspoons baking soda
- 50 g ground almonds
- 265 g butter at room temperature
- 425 g brown sugar
- 2 teaspoons vanilla extract
- 5 eggs at room temperature
- 265 g sour cream
For the vanilla honey cheesecake layers:
- 500 g cream cheese at room temperature
- 200 g mascarpone use another 200g cream cheese if you don’t have/can’t get mascarpone
- 1 ½ teaspoons vanilla bean paste
- 150 g caster/superfine sugar
- 4 tablespoons honey I used squeezy honey
- 2 large eggs at room temperature
- 3 tablespoons cornflour/cornstarch
- 120 ml whipping cream
- Vanilla Italian meringue buttercream {Click for recipe}
- 250 g chocolate at least 50% cocoa solids, melted and cooled.
Instructions
Make the cake layers
- Preheat the oven to 180° C. Line the base and sides of two 7” round cake tins with baking paper, leaving a high ‘collar’ of baking paper above the edge of the tins.
- Roughly chop the chocolate and place it in a heatproof jug with the coffee (if using) and then pour over the boiling water and stir to melt the chocolate. Set aside to cool. Sift together the flour, Xanthan gum, cocoa and baking soda. Add the ground almonds and whisk to combine thoroughly.
- In the bowl of an electric mixer fitted with the paddle attachment, beat together the butter, sugar and vanilla extract until very light and fluffy. Gradually add the eggs, beating well between each addition. Turn the mixer down to low speed, and add the chocolate mixture and flour alternately, beating well between each addition.
- Scrape down the sides of the bowl, and then add the sour cream, mixing on low speed until just combined. Remove the bowl from the mixer and give the batter a last stir by hand, scraping down to the bottom of the bowl to ensure it’s all thoroughly mixed.
- Divide the cake batter between the tins, with more batter in one tin than the other. {See notes below on how to divide the batter}
- Place a piece of foil over each cake (it should rest on top of the collar of baking paper) and then bake in the preheated oven for 45 minutes – 1 hour, or until they spring back when pressed, and/or a skewer inserted into the middle of the cake comes out clean. Leave the cake in their tins to cool, then fold down the baking paper, cover the top of the tin with foil and leave overnight to cool completely (this makes the cakes easier to handle).
Make the cheesecake layers
- Line the bottom and sides of two 8”(20cm) springform cake pans with baking paper. Wrap the outsides of the pans with foil, you’re going to bake the cheesecakes in a bain marie, and you don’t want the water getting into the pans.
- Preheat the oven to 130°C. Get ready two baking dishes (or one large baking dish) big enough to fit the cake pans.
- Put the cream cheese, mascarpone and vanilla paste in the bowl of an electric mixer, and beat on medium speed until smooth and creamy. Scrape down the bowl and then add the sugar and honey, and beat again on medium speed until the sugar has mostly dissolved.
- Lightly whisk the eggs together and add them gradually to the cream cheese mix, beating on low speed until combined between each addition of egg. Scrape down the bowl and mix again.
- Sift the cornflour into the bowl, and mix until incorporated. Mix in the cream on low speed. Scrape down the bowl and mix again.
- Divide the mixture evenly between the two cake pans. Place the cake pans into the baking dishes, and put them in the oven. If your oven isn’t big enough to fit both cheesecakes at the same time, bake them one at a time. Pour boiling water into the baking dishes, up to the level of the cheesecake mixture.
- Bake for 20 minutes, or until the edges of the cheesecakes are set, but the middles are still a little wobbly. Leave to cool, and then place in the fridge until firm. When you’re ready to put the cake together, place the cheesecakes in the freezer while you get everything else ready.
Putting it all together
- If you haven’t already, make your vanilla Italian meringue buttercream (or use your favourite buttercream recipe).
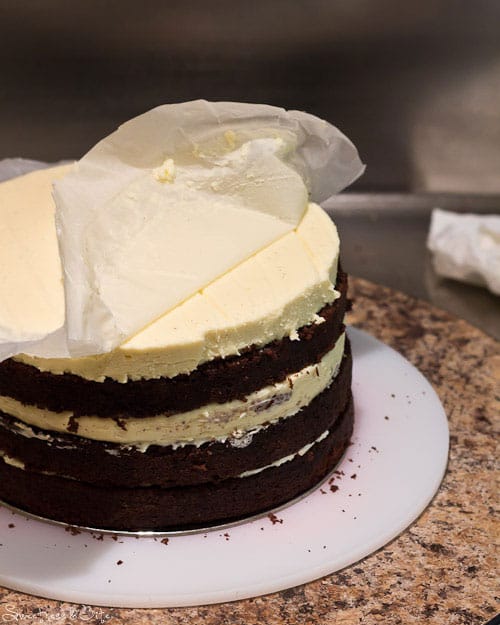
- Remove the cheesecake layers from their tins (still on the baking paper). Make a baking paper template (I drew around a 7” cake card, cutting the template slightly smaller than 7”). Use the template to cut out the cheesecake without cutting through the paper underneath. Leave the circle of cheesecake on the paper, and remove the excess cheesecake from around the edges. I found it easiest to do this with a metal spatula. Place both cheesecakes in the freezer.
- Use a large serrated knife or cake leveller to remove the domes from the tops of the cakes. Split the taller cake into three layers, and the shorter cake into two layers, so you have 5 layers of cake in total. If your cakes are soft and hard to work with, place them in the freezer for 10-15 minutes to firm them up.
- Spread a dab of buttercream onto a 7” cake card (or straight onto your plate or cake stand, if you prefer) and place a layer of cake on top. Spread the cake with a thin layer of the vanilla buttercream and top it with another layer of cake. Take one cheesecake layer from the freezer and smear a bit of buttercream on top. Flip the cheesecake over onto the cake and peel away the paper. Dab with more buttercream and place another cake layer on top. Repeat steps with the next layer of cheesecake, then cake, then a layer of buttercream and the final layer of cake.
- Lightly crumb-coat the cake with buttercream then pop it in the fridge. While the cake chills, divide the remaining buttercream between three bowls. Add melted chocolate to them, starting with a small amount in the first bowl, then a little more in the second, and more in the third so you have three different shades.
- Cover the top of the cake with the lightest buttercream and smooth. Roughly and thickly spread the darkest buttercream around the bottom of the cake. Repeat with the middle shade, around the middle of the cake. Use a spatula or scraper to smooth all three colours together. {See Sweetapolita's tutorial video on how to do this}.
- If transferring the cake on a cake card to a stand or plate, chill the cake until the buttercream is firm before transferring. Sprinkle the top and the bottom edge with sprinkles if desired. To place sprinkles around the bottom, I poured the sprinkles onto the stand around the cake, and then used a clean paintbrush to press the sprinkles against the cake.
- Best served the day it is made, but can be stored in the refrigerator for up to two days. Remove from the fridge half an hour or so before serving to let the buttercream soften.
Notes
Nutritional Disclaimer: Any nutritional info provided is a computer generated estimate and is intended as a guide only.
I hope you and your family had a very happy Easter.
~Natalie
xx
