Cute Doily Cake Boards {Tutorial}
This post may contain affiliate links to products I recommend. I receive a small commission at no cost to you if you make a purchase using my link.
For the purposes of this post, I would greatly appreciate it if you pretended to love paper doilies as much as I do. It would make me feel a tad more normal. Thankyouverymuch. See, you may or may not have guessed this, but I am a doily addict. I gave you a few clues, y’know, from the doily lace pattern on my blog header, and the doily social icons I created. And also the doily patterned photo background that I made and used in my last post.
This coming from a girl who until a year or so ago, thought of herself as thoroughly modern. Everything needed to be new and preferably shiny. Pre-loved? Ew! Second hand shops smelt like old people and therefore I would not step foot in one. (Nothing against old people, I happen to love some old people, but that old dusty smell, not so much.)
Now I have to be physically dragged away from second-hand shops, hospice shops, SPCA op shops and second-hand stalls at the Martinborough Fair. I collect tea cups like they’re going out of style. I hoard teapots, vintage plates and cake stands. And the aforementioned doilies? Yeah I have a few of those. My Nonna’s old crocheted doilies, and packets and packets of paper doilies.

One of my all-time favourite ways to use paper doilies is what I’m going to show you today. But first I want to tell you another little story.
A couple of weeks ago I was lucky enough to spend a weekend up in Auckland with some lovely ladies from all over New Zealand, who all love cakes. We met on the Kiwicakes forum, and I can’t even describe the awesome feeling that comes from being able to talk all things cake, all weekend, with people who don’t get bored halfway through and tune out. Much as my family are supportive of my cakes, there is only so much cake talk the poor things can handle.
But cake girls? Yeah we can talk cake for 72 hours straight and still not be sick of it. It was so much fun. As someone who has never done a cake class or anything before, it was awesome to watch other people demonstrating how they do certain techniques. I learnt new things, and (hopefully) got to show them a few things as well.
I demonstrated this madhatter cake, and while I went spastic covering the bottom tier in fondant, not being used to humid Auckland weather, and botched it pretty badly, I managed to cover up the worst of it with polka dots and butterflies. And everyone was polite enough not to remind me how awful it was. Aimee and Suzette made some flowers to assist in my “shock and awe” tactic (ie cover it in stuff so people are distracted from the flaws).

I recycled a cake board I had used for another madhatter I made last year, and between that cake and this one I’ve had a few people show interest in how to apply the doily to the board. So that’s what I’m going to show you today, how to (neatly and cleanly) cover your cake board in paper and a doily.


While I usually cover my cake boards in fondant, occasionally I like to save time, money and icing, and cover my boards in paper instead. And, obviously, I’ve been known to put a doily on there too. It’s not a super tricky thing to do, but I do have a few tips on how to keep things looking neat and tidy.
Covering your board this way relies on you having your cake already on a cardboard cake card the same size as your cake. I always decorate my cakes on their own board, it helps to get the sides of the cake straight when you ice them, and makes for easy transfer of your cake from set-up board to your final display board. Your cake should be pretty much fully decorated before you transfer it to your paper covered board. If you want to do more decorating once your cake is on the board, or if you’re using a buttercream icing and no fondant, I would suggest covering your board in clear contact paper after decorating with the doily. This means you can easily wipe off any mishaps, and the fat from the buttercream won’t seep into the paper and leave greasy marks.
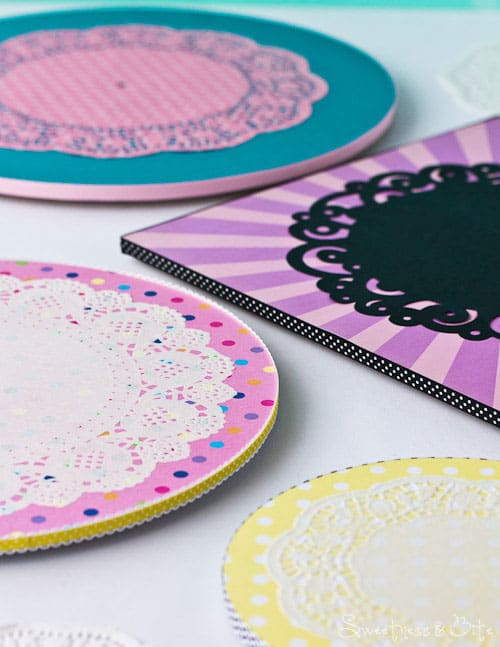
You can find plain white paper doilies in most $2/cheap shops, and on the wonderful internets there are so many gorgeous coloured and patterned doilies. I happen to love these pink ones from Pop Roc Parties….

My best cake friend Rachel, who let me invade her house in Auckland for the week, took me cake-toy shopping and we happened upon these gorgeous black Wilton cut out ‘doilies’. They come in three sizes, I managed to be disciplined and only bought the large and small ones. Ok so that’s only semi-disciplined. Whatever. Aren’t they pirty?! And they sparkle!

You can pretty much use any paper you want on the cake board. I love using patterned scrapbooking paper for cake boards 12″ or smaller, although you do have to be careful as the sheets are usually 12” square, but they don’t necessarily fit a 12” round or square board. Sometimes the paper is several millimetres too small, so just check that before you try to stick it onto the board. Plain sheets of thin cardboard are also good- for bigger cake boards the A1 sized cardboard sheets are very useful. You can also use pretty wrapping paper, or even fancy handmade paper. You do want to stick with papers that are reasonably thick; it means you’re much less likely to get nasty wrinkles in the paper when you glue it on.
I find spray adhesive to be the quickest and easiest way to stick the doilies onto the background paper. You could try and use a glue stick, but it’s harder to get it into the lacy edges without getting chunks of glue stuck. Use non-toxic spray adhesive if you can get it, but that’s not critical as your cake won’t actually be touching it, since the cake will be on its own board. And if you are concerned then just be sure to remove the cake from the doily board before you cut and serve it.

I like to put ‘feet’ or cleats on my cake boards, as it gives me room to get my fingers under the board to lift the cake. I use self adhesive furniture skid protectors, and stack them 2 – 4 high.

If you want to use a ribbon or trim that is wider than the thickness of your board, you can stack these little feet high enough to give you room for your pretty ribbon.

{I happen to have an even bigger collection of various ribbons and trims than I do doilies.}
*
Let’s get started, shall we?

What you’ll need:
Cake board (I like the 5mm thick masonite boards)
“Feet” for the board (optional)
Paper
2 doilies (try to use a doily with an inner circle that is a similar diameter to your cake)
Glue stick
Spray adhesive
Scissors
Double-sided tape
Ribbon or other trim (of a similar width to your board)
Plastic ‘bone’ paper folder (optional, but useful)
Pencil
Apply the feet to your board. Try to space them so that the weight of the cake will be evenly distributed. The bigger the cake and board, the more feet you will need.
Cover the surface of the board thoroughly with the glue stick. You’ll be able to see where you’ve glued as the glue dulls the silver paper. Place the paper over the board (or if the paper and board size are very close, turn the paper upside down and centre the board on top). Using your hand or a folded up cloth, smooth out the paper. Press gently around the edge of the board until you can see the outline of the board on the paper. Set aside for the glue to dry a bit, then flip the board upside down and cut away the excess paper, using the board to guide your scissors. Press around the edges with a bone folder or folded cloth to smooth down the cut edges. You could use your finger, but I take no responsibility for paper cuts!

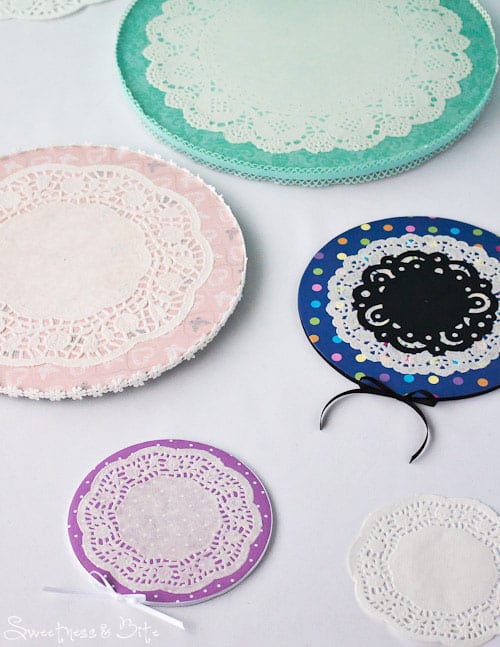
Mark the centre of the board with a pencil (I use a folded circle of paper to mark the centres of my cake boards) Fold one of the doilies into quarters, then unfold and poke a hole in the centre. Lay this doily on top of the other doily and poke a hole in the centre of that one too.

Spray the back of the second (fold-free) doily with adhesive, then line up the centre hole with the mark on the board. Smooth the doily down gently, from the centre outwards to avoid pleats. Use a bone folder if you have one to press the doily down. Don’t press too hard if you want to keep the slightly raised texture of the doily.
Apply the double-sided tape around the edge of the board. If you have a dodgy side of the board, use that as the back and start the tape from there. To get a neat ribbon join, cut the tape 5mm longer to give you an overlap. Pull that back slightly and start removing the paper from the other side of the tape. Place your ribbon and stick the overhanging 5mm of tape from the other side on top. Continue applying the ribbon, pulling it taut and pressing it against the tape. When you get to the end, cut the ribbon 5mm longer, and stick it to that overhanging tape.

If the cake you are making requires a centre dowel, like a madhatter cake does, then drill the hole in your board before you cover it with paper. Follow all the steps to cover the board and apply the doily, and then use a scalpel or craft knife to cut out the paper covering the hole. Then you can insert your dowel and attach it with glue underneath the board.

To attach your cake to the board I suggest using a dab of royal icing or white chocolate. Try to centre it as best you can, so the doily radiates out nicely from the cake. Of course if it has a centre dowel it will be nicely centred all on its own.
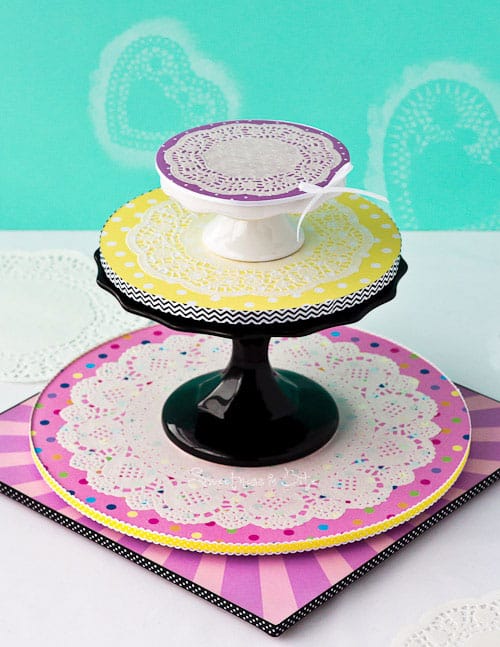
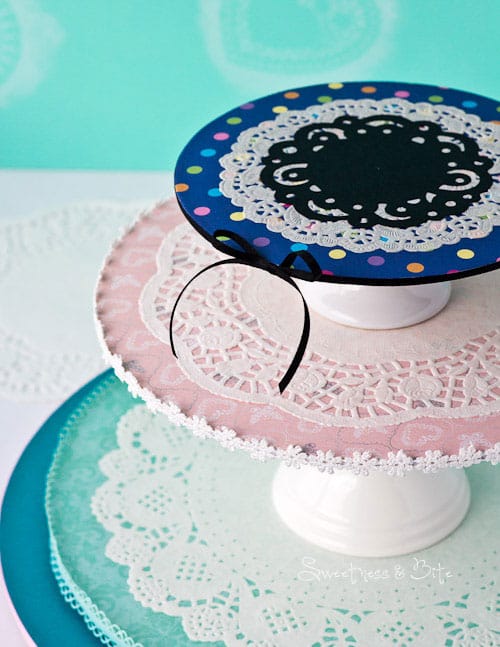
These don’t have to just be used as cake boards either, you could use thin cake boards and use them as cute party placemats, or stack them up using cake stands or paper covered polystyrene cake dummies and make your own cupcake stand.
I can also picture them on the wall as art, but then, that might just be the over-enthusiastic, crazy-doily-lady inside me talking. Wish she’d be quiet, I’m embarrassing myself.
To Rachel, Liz, Loralee, Aimee, Petra, Audrey, Suzette, Penny, Dianne and Nina, thanks so much for an awesome weekend (and also for not being serial killers who murder people they meet on the internet. Y’know, it happens.)
Natalie
x
