How To Cover a Cake With Fondant Using the Wrap Method
This post may contain affiliate links to products I recommend. I receive a small commission at no cost to you if you make a purchase using my link.
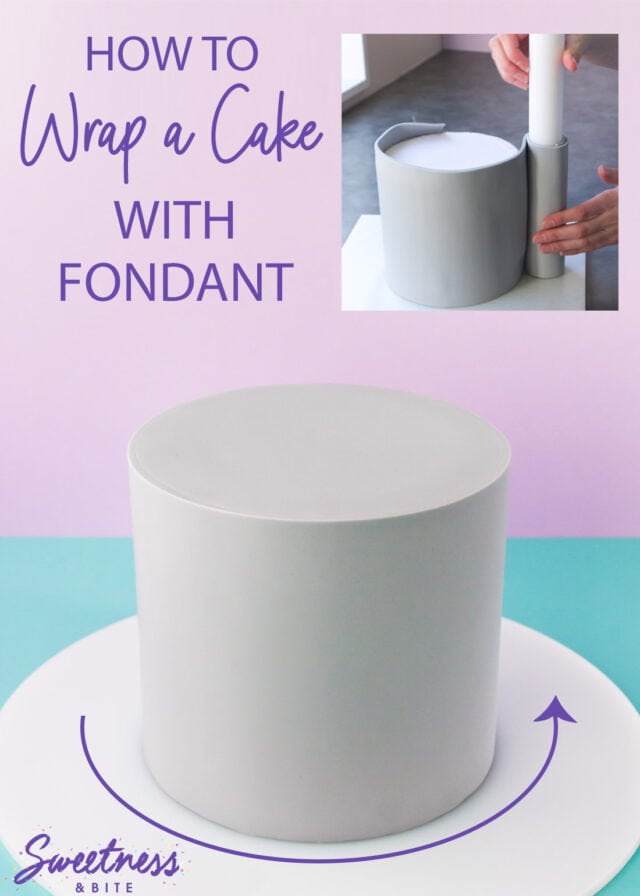
Learn how to cover a cake with fondant using my favourite technique – the upside-down wrap method. If you’ve ever struggled to cover a cake with fondant the traditional way – this is the perfect post for you! Full step-by-step tutorial showing how to wrap a cake with fondant to achieve sharp edges, and smooth sides!
If you’d asked me when I started this blog, “what is the one thing you will never do a cake decorating tutorial on?” I wouldn’t have hesitated – my answer would be “showing how to cover a cake with fondant!”
Fondant and I have issues. Like serious, personal issues. For years, fondant hated me. Hated me. I don’t know what I ever did to it to make it feel that way, but it did. So there it is.
Every time I would try and put fondant on a cake, something would go wrong. The fondant would be too dry. It would be too soft and sticky. There would be air bubbles. Holes. It would stretch. It would tear. There would be tears (my tears, because of the tears). And that’s just on round cakes, don’t even get me started on square cakes!
I know some of my cake preferences make things harder on me. I love sharp-edged cakes, and I love tall cakes. Both of which can make it harder to cover a cake. The sharp edges can tear the fondant, and the height of a cake can mean that before you’ve finished easing out the pleats in the fondant and smoothing it all the way down the cake, the fondant can dry out and give you the dreaded ‘elephant skin’.
Sure, there are magnificent cake decorators out there that can cover a cake in five minutes flat with no rips, no flaws and no swear words. I have no idea whether they are magicians, ninjas, or just purely brilliant decorators, but all I know is that I’m not one of them. There are probably also a lot of decorators who aren’t as ridiculously fussy as I am and don’t lose sleep over minor imperfections, but I do. I care. Too much, probably. But it’s a character flaw that I’m learning to live with.
I’ve never been to a cake class, I’ve learnt what I know from the internet, books and from a hell of a lot of trial, error, bad language and meltdowns. And it’s that trial and error that led me to realise that sometimes, you just have to do things differently.
And in this case, “different” for me is wrapping a cake in fondant instead of covering it in one piece. Sure, you do end up with seams, but the way I wrap my cakes now results in seams that are neat, clean and barely visible unless you’re specifically looking for them. See?
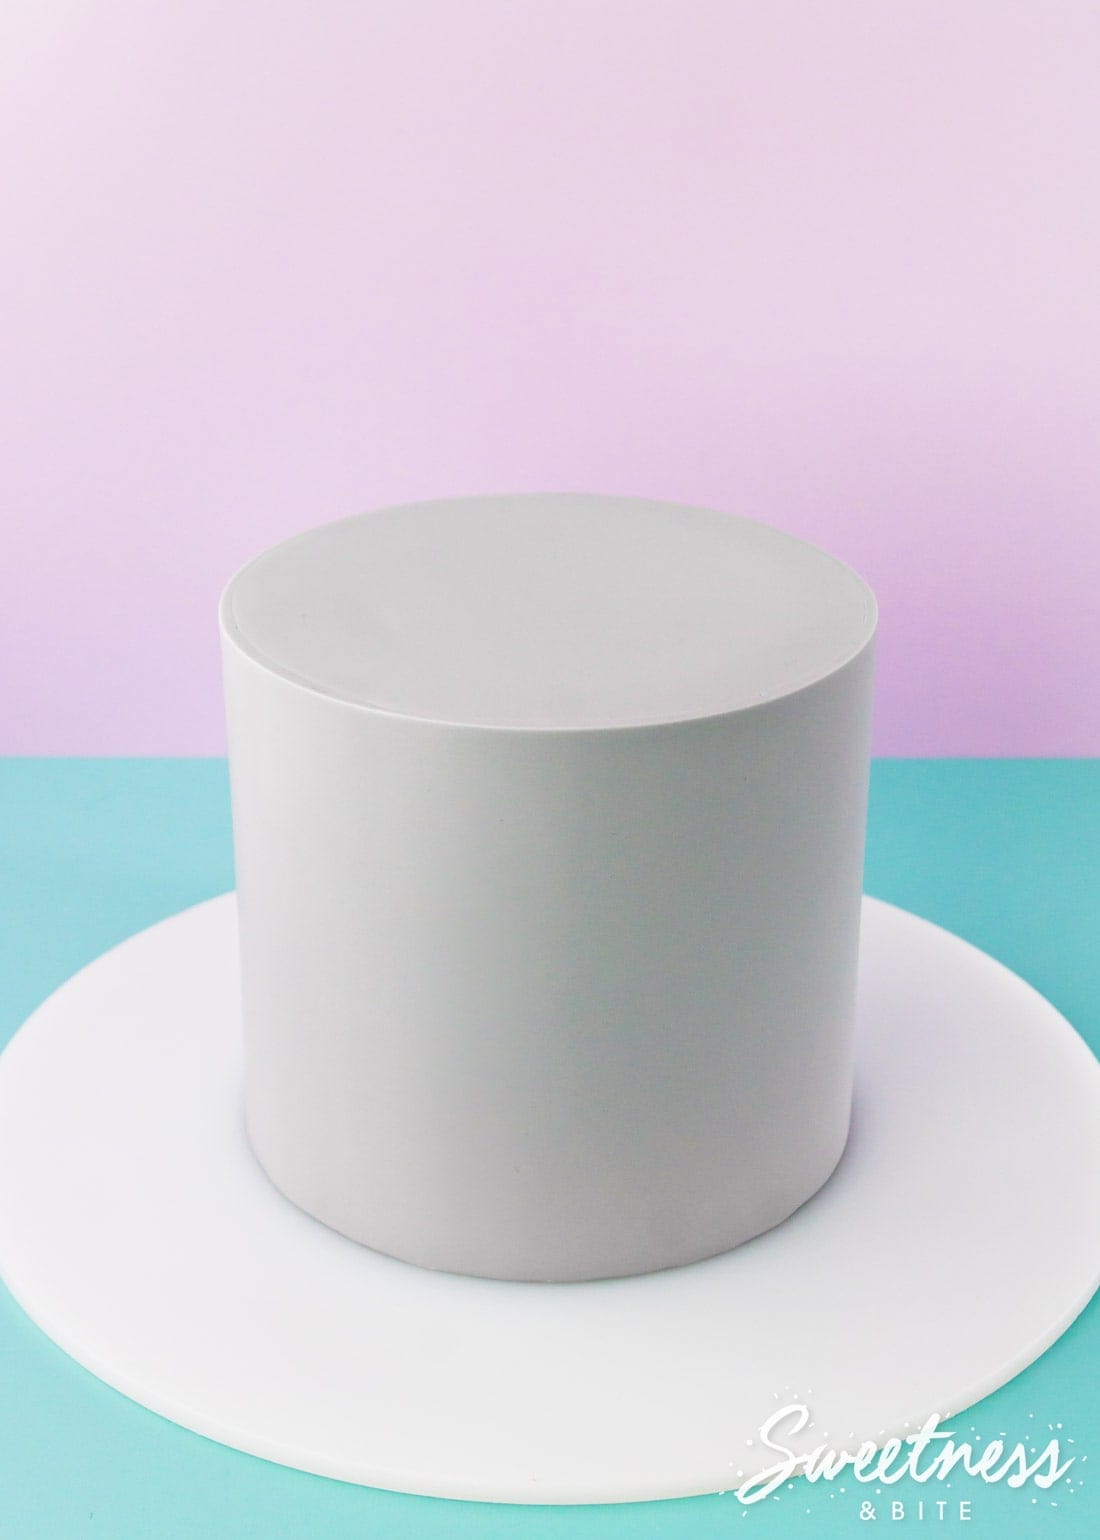
Wrapping a cake has always been recommended as the best way to cover tall cakes with fondant (double/triple barrel cakes, etc.) but I have to admit that these days I wrap most of my cakes, regardless of whether they are super tall or not. I find it much less stressful, and now that I have done it many times, I always end up with a good result. With a little practice, maybe you’ll find this technique a little less stressful too.
When I was first experimenting with wrapping a cake with fondant, I followed a few online tutorials which had various ways of covering the top of the cake, but most of them involved a lot of messy trimming, which made the seams, well, messy. Or they wrapped the cake with cut-to-size pieces of fondant, which could stretch and/or distort, ending up too big or too small, leaving either pieces that needed trimming or unsightly unfixable gaps. Frankly, I found it all a bit hard, a bit imperfect, and almost as stressful as the all-in-one method.
Then one day, while flipping a cake upside down to ganache it, I thought, why don’t I do that to cover it with fondant?! And as it turns out, it wasn’t a stupid idea.
Check out this cake from my watercolour cake tutorial which I covered using this technique, if you look close enough you’ll see the seam around the top edge, but on this cake, it was barely noticeable.

My basic process for wrapping a cake in fondant is to cover the top first, then flip the cake upside down and wrap one long strip of fondant around the side of the cake.
Having the cake upside down means that you don’t have to trim the fondant at all along the top seam (this will make more sense once you read the steps below) which in turn means your seam will be much neater and you won’t risk damaging your perfect sharp edge by having to trim it.
Using this method means that the top seam of the fondant will be on top of the cake, rather than around the side. I prefer it this way as the seam is less visible from the front. If, for the purposes of your cake design, you want to have the seam on the side, you’ll need to skip the first step of covering the top and flip your cake upside down straight away. Then follow the steps to wrap and trim the cake. Once that’s done, flip the cake back over then follow the steps to cover the top, flip the cake over again (onto another waxed paper-covered board) and very carefully trim the excess.
Table of contents
My Top Three Keys to Neatly Covering a Cake with Fondant
- A good ganache base. Having a nicely ganached cake will give you a great base for covering it with fondant. In order to get that glorious sharp edge on your fondant, you need a sharp edge on your ganache. Check out my ganache tutorial if you need tips.
This can be done with buttercream but it is a lot trickier. You will need to make sure your buttercream is super chilled and firm, and then work quickly to get the cake wrapped and smoothed before the buttercream softens. If you’re not confident, then I recommand go with the ganache, or fill your cake layers with buttercream and then use ganache on the outside (best of both worlds!). - Thin fondant. The thinner you roll your fondant, the neater your top seam will look. 3-4mm is ideal, thinner if your fondant allows. If you happen to have a rolling pin with spacers, that will make it a whole lot easier to make sure your fondant is evenly rolled. I use the orange spacers on my large Wilton rolling pin.
- Neat cuts. Using a pizza cutter to cut out your strip of fondant will help keep the bottom edge clean (and this edge will be on the top of your cake). Using a super sharp knife or scalpel to trim the seam at the back will make that seam neat too.
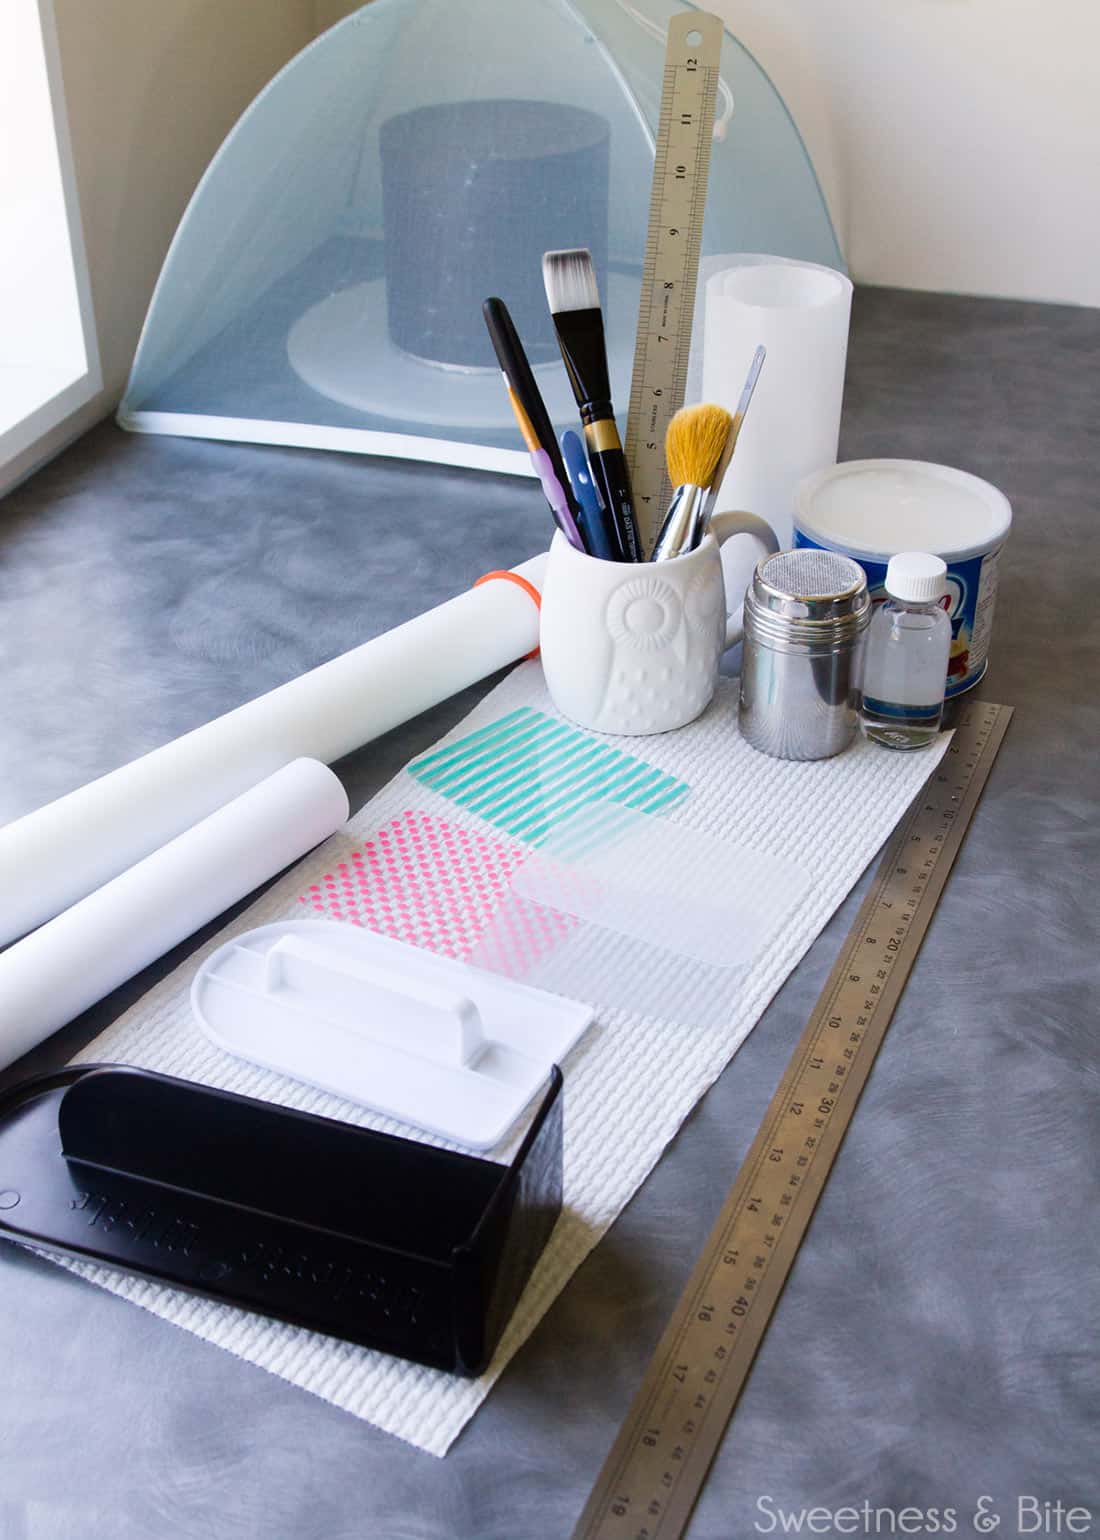
One tool that probably needs an extra mention before we start is the one you’ll use to roll your fondant around. I have a plastic rolling pin that is perfect for this as it has flat rather than rounded ends (you can see it in the first image below). You can use a rolling pin with rounded ends (obviously you cannot use one that has handles) but you will need to be very careful when you roll your fondant around it that you line up the edge as you roll. You could also use a piece of PVC pipe (the kind used for drinking water plumbing) with the end cut straight.
So, whether you’re making a 12” tall triple barrel cake, or a 4” tall 4” cake, soon you’ll know…
How to Wrap a Cake With Fondant
What You’ll Need
- Ganached cake – make sure you ganache your cake the day before, and leave it overnight to fully set.
- Fondant (if colouring your fondant, do so the day before and let the fondant rest overnight) I used Satin Ice here but have also done this with Bakels Pettinice. Any good quality fondant should work.
- Vodka or cake decorator’s alcohol
- Vegetable Shortening / Crisco – this is what I like to use to stick my fondant to ganache, see this post for more info.
- Cornstarch or icing sugar/powdered sugar – for dusting. I prefer to use cornstarch.
- Waxed paper – Edit: Waxed paper seems to be a bit trickier to find now than it was when I started using this technique. If you can’t find waxed paper you can use regular non-stick baking paper, just keep in mind that you can’t tape it to the board (because it’s non-stick) so you will need to be more careful when you flip the cake over, as the paper can slip. Using a slightly bigger board to flip the cake onto will help.
- Long metal ruler, pencil, craft knife or scalpel and cutting mat
- Rolling pin
- Plastic fondant smoother – I use a ‘smedger’, but any rigid plastic fondant smoother will work.
- Flexible fondant smoothers – Learn how to make your own flexible fondant smoothers here.
- Sharp knife and/or scalpel
- Pizza cutter/wheel
- Pin or acupuncture needle– For removing air bubbles
- Two setup boards – I use acrylic boards, but if you don’t have those you can use masonite cake boards. One should be square, if possible. Both boards need to be at least 3-4” wider than your cake.
- Paintbrushes – I like to have one flat brush for painting vodka or water onto the top of the cake (you could use a pastry brush for this), one fluffy brush for dusting cornstarch, one large flat one for un-sticking fondant (that’ll make sense once you read that step in the tutorial) plus one little one for painting vodka into seams that haven’t stuck down.
- Grippy/non-slip mat –cut into a circle slightly smaller than the cake width.
You’ll also need to excuse any photos below that are a little blurry, I basically threw the camera at my mother and asked her to quickly take shots as I was working, and we had some technical difficulties with the camera focusing. (I had the problems before I threw the camera at her, so it wasn’t that… 😉 )
The Prep
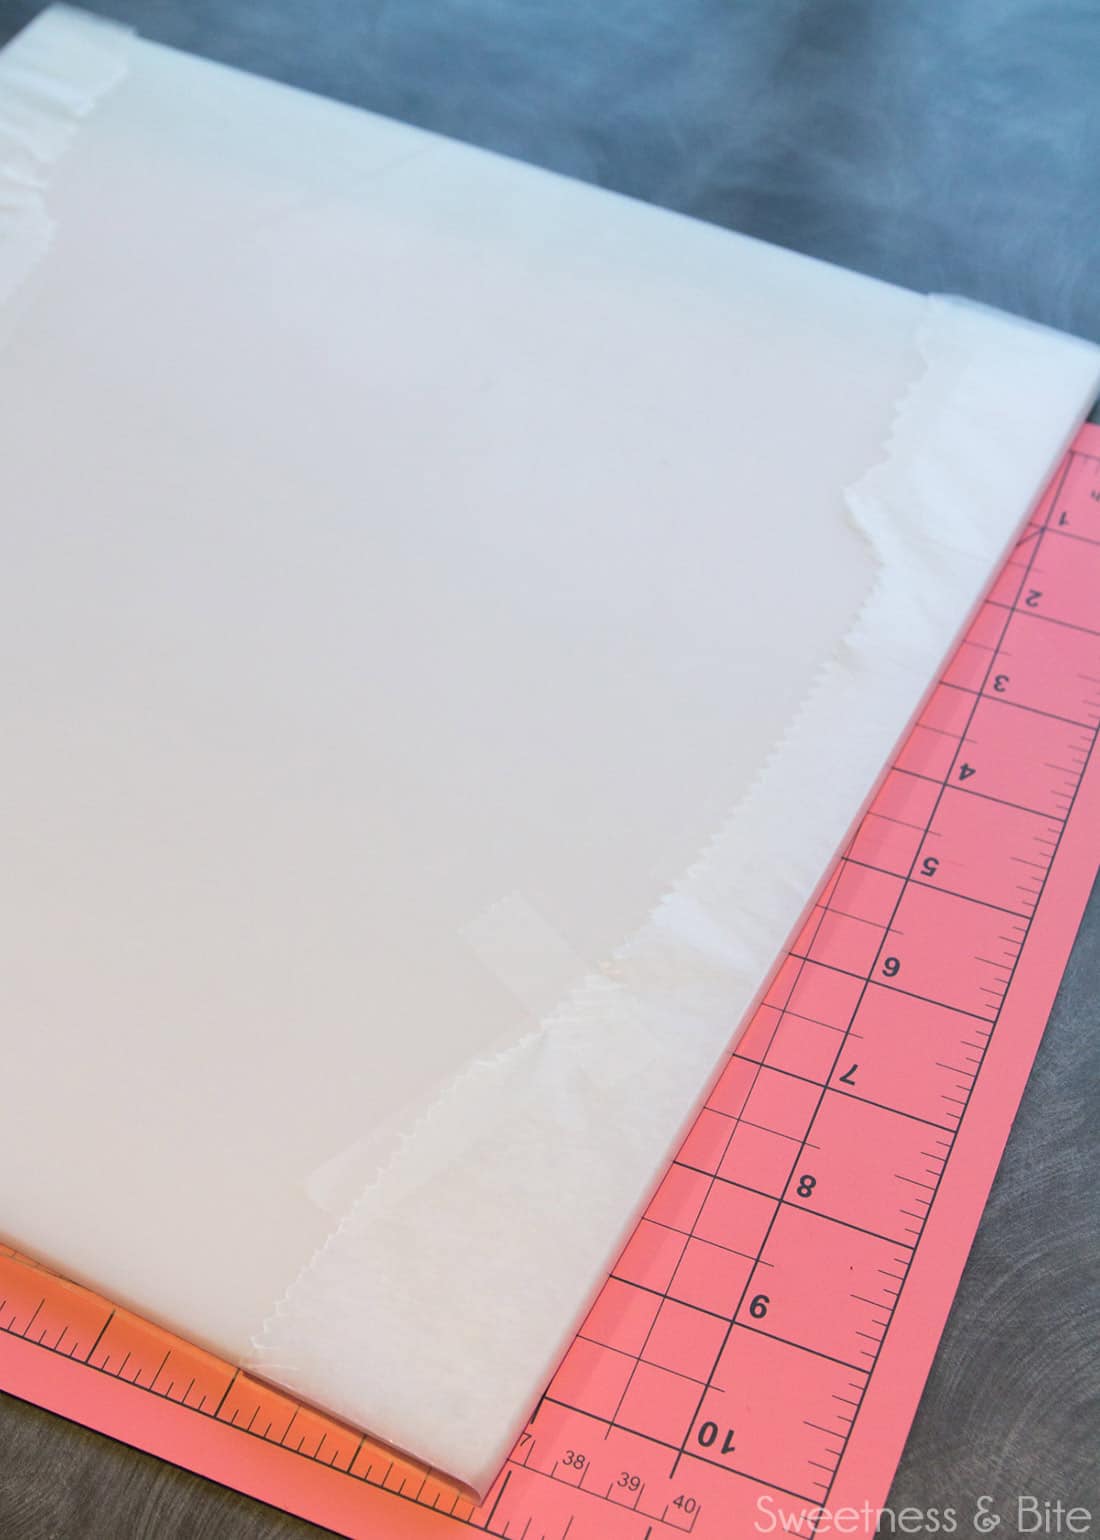
Start by covering a square cake board with waxed paper. Place the paper waxed side down on the bench, put the board on top and tape along one edge. Pull tightly and tape on the opposite edge. Then tape along the other two edges, again pulling tightly. The fondant on the top of your cake will be on this paper, so the smoother it is, the smoother your fondant will be.
If you can’t find waxed paper, then you’ll just place down a piece of non-stick baking paper roughly the same size as the board. It won’t stick if you try to tape it, so just pop it on top of the board.
Now you’ll need to cut out a rectangular template for the fondant you’ll wrap around the cake.
I like to use a template because it is really important that one edge of the fondant is cut perfectly straight (this will be the edge that is on the top of the cake) and this is the easiest way to make sure it’s straight. The template will be just slightly bigger than the cake, so that we can still trim along the bottom edge.
Also, I find it easier to have a rectangular template and be able to just place it onto my rolled out fondant and cut around it, than faff about with a tape measure/ruler making sure the fondant is long enough to go around the cake, and having the fondant sitting there drying out while you measure. Anything we can do to reduce the time the fondant is exposed to the air is worth doing.
To make the template, measure the circumference and height of your cake. You will need to add 2-3” to the circumference, and 1” to the height.
As an example, my cake was a 6” high, 6” round cake. The circumference was (almost) 19”, so my template was 22” x 7”.
Mark the measurements onto waxed paper or baking paper, and then use the ruler and craft knife to cut it out. Carefully roll this up and set it aside.
If you prefer, you can skip the template and just measure your rolled-out fondant with a ruler and cut your rectangle that way, but to start with I recommend the template as it will help you work faster before the fondant dries out.
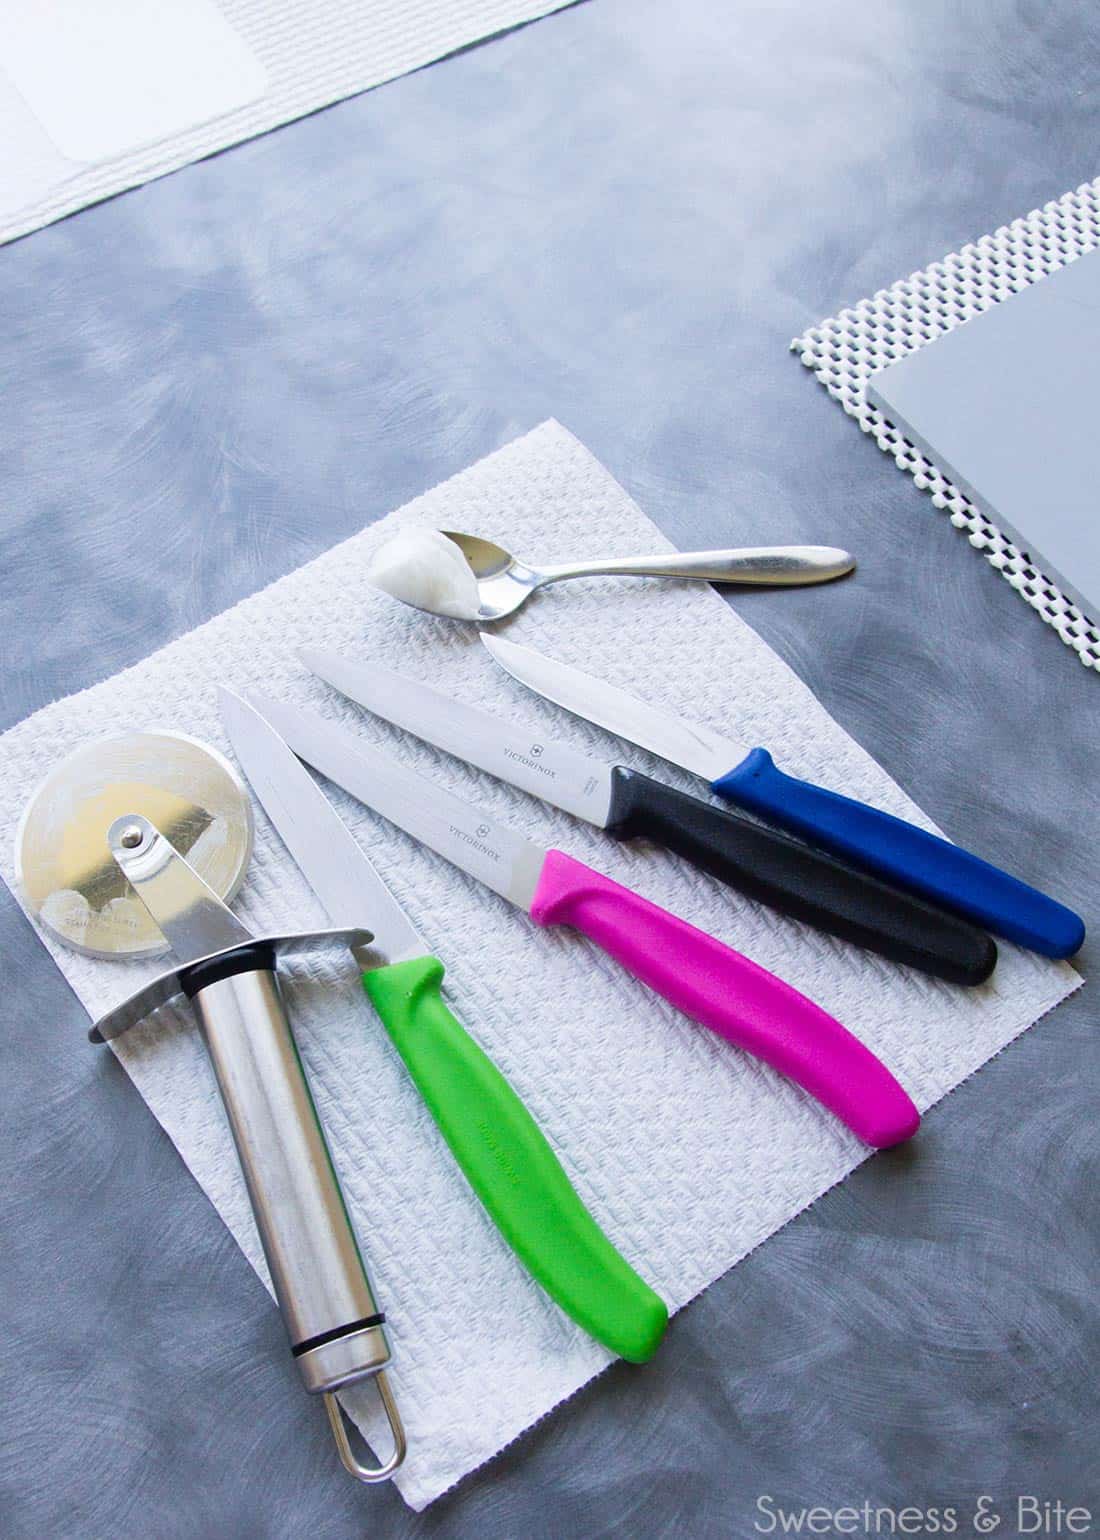
While I’m in prep mode, I like to get all of my tools and stuff set out. There’s nothing worse than groping around for a knife and realising they’re all half a kitchen away.
Oh, and on the subject of knives, I like to rub mine with a little Crisco shortening (same goes for the pizza wheel), this stops the fondant from sticking and helps keep each cut clean and neat.
Wrapping the Cake
Start by giving your fondant a good knead. The amount of time you’ll need to knead (sorry, couldn’t help myself) will vary by brand, but basically, you want the fondant warm and pliable but not too soft, and not sticky. I find with Satin Ice, I don’t need anything to stop it sticking to the bench or my hands as I knead, but if you do then I suggest using a little shortening rather than cornstarch or icing sugar, you really don’t want your fondant drying out.
(If you don’t want to cover the top first, because you want the top seam on the side of the cake as I mentioned above, then skip this next bit, and move straight onto flipping the cake upside down and covering the sides).
Paint some vodka or water onto the top of the cake.
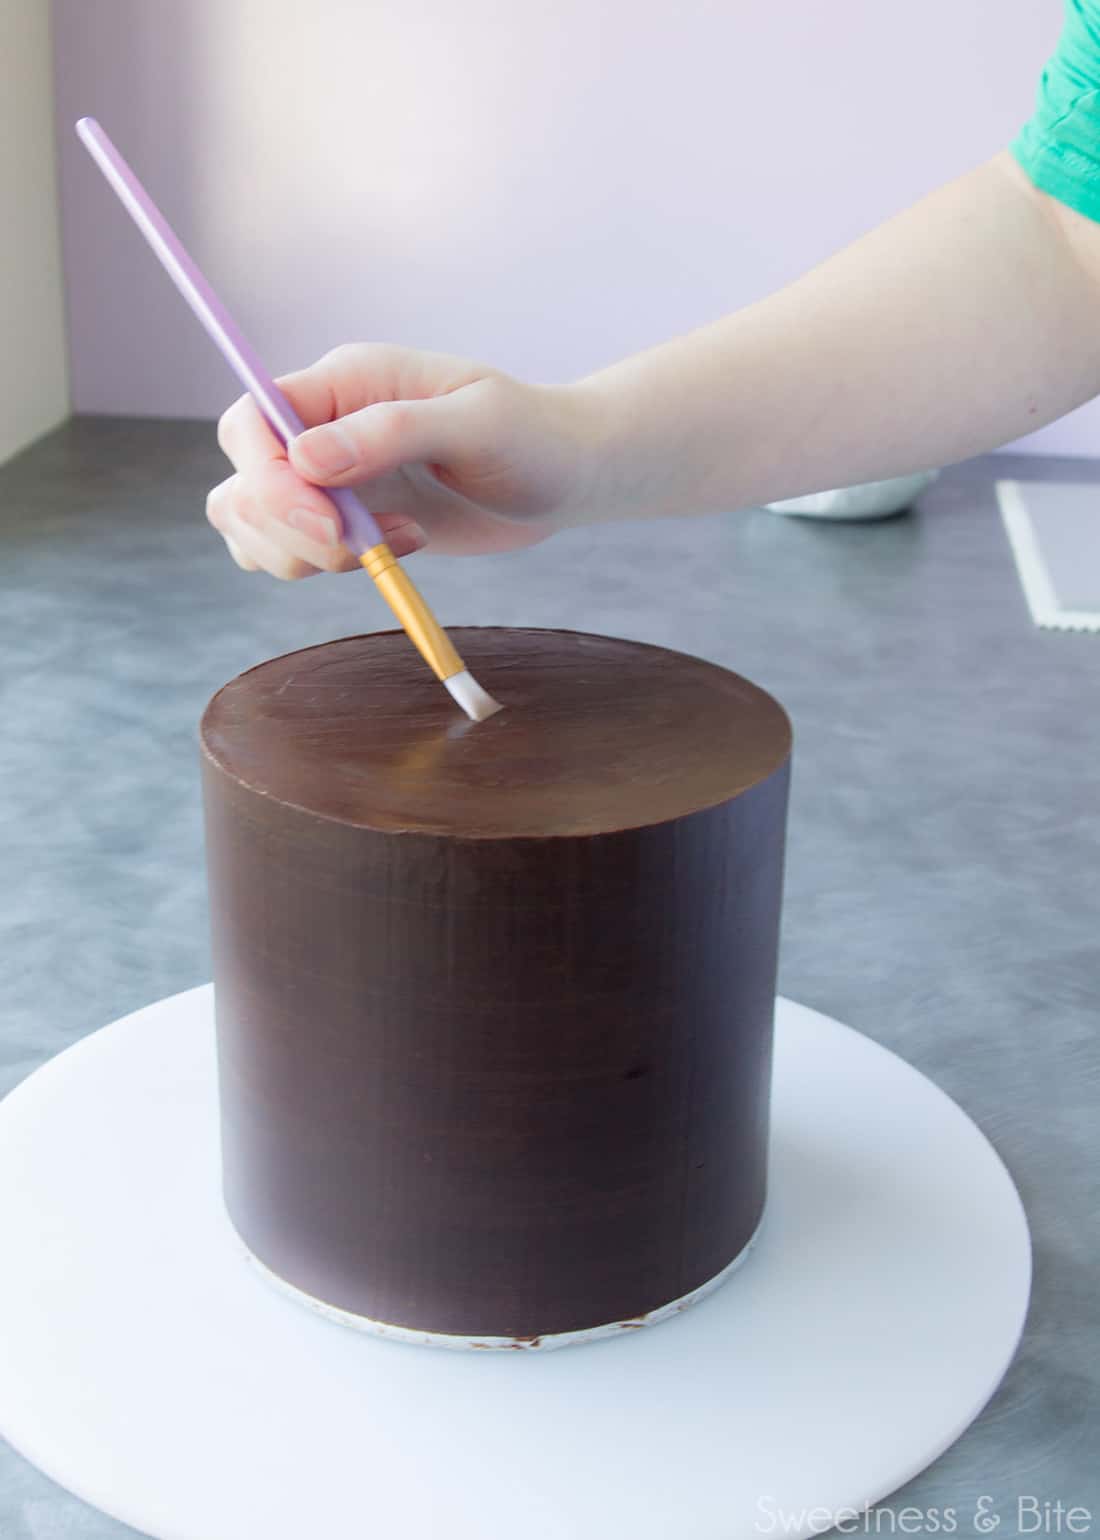
Roll out a small piece of the fondant, aiming for a thickness of 3-4mm. Place it onto the top of the cake, smoothing out any air bubbles.
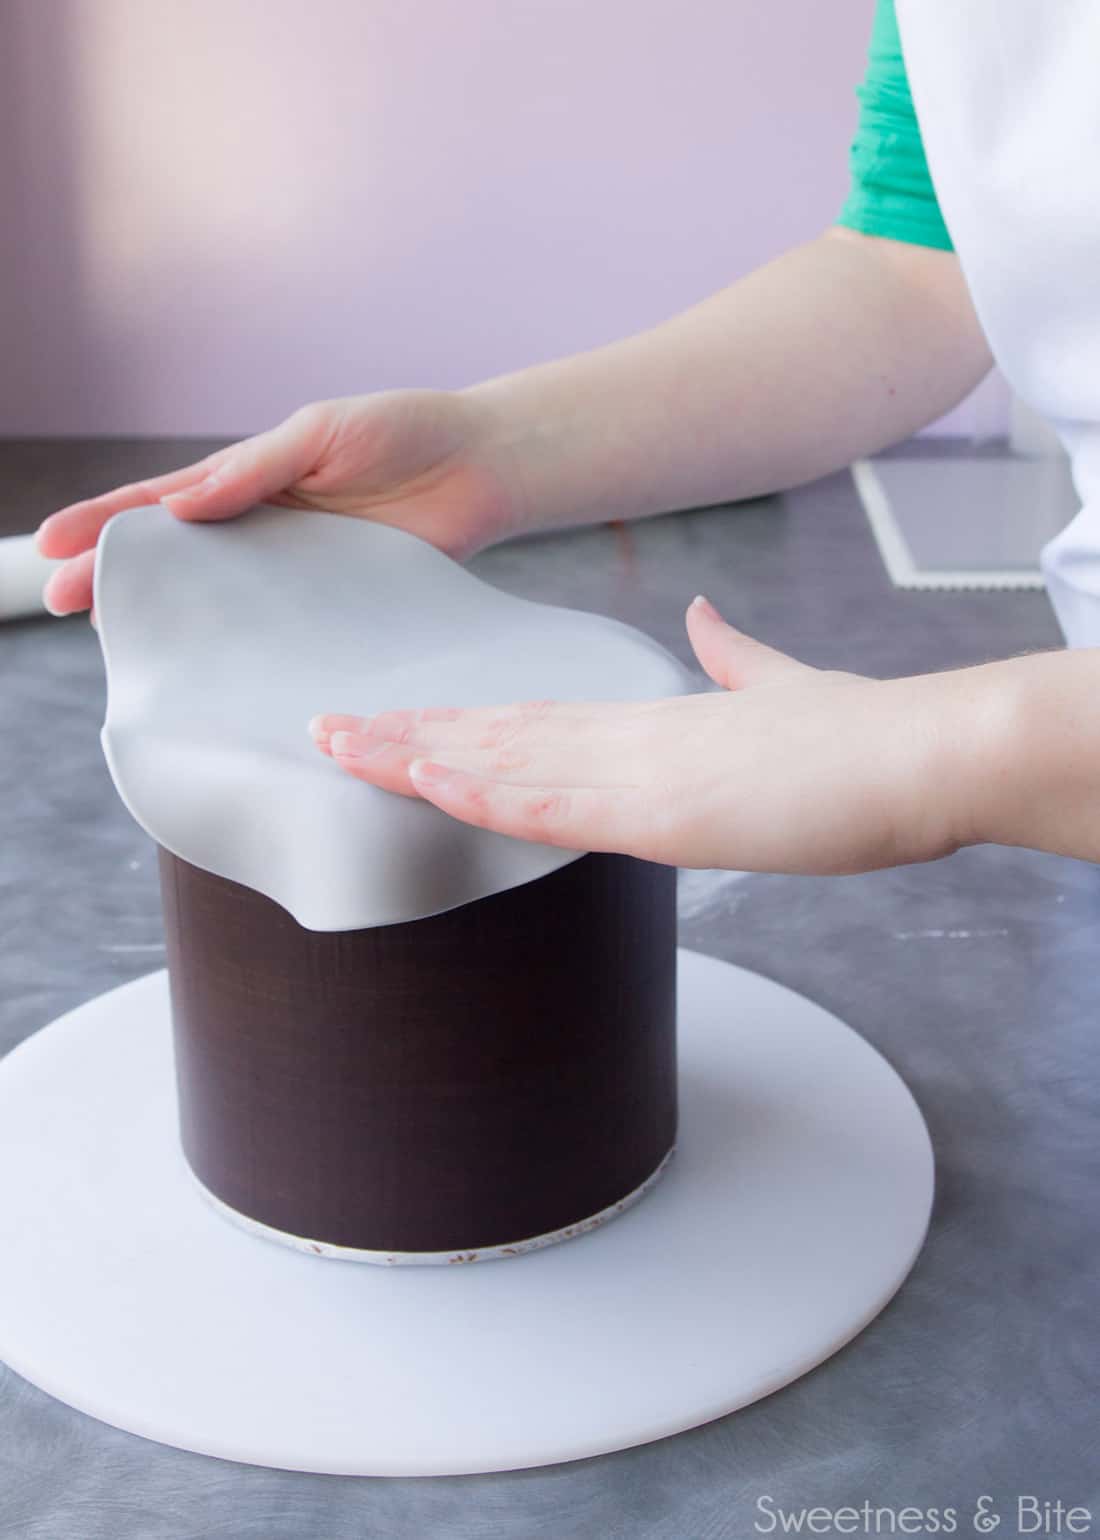
Give it a rub with a fondant smoother…
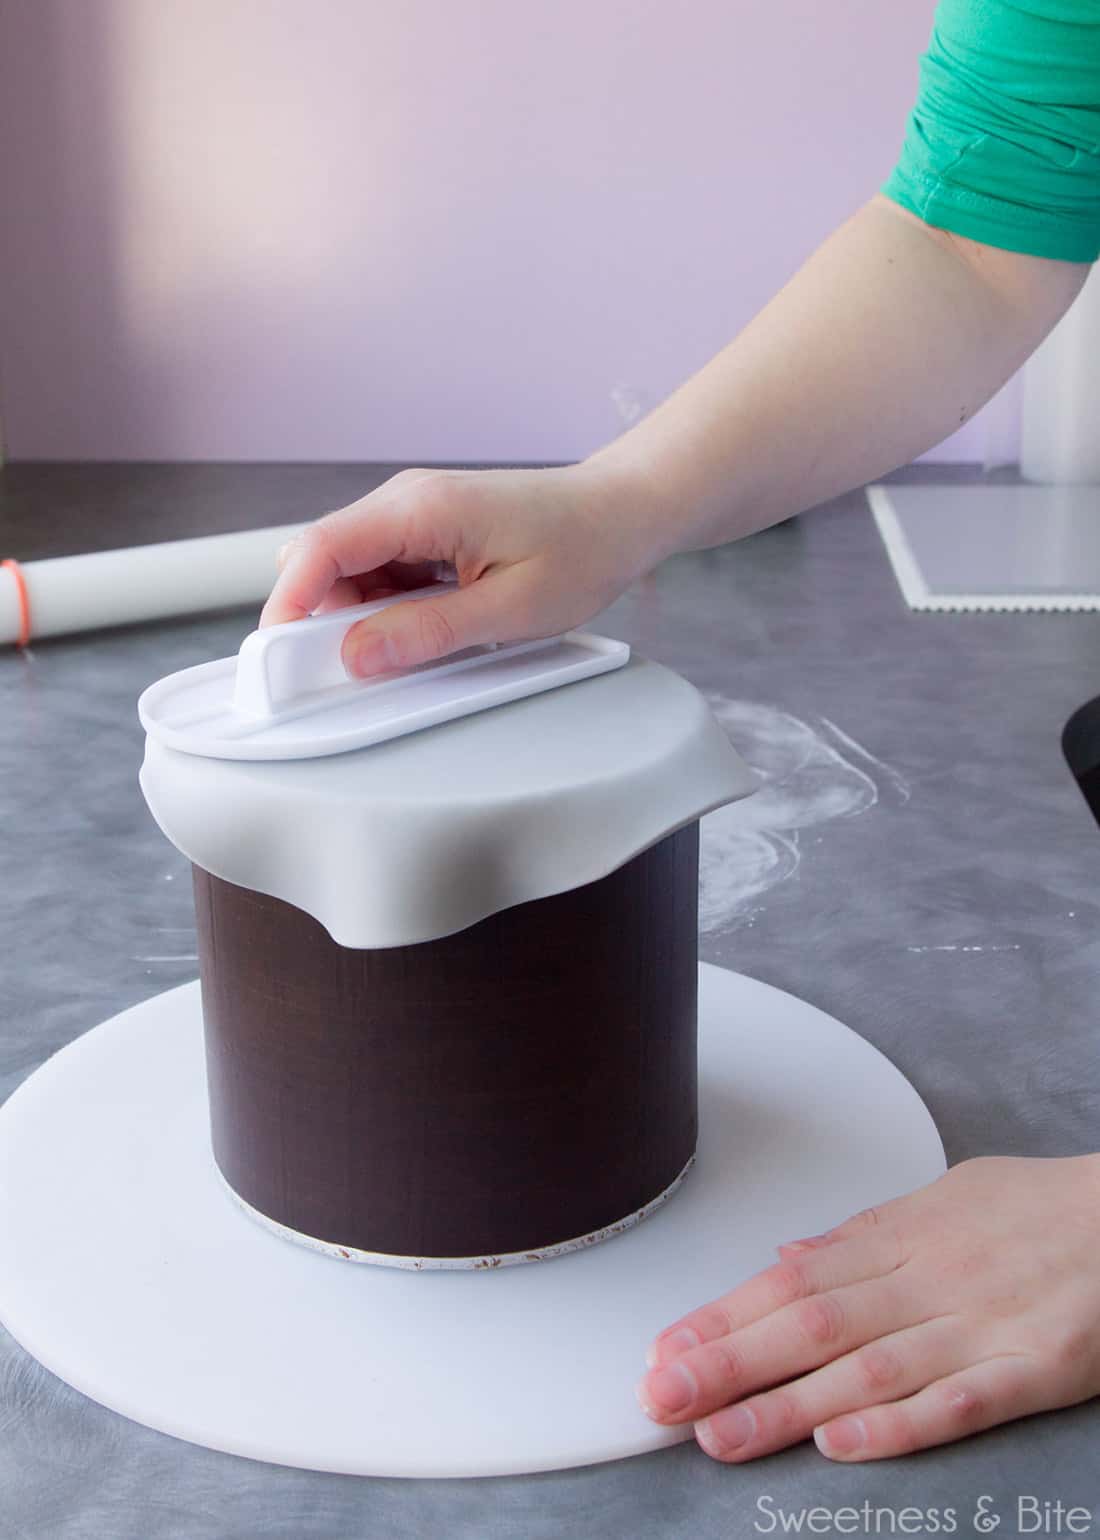
…then place your waxed paper-covered board on top, and flip the cake upside down.
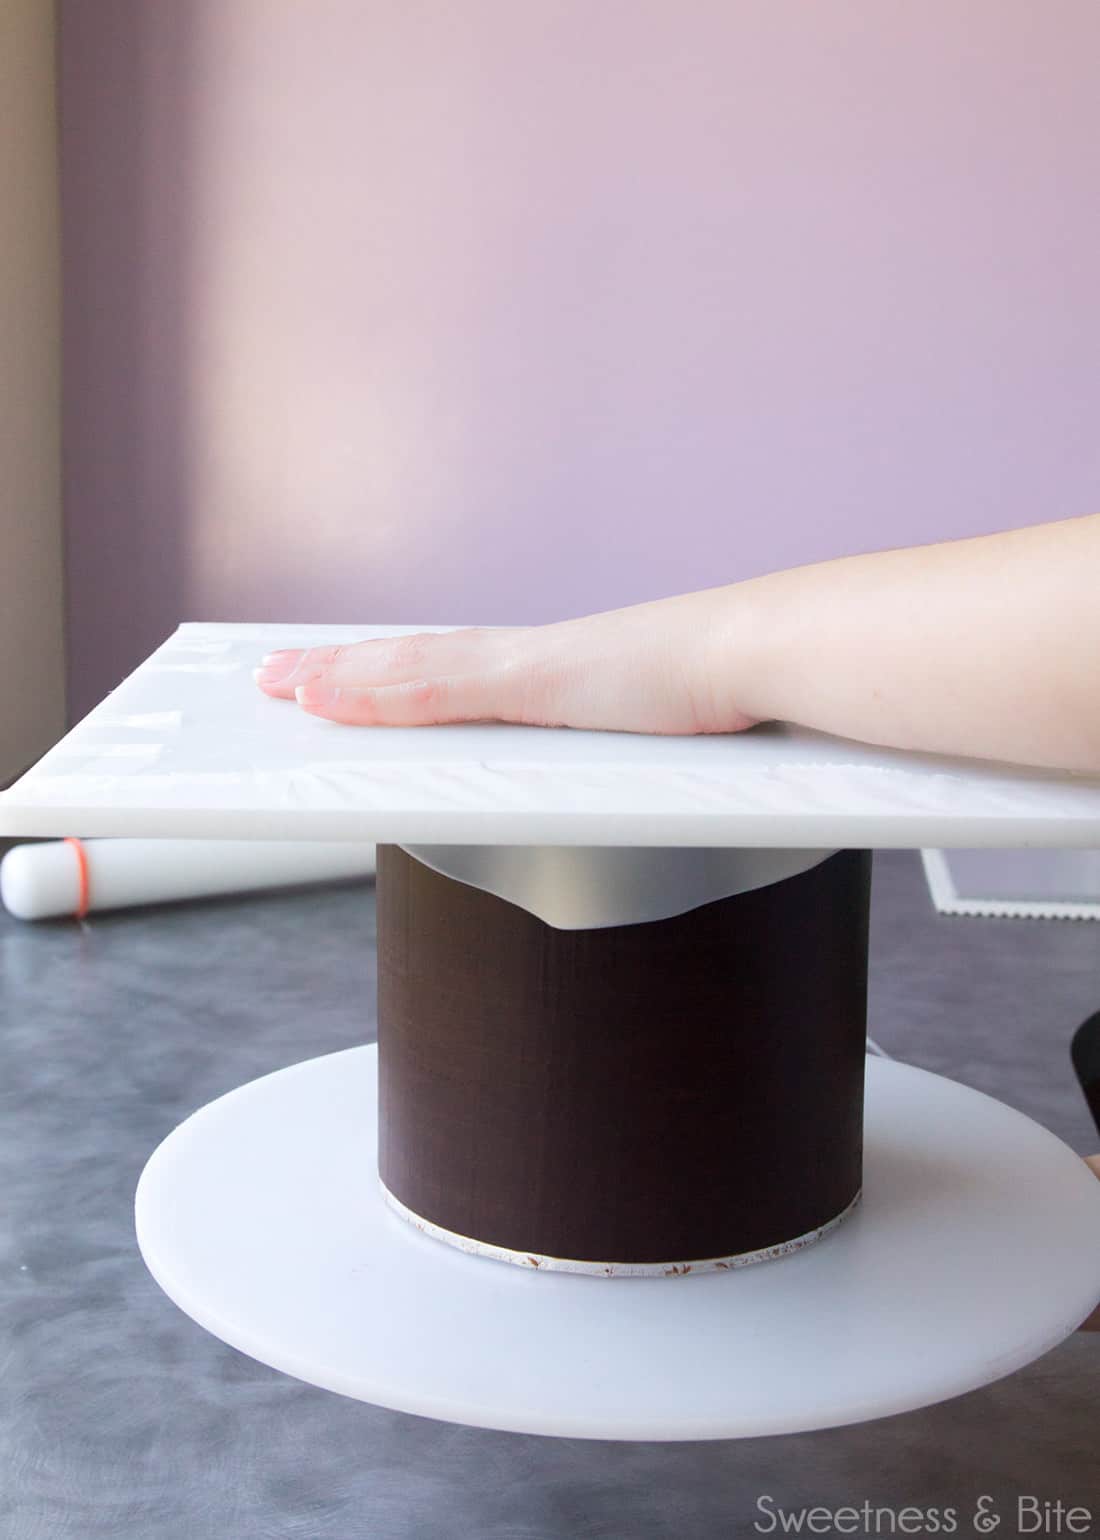
The fondant will flop down onto the board. You can then use a knife to carefully trim around the cake and remove the excess fondant.
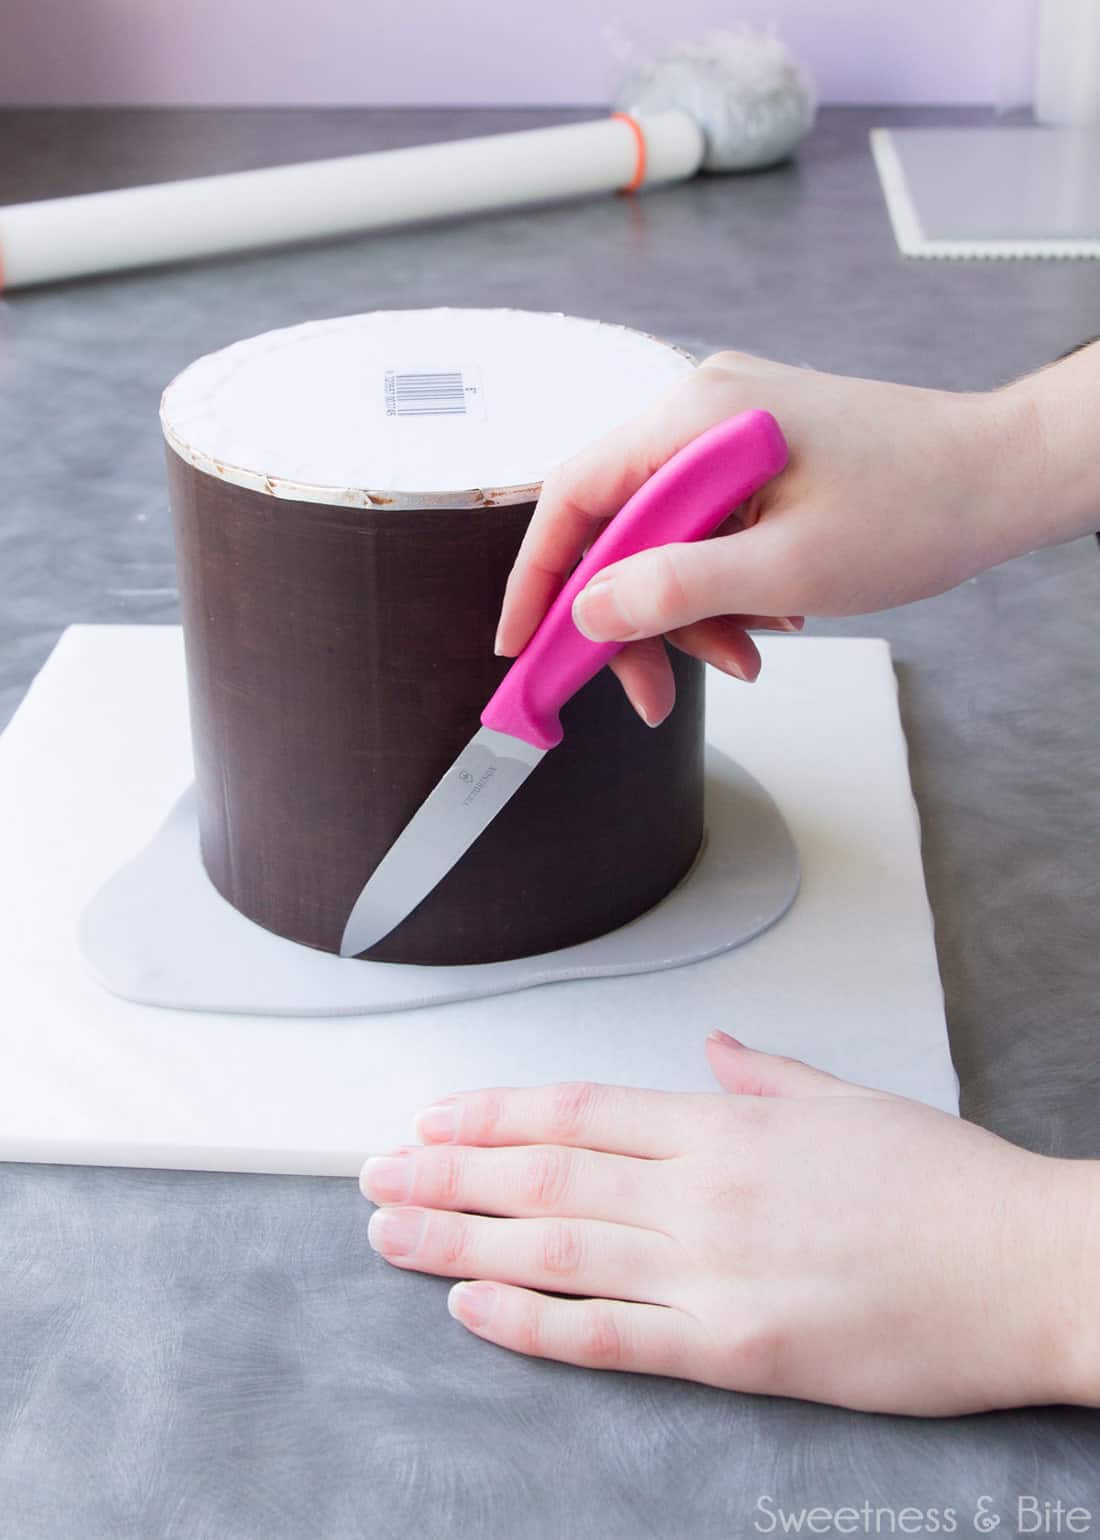
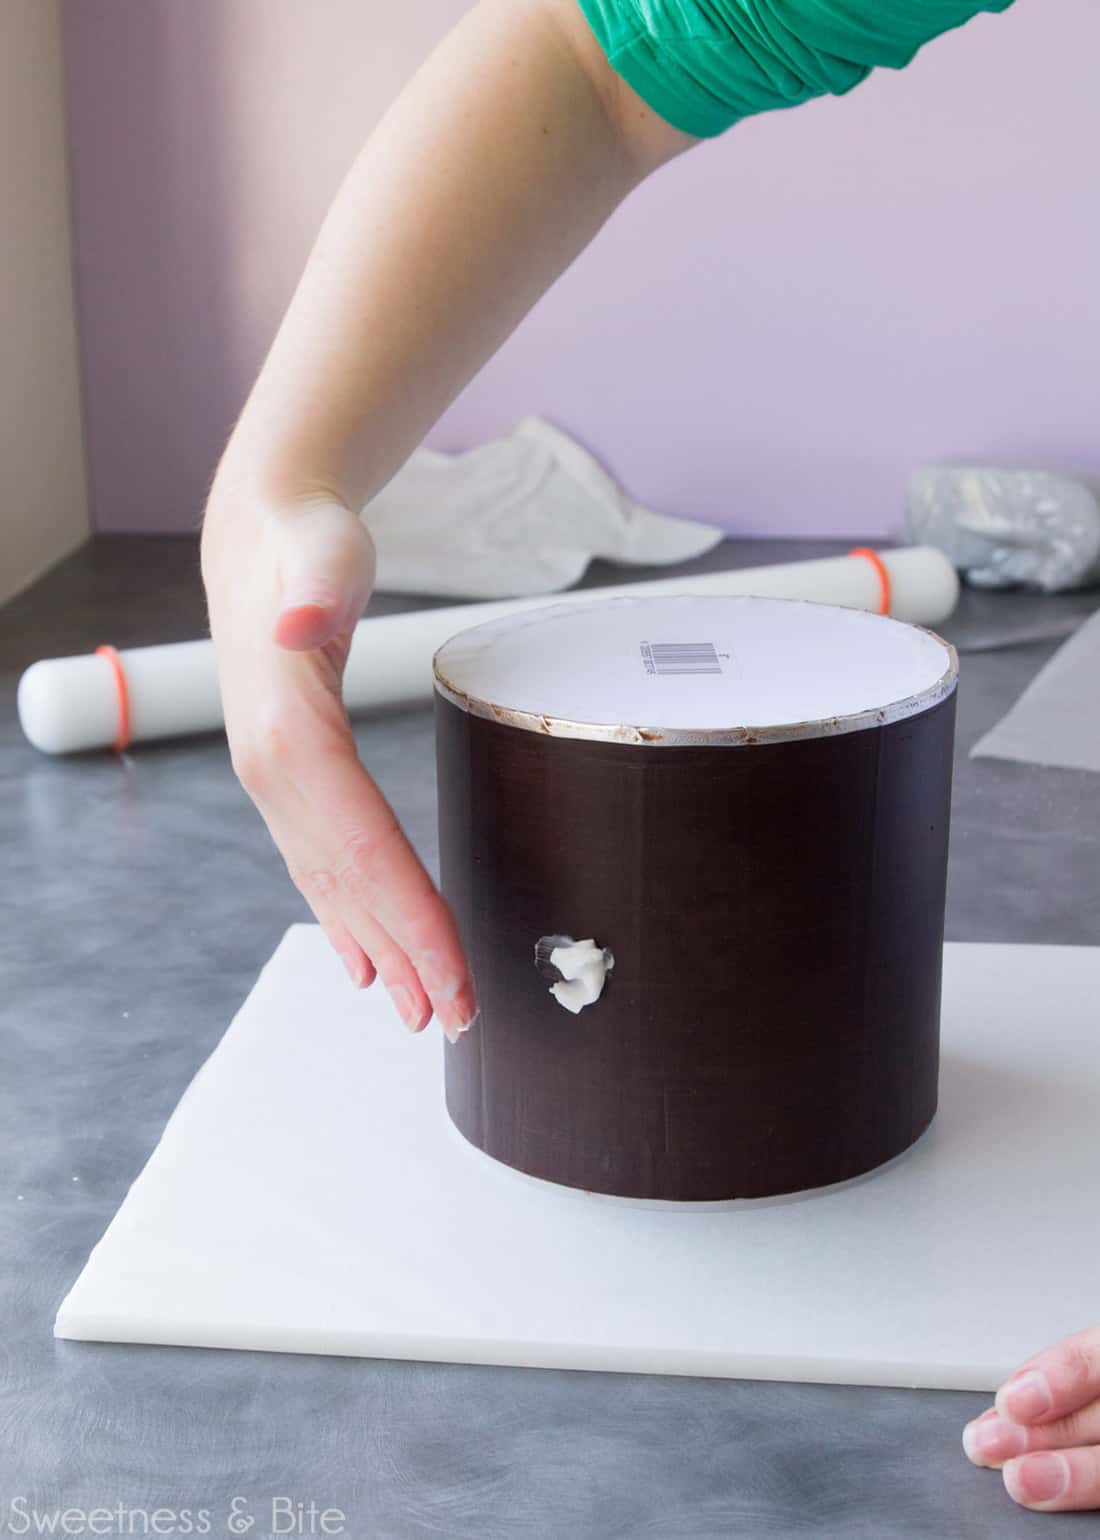
Rub the sides of the cake with a thin layer of shortening, trying to avoid the edge of the fondant.
I didn’t get a shot of this, but you basically want just enough shortening to cover the ganache – it will look shiny but it shouldn’t be too white. Set the cake aside (and give your hands a good wash!)
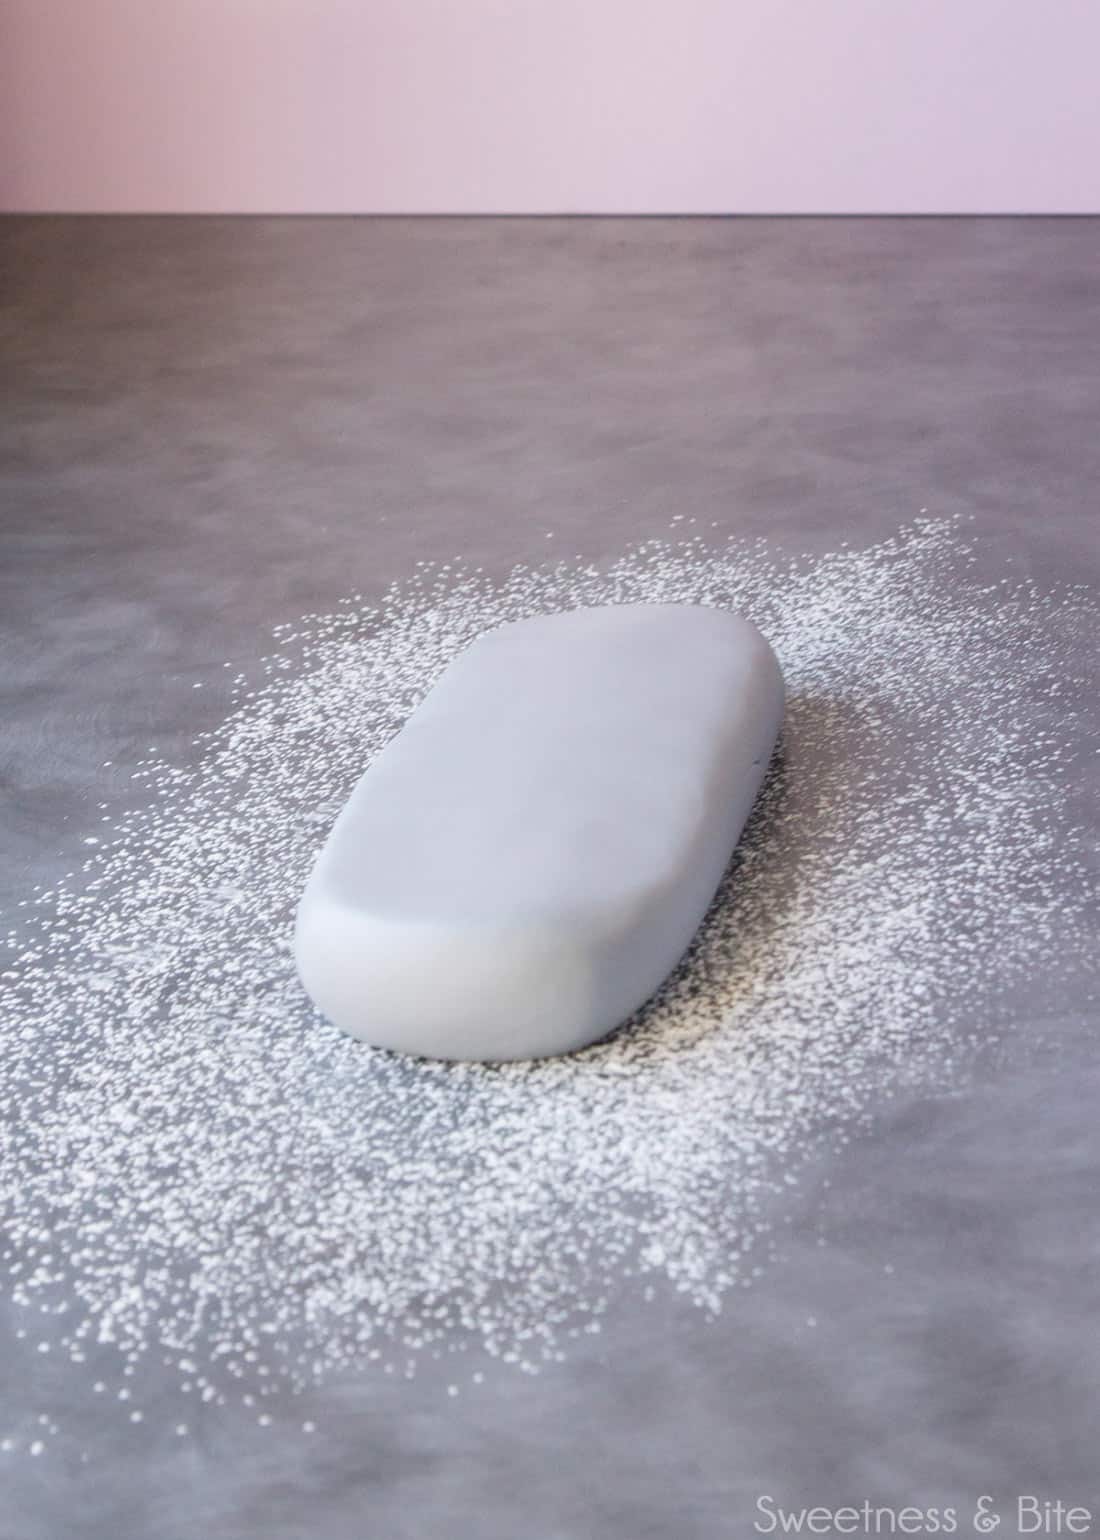
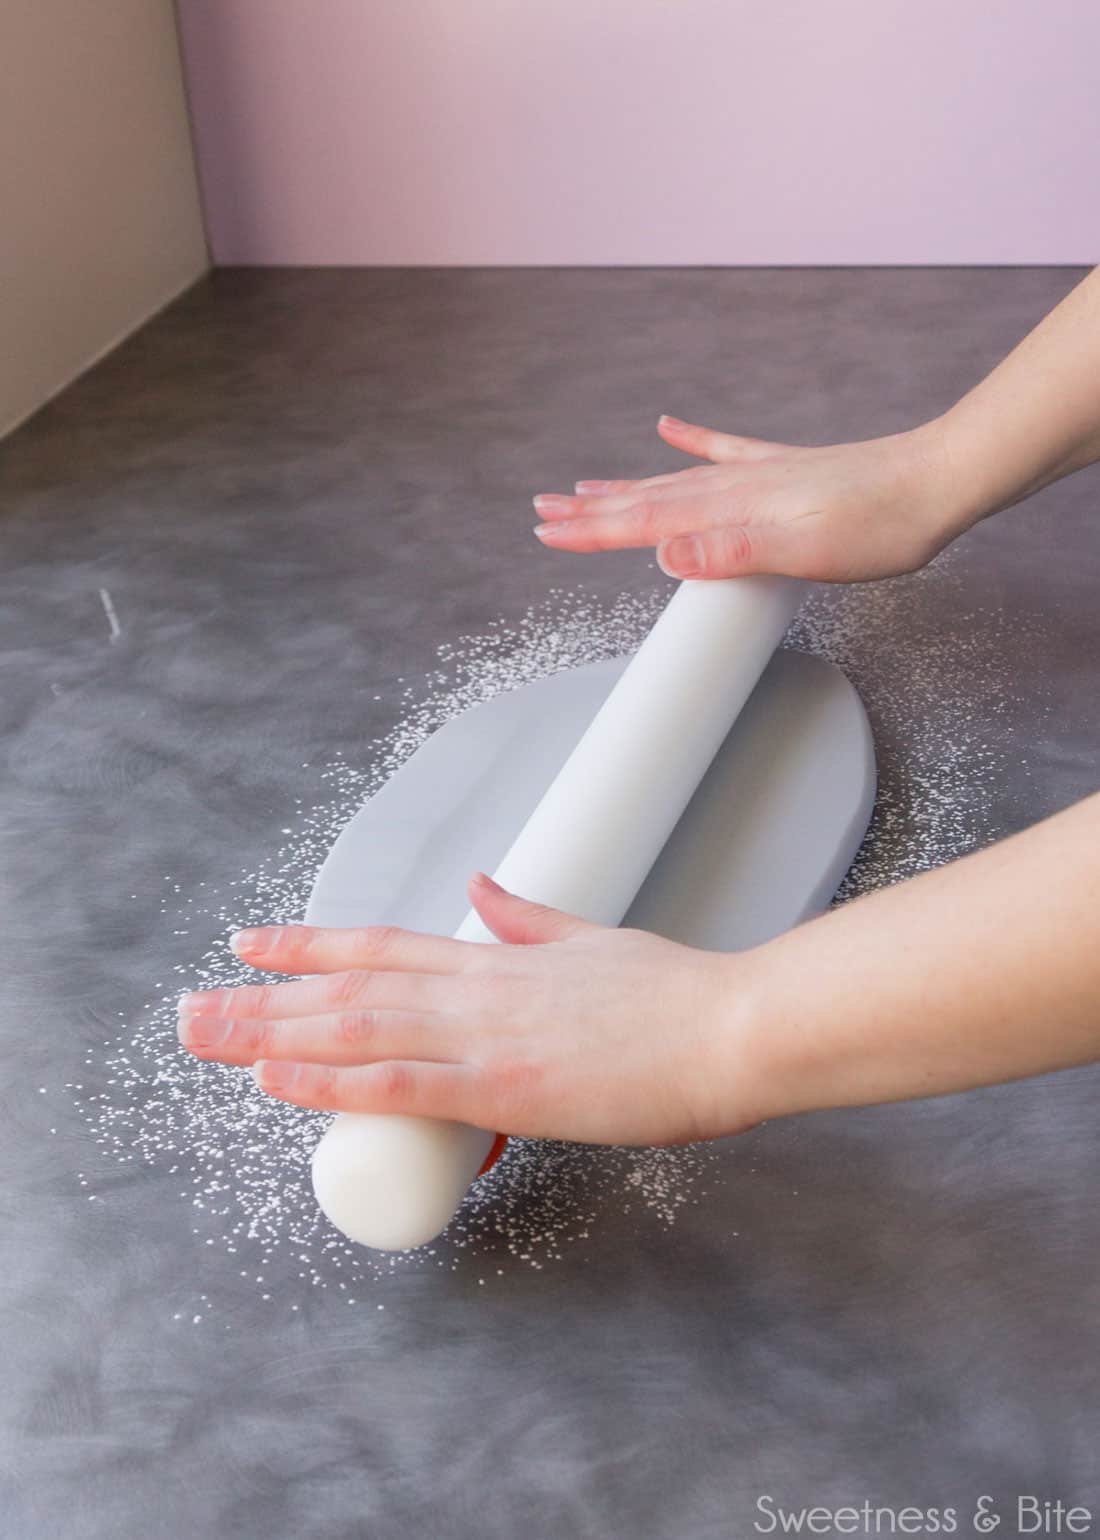
Give the rest of your fondant another brief knead, then dust the bench with cornstarch, shape the fondant into a sausage and flatten it out onto the cornstarch (starting with a sausage shape makes it easier to roll the fondant out in a rectangular shape).
Start rolling it out, trying to keep the rectangular shape. Keep an eye on the thickness of the fondant as you roll – remember, getting the fondant even and thin is one of the keys to getting a neat seam on your cake.
Aim again for 3-4mm in thickness, thinner if your fondant is capable of it. Make sure you move the fondant around as you roll, and add a bit more cornstarch underneath if the fondant is sticking. Try to avoid dusting cornstarch on the top surface of the fondant unless it is really sticky.
Lay your template onto the fondant, and press it down gently with a fondant smoother.
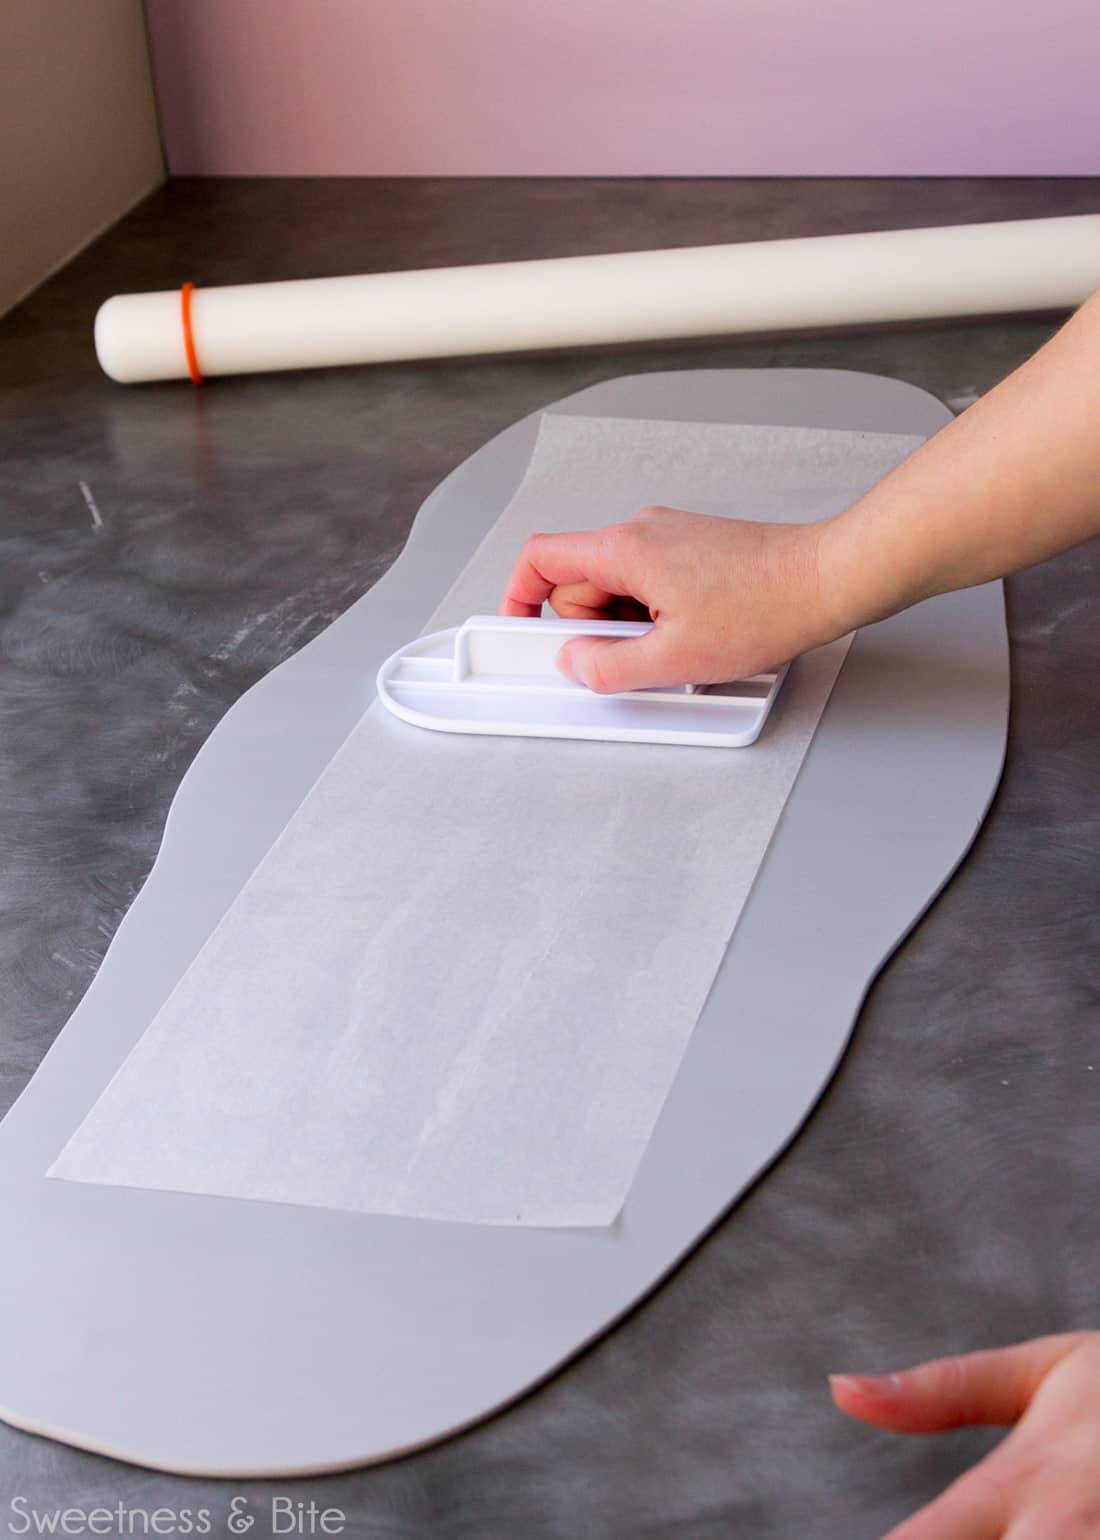
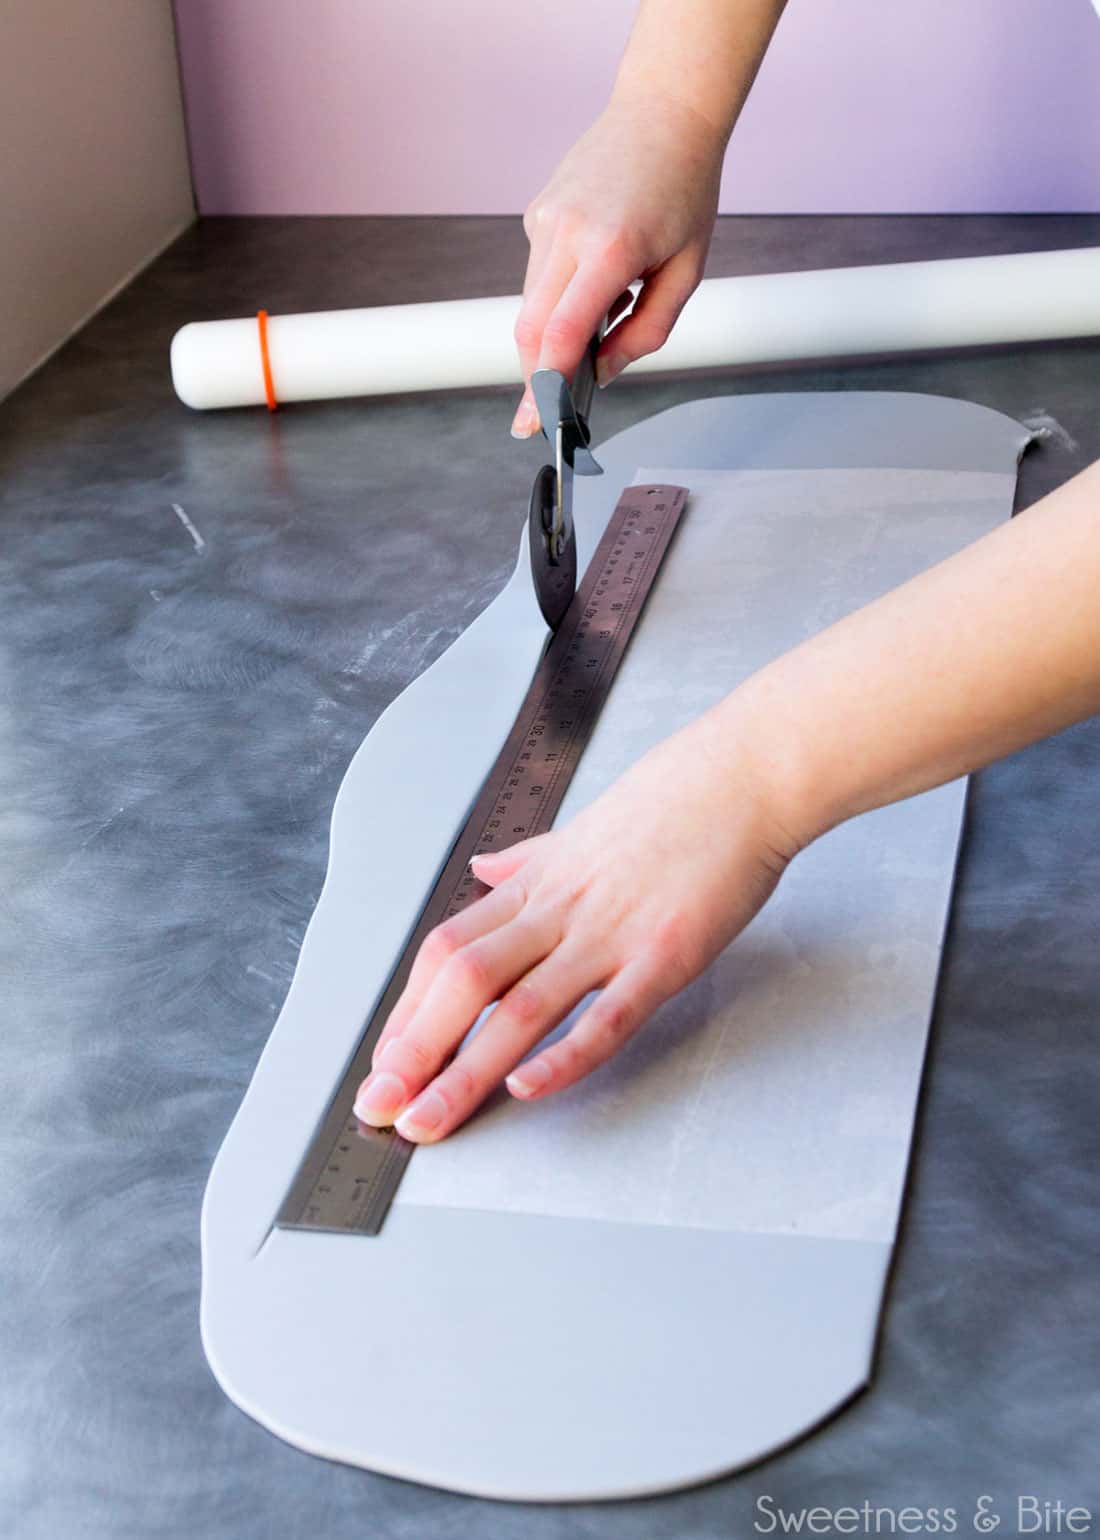
Use the ruler and pizza wheel or sharp knife to cut the shape out. Make your first cut on the long side closest to you, and be super careful with this cut, making sure it is neat as it will be the top edge of your cake.
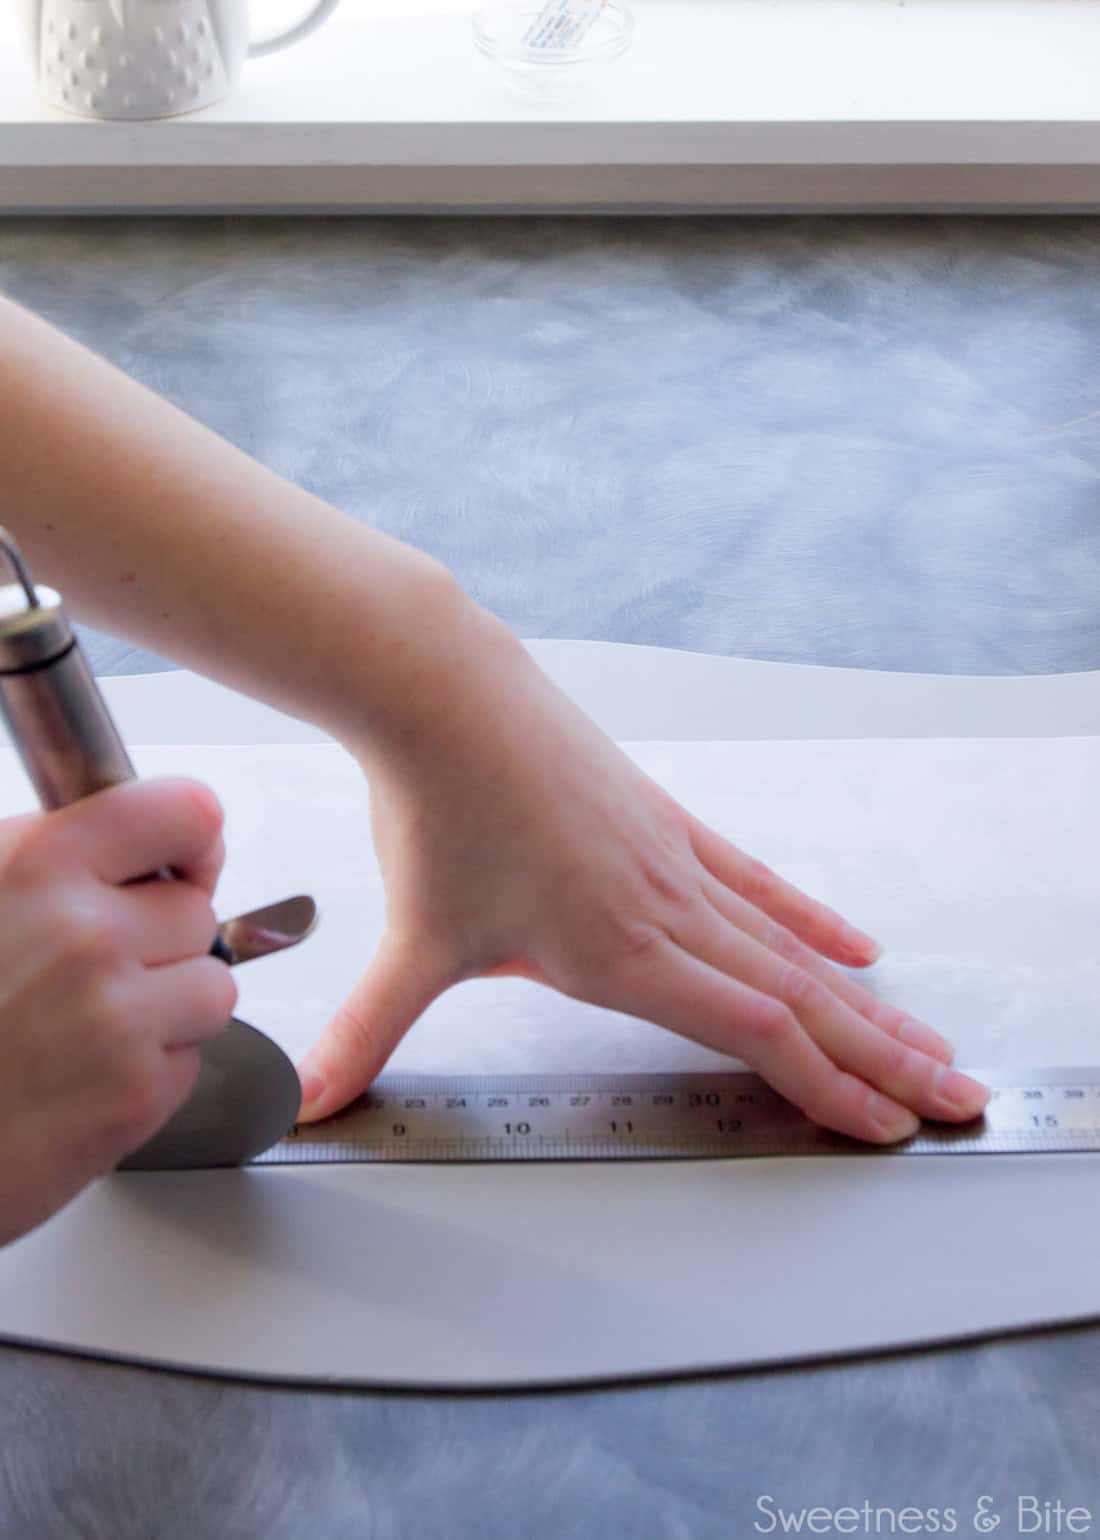
You can be a little lazier/faster with the other three sides, but that first one will be the star of the sharp-edged-cake show, so be gentle with it.
The way you roll your fondant around the rolling pin will depend on which hand is dominant. I’m right-handed and like to hold the roll of fondant in my right hand and smooth it onto the cake with my left. This means that I start rolling the fondant from the right-hand edge. If you prefer to go the other way, then obviously you’ll need to do the opposite of what I do.
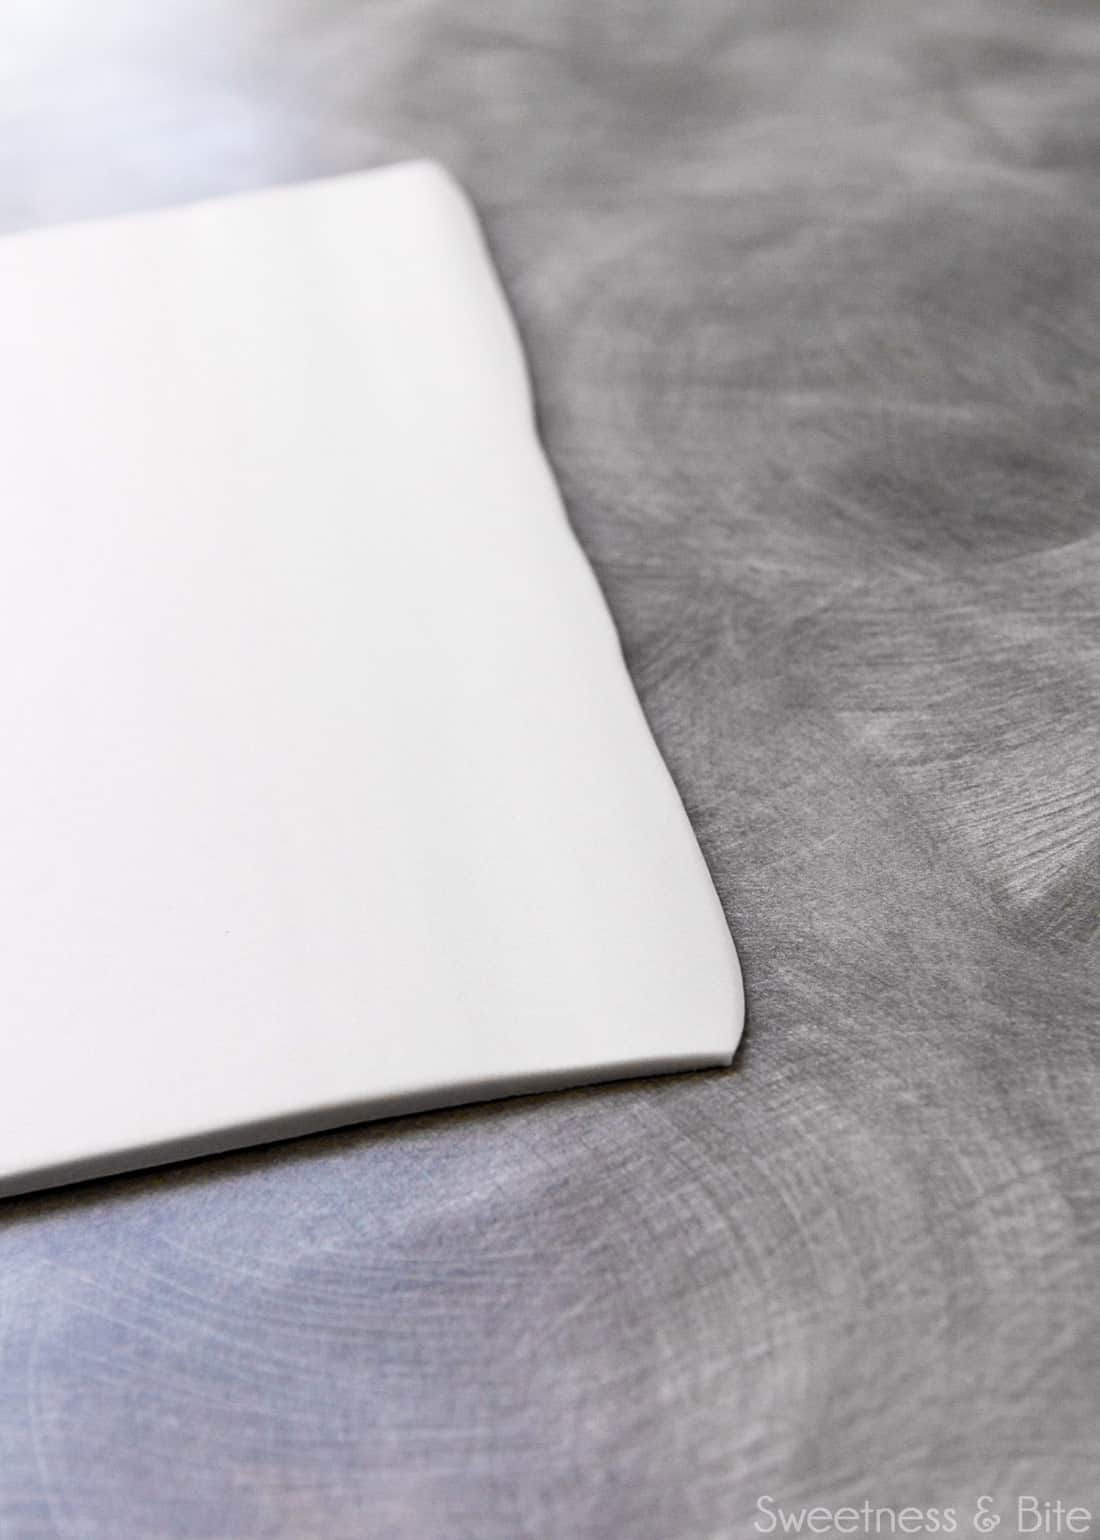
Gently roll the very edge of the fondant flat with the rolling pin, this will stop it from indenting too much into the rest of the fondant as you roll.
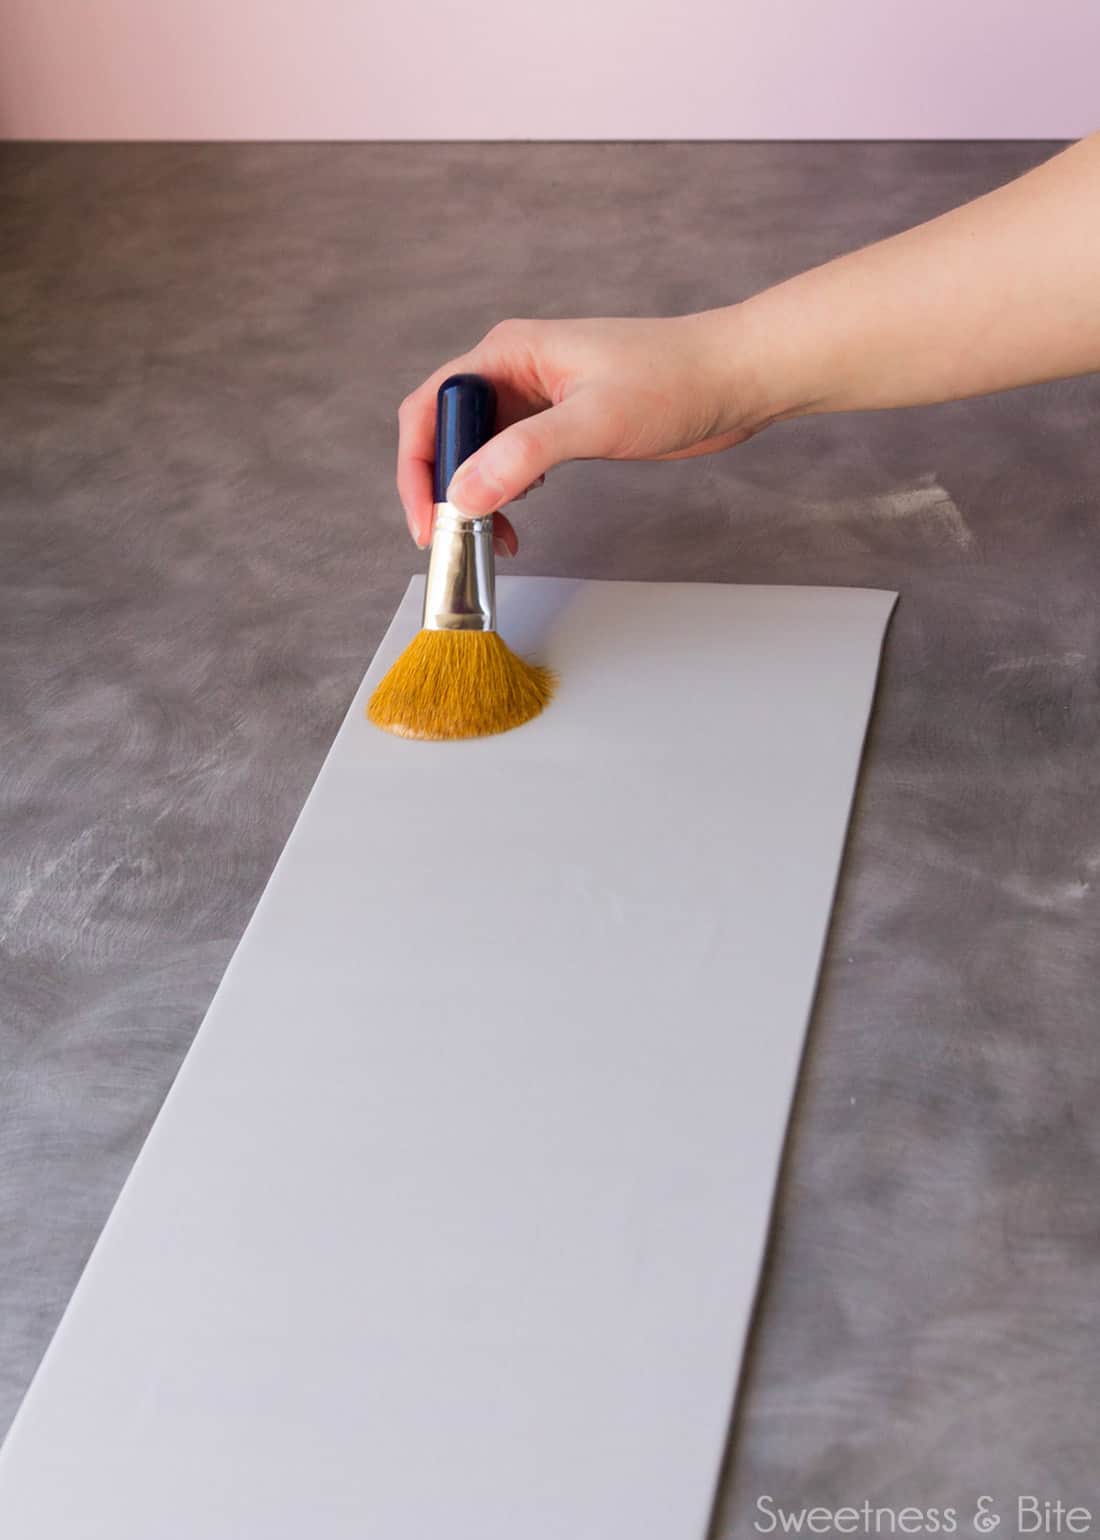
Very, very lightly dust the surface of the fondant with cornstarch. You really don’t want too much here, just enough to remove any tackiness from the fondant, so it doesn’t stick to itself when you roll it up. I usually just use any excess cornstarch that’s on the bench from rolling the fondant, and dust that over the surface.
I know I said up there that you don’t want too much cornstarch on the surface as it dries the fondant out, but this single light dusting here is very important. Keep this brush nearby for the next step.
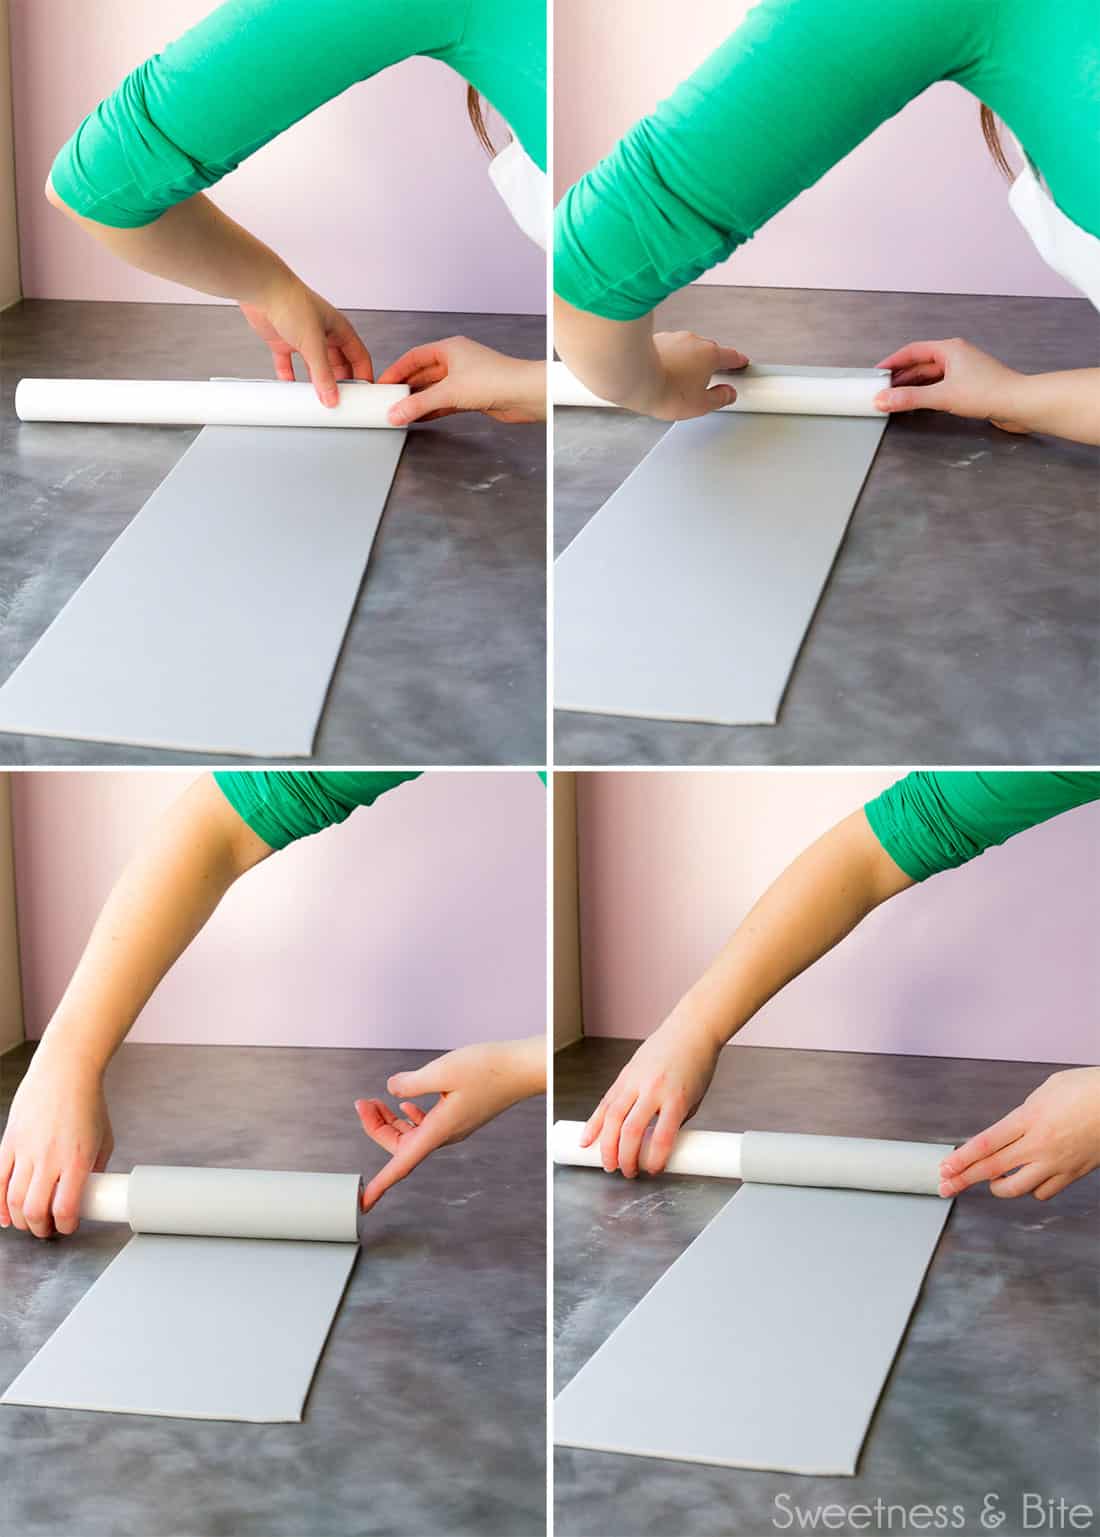
Carefully line up the end of the rolling pin with the edge of the fondant. Start rolling the fondant around the rolling pin, keeping a careful eye on the edge closest to you, to make sure it is flush with the end of the rolling pin.
If you’ve used too much cornflour as you rolled the fondant out, you may need to use the fluffy brush to dust the excess off the underside as you roll it up. Too much excess cornstarch under the fondant will stop it from sticking well to the cake, and in turn, cause air bubbles and other nasty you-really-don’t-want-thats.
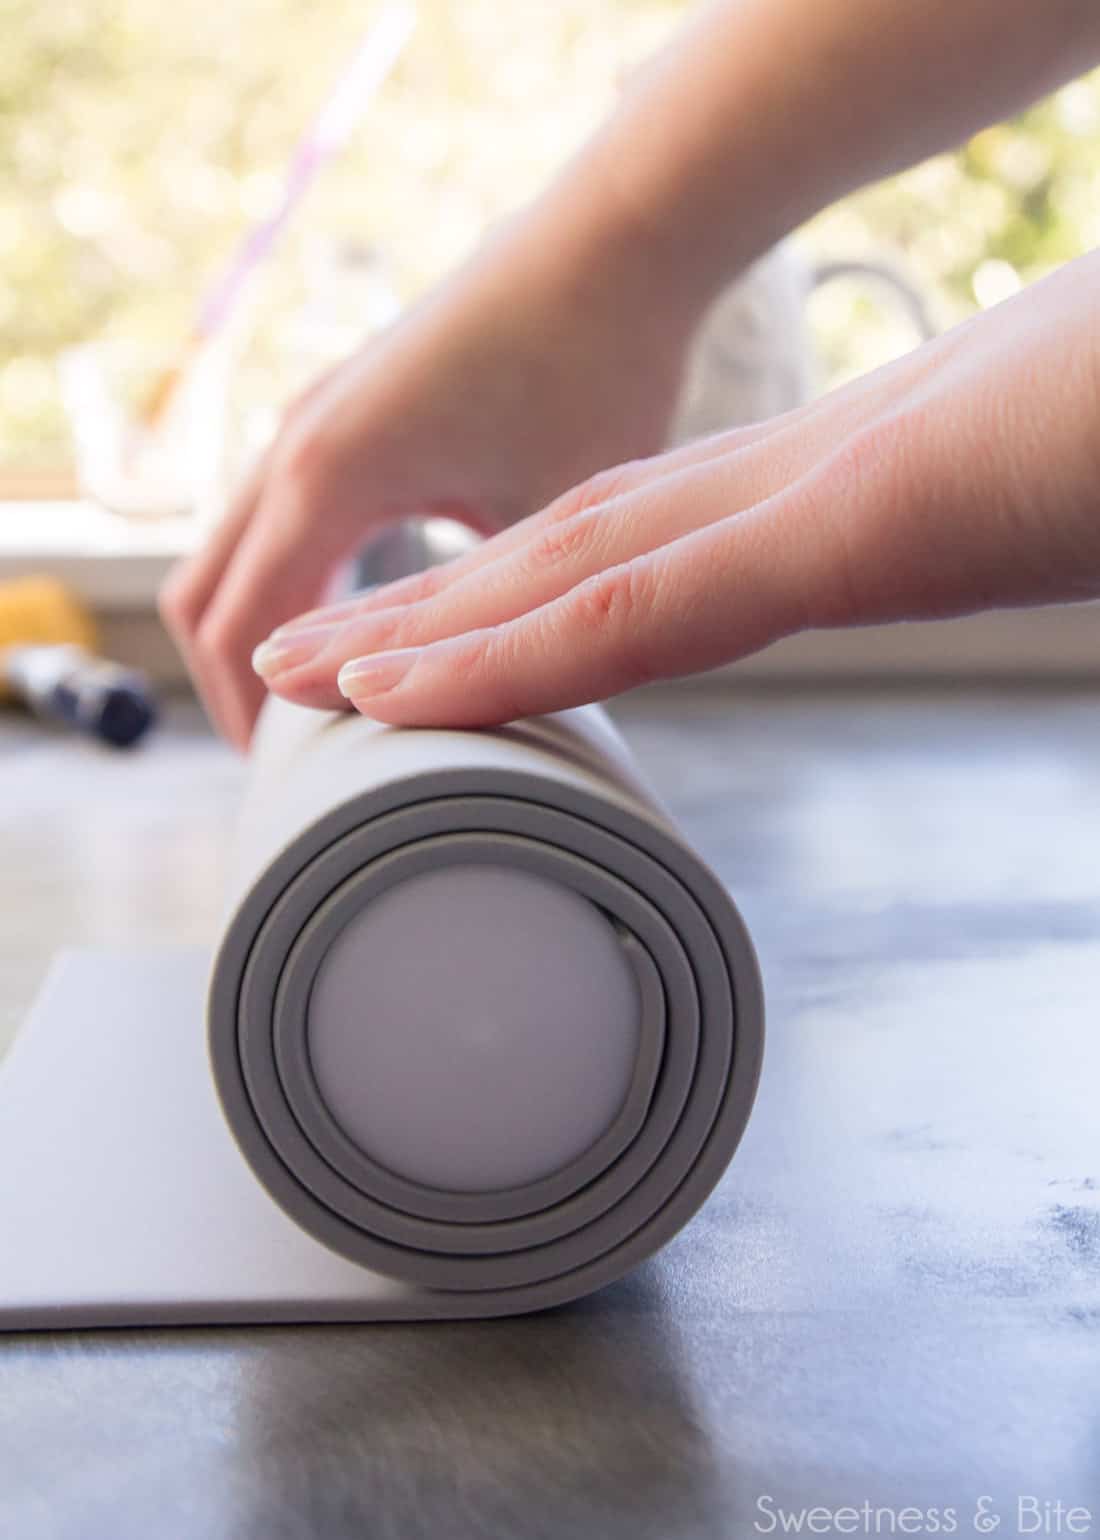
Have a good look at the picture below, that’s how you want the edge of the rolled fondant to look, even and flush through the whole roll.
Gently lift the rolling pin up to the cake, and press the end of the fondant against the cake, making sure it is well adhered.
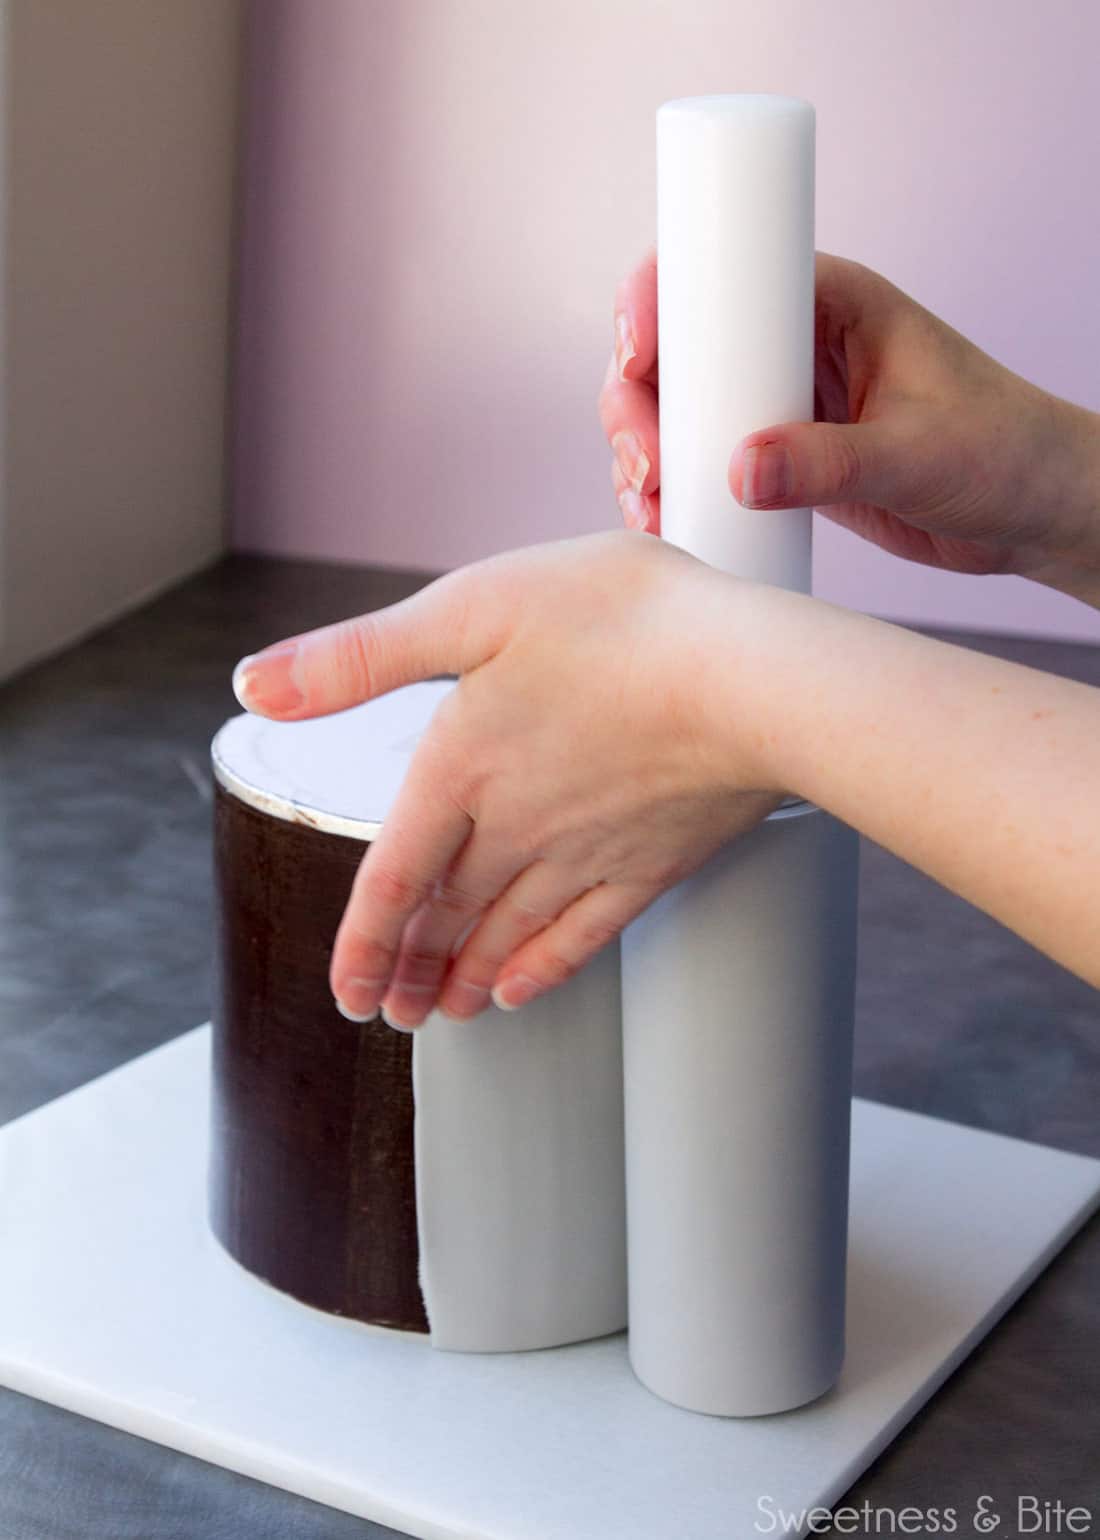
Slowly unroll the fondant around the cake, smoothing with your hand as you go. Make sure you keep checking the bottom edge, to make sure it sits flush against the board.
If you find the fondant is rising up – this could be due to the fondant not quite being rolled flush around the rolling pin, or the roll could be riding up like a pair of ill-fitting pants as you unroll it. You can very, very gently pull it away from the cake and let the fondant sink down a bit.
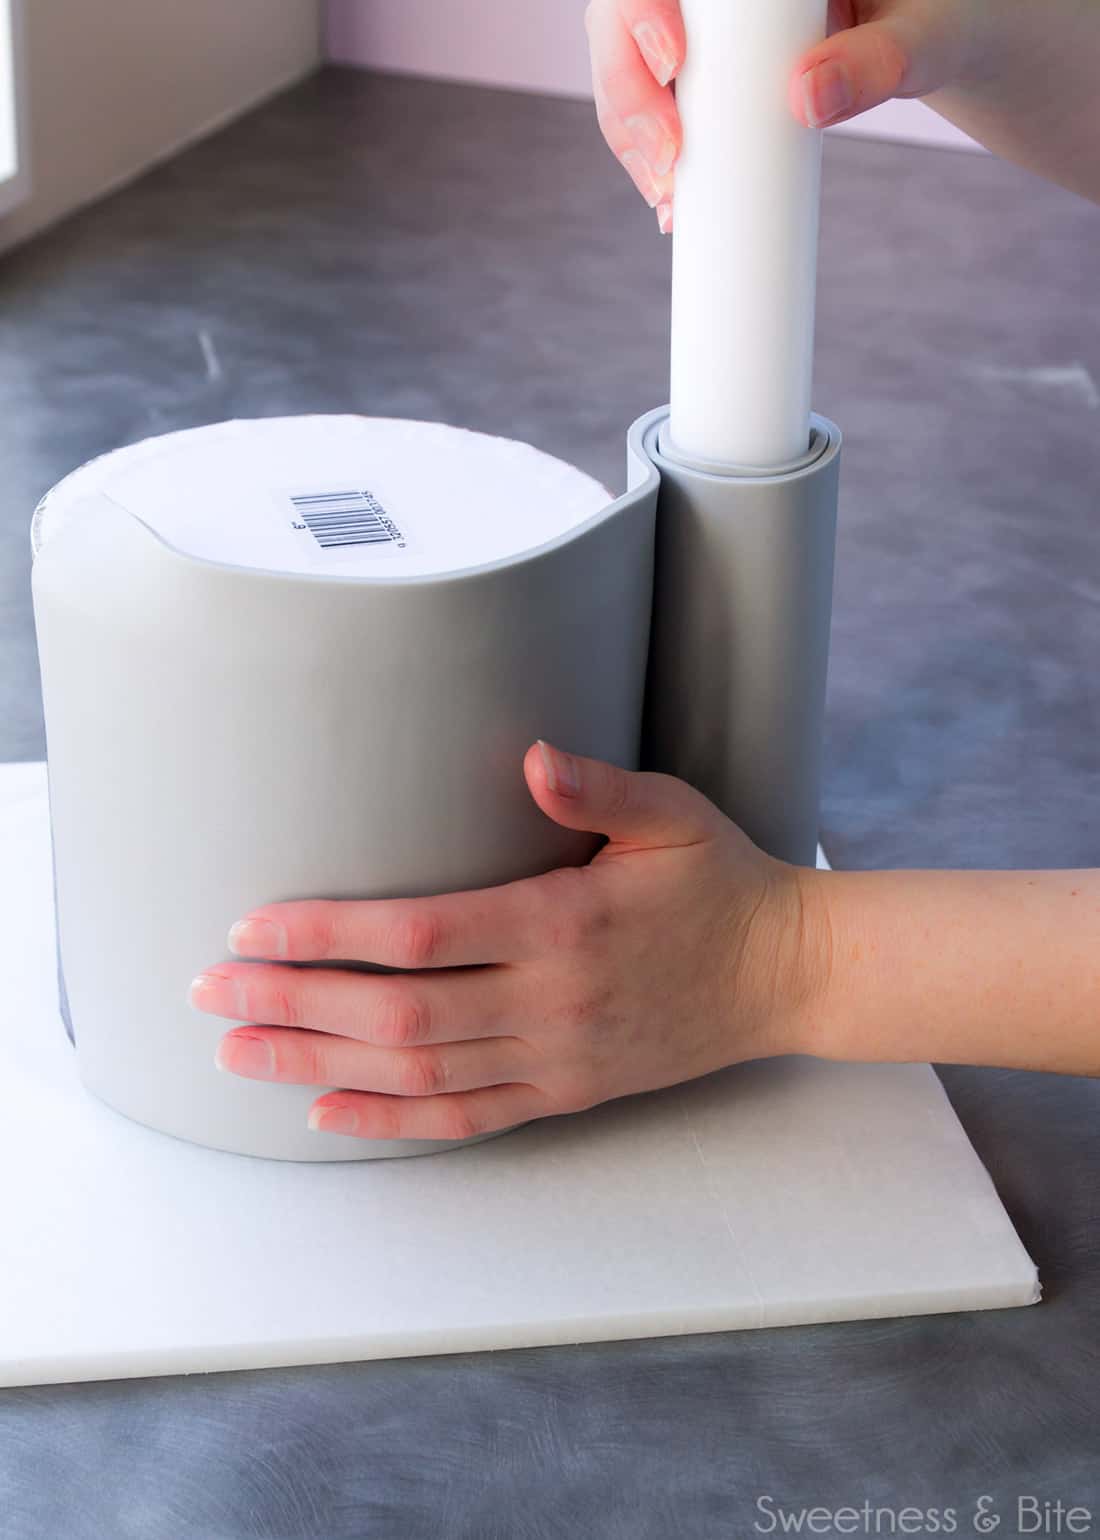
Now, if your fondant is a bit sticky, then it may, at any stage (but I find it tends to be as I get to the end of the roll) stick to itself. If you have a look where my blurry finger is pointing in this photo, you’ll see where the fondant is sticking to itself a little…
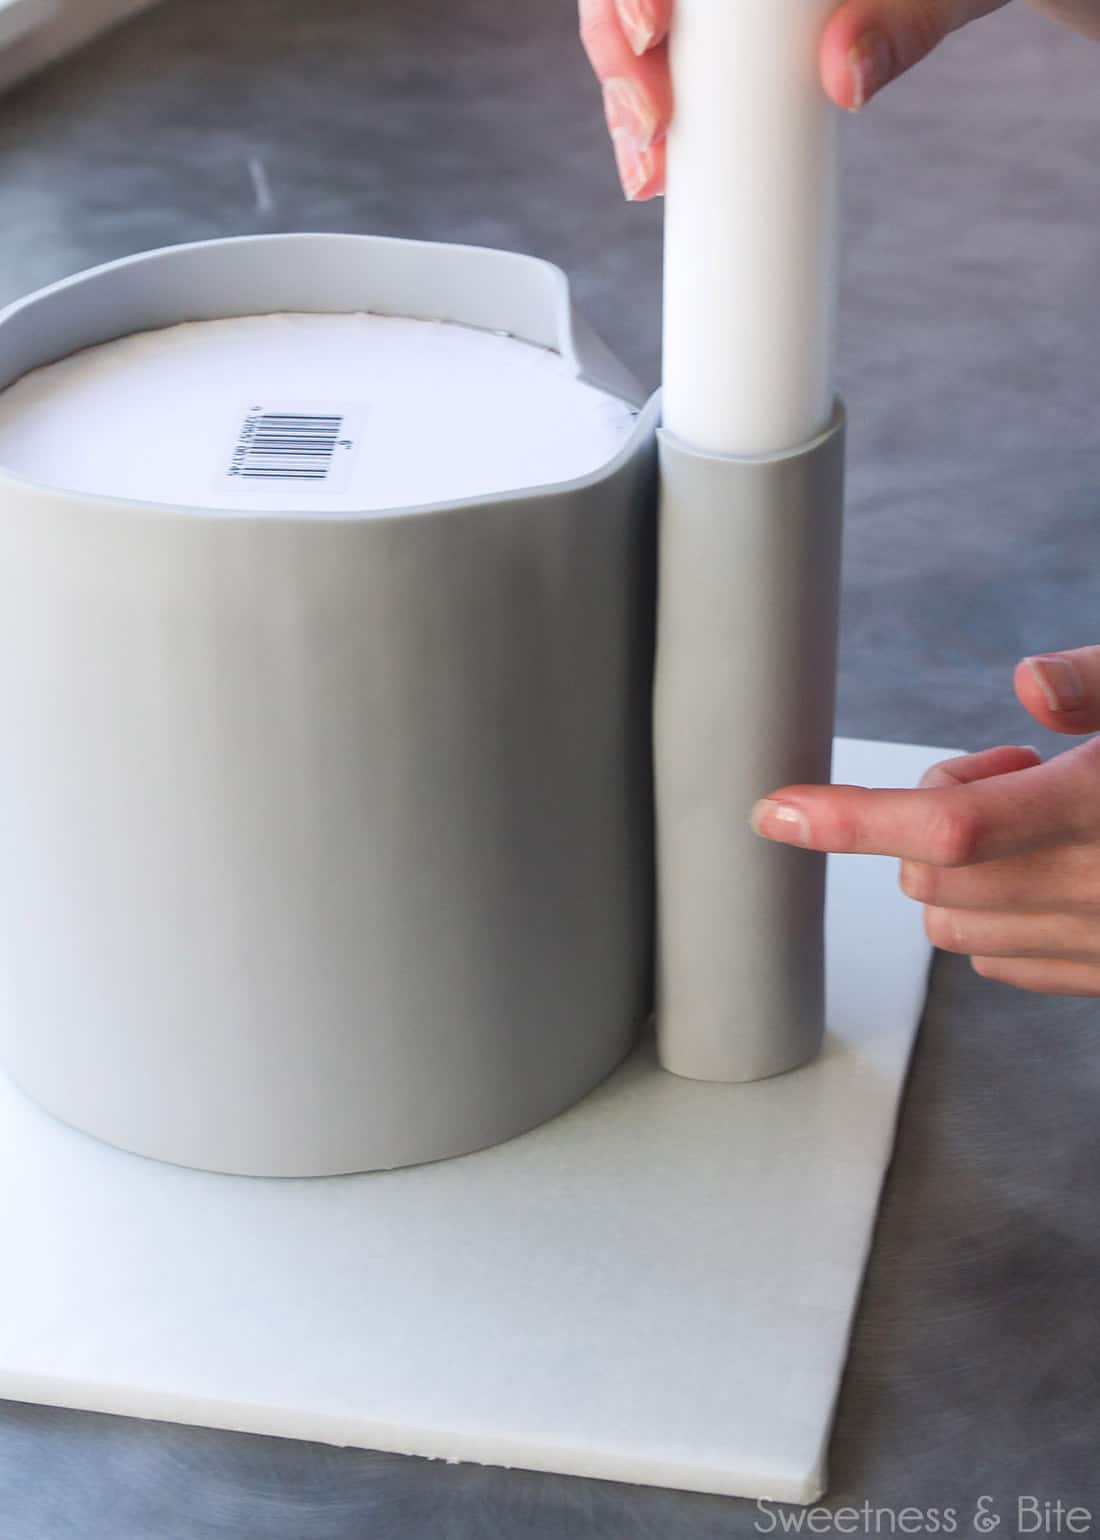
Don’t panic if this happens, in most cases, you can fix it. Just whatever you do, don’t pull on the fondant roll to try and unstick it. Grab your flat paintbrush, and use it to gently run up and down the fondant, easing it apart.
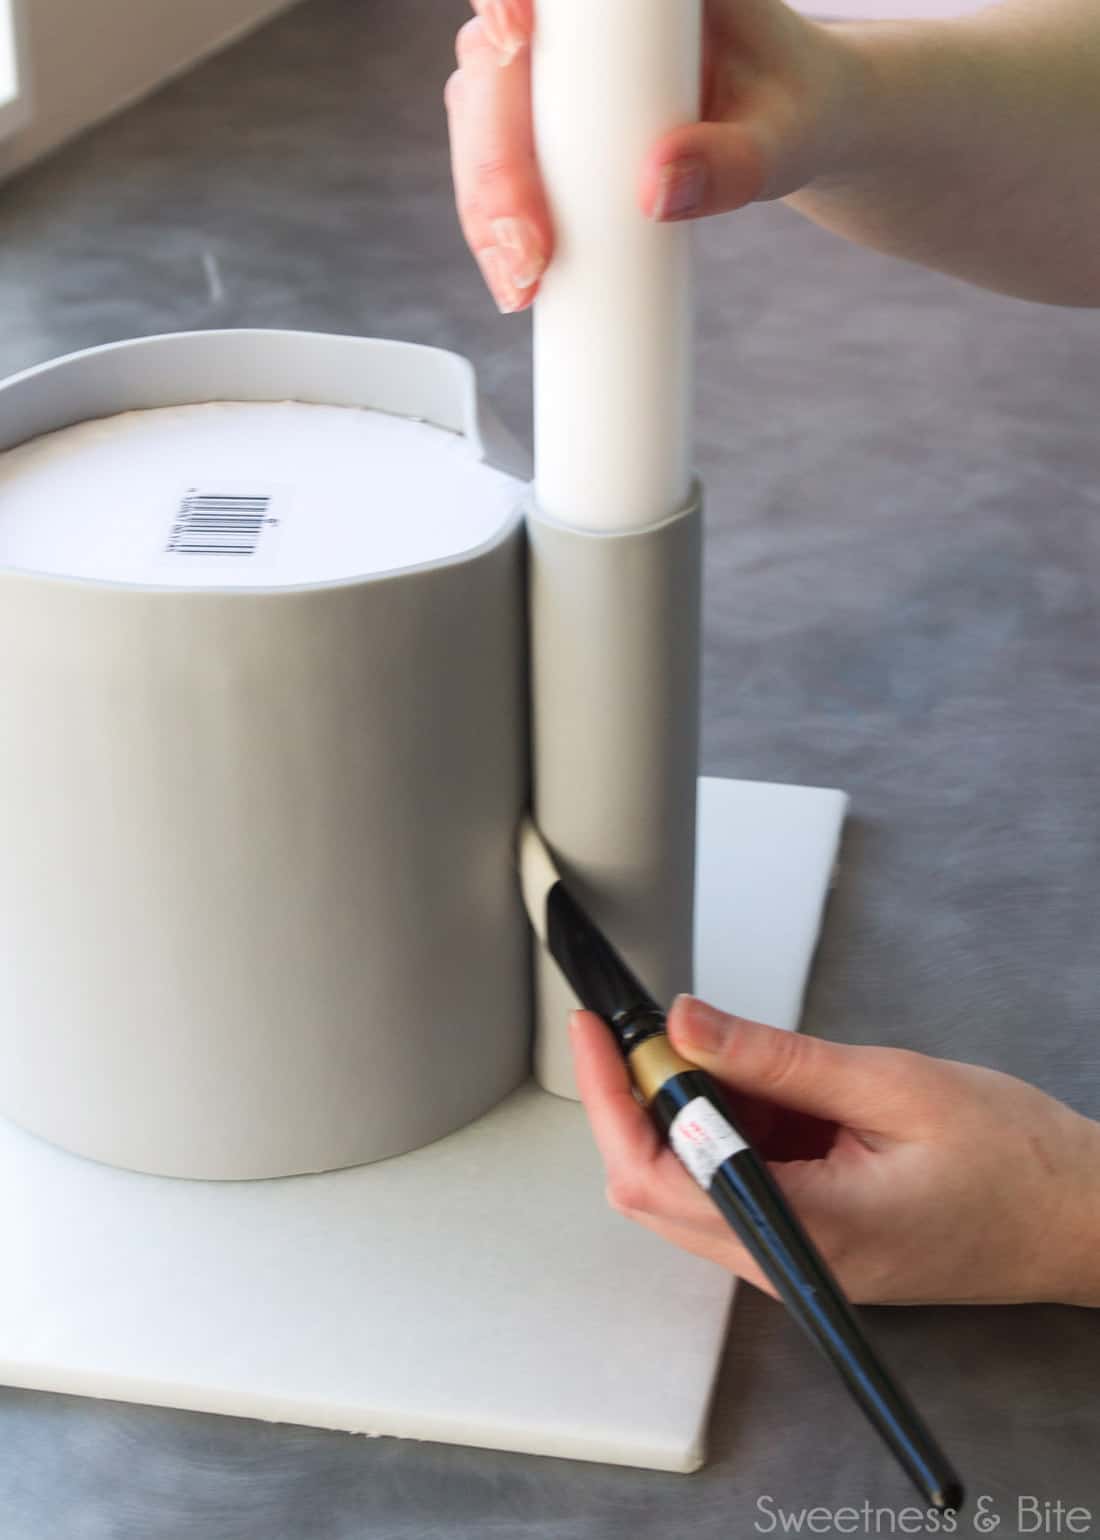
You can put a bit of cornstarch on the brush if you need to, but just the brush tends to be enough. I’m not going to lie to you, sometimes it gets so stuck that you cannot fix it. But you should know that in all likelihood, it’s not your fault, it’s because the damned fondant is sticky. That may only make you feel slightly better as you remove the fondant and try again.
Things you need to keep an eye on while wrapping: the bottom edge, the fondant sticking to itself.
Things that don’t matter right now: air bubbles (we’ll get ’em later), bumps, anything to do with the excess fondant around the top, we’re trimming it off in a minute anyway.
Once you get to the end of the fondant, place a ruler against the cake, in the middle of the overlapped fondant. Try to just lightly rest it against the fondant, so you don’t dent the fondant with the edge of the ruler. Use a scalpel to cut down through both layers of fondant.
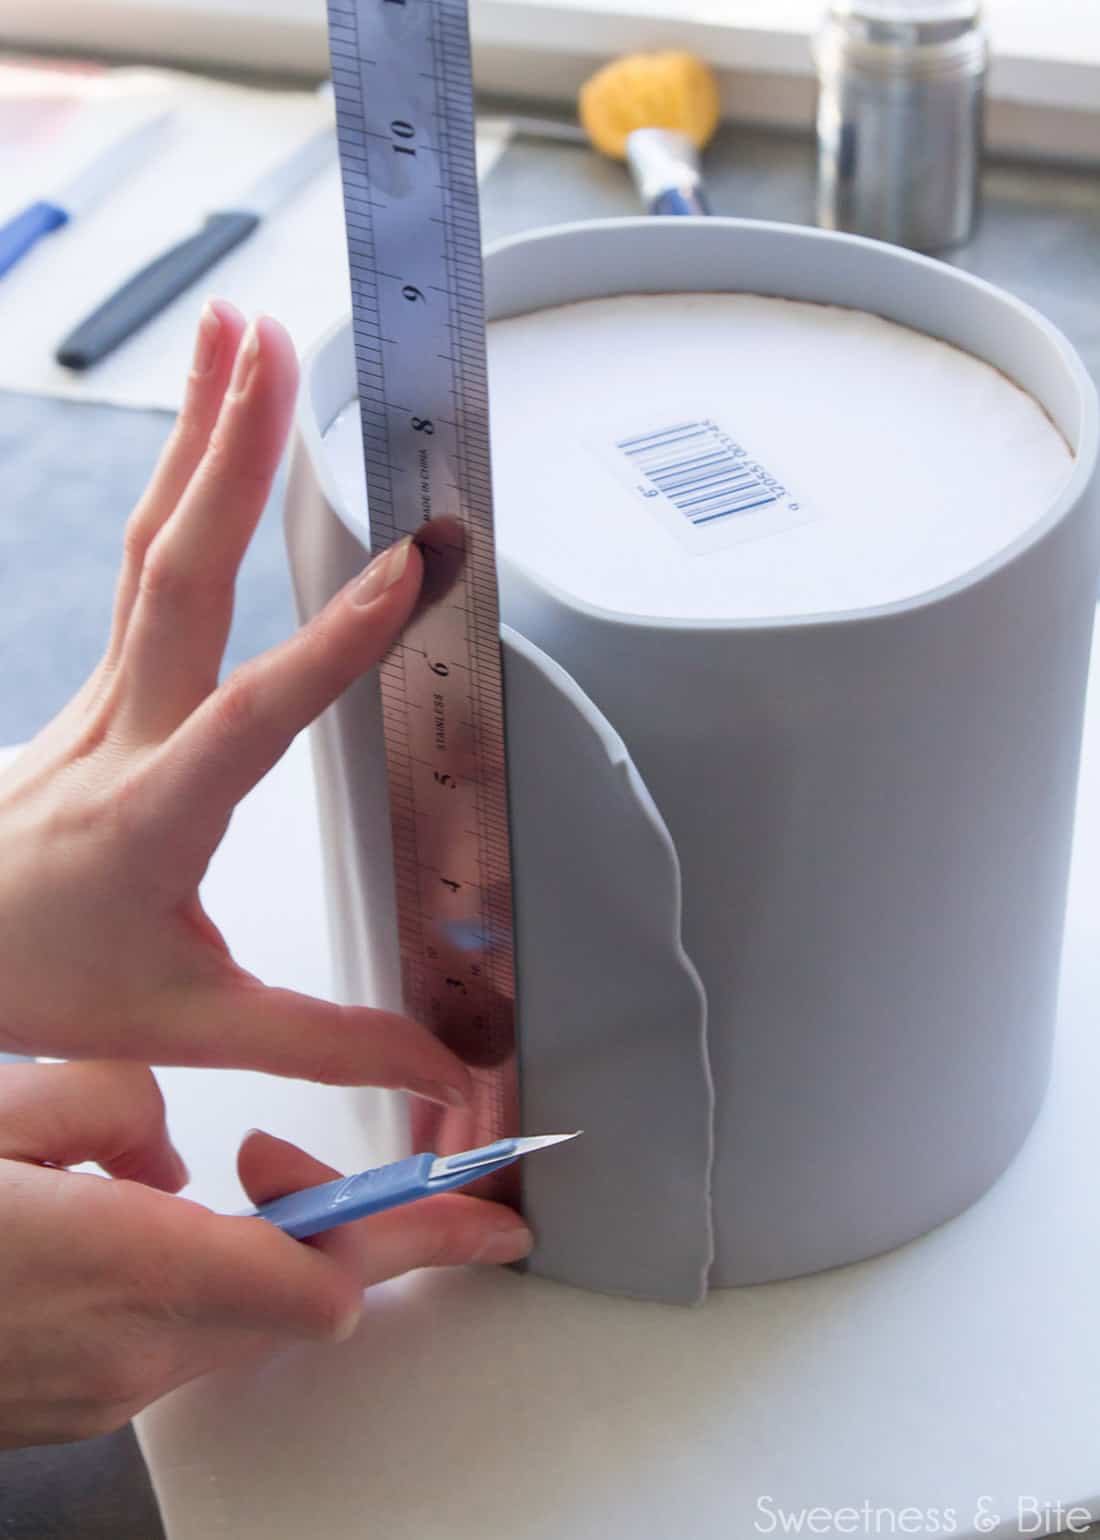
The loose outside piece will fall away, and you can ease back the opposite edge and remove the cut section from underneath. Be gentle as you do it, sometimes you may not have cut all the way through both layers of fondant and you don’t want to tear it. Cut it again with the scalpel if necessary and pull it away.
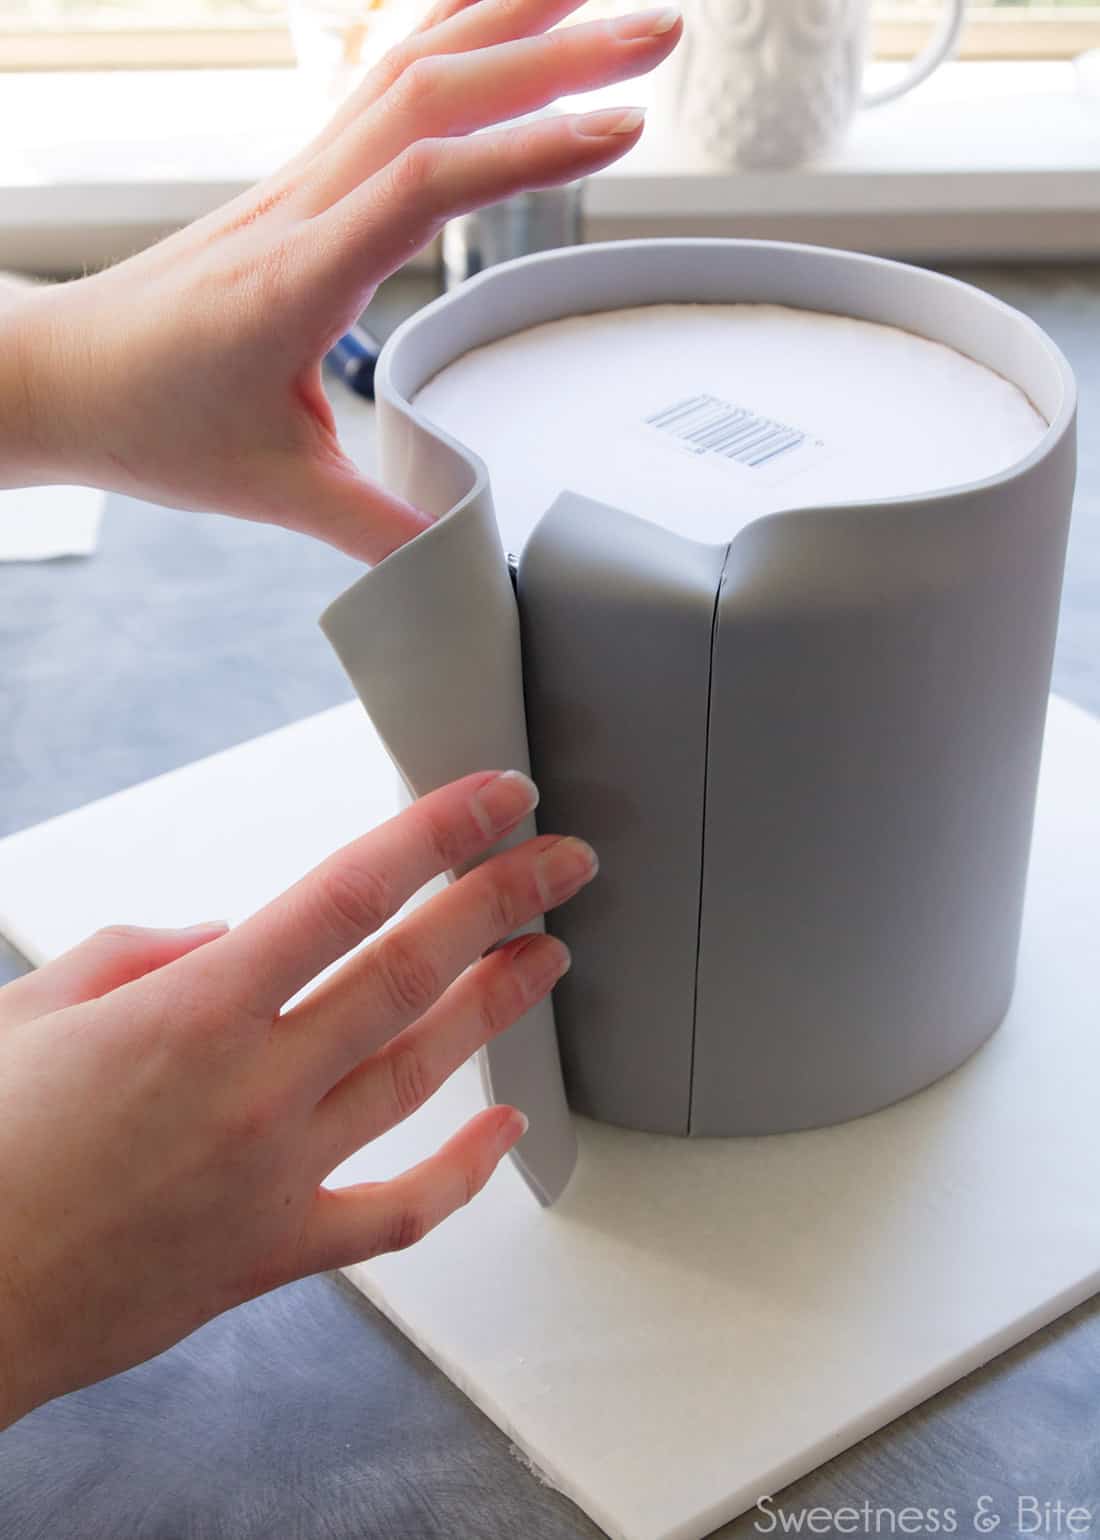
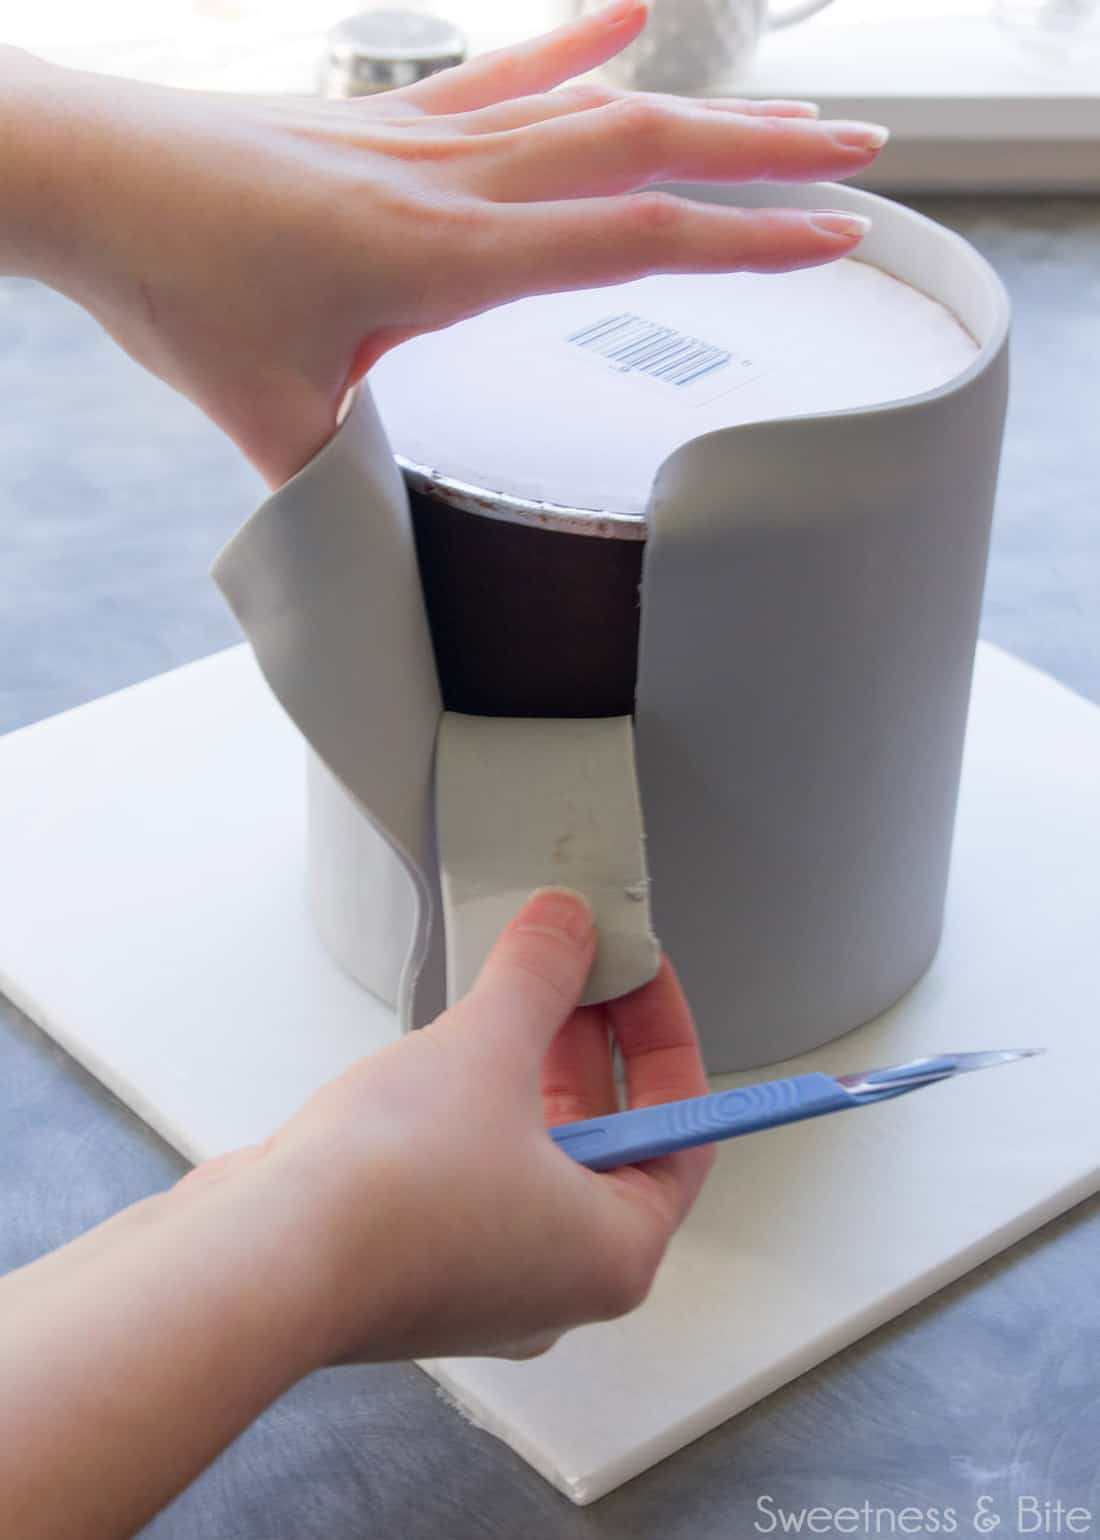
Very gently press the edges of the fondant together with your fingers. Don’t overlap them – make the cut edges sit flush together. If the edges are slightly dry and they don’t stick, you can use a small paintbrush dipped in vodka or water (vodka is better as it dries faster and doesn’t mark the fondant) to dampen the edges so they’ll stick. Use your fingers to rub up and down the seam until it has fully stuck together.
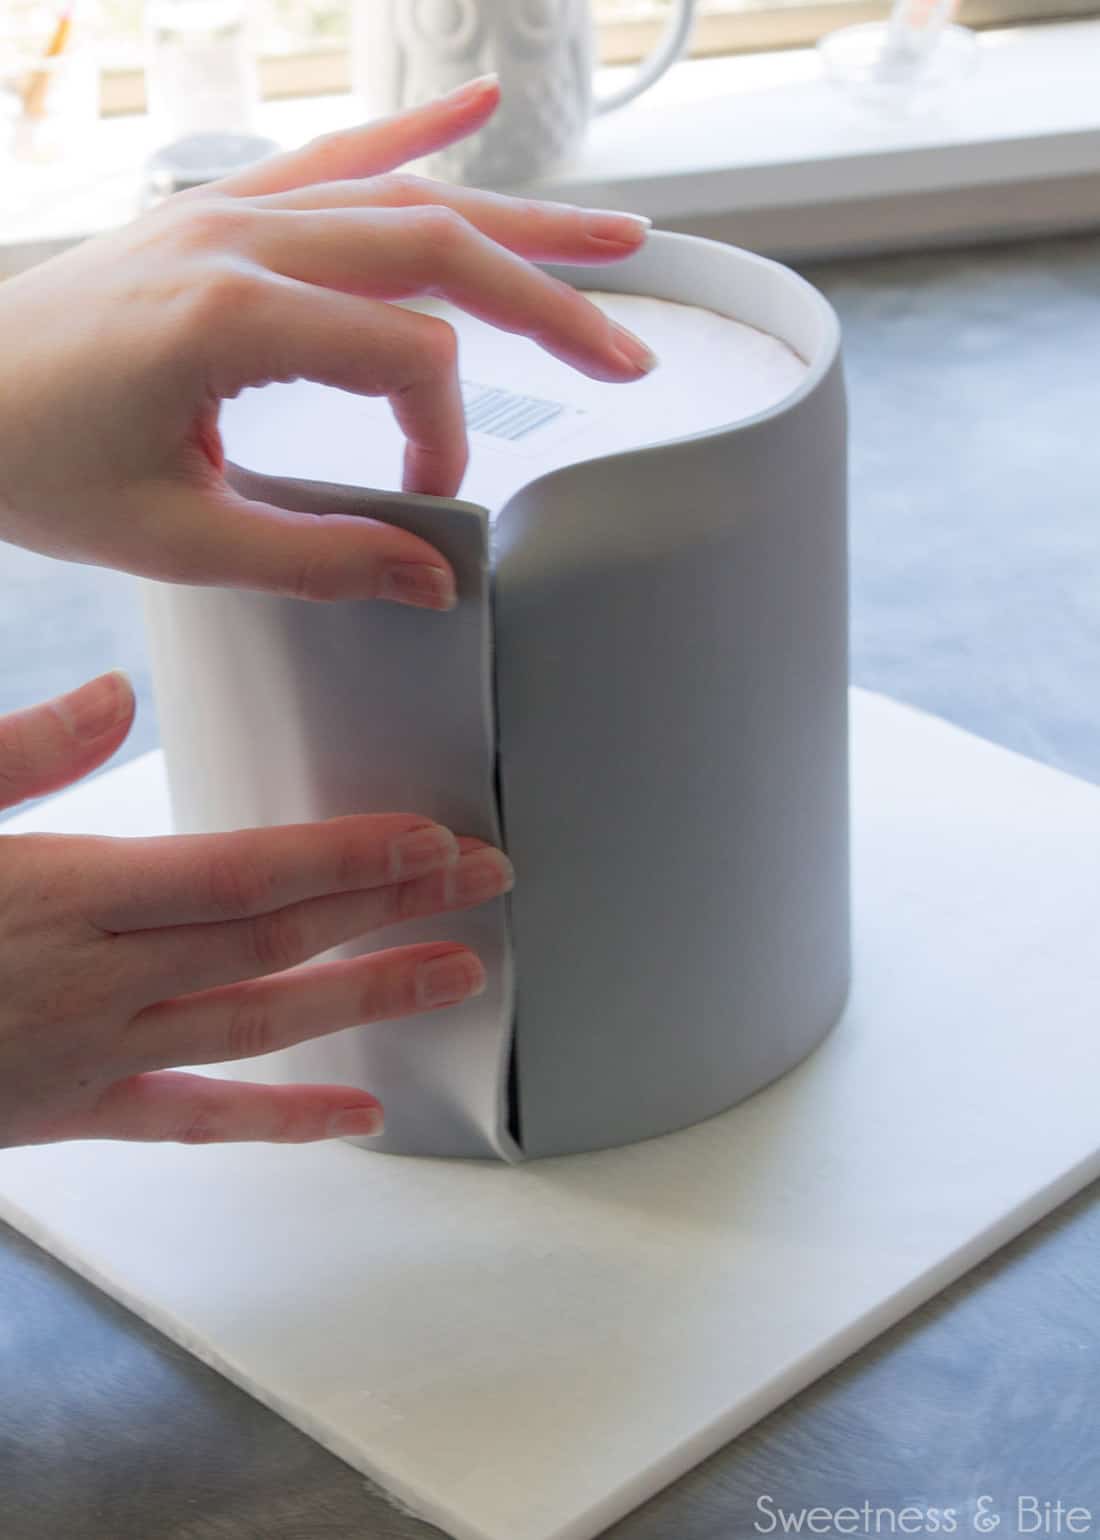
Then grab one of your thicker flexible fondant smoothers and use it to buff the seam. Use the smoother in a super gentle circular motion. The reason you need to be gentle is so you don’t distort the line. If the line does start looking a little wonky, then use the smoother or your fingers to gently coax it back into line, so to speak.
“A straight line looks neater than a squiggly one” – Old New Zealand proverb*.
*Not really.
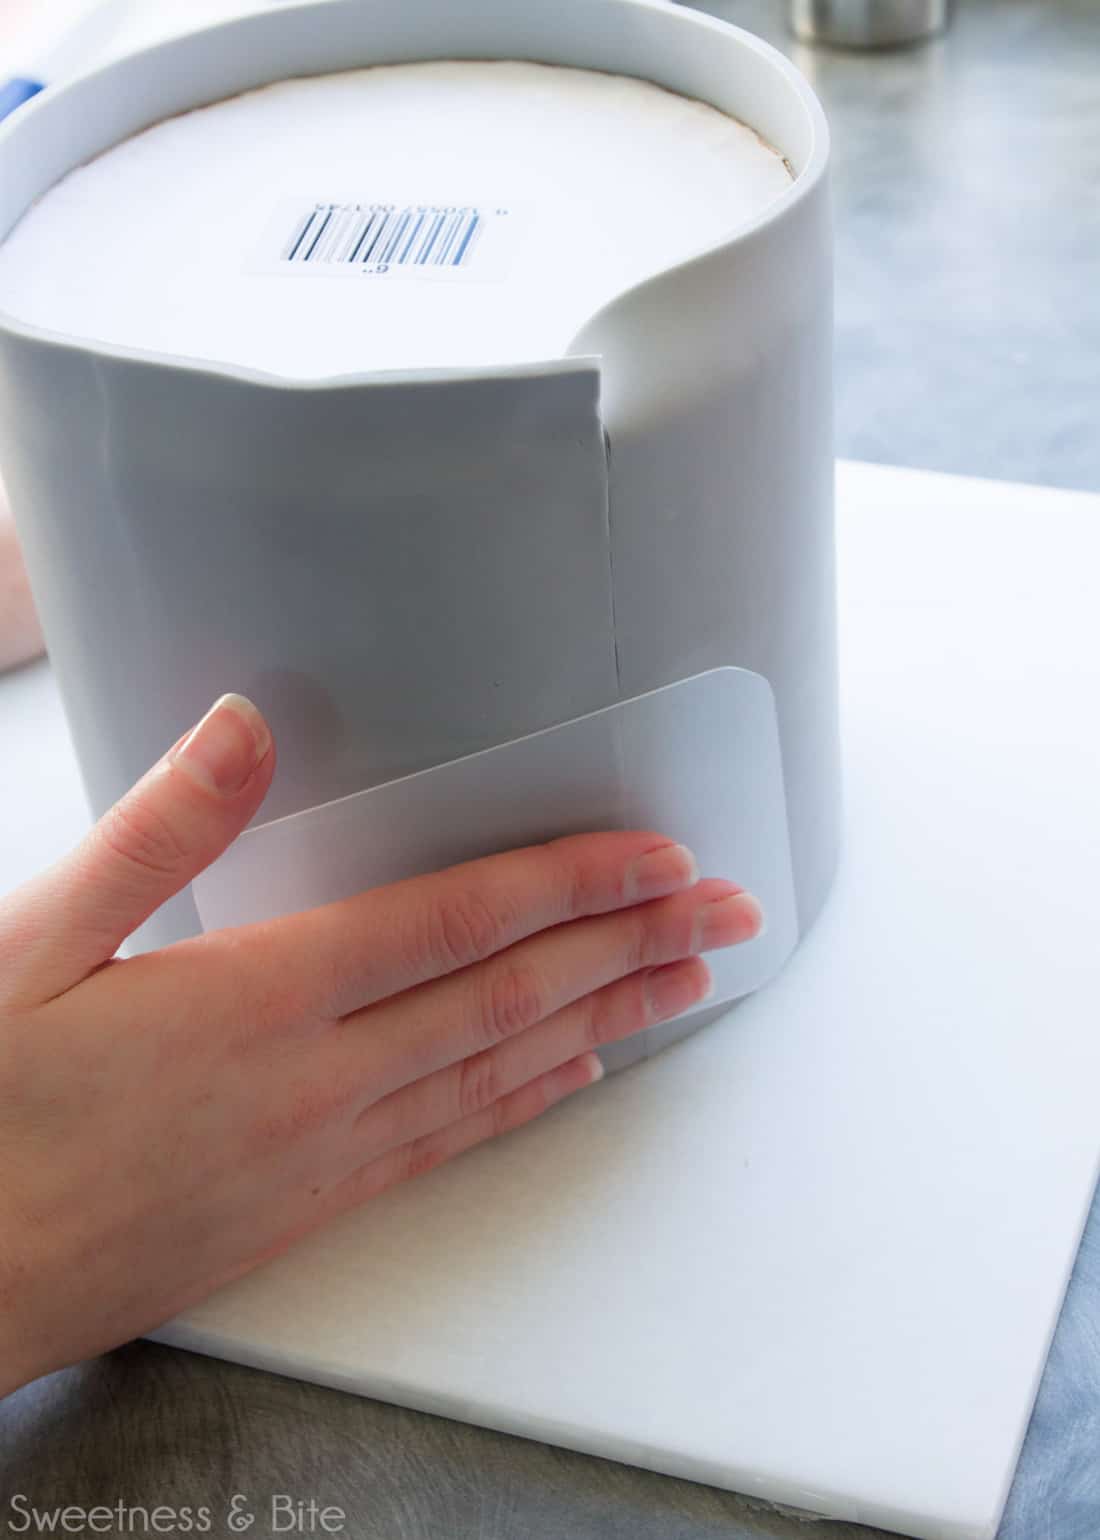
Once you’re pretty happy with the seam (you can work on it a little more later), continue to use the fondant smoother around the cake, buffing out any obvious bumps. Check for air bubbles as you go. Often, if they are towards the top of the cake, you can use the fondant smoother or your hand to gently ease them up so they release the air at the top. Other bubbles you may need to prick with a fine pin or needle (acupuncture needles are great for this) and smooth them out.
Check around the bottom (remember, that’ll be the top of the finished cake) and make sure the fondant is sitting flush against the setup board. If there is a little gap, you can use the fondant smoother to very gently smooth the fondant down to fill the gap.
When you’re mostly happy with the sides of the cake, trim the fondant from the top of the cake. Run the knife along the cake board as you cut, making sure the knife stays flush against the board, to get a perfectly straight cut.
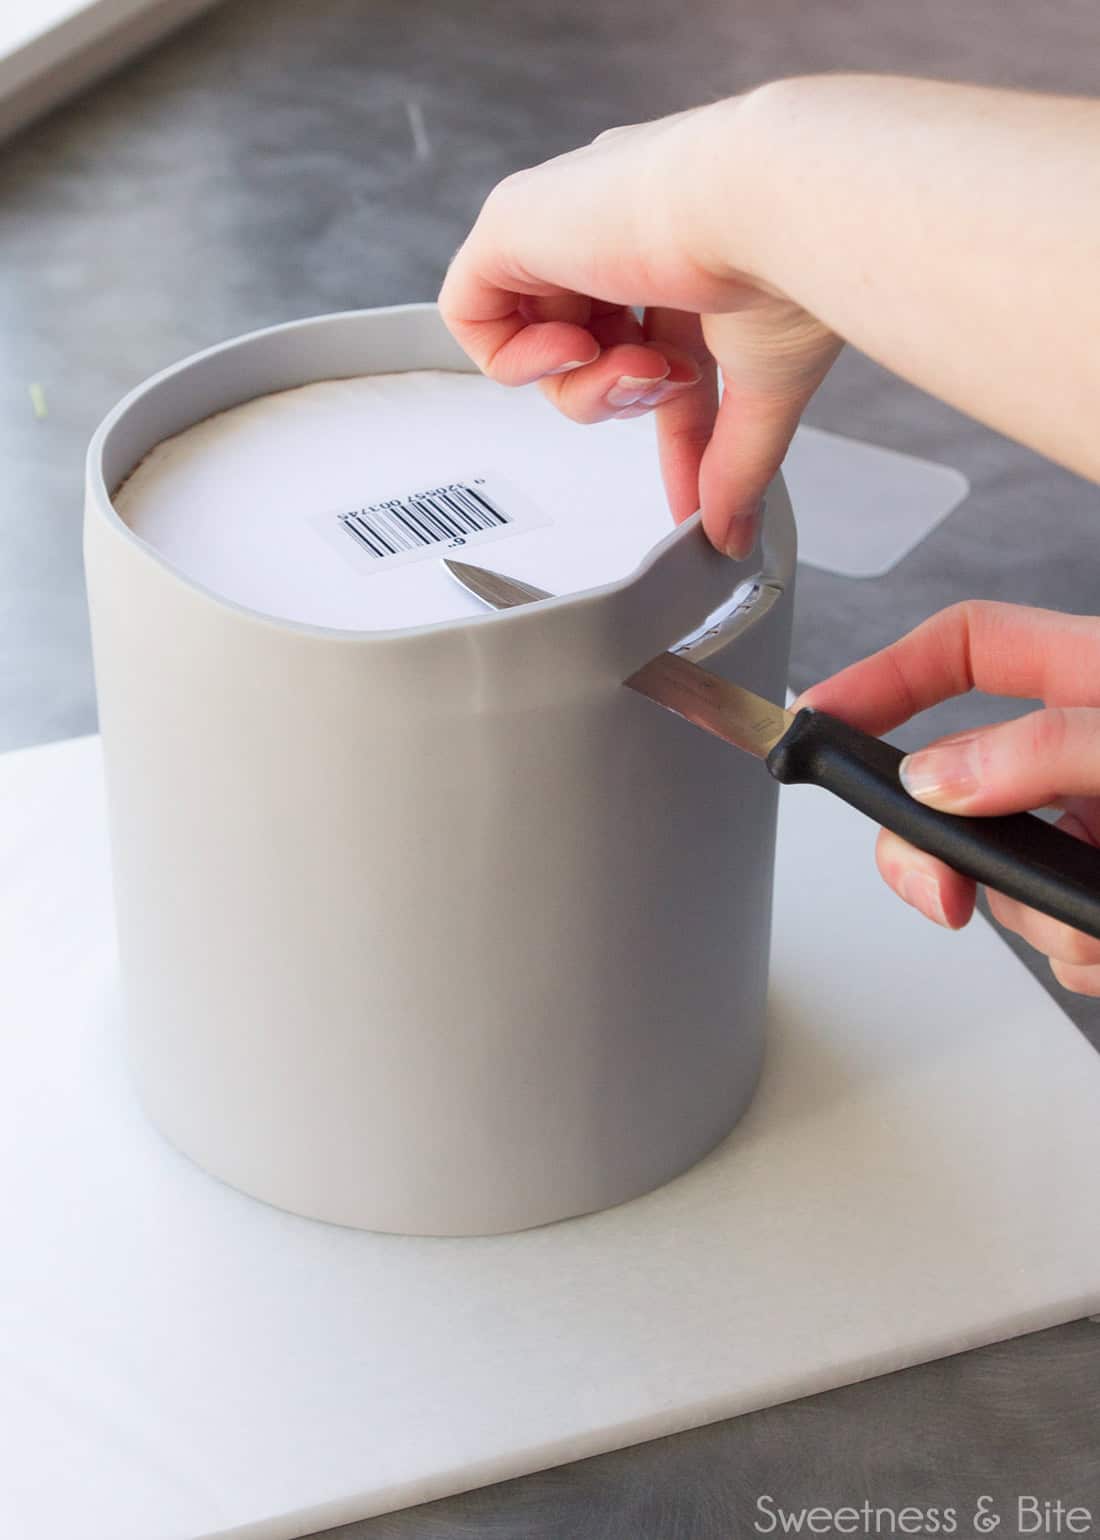
Pop a piece of non-slip/grippy mat onto the top of the board…
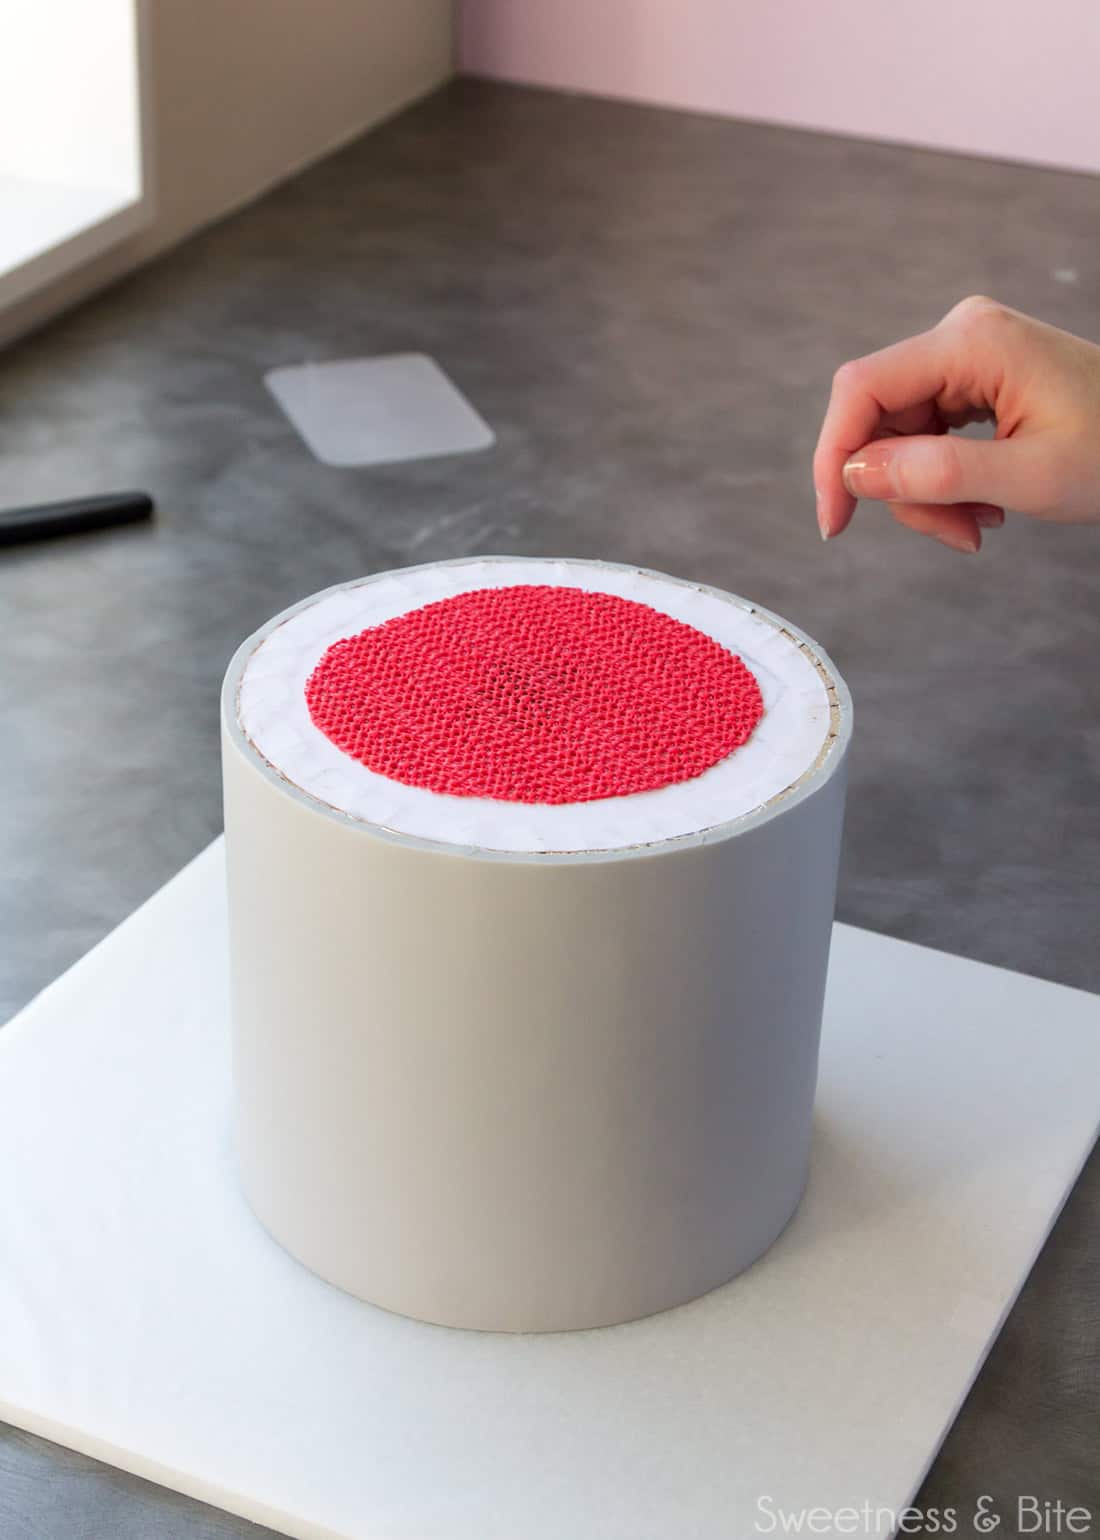
…then put your original setup board on top…
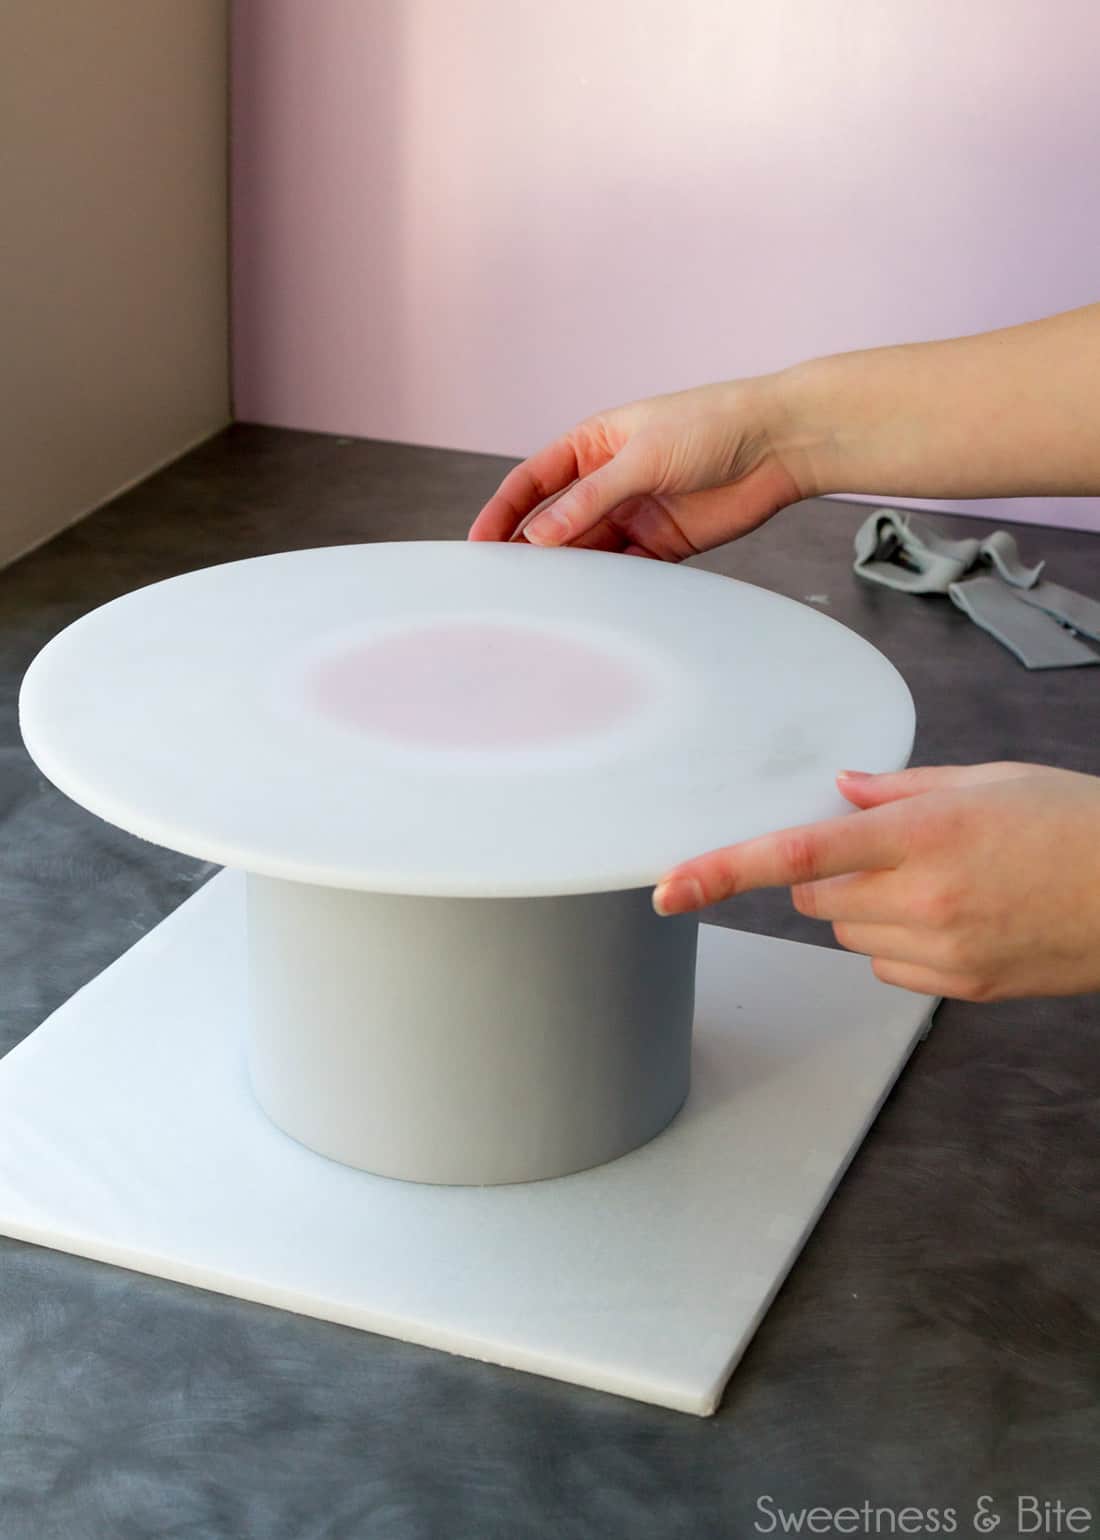
…and flip the cake back over, right-side-up. If the paper on your board isn’t taped down, be super careful when you flip the cake back, to make sure it doesn’t slide off the board as you flip.
If your paper is taped, use a knife or scalpel to cut through the tape holding the waxed paper onto the board, and remove the board.
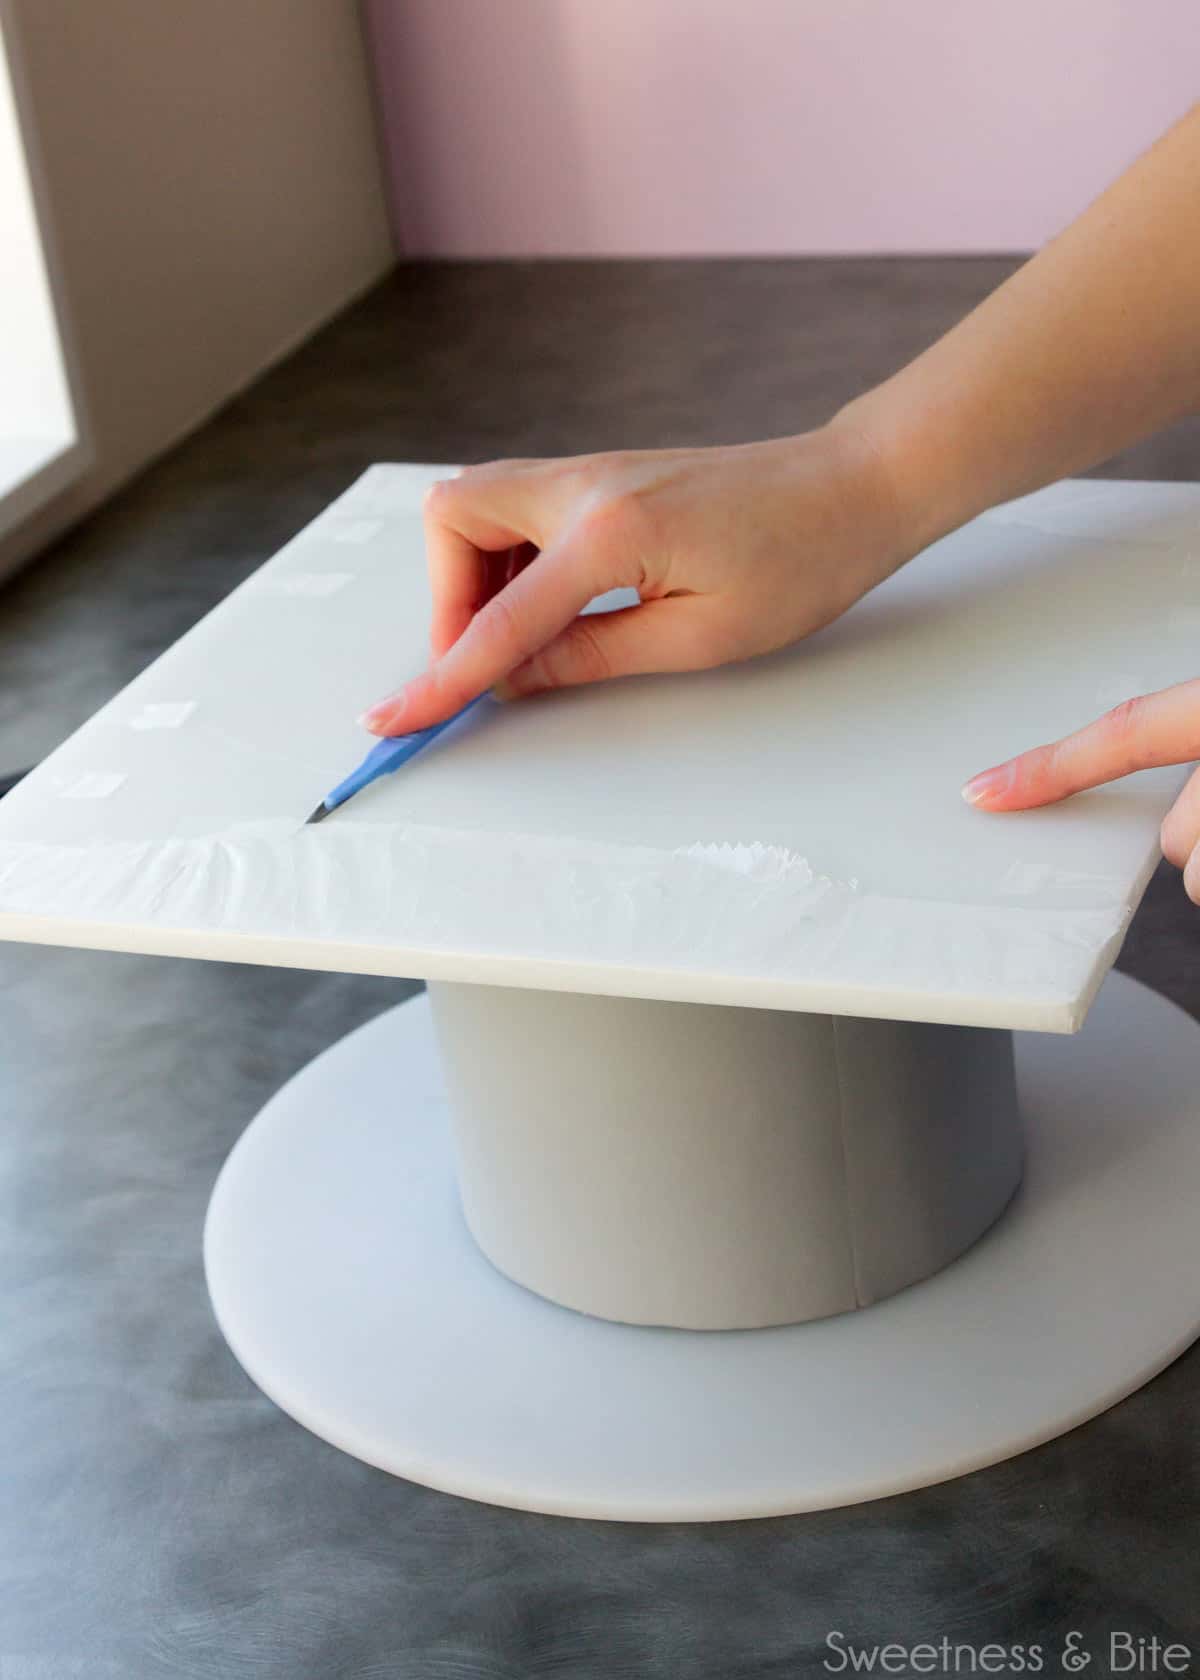
Carefully peel the paper off the cake.
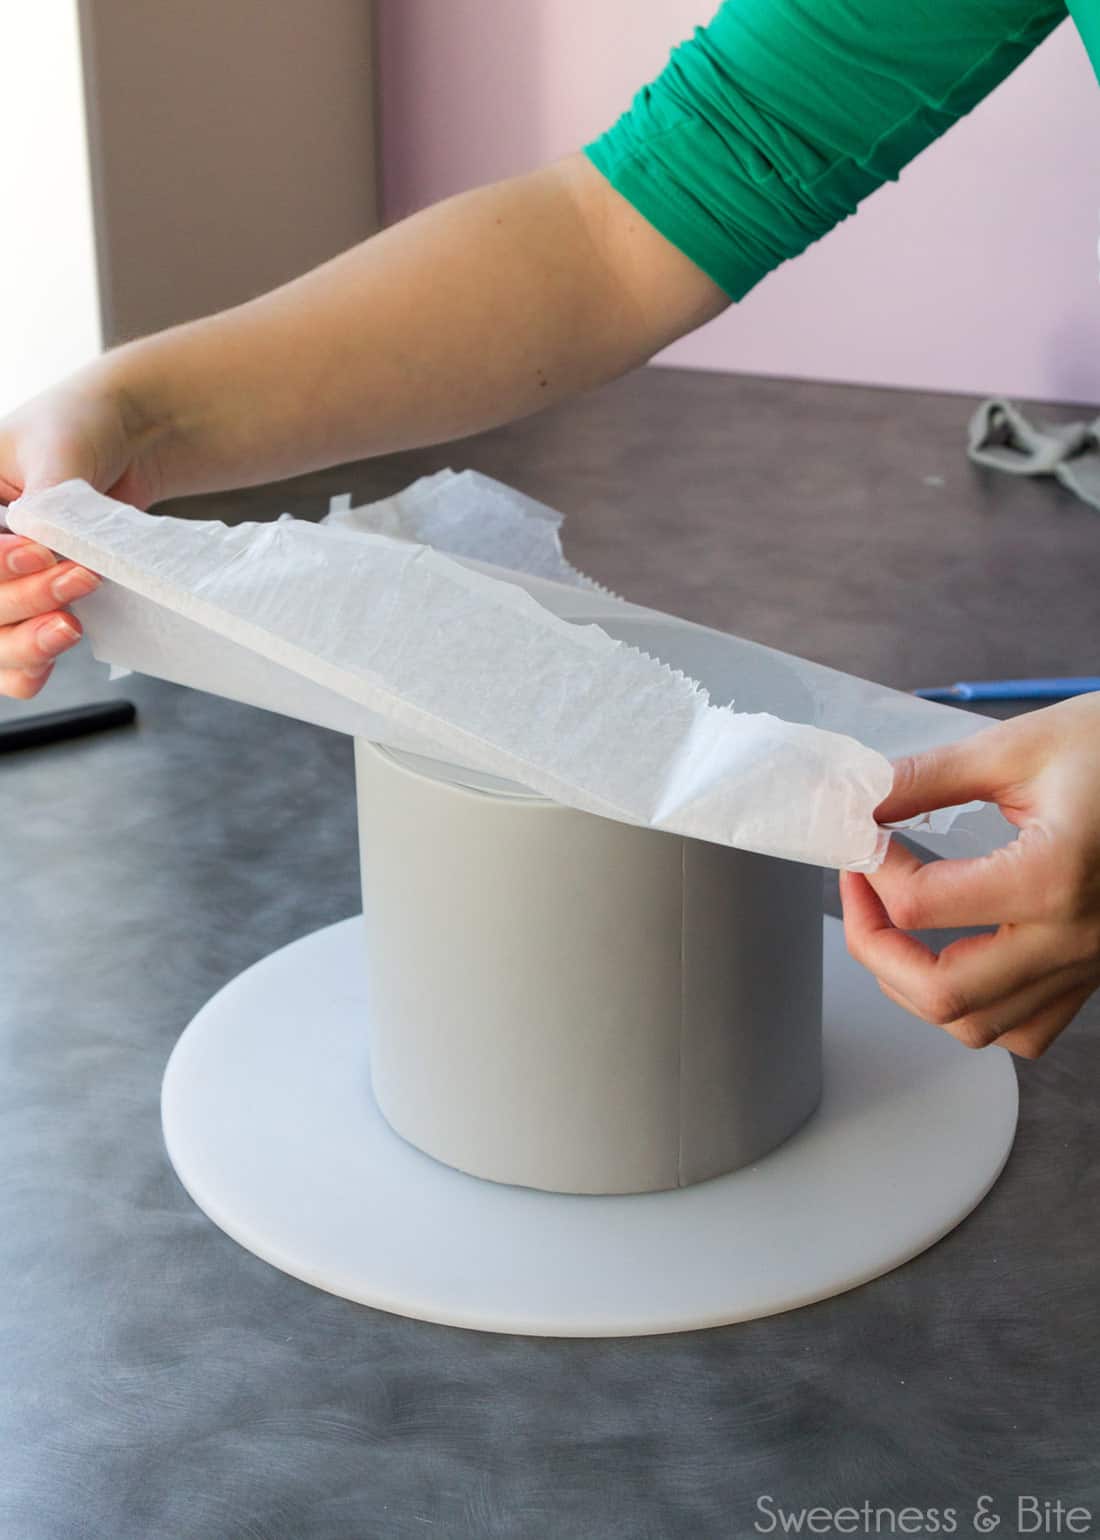
(If you’re covering the top of the cake now so the seam is on the side, then do this now and follow the instructions for flipping and trimming the cake)
Run a smoother around the cake, and then check out your top seam.
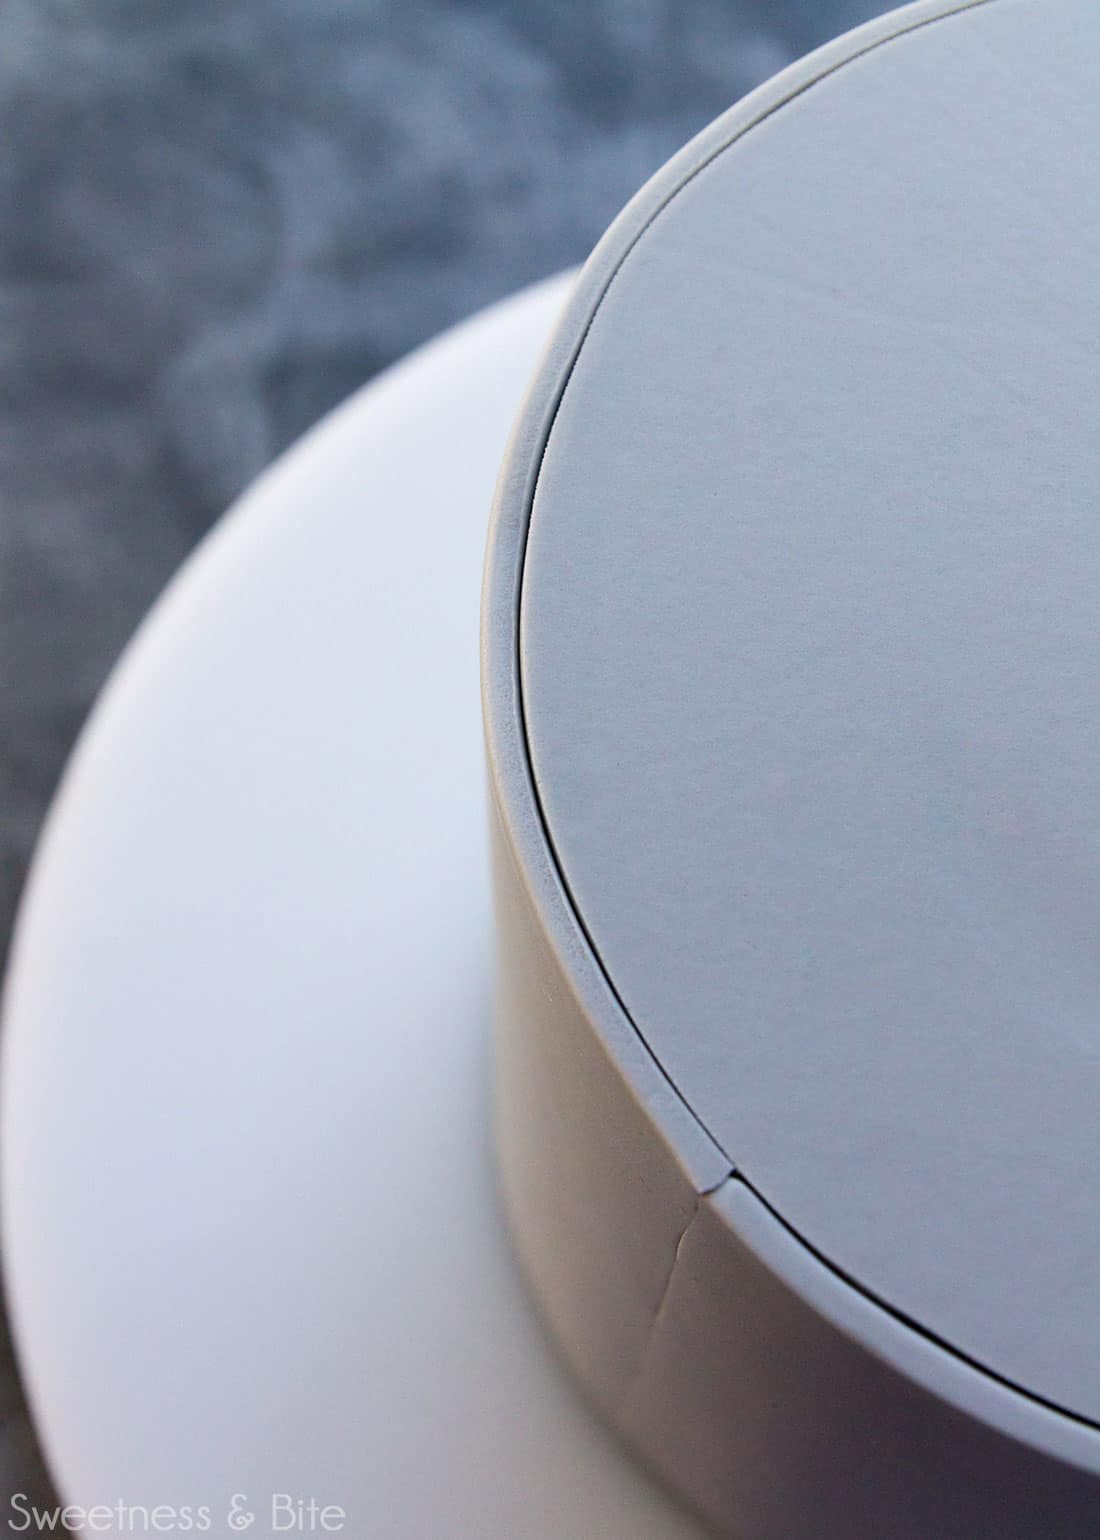
If the fondant hasn’t joined together well (as you can see in the picture above, mine hadn’t – totally planned it that way to show you.. you’re welcome!) you can use a paintbrush dipped in vodka to moisten it (argh, moist)…
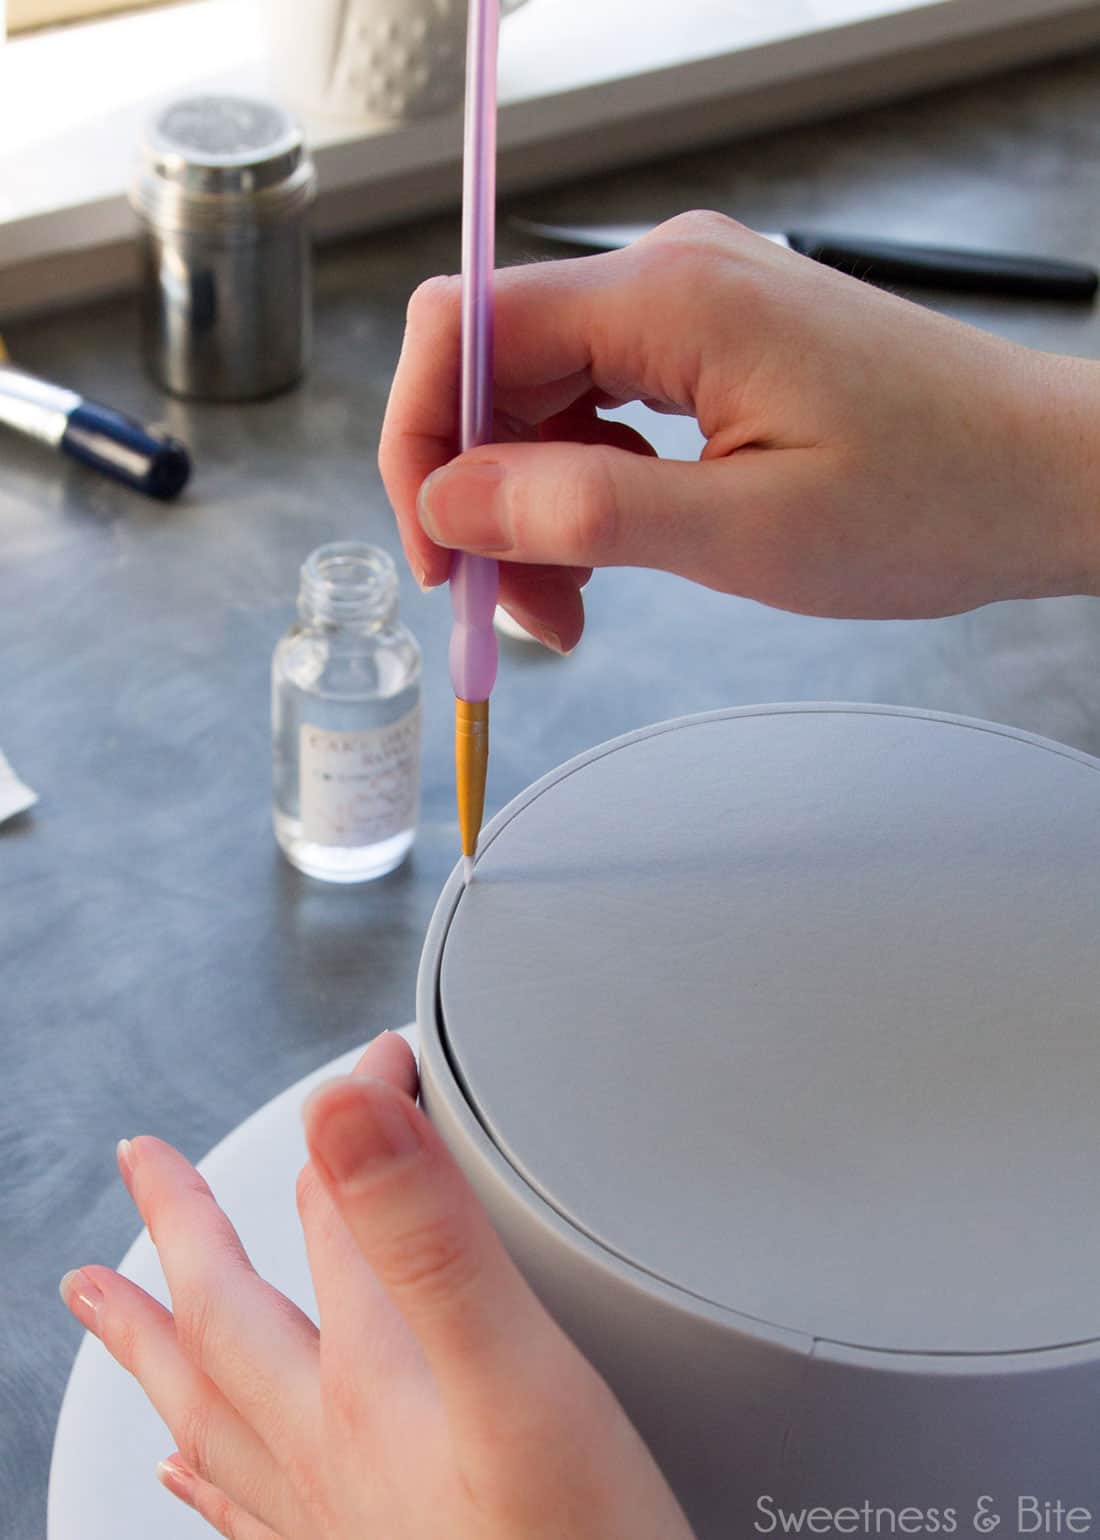
…and then smooth the fondant together with your fingers. Hey, even though it hadn’t fully joined up yet, you can see how neat the seam is already, right?!
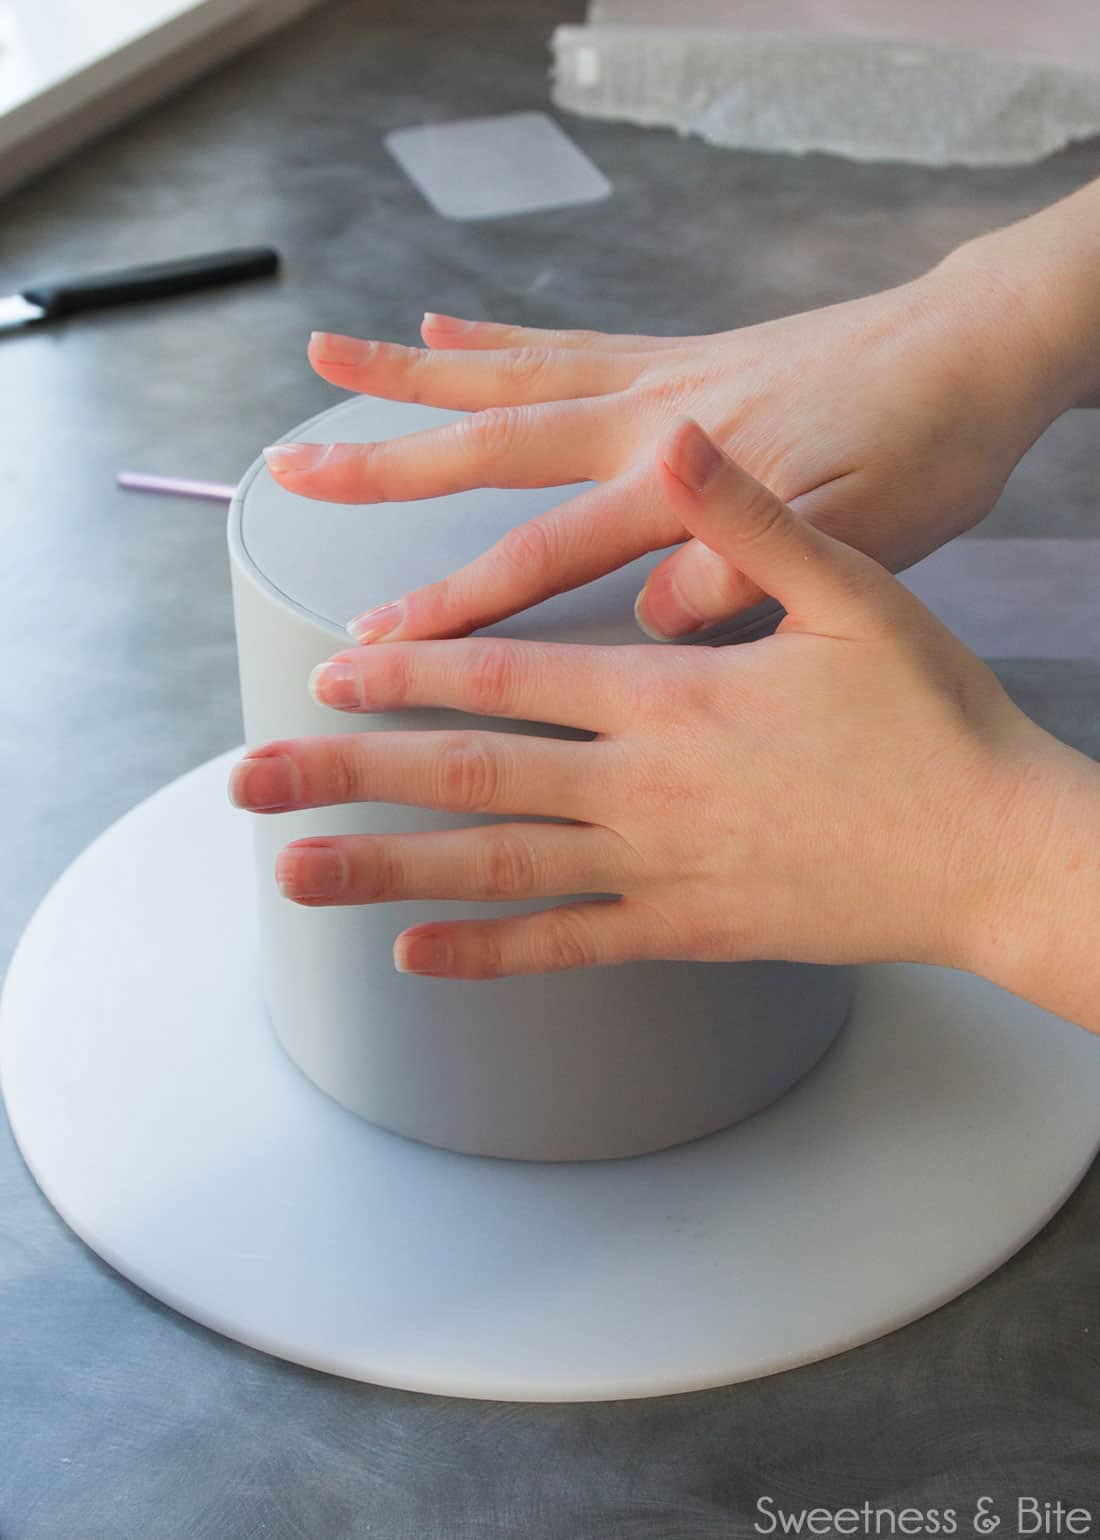
You can also use your fingers again to gently rub around the seam, the heat from your fingers will help to blend the seam. If your cake moves around as you’re smoothing, you can pop another piece of non-slip mat under the setup board to hold it in place.
Place a rigid cake smoother against the side of the cake, and the thick flexible smoother on the top, and gently run around the top edge with the smoother. This will press the fondant together and make the seam less obvious (as a side note, this is also the same technique I use to get sharp edges on a cake when I cover it in fondant in one piece).
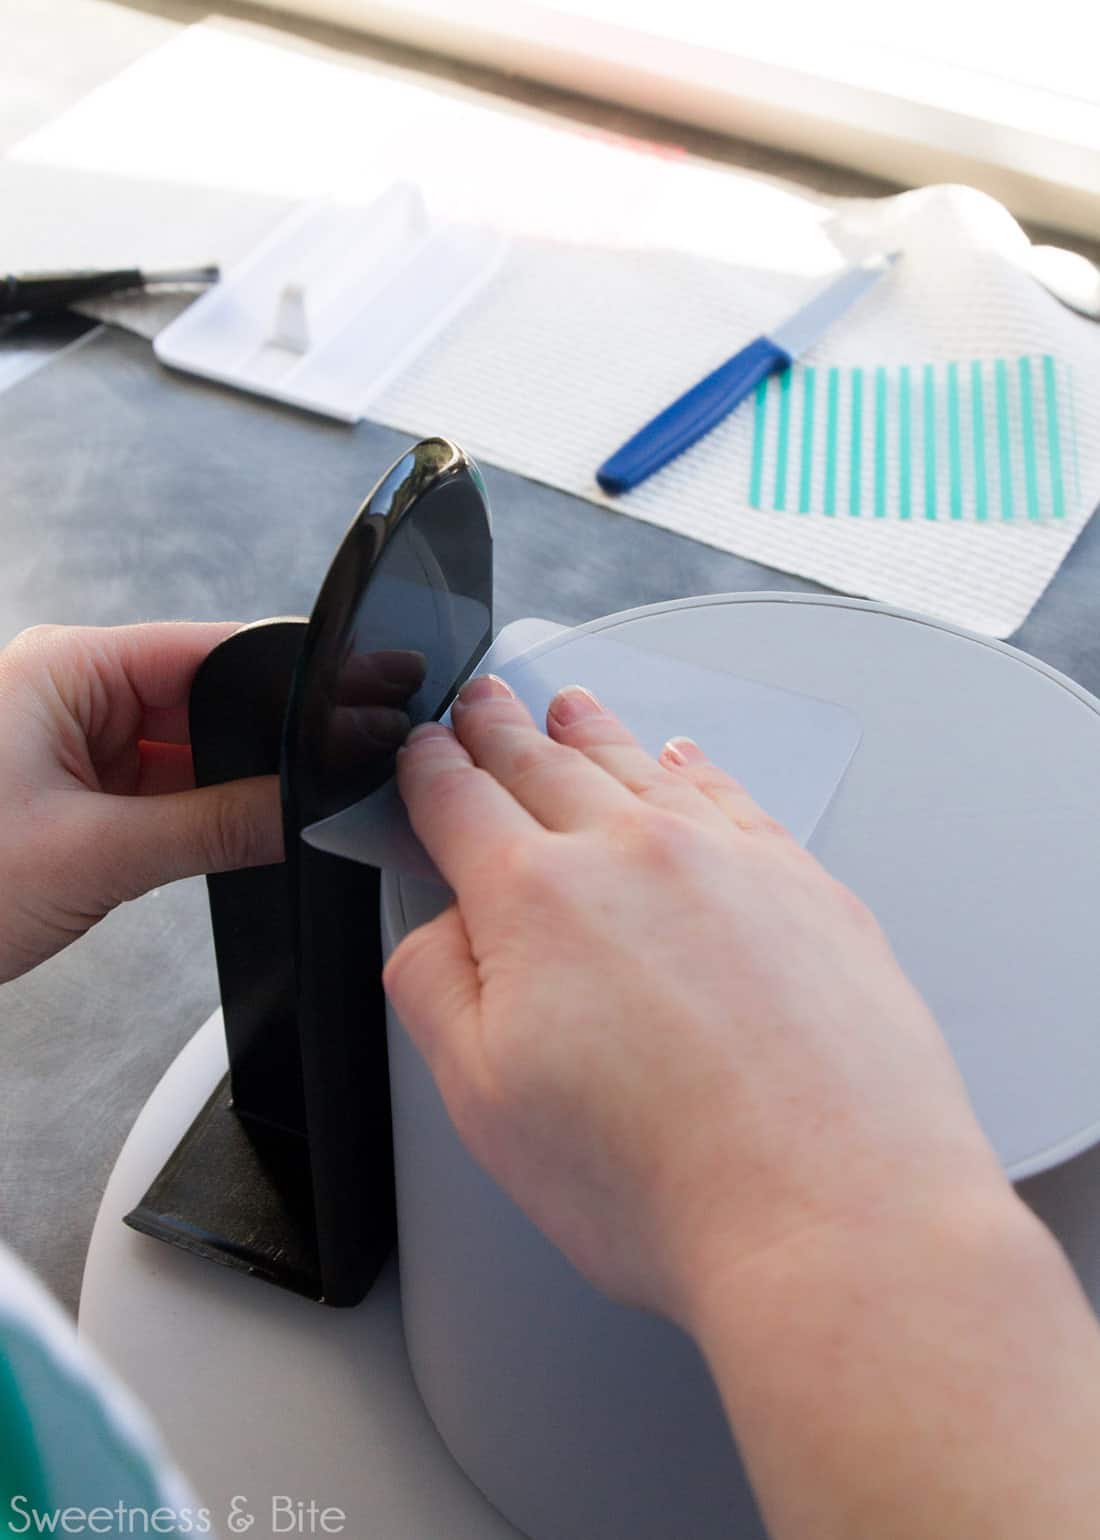
Check out the video to see this in action.
Once I’m happy with the edge, I like to go around the whole cake again with the thinner flexible smoother. Using the thinner one means you can feel any little lumps or bumps and work on smoothing them out. I usually do a bit more work on smoothing the back seam as well (although if the back of your cake won’t be seen, you may not want to waste time smoothing it further).
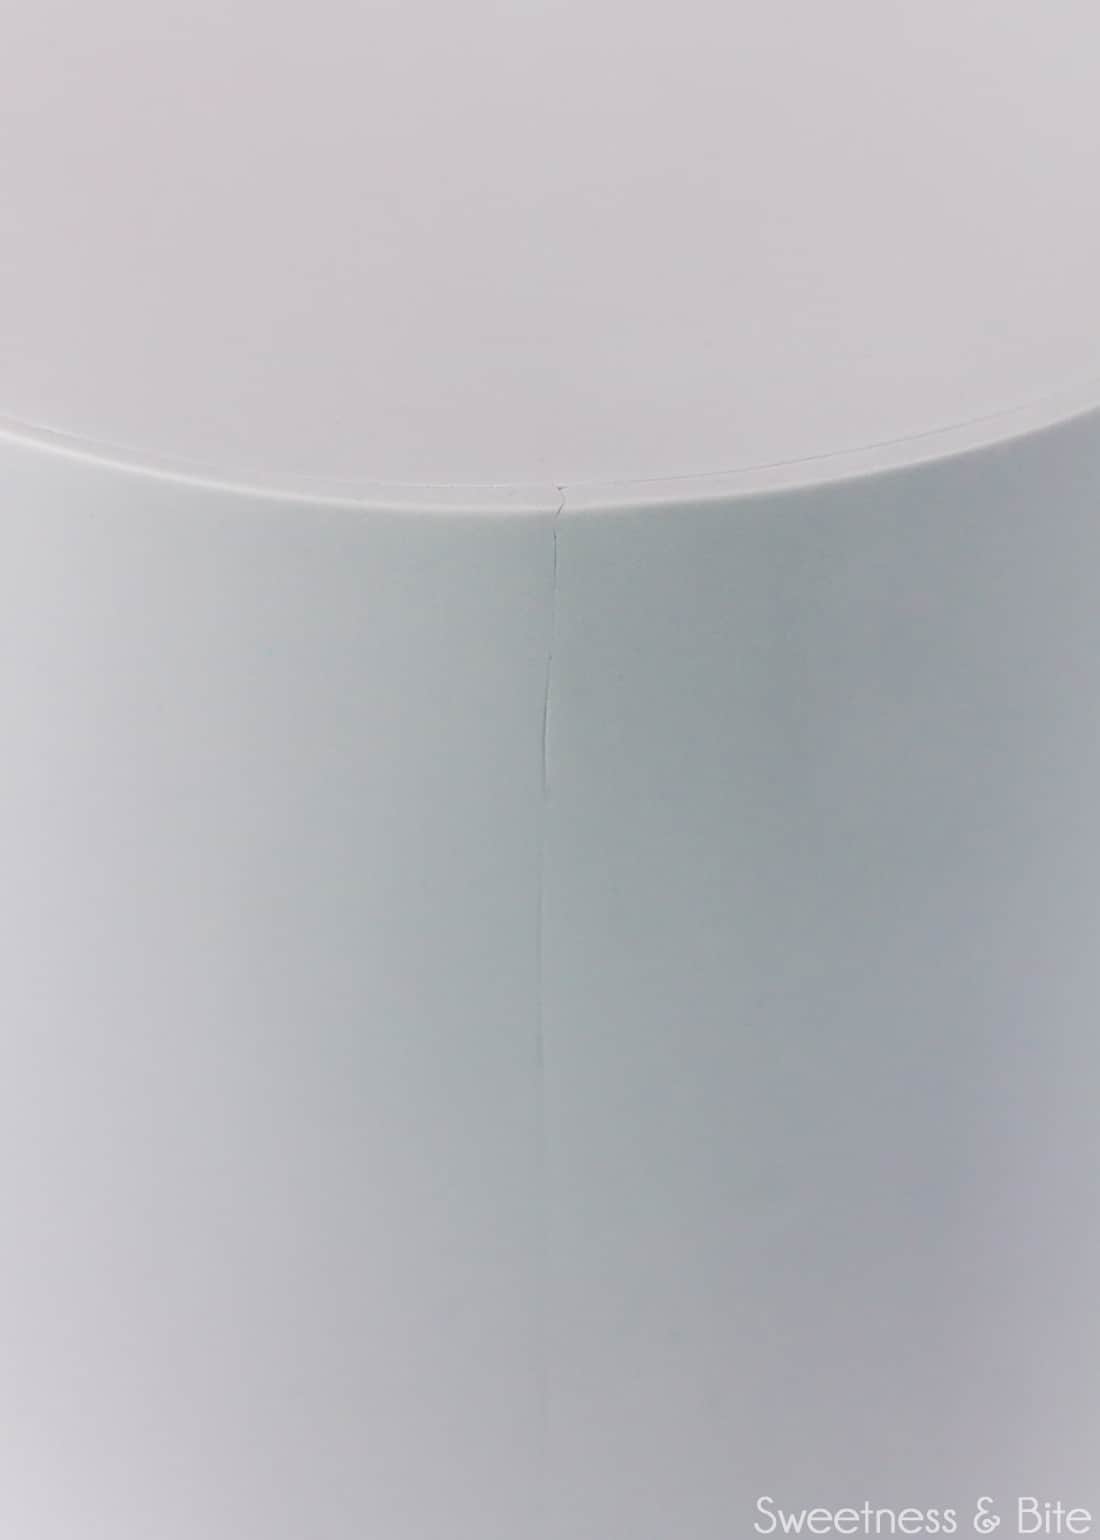
This is the back seam of my cake. No Photoshopping here! Hopefully, you can tell that by the fact it’s not totally perfect or completely invisible (if I was going to Photoshop it, I’d have made it invisible. But we’re friends, so I don’t lie to you) but it is pretty neat and tidy, and when you’re doing this at home (or work) and not stopping to take photos, you’ll have more time before the fondant dries so you can make the seam nearly invisible.
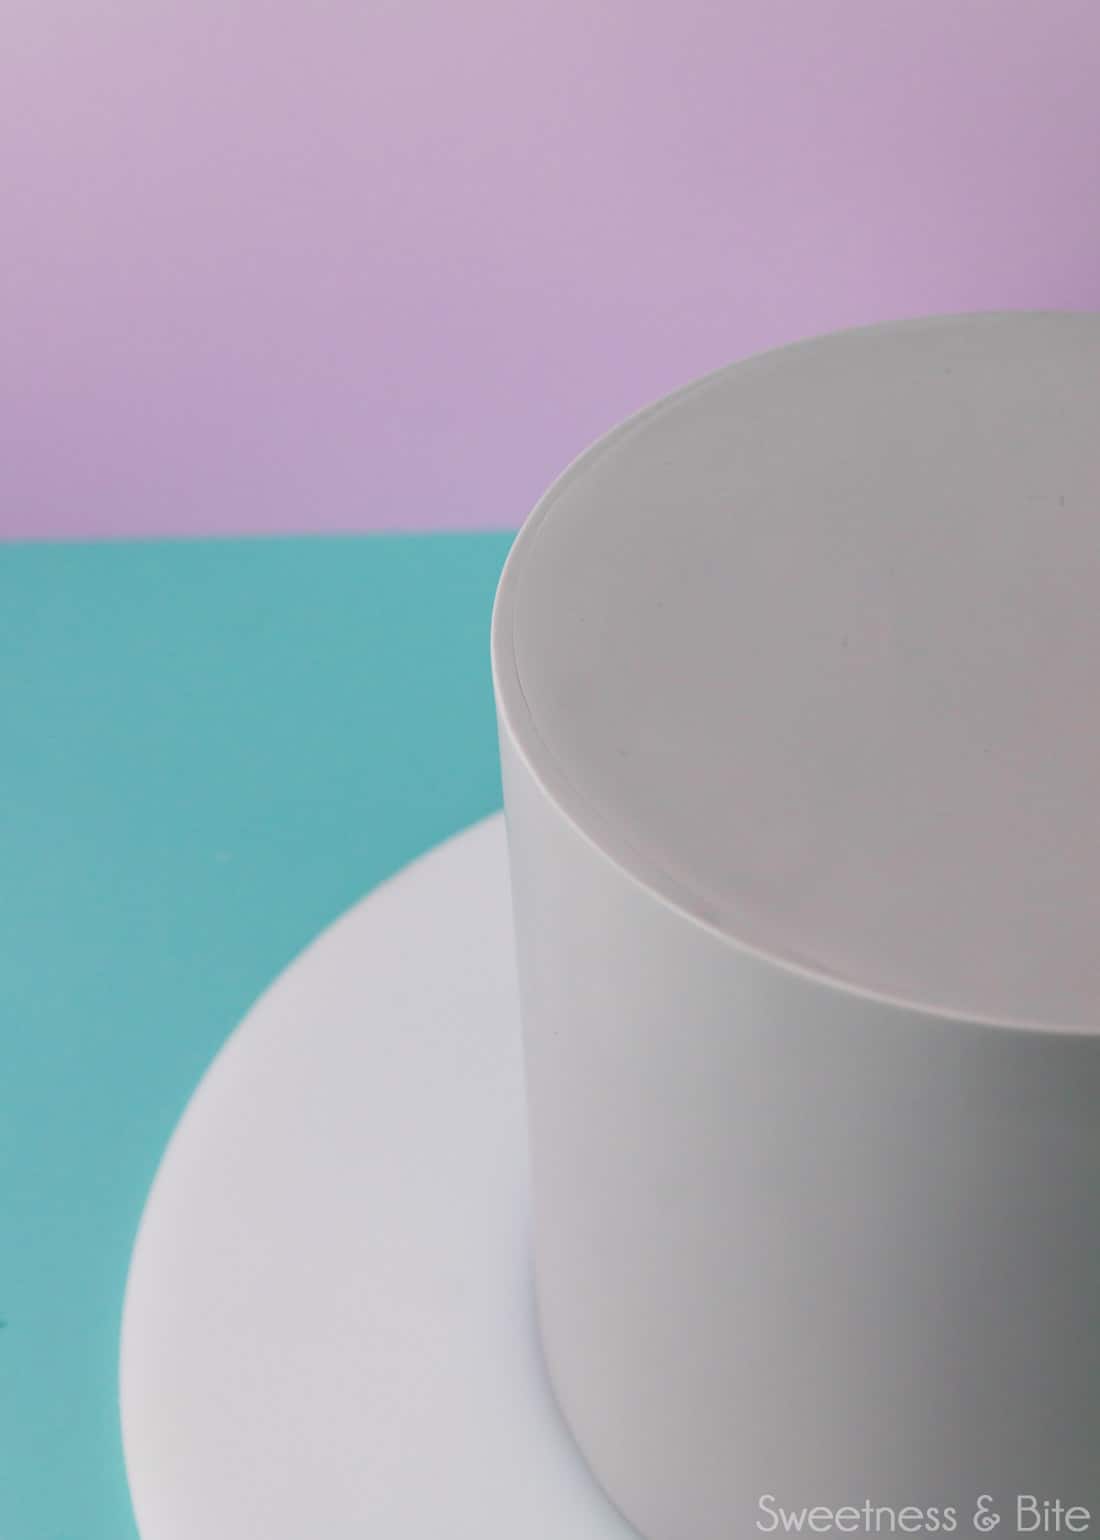
And then, you get to step back and look at your beautiful fondant covered cake and give yourself a pat on the back. If you can, I usually have a sore arm after kneading all that fondant. But I’m a weakling like that. So the back-patting is optional.
How to Store a Fondant Cake
This will depend on whether your cake has a perishable filling.
If your cake is filled and covered with ganache before fondant, then the cake will be perfectly fine when left at cool room temperature for 2-3 days. Keep it away from light if possible, either in a cupboard or in a clean cardboard box or cake box. Cakes filled with buttercream but covered with ganache can be stored the same way.
Cakes that are filled and covered with buttercream should be fine stored as above at cool room temperature for a day or so. Any longer and you may wish to refrigerate it. It’s best to put the cake into a clean cardboard box or cake box first, as the box will absorb moisture from the fridge and protect the cake from any smells from other foods. The cake will need to come to room temperature before serving, and it’s best to let it do that while still in the box, to prevent condensation from forming on the fondant. If the fondant does become wet and sticky from condensation, avoid touching it, and if possible, direct a fan onto the cake to dry the surface. (This risk of sticky fondant is one reason I prefer to use ganache, so I don’t need to refrigerate the cake.)
Cakes with perishable fillings like fresh fruit should be stored in the fridge as above.
If you run a cake business, you should check what the rules and regulations are in your area as to how you are allowed to store your cakes.
Fondant FAQs
If you’re a beginner cake decorator, I suggest first trying the all-in-one method of covering a cake in fondant. If you find you’re not getting a result you’re happy with, or you encounter the problems I mentioned above, then definitely give this a go. You may find this works more successfully for you. Either way, when covering a cake in fondant the first few times, leave yourself plenty of time so you’re not rushed, read through the instructions thoroughly first, and make sure you have all your tools on hand. These things will all help the process go more smoothly.
As I touched on briefly above, yes, you can, but you will need to make sure your cake has been well chilled and is super firm before you wrap it. You will then need to work quickly to get the cake wrapped and your fondant smoothed and trimmed before the buttercream starts to soften.
My recommendation for best results is to fill your cake with buttercream, but cover the outside in ganache. The ganache will be firm at room temperature, and it will be easier to cover in fondant. It’s the best of both worlds.
I wrap square cakes pretty much the same way I do round ones. You will need to choose whether you want your back seam on a corner or in the middle of the back side. Start wrapping there, making sure to smooth the fondant around the corners gently, pressing out the air to avoid bubbles. When you’re ready to smooth the fondant, you can sharpen the corners of your cake using the fondant smoothers the same way as I demonstrated doing on the top edge, just have one smoother on each side of the cake.
This is tricky to answer because it depends on a lot of things. Some types of fondant icing work better in different environments than others, and you will likely need to test out a few and see what works best for you. It’s best to avoid fondants that are too soft and sticky, as you won’t get a good result with them.
When wrapping a cake with fondant I find it easier to use a more firm fondant than a soft one. My own personal preference is Satin Ice. I haven’t tested this technique with homemade fondant or marshmallow fondant.
There are a few things you can do to try and limit how much the fondant dries out while you’re using it.
Firstly (and maybe most obviously) the faster you work, the less time it will have to dry out. You will naturally get faster at this the more practice you get. But also, make sure you have everything you need on hand so you don’t have to leave your fondant uncovered while you go looking for something.
Secondly, try not to use too much cornstarch or icing sugar when kneading and rolling out your fondant. It’s better to use a little shortening when kneading to stop the fondant from sticking to the bench. When rolling out the fondant try to only put cornstarch on your work surface, and only use a small amount on the top of the fondant if you really need it. The less you have on the surface of the fondant, the less dry it will be.
Thirdly, if your fondant is particularly dry, you can knead a little more shortening into it, or knead in some food-grade glycerine. Be careful not to add too much glycerine, as it can go the other way and make the fondant sticky.
Now you know how to wrap a cake with fondant. As always, if you have any questions about this technique, you can ask them in the comments below.
Happy wrapping!
~Natalie

Wow this is amazing thank you so much for this, definitely trying this.
I have been waiting for this for a few months! Thank You Thank You….did I say Thank you?!
Hey Aisha, I think, maybe, yep, I do think you did say thank you somewhere in there 😉 hahaha. You’re welcome, and did I mention, you’re welcome 🙂
And the same for square cakes too???
Hi Tania. I wrap square cakes in much the same way, it just takes a bit of extra care around the corners and a good rub with some fondant smoothers to sharpen the edges. It’s definitely on my list of upcoming tutorials!
Thank you Natalie for Sharing. Much appreciated
Great tutorial. I’m going to use this for my next cake. Not only is it double barrel making it 8in tall, but it’s also square. Double trouble.
Hi Gail, that sounds like a monster of a cake!!! I usually cover square cakes in panels, but I’ve been thinking that next time I’ll do it this way instead as then it won’t have seams on the corners. I think the only thing you’ll need to be extra careful of is as you unroll the fondant around each corner, make sure you smooth it on well using your fingers to make sure no air gets trapped and causes air bubbles on the corners. But other than that it should be pretty straightforward. You can use your smoothers on the corners in the same way you do for the top edge. Good luck, and I’d love to know how it goes! 🙂
Wow! Wrapping my cake is always my problem because the it’s messy at the bottom. Thanks so much for this Brilliant idea.?
Thank you for this tutorial Natalie. I have been wrapping my cakes for a little while – like you I find it easier than dealing with a huge piece of fondant and ending up with elephant skin – aargh!! I like all your ideas for creating a template and flipping the cake upside down. Where I have struggled is getting really neat seams and I think your flexible smothers will resolve that problem.
Can I asked you where you got your large black “heavy” smoother from? I like the right angle foot it has on it.
By the way I think all your tutorials are fantastic they are clear and easy to follow. Your detailed explanations are excellent. I’m like you and love a sharp crisp edge to my cakes and have had great success with your ganache tutorial – can’t wait to try this fondant one
Hi Julie, thanks so much, I’m glad you enjoy my tutorials. I think you’re right, the flexible fondant smoothers really help with blending the seams. The black fondant smoother is called a “smedger”. The brand is Prestige, and I got it from Kiwicakes. The same brand also sells a “side edger” which also has the flat base, I think it’s just shorter than the smedger. I just love it because of the flat base, it means I can’t accidentally push the bottom edge of the smoother into the fondant and dent it when I’m smoothing the top edge. So if you can get your hands on one, I definitely recommend it!
Hey. I really need to try this method! Sounds great. Have you any experiences w buttercream instead of ganache? Do you think this method can be used? Or do you even know?
Greets from Germany,
Hi Finja. I haven’t tried this yet with buttercream instead of ganache, although I do think it would work as long as you use a firm buttercream. You’d need to apply the fondant to the cake when the cake was chilled, so there may be some issues with the fondant getting sticky as you try to smooth it, so just keep that in mind. Another alternative (and what I did when I used this fondant wrapping method on a cake last week) is to fill the cake with buttercream but coat the outside in ganache. Then the cake can be at room temperature when you cover it, and you won’t have to worry about the fondant getting sticky 🙂
Thank you thank you thank you. I hate fondant and fondant hates me back too 🙁 … I am going to give your technique a try before I totally step away from fondant cakes (which I had just decided to do lol)
This looks awesome and I soo have to try it. Will probably be a challenge though as Norwegians don’t like dry cake or buttercream….. or even a cake filled with ganashe. Most people want moisted cakes filled with fresh fruit, raspberry mousse and stuff like that. And marzipan….. Naturally sticky! This is going to be such a cool challenge though 😀 Thanks for sharing!
Hi Tyra, I have to admit that I love those kinds of cake too, I’d much rather eat a mousse-filled cake than a ganache-filled one, they’re just not so easy to decorate 🙁 Have you tried making meringue buttercreams? I’m a huge fan of Swiss meringue buttercream, it’s not too sweet and is much like a mousse in texture but much easier to decorate with. I still like to use ganache on the outside, but I love having the meringue buttercream as a lighter-textured filling.
Just wanted to suggest a different fondant for those of you who have trouble working with it or even don’t like the taste/texture . . . . I LOVE fondant since I found Fondarific fondant! I find it easier to work with, doesn’t dry out as quickly, and everyone (yes! everyone) likes the flavor. They have mostly buttercream flavored fondant, but also some other flavors . . . like Mocha! and they all taste great!
Thanks for the tutorial . . . I am definitely going to try it
You are a genius…thank you thank you for sharing this with the cake world. You should be on the FOOD NETWORK….brilliant. I too am Fonderrified to try Fondant on bigger cakes, the smaller cakes drape well but as you go up the number its such a pain in the “Ahem”.
Definitely my go to method this time around….the thought did cross my mind before but ….NOooooo I thought that would be taboooo since the Big Cake Gods hadn’t invented it yet.
Thank You NATALIE, Great tutorial, It’s fantastic clear and easy to get
Hey, Natalie! Thanks a lot for sharing this amazing tutorial! I’ve always wanted to do this perfect sharp edges, but never achieve the expected result following instructions of others. Now I can make really cool sharp edges in my cakes!!! Thank you very much! I’m too happy and excited about this!!!
Hi Beatriz, you’re most welcome! 🙂
Can this work with frosting instead of ganache?
Yes, you can do this with a firm setting buttercream. It has to be able to set very firm in the fridge so that that the cake holds up to being flipped over. I have done it with Swiss meringue buttercream, and as long as the cake is well chilled, it’s fine. Other than that, the technique is the same.
Thanks for the great idea! I want to make my cake in advance for trade shows and since I’m covering dummy tiers with fondant, how long can I keep them at room temp before it starts to look “aged”? If using ganache, should I refrigerate it or will this create condensation issues?
Hi Cynthia. Fondant can last a long time on dummy cakes, but it depends on the colour, some colours (like purples and pinks) can fade a lot so you can’t keep those for as long. Other colours will keep well for months. If you’re using ganache under fondant I don’t suggest putting them in the fridge, they don’t need to be in there as long as they’re kept at cool room temperature, so it’s easier not to have to deal with the condensation issues. Hope that helps 🙂
Thank you! I’ve just covered fake bread tiers (idea found on wicked goodies.com) with ganache with success and am about to try this technique for covering dummy tiers with ganache. I have two concerns and one idea I wanted to run past you:
Q. in one or two places my ganache isnt 100% smooth. Will this be visible once I cover it in fondant and/ or will it interfere with smoothing the fondant?
Q. I’ve used chocolate ganache and will be covering with white fondant — will the chocolate show underneath and if so how do you suggest I handle this?
Suggestion: And thirdly, rather than smooth out the seams why wouldn’t you go over it with fondant gunge which I think would be easier and produce a smoother effect?
Thank you I much, you’re a God Send!
Hi Cynthia. A few little patches of uneven ganache shouldn’t affect the fondant finish too much, you can just work a little bit on those areas with the fondant smoothers and they should be fine. If they’re little dents or holes in the ganache, then if you use Crisco to attach your fondant you can fill those areas with Crisco. It eventually absorbs into the fondant so you don’t bite into it when you eat the cake.
I find with wrapping a cake in fondant there is much less chance of the dark ganache showing through the fondant, because the fondant doesn’t crease or stretch and end up with thin patches. If you’re really worried, you can roll the fondant a millimetre or two thicker, but if your fondant is 4mm or so thick then the ganache won’t show through.
I generally find that gunge doesn’t dry quite as matte as the fondant, it’s usually still a little shiny and therefore more noticeable. When you smooth the seams with the fondant smoothers, the seams blend nicely and are barely noticeable, especially if your fondant is rolled to an even thickness and trimmed neatly. But if your gunge dries nicely though then you could absolutely use that.
Hope that helps 🙂
Hi there!! I don’t think that my fondant edges are ever that sharp.(yikes) I am gonna try on this weeks cakes. Thanks so much for this. A couple of questions, where can I get a scalpel and that glorious black smoother???
Thanks!!!!
Hi Debi, you can use any super sharp blade for this, I got these disposable scalpels from a friend whose mother is a nurse, but you can sometimes buy them from pharmacies or art supply stores (I also just got some scalpels from an art shop that are great because they come with a proper lid for the blade). Otherwise if you can’t find an actual scalpel, a sharp craft knife will also do the trick. The black smoother is called a “Smedger” and it’s honestly one of the best cake tools I own. The brand that makes it is Prestige, I bought mine from Kiwicakes, but if you Google ‘smedger’ you should be able to find a stockist near you 🙂
Thank you so much for this tutorial! I can’t wait to try it out on my next cake!
I love this idea as I too have so much trouble and dread covering my cakes with fondant. Is there a reason why you couldn’t leave your waxed paper template rolled up between the fondant to stop it sticking to itself? Would it cause the fondant roll to slip? Just a thought, maybe I can try it next time and find out.
Happy cake making….
Hi Karen. I’m pretty sure I did try rolling the paper up with the fondant one of the first times I did this, but if I recall it kind of crinkled and marked the fondant. It could be worth another try, although I find as long as I use non-sticky fondant and remember to dust the cornstarch on the end of the fondant it doesn’t stick. I’d love to know how you get on when you try this technique, I used to dread using fondant too, but I find with this method I don’t stress as much 🙂
Thank you so much for showing “us”. This is the best tutorial ever, all we need is time and patience, icing cakes are like wrapping gifts, with a bit of effort you have a wow end result. Thank you again for posting.
Hi Elize, I hadn’t thought about it like that before but I really love it, icing a cake really is like wrapping a gift <3 Must be why I enjoy it, I love wrapping presents too (and I take just as long getting them perfect as I do with cakes 😉 ) xx
Thanks for this Natalie!
I have had such a nightmare with covering fondant since I started cake decorating in Dubai (I am originally from London). The dryness of the air really can be horrid for fondant. Wrapping might be the solution to my problems.
Thank you!
Hi Racheal, I definitely think this method works better when you’re dealing with dry air than the over-the-top method. I used to find my fondant would dry out before I got all of the pleats smoothed out (and the air isn’t as dry here as it would be over there!), but when you wrap it it’s pretty much smooth as you wrap it and there are no pleats to worry about 🙂 I’d love to know how you go with it! x
Thank you! Feels like I’ve been driving myself mad trying to teach myself some this which should be so simple.
Your blog is perfect and makes perfect sense. Picures also making your summary clearer to follow.
I will try this for my baby’s 1st birthday cake. 🙂
Hi Anitha, you’re so very welcome. I’m glad you found the tutorial easy to follow, and I hope the technique works well for you when you try it 🙂
Hi Natalie … something weird happened when i was wraping my cake which is not my first time by the way .. as i wraped it the fondant sagged at the bottom quarter of the cake creating a belt .. what could have gone wrong ?
Thanx a lot
Hi Reem. Hmmm that’s really weird! So it was sagging as you were wrapping it? It’s hard to say without seeing it, but it almost sounds like maybe the fondant was too soft and therefore too stretchy maybe. What kind of fondant were you using? Or perhaps the fondant wasn’t sticking properly to the cake. Were you wrapping a buttercream or ganache covered cake? And what were you using to adhere the fondant to it? Hopefully we can troubleshoot this and work out what’s going on 🙂
Yes me to..I really don’t think that fondant like me. 1st time doing it’s too hard and recently Malaysia weather raining so its humidity and its go too sticky.should try your techniques hope it’s work.tq
Hi, great tutorial. Have you ever tried hiding your seems with gunge?
Hi Linda. I have tried it a couple of times, but I found the gunge was still just a bit shiny and made the seams more noticeable than just a neat line. But if you’ve got a good recipe for gunge that doesn’t dry shiny then it could definitely be an option 🙂
Wow…..amazing…can’t wait to try it. Thank you for being so detailed in your tutorial. The only thing is that waxed paper is nearly impossible to buy in Sydney now. I still have a little bit in the cupboard. Thank goodness !! Thanks again ?
Hi Sally, waxed paper can be a bit of a hassle to get a hold of here too, it doesn’t seem as popular in Aus and NZ as it is in the States, which is a shame. I’d never realised before how useful it could be, now I use it all the time when I’m decorating!
Wow this tutorial is amazing. I’m a fondant wreck like you from tears to a bloodbath, I’ve had it all. This will be extremely helpful for me. Thank you
Hello,
This tutorial was so detailed and fun to read!
Covering cakes in fondant is daunting but you have managed to make it more beginner-friendly 🙂
Thank you!
Thanks for the best tutorial
Hi,
I read somewhere that when covering a cake with fondant, the cake should be dense like a Madeira cake and not a light sponge cake. Is that true?
I need to cover a chocolate cake with fondant but with my recipe the sponge is very light and not dense at all. ? Will this be an issue? Please advice.
Thanks,
Heenal xx
Hi Heenal. It’s definitely easier to cover a dense cake than it is to cover a very light one. A sponge doesn’t hold up very well to the weight of the fondant, so something more like a Madeira is best. If you need a chocolate cake that stands up well to fondant, I’d recommend trying my devil’s food cake recipe, it’s not a heavy, dense cake, but it’s firm enough to hold up to fondant, especially if you cover it in a firm buttercream or ganache under the fondant. Hope that helps 🙂
I will do. Thank you 🙂
Heenal x
Hi, great tutorial but I tend to make 25cm & 30cm cakes. Have a nightmare covering large cakes with fondant. Love this idea but have you any tips on on wrapping a large cake without turning over?
Hi Jayne. It’s definitely trickier when you can’t flip them over. Your best bet is to cover the top of the cake with fondant, trim it as neatly as you possibly can around the edge, then cut out a strip of fondant (using the same waxed paper template technique) but the same height as the cake and wrap it around the cake, paying extra attention to lining up the top edge neatly. Then use the flexible fondant smoothers to blend the seam. I don’t do big cakes too often, but next time I do I’ll try and take some pictures to show what I mean. Hopefully that helps you a bit though 🙂
Have you tried this with a square cake?
And have you tried with crusting buttercream like American?
Hi Krystle. You can do this exact same technique on a square cake, just smooth the fondant around the corners are you wrap, then go back with your fondant smoothers and run them up and down the corners to sharpen them. You can do it with buttercream, but you have to make sure your buttercream is really well chilled and firm, and then you need to wrap the cake quickly before the cake begins to warm up and a) soften at the edges and b) start forming condensation and make the fondant sticky. If you’re used to working with buttercream and fondant though then you’ll be used to that. But those are the keys, keeping the buttercream firm and working quickly 🙂
I’m glad I found this article via google search. Because I don’t offer fondant covered cakes in my business because no matter what I do or how I do it. My fondant tears the minute I start smoothing it. So the original way of covering it is definitely a NO For me. I will try this will crusting buttercream I have a feeling it will end badly lol but thank you
Oh I feel your fondant pain! You can also fill the cakes with buttercream and cover the outside with ganache before you wrap it in fondant, means you can have your cake at room temperature when you cover it as the ganache is solid at room temp. Best of both worlds. I’d love to know how you get on, I hope the technique works for you! 🙂
Hi. Totally fantastic tutorial, thanks!
I’ve been asked to make a mad hatter’s tea party hat and I’m terrified at the prospect of covering it- having sloping sides. ANY advice would be spectacularly welcome!! Thanks 🙂
Hi Joanna. If the cake will be small enough to flip over, then I would suggest this (and bear with me, I hope this makes sense!):
Ganache the cake and let it set overnight. Cover a setup board in waxed paper (as in this tutorial). Roll out a really thin piece of fondant and cover the top of the cake and flip it over (as in this tutorial). This doesn’t need to be too neat as you’re mostly using it to hold the cake in place while you cover the sides. Trim the excess fondant.
Roll out a piece of fondant large enough to cover right over the cake (as you would if you were covering the cake using the all-in-one method) drape it over the cake, right over the cake board (which is on the top, because the cake is still upside down). Smooth the fondant down the sides of the cake. Trim carefully around the bottom to remove the excess. Then trim the fondant off the top/cake board (just cut through the fondant on the top of the cake until you get to the board, then hold the knife flush with the board and trim around the edge). Use your fondant smoother to smooth the fondant.
Flip the cake back right-side-up, then repeat the same steps to cover the top again, but with the fondant rolled to your usual thickness. Flip it upside down again and trim the edge, then smooth it with a fondant smoother (a flexible one is best for this). Doing it this way means there will be a seam around the top-side-edge of the cake, rather than on top like in this tutorial, which I think works better for a hat. Hopefully that makes sense! I can see it in my head but I can’t always describe it without pictures 😉
I did a small Mad Hatter’s hat a while back, the hat was a topper and made of polystyrene, but that’s pretty much what I did with it. https://sweetnessandbite.com/mad-hatter-hat/
Hi.
Thank you so much for your quick and detailed reply, so very kind of you!
Took me a couple of read throughs to get it in my head but I think your advice is perfect! Thank you SO much!!!!! I’m feeling a lot less stressed now ?
Bless you for being so generous with advice.
Joanna x
You’re most welcome, I was worried I’d just confuse you, but I’m glad it made sense in the end! Best of luck, I’d love to see it when it’s finished if you’d like to share 🙂 xx
No idea how to share but I’ll give it a go! Haha 🙂
Xx
You can email me a picture to natalie @ sweetnessandbite.com (just remove the spaces around the @ , I’m not supposed to put full email addresses in comments) or if you’re on Facebook you can share it on my page 🙂
I’ll do that- thanks! Won’t be til 8th April and won’t be up to your stunning standard but gonna do my best and enjoy myself 🙂 xx
Enjoying yourself is the most important thing! I never used to be up to my own standards, and sometimes I’m still not 😉 haha. I hope you have fun with the cake, and I’m really looking forward to seeing it 🙂 xx
AHmazing!!!! I love it. Thanks SOOOOO much for sharing! This’ll be my new process from now on. Thank you a million times over.
Thanks so much. I’ve thought about trying this myself. I’ve never used ganache, but will try this with a firm buttercream and let you know how it works. I’ve tried all the fondants and have trouble getting them to wrap well around the bottom. If the fondant is too thick it won’t lay flat and if it’s too thin it tears!! I know Satin Ice almost caused me to have a breakdown last summer. I found it easy to use but sagged and tore. I’m in Tennessee and it was hot and humid. I have found Dream is much better and doesn’t dry out like the others do and it actually tastes good….has a little white chocolate in it I think. It is really hard coming out of the carton but you zap it a few seconds and it’s great. Thanks for the great tutorial.
Hi Sue, I’d love to know how to get on using this technique with buttercream. It’s so frustrating when you try so many different fondants and none of them work exactly the way you want them to. I use mostly Satin Ice and it works pretty well for me (most of the time), but it doesn’t tend to get overly hot and humid here and I have heard from a lot of people that it’s not great in that kind of weather. If the Dream fondant has chocolate in it then it should work well for blending the seam with this technique, the chocolate should help to join the seam with the heat of your fingers. Just be careful the fondant doesn’t get too warm when you’re rolling it around the rolling pin, or it can stick to itself, so just keep an eye on that. Good luck, I hope it works well for you! 🙂
I’m confused as to how you got the red gripping mat out from the bottom of the cake when you flipped it back. I’m rather new at all of this so maybe I don’t understand.
Hi Katrina. Do you mean the final time the cake gets flipped? If so, the board it gets flipped back onto at the end isn’t the final display board for the cake, it just stays on that board til you’re ready to put it on the final board (or cake stand) and finish decorating it. Once the fondant is dry you can lift up the cake and move it onto the display board. Does that make sense? Let me know if it doesn’t! 🙂
Hi Natalie
Can I use parchment paper instead of wax paper
Hi Geenah, I’m afraid parchment paper doesn’t really work for this, it’s non-stick so you can’t tape it to the board.
Hello and thank u so much for this brilliant tutorial! I’m very interested in covering my cakes with ganache but what if a client does not want chocolate flavor?
Hi Susan, you can always fill the cake with buttercream and just cover the outside of the cake with ganache, that way if people really don’t want chocolate they can just not eat the outside 🙂 When I was selling cakes I didn’t offer fondant-covered cakes that weren’t covered with ganache, they could have them filled with buttercream but I always covered the outside with ganache. For me it’s just so much easier to work with fondant when the cake is covered in ganache. Hope that helps!
thnx! it does help! additionally, it just occurred to me that maybe white chocolate ganache would be even less noticeable (color- and flavor-wise) ! any thoughts on that?
thnx again!
White chocolate is definitely a less chocolate-y way to go. Mostly just tastes like vanilla anyway ?
Thank you. Fondant is my nemesis!
Your tutorial looks brilliant. Thank you so much for your advice. I’m about to try your wrapping method but without flipping the cake as I’m so worried I’ll damage it. It’s a reasonably dense 8″ x 5″ chocolate cake. Should I be able to flip a cake that size? Many thanks
Sue
Hi Sue. I think it should be fine to flip a cake that size, but it’s really about what you’re comfortable doing. If you’re happy lifting the weight of the cake, then flipping it is reasonably straightforward as the cake is basically stuck to the waxed paper, so it shouldn’t slip. But if you’re not confident about flipping it, then have a look at some of the other comments on this post and I’ve given some tips for what to do if you can’t flip the cake. It’s a bit fiddlier but it’s definitely still possible to get a good result 🙂 Let me know if you have any other questions.
Thank you so much for this detailed how-to! I am an upside down froster already (love those perfect edges and level tops!!) and was wondering if the same could work for fondant (specifically, on the three cakes in my fridge that need fondanting right now) so I was super excited to find your tutorial. I’m trying your method this afternoon! You rock! 🙂
What’s your recepie to your favorite fondant?
Hi Leeia, I generally use Satin Ice fondant 🙂
I LOVE your tutorials. Seriously, without them I would be lost, and the step by step nature works really well with my to-do-listy brain. I’m still fairly useless and uncoordinated, but believe me, my fondant cakes look so much better (to me at least, I’m pretty sure my family and friends just want to get to the cake inside).
Keep up the good work 🙂
Awww, thank you Ellie! I’m really glad you find them helpful. Shh, don’t tell anyone, but I’m uncoordinated too. I just hide it well 😛 xx
Thnk u so much for brkin it down to simple n clear steps..u r really gud at it n it shows tht u hav done quite an amount of practice.. btw i luv ur humour..im gona watch out for ur posts frm now on..! 😀
Thank you very much for shearing this, you have done big job just to help others.
Looks awesome! Question: do you have issues flipping the cake? What is the largest you’ve done? The bigger cakes get pretty heavy. :-/.
I’ve also honestly never used ganache when covering with fondant – always buttercream. So how do folks like the ganache versus buttercream?
Hope these aren’t too dumb of questions.
Thanks for taking the time to do this tutorial!
Hi Gina. Not dumb questions at all! 😉
Haha yes I have had problems flipping larger cakes, I can’t personally flip anything over about 10″ by myself, I usually get someone stronger to do it for me. Having said that you can alter this technique so you don’t have to flip the cake, I describe how to do it in my Ganache FAQ post. It’s a bit more fiddly, but better than risking trying to flip a super heavy cake. I think ganache vs. buttercream is a personal preference thing, I like both but I much prefer to use ganache when I’m going to be covering a cake with fondant as it is a lot easier to work with. The ganache sets firm and you don’t need to chill the cake before applying fondant, so there aren’t issues with condensation forming on the cake as it comes back to room temperature. They both have their place but I definitely think it’s worth having a go with ganache and seeing if you like it! 🙂
Oh yeah. Where did you get that awesome mesh cake cover in the first photo?
It’s a mesh food cover (usually used to keep flies off food if you’re eating outside). I like to use them to cover my cakes in between working on them. I also have a large one which is just big enough to cover a stacked two tier cake. You can generally buy them from homewares stores, some supermarkets have them too, or you can grab one on Amazon 🙂
Thanks for sharing ….. I will defenitely try this method.
What a great video!! I’ve read how people do this but your pics have made it so clear! Thank you!!!
Terrific tutorial. Thank you for sharing. Xx
Definitely going to do this ! Been baking for years, and fondant has always been a challenge. Thank you !!!,
Thank you for so many photos. I am a very visual learner. Show me clearly once and I can usually pick it up. That’s what tutorial had done. Fantastic ?
Excellent tutorial. Can u plz also make some tutorial for characters cake. How to cut characters over fondant.
Hallo Natalie,
The upside method is brilliant!
Thank you for sharing.
Be blessed
Daleen
Hi Natalie,
Thank you for posting this, so helpful! Unfortunately though, I used this to help a groom with his wedding cake and after it sat out for a while the back seam started to bulge out. So much that it caused a tear near the seam. Any suggestions for fixing it?
Tried smoothing it back onto the buttercream cake and wrapping tightly with plastic but it starts coming off again when you unwrap it. Wonder where we went wrong…
Hi Naseem. That’s no good! It sounds like possibly a problem with the buttercream underneath the fondant, rather than an issue with the fondant itself. Buttercream can bulge under the weight of fondant, but there are a few things you can try to prevent it happening again. Firstly, it’s important to use a firm buttercream to fill the cake with, if the buttercream (or other filling) is too soft, then the weight of the fondant will cause the filling to bulge out and in turn push out the fondant. It’s a good idea to let the cake ‘settle’ after you fill the cake before you cover the outside with the buttercream. I usually do this by placing a weight like a cake board or plate on top of the cake and leaving it for half an hour or so, either on the bench or in the fridge. This will weigh the cake down, and push out any air bubbles. Also, I’m not sure if you refrigerated the cake or not, but bear in mind that if you have kept the cake in the fridge and then brought it out to serve, the fondant can sometimes react badly to the change in temperature as the cake comes back to room temperature. It can depend on the type of fondant though so it might be something you’d need to experiment with. I hope that helps somewhat and if there’s anything else I can help with, then please let me know 🙂
Hi Natalie,
Thanks for the advice! I already delivered the cake earlier today. Ended up having to keep the cake refrigerated to keep the fondant from bulging. I did see evidence of the buttercream filling oozing out in the bottom layer leading to the fondant bulging. I’ll have to try the weights method next time. Despite the imperfections in the back, the cake still turned out great and everybody loved it 🙂
I’m so glad to hear you managed to get it looking good and that everyone loved the cake. Hopefully next time you can tweak the process and not have those issues again, fingers crossed! 🙂 xx
Wow that’s great! Thank you so much for sharing this. I’m sure it will help improve my output using this technique. I really want to try it soon. This chance of seeing your sharing is really a blessing! I feel so thankful! GOD BLESS!
Hi Noemi, you are so very welcome! I’m really glad you found it helpful. If you try it out I would love for you to let me know how it goes 🙂
I tried it last weekend and find it helpful as a new technique. Of course I need more practice to make it perfect like your sample. A big improvement of my output.
Frosting should be refrigerated to make it firm before covering it with fondant? THANK YOU AGAIN. I hope you will not get tired of answering queries.
Yay, I’m so glad you liked it! Yes if you’re using buttercream under the fondant you’ll need to refrigerate it and firm up the frosting before you wrap it. The whole process is much easier with a firm cake to work on, that’s why I prefer to use ganache on the outsides of my cakes, as the ganache is firm at room temperature. But if you chill your buttercream and then cover it with the fondant before it softens too much, then you should still be able to get a good result 🙂
Natalie,
Thank you so much for this tutorial. It is so helpful! May I ask where you buy your flexible fondant smoother?
Again, thank you for the lesson!
Laura
Dish Catering
Los Angeles, CA
Hi Laura, I actually make them myself, and I have a tutorial on how to make them here: How to Make Flexible Fondant Smoothers 🙂
Hi Natalie.
Loved this tutorial. I’ve never seen this method before. Would this work for a fruitcake covered with marzipan?
Hi Sue, I’m so glad you enjoyed the tutorial. Yes you can absolutely do that 🙂 If it’s a large fruit cake just make sure that you’re strong enough to flip the cake upside down (or like me, that you know someone who is strong enough and will flip it for you) 😉
Thanks Natalie. I think I’ll enlist some help for the flipping
Good plan. And good luck! I’d love to know how you get on 🙂 x
Thank you for this amazing tutorial! I used this to cover my wedding cake last week which here in Arizona, fondant cakes are always a hassle with the heat and dry air taking a toll on the fondant! I have never covered a cake so quickly or easily as I did following this tutorial.I really appreciate our detail and sense of humor throughout this post and your tutorial on ganaching a cake. I have learned more from you than my Culinary School teachers!
Thank you again!
Hey Danielle, awww, you are lovely and that is so awesome! I’m so glad that it worked so well for you, especially in that kind of heat. And thank you for letting me know, I really appreciate it 🙂
Thank you, thank you and thank you again. Just finished wrapping a 5 layer high cake using this step by step guide! Fondant hates me as much as I hate it, but you tutorial has certainly improved my outcome by 100%….but there is a lot of scope to practise and get it to your level! Great help indeed!
Hi Betsie, thank you, thank you and thank you again for your lovely comment! <3 You are most welcome and I'm really glad that you found this technique helpful and that it's working so well for you. The fondant may hate us, but we can still show it who's boss 😉 xx
hey its a great tutorial u’ve got.please how do u make your ganache.am soooo novice
Hi Valerie, I have a tutorial on how I make and use my ganache, have a look at that and if you have any questions just let me know 🙂 >>Ganache Tutorial<<
I did it! I did it! Oh the result was lovely <3 – even with buttercream instead of ganache
I've been wanting to try it for ages! Just wanted to thank you (and you lovely mother who took these nice pics) for the wonderful tutorial
lots of love
Hi Laís, that’s fantastic! My mother and I both say you’re very welcome 😉 I’m super glad you got such an awesome result. Thank you for letting me know! 🙂
i am soo soo happy to see your post as i m facing a hell a problem in draping my chocolate ganache cake . yes , i wasted four cakes in this process. i am crying in depression as my fellow mates ( class) have moved ahead to making flowers but i m still stuck with this …
After i ganache my cake it is left out / AC ( almost 8hrs) to crust after giving sharp edges. ( we are not supposed to put in the fridge ) . Once it is dry to touch , i apply water slightly with pastry brush and drape the fondant in normal room temperature. Immediately i bring to Ac room so that the ganache will not melt. But here comes my problem , within few minutes the cake starts getting a bulge on one side and i can do any smoothing on fondant as the ganache starts oozing out from that place. this is happening repeatedly.
Please rescue me …..
Hi Annapurna. That’s really frustrating! There are two main things I’d suggest you look at to fix this problem. One is making sure that your ganache is actually setting firmly enough. If it’s oozing out at room temperature then it sounds like it’s not totally firm. So I would try increasing the amount of chocolate in your ganache to make sure it sets nice and hard. If you haven’t had a look at my ganache tutorial and ganache FAQ posts then you might want to have a read of the troubleshooting tips there as they might help. It sounds like it’s pretty warm where you live, so I think a ganache ratio of 4:1 or even more might be better and make it set more firmly.
The other thing I would suggest is that after filling your cake (before you cover the outside of the cake in ganache) try placing another cake board on top of your cake and then placing a weight on top (I just use a couple of small plates) and letting the cake sit for half an hour or so. This allows the cake to settle, any air that’s trapped in the filling will be squeezed out, and the cake will squish down a little bit. Then you cover the cake in ganache as usual. This means that when you put your fondant on, the cake won’t squash down and squeeze that filling out, and there won’t be any air bubbles being pushed out either.
Give those a try, and if that doesn’t help then let me know and we’ll troubleshoot some more. Good luck! 🙂
I love your tutorial but more importantly I love and really really appreciated that you mentioned photoshop. Sometime the bar is set too high and people including me sometimes forget photoshop exists and think others can do it “just perfect” with not big effort.
Thank you again
Diana
Hi Diana, absolutely, it can be so disheartening to look at those “perfect” cakes and think “my cakes will never look that good”, but we forget that we’ll never know how many of those images have been touched up. I think it makes it harder for beginners because they’re comparing themselves to those kinds of cakes. But it’s more important to look at your own work and see the improvement you’re making, rather than comparing yourself to someone else. Although sometimes thats easier said than done, I still fall into the Perfect Cake Lust Trap sometimes 😉
Oi Natalie,Adorei o seu método para cobrir um bolo.Sim,eu consigo cobrir um bolo pequeno.Mas estava imaginando o que fazer para cobrir um bolo de 20 cm (comprimento) X 24 cm (altura),quando descobri você!
Obrigada por compartilhar seus conhecimentos!
Oi Jaqueline, você é muito bem-vinda, fico feliz que tenha achado útil! 🙂 (Espero que o Google traduza isso corretamente para você!)
Thank you so much for this great tutorial. I’ve just set up a small cake business and have had an order for a 14″ diameter, 9″ tall cake with clean lines and sharp edges! I’ve been worrying about getting it looking good enough but now I see how!
Omg this is a brll way to cover a cake i have been making cakes for a long time and will now be using this method what a lovely finish .
Hello Natalie, perfect idea I tried it and it’s work well, but i have a problem when I rolled fondant I can’t keep the fondant shape near to be rectangle to can cut it, it’s start to became like circle so it’s hard to cut it the same as cake size, always I make this mistake, so what u can advice me.
second point why my fondant being humidity even if when I coated a Styrofoam and it’s became very hard when i start to use the smoother it’s stuck on it specially on the top so it’s hinder me to smooth it so what is the mistake i might do to keep this happen, I sometimes use microwave to make it more smooth and sometimes i put little shortening and last time i remove the paste from Styrofoam and rolled it again is those maybe the cause?
thank you in advance
Hi Sara, it can be a bit tricky to roll the fondant out into a rectangle shape, I usually try and shape it into a rectangle before I start rolling, but you could even shape it into more of a sausage shape so that it’s already in a longer shape before you start, that might help to stop it becoming too round. You also have to kind of get used to rolling more in one direction, I think we get used to rolling out fondant into a round shape and trying to make it even, but for this you just have to roll it more long-ways than width-ways. I hope that makes sense!
Humidity can make working with fondant really difficult, if your smoother is getting stuck then it can help to dust it lightly with cornstarch, I try to avoid using icing/confectioner’s sugar to roll fondant when it is humid as the icing sugar attracts water (it makes things more sticky, not less) so using cornstarch to dust the fondant while you roll and then before you try and smooth the fondant can help. If you happen to have a fan or air conditioning it can help to have that running while you’re working with the fondant too. Hope that helps! 🙂
Hi, I just tried your method yesterday and it worked a treat thank you so much. Tall cakes used to send shivers down my spine knowing I would have a rip or creases. Cake looks great.
Hi Natalie,
Thank you for this wonderful tutorial.
I’ve been making cakes for a while now and getting straight sharp edges has always been a challenge.
I cannot wait to try out your method. It will not only save me time but it will improve my Cakes overall.
I will keep you posted.
Cheers
Hi Deborah, you’re so welcome, I hope you find it helpful and I’d love to know how it goes for you 🙂
Hi from Malaysia ? did you wrap the cake with fondant while the ganache is still hard and cold? Or do you wait for the ganache to soften a bit and come to room temperature?
Hi Dora, I use ganache that is firm at room temperature, so it doesn’t go in the fridge. There is more detail on that in my How to Ganache a Cake tutorial if you want to check that out ? https://sweetnessandbite.com/how-to-ganache-a-cake/
I am one of those people who cover their fondant the traditional way,but this method os a good tip for tall cakes actually. Thank you for sharing. If u ever want give it another go at covering a cake with 1 big fondant piece though,here’s a few cheat tips.
1. Instead of using corn starch,use icing sugar. The corn starch is what makes it more prone to getting elephant skin. While using icing sugar gives the same needed effect without over drying it. And bonus, it seamlesly blends into the fondant afterwards.
2. If u get elephant skin,massage vege shortening onto the area and then rub icing sugar onto the place with vege shortening. Keep on massaging and smoothing the area until the elephant skin dissapears.
Happy decorating! ?
Thank you soooo much for all your fantastic tutorials! You have been my Cake Teacher since I have begun making beautiful cakes with all your techniques (ganache, fondant, etc). I made recently a very geek(!) three tier wedding cake for my sister and it was delicious (your dark chocolate and white chocolate mudcake recipes) and stunning!
I can’t put photos here, unfortunately, I think but thank you so much!
Hi Kim! Oh you are so welcome, it gives me major warm fuzzies to know that my tutorials have helped you out so much <3 If you ever want to share a cake with me you're welcome to post it on my Facebook page, or tag me on Instagram ( sweetness.and.bite ) I would love to see them!
Hi Natalie, I adore your technique for fondant, I’m in the very beginning stages of making cakes as I recently discovered my love for baking, so I’ve never actually used fondant, but the thot always intimidates me. I’m inspired to try this method now though, I am! Please tell me if you know what I can use to substitute for cake boards and fondant smoothers and stuff because I don’t have any proper equipment, nor the money to buy it 🙁 If you can provide some ideas for improvising Natalie, I will try to wrap a cake with fondant I will- using ganache. Thanks you!!
Hi Mara. That’s great that you want to give fondant a go, and please don’t be intimidated, just give it a try 🙂 If you don’t have the large cake boards for flipping the cake over, you could use something like a chopping board, anything that has a flat surface and food-safe. There’s really no substitute for the cake board under the actual cake though, without that you won’t be able to move the cake around easily. Depending on where you live, cake board (or cake cards) can be found reasonably inexpensively at cake decorating suppliers. You can make your own flexible fondant smoothers (I have a tutorial for that) and just use two of those to work on the top edge instead of one solid smoother and one flexible smoother like I do. I hope that helps 🙂
Wow!! I am so glad I came across this tutorial. I am 100% with you on the fondant part! I hate it with a passion and it hates me too. I want to love it but it just won’t give in when I try and use it!
Elephant skin, too dry, too cold to knead, stretching. The last few times I used it I cried my eyes out and thought ‘I can never decorate cakes!!’ People just seem to throw a chunk over their cake and next minute it’s a beautiful smooth cake! I just don’t know how they do it!
But now I’ve seen this I’m super excited to give it a try! Thanks for being so descriptive and I love the mini video showing your sharp edge technique!
Thanks!
Kelsie
Hi Kelsie. Oh, I absolutely feel your pain! I would love to be one of those people that can just toss a piece of rolled out fondant over a cake and smooth it over the sides with no hassles. But until some kind of fondant fairy godmother waves her magic wand and gives me those skills (and some kind of miraculous fondant that never rips, tears or dries out), I’ll just stick with wrapping instead ? I hope this technique helps you learn to love fondant too!
Natalie, yes, I will try this afternoon to use fondant, thanks to your tutorial I feel more confident, but I’m not expecting perfection on my first try. (I am a bit of a perfectionist tho so this could be interesting…) Great idea for saving money with the fondant smoothers too! For cake boards-can they be cardboard or foam or is that too flimsy?
Btw I appreciate your humor, tutorials can be boring to read through but yours always give me a laugh. 😀 You do good with reminding everyone that baking should be fun, not frustrating!
Hi again Mara, I’m so sorry, for some reason I didn’t get a notification of your second comment and so I’ve only just seen it. I’m probably too late, but I would say that regular cardboard or foam board would probably be too flimsy, and also they wouldn’t be food safe or able to be cleaned well enough to be food safe. Proper cardboard cake boards tend to be made of stiffer cardboard, and they have a foil paper coating that makes them food safe.
I’m so glad you’ve been enjoying my tutorials, and you’re so right, baking should be fun and not frustrating! ❤️
(Not sure why that reply showed up as a new comment, sorry bout that…) No problem! I didn’t have all the supplies I needed so I couldn’t start anyway, so you’re not too late. I will look for proper cake boards. I thought I remembered seeing a recipe you had suggested for the cake that works well for ganache, but now I can’t find where that tip was… did you have a specific recipe you think works best? Thanks for your help!
You can pretty much use any cake you like. Sponge cakes are usually a bit too light, but anything firmer than that should work well. I usually make chocolate mud cake or devil’s food cake, and they work really well. You can find all my cake recipes by clicking on the “Recipe” tab in the menu, and the cake recipes are right at the top 🙂
Hello,
I live in a tropical country. how can I avoid the ganache getting too soft in the heat? this is a real issue when covering with fondant as the gnanace would not hold the weight of the fondant….. love your step by step method…..
Hi Sue. To make the ganache set better in higher heat, you need to increase the ratio of chocolate. If you have a look at my How to Ganache a Cake tutorial, I talk a bit about the ratios and how to adjust them for warmer weather. I’d suggest checking that out, and then if you have any more questions please let me know 🙂
Yay! Just tried this Natalie and so much easier than creating a huge fondant skirt and all the effort of rolling out something massive. The only down side is it’s 27 degrees here in late April, humid and windy so my white chocolate is struggling a little and developed a bulge ?. I’ve got it locked away with the dehumidifier for the rest of the day and hopefully I can minimise how it looks as it cools a little. My rolling pin doesn’t have a flat end unfortunately but I just got away with it. It did slip a little bit but actually smoothing it all and using a sharp knife for the bit that squished out and a lot of smoothing I got away with that too. My cake is two x 7 inch rounds which are almost 8 inches tall togethers so wrapping was so much easier
Hello, thank you so much for so detailed and wonderful tutorial. You are so awesome! it’s possible to put swiss marinque buttercream under the fondant instead of ganache? Did you ever worked with marshmallow fondant? It’s there a special kind of ribbons to put on cakes or can I use any from the craft store?
Thank you
Hi Bo. You can use buttercream under fondant, but I find it a lot more difficult to work with so I don’t tend to do it. You have to chill the cake until the buttercream is completely firm, and then work very quickly to cover it in the fondant before the buttercream starts to soften. What I tend to do is fill the cake with the swiss meringue buttercream and then use ganache on the outside, so you kind of get the best of both worlds – buttercream filling but with the stability and firmness of the ganache on the outside.
I have used marshmallow fondant before, but I prefer to use ready-made fondant for my cakes, purely because I don’t like to have the extra work of making the fondant ? Marshmallow fondant does taste nice though, I think.
I just use regular craft store ribbons on my cakes, wrapping them around the cake and securing the overlapped ends with a bit of double-sided tape. I don’t tend to use ribbons very often on buttercream cakes though, just fondant or ganache, as the fat in the buttercream seeps into the ribbon and makes it look blotchy.
Hope that helps! 🙂
Hi Natalie.
I am a real novice so have some questions I hope you can help me with and don’t think they are a bit dumb in the first place.
I have made 3 wedding cakes before, one each for my nephews which I was very proud of and many celebration cakes for friends and family.
However in September I am making my sons wedding cake!!!!!
My future daughter in law has requested a 4 tier tall cake. Bottom tier fruit cake and then a lemon drizzle, carrot cake and Madeira.
So I feel a lot of pressure and need some help please.
The fruit cake I think I would cook as one cake, however would I cook the sponge cakes as one, or would I layer tiers on top to get the tall effect. ( sorry I have never made/cooked a tall cake before.)
Also would you have any suggestions as to how I can make a more dense Lemon Drizzle , as my usual recipe is very light and usually I pour on top the sugar and lemon juice for the crunchy topping which obviously I will not be able to do.
I have never used ganache before when covering a cake with fondant. So would you suggest I use the white chocolate and if so have you a recipe for this please.
I will obviously have a practice before September, before I make the real one!!!!!!!
Thank you so much.
Carol
Hi Carol. They’re not dumb questions at all, so don’t worry about that!
I would suggest first deciding how tall you want your cake tiers to be. If you’re wanting them all to be the same height, and you’re baking the fruit cake as one cake (as most people would) then I would figure out how tall that one will be so you can match the others to it. I can bake my fruit cakes to be 4 – 4.5″ tall because my tins are quite tall, but it will depend on how tall your tins are and therefore how much batter you can fit.
What I would recommend doing in your case is, if possible, testing out the recipes beforehand, baking them in the sized tin you’re going to use for that flavour, figuring out how tall they’re going to come out (and obviously whether you will need to adjust the recipe up or down) and seeing how many layers you might want to cut them into. As far as heights go, it really is all down to personal choice. I’m a fan of 4″ – 5″ tall cakes, but some people like them taller or shorter, it really is up to you.
For pretty much all cakes except fruit cake, I personally like them to be split into layers and filled with buttercream or ganache. Most of my cakes are 4 layers of cake and 3 layers of filling, but you can pretty much do anywhere between 2 and 5 layers for a standard height cake. Obviously, the thickness of your layers and how much filling you use will dictate how tall your tiers end up.
For the lemon cake, I highly recommend this Lemon Sour Cream Cake on Food to Love, it works really well for tiered cakes. It’s dense but not too dense and stays super moist. You could also do a lemon syrup if you want to add more flavour and moisture.
When it comes to ganache, I have a whole tutorial on that including how to make it. If you have a favourite way of icing your cakes you definitely don’t have to do it how I do, but the tutorial does talk you through how to make and use the ganache, so definitely worth a read. White chocolate ganache would probably work well with all of your cake flavours. You can also fill the cakes with buttercream and use ganache on the outside, if you prefer.
Hopefully I’ve covered all your questions, but if there’s anything I’ve missed or you need me to clarify anything, just let me know! 🙂
Thank you so much Natalie. So kind of you to spend the time to reply. I am going to have a practice over the next few weeks. Lots of cakes to eat !!!!!! My husband will be happy.
Just wanted to say thank you for this very detailed tutorial. It helped when making my first wedding cake last week.
Hi Dee! You’re most welcome, super happy to hear you found it helpful! 💜
Awww this is so good,i believe covering of Fondant will be alot easier for me now thanks for sharing 💞
So I FINALLY got to try this method. And with my practice it went so well! But then when it came to the real deal, my fondant slipped off the end of my roller and it became a disaster. Luckily I was able to save it a bit but the join wasn’t as good as I’d hope due to the fondant squashing as it dropped 😱 Has this happened to you? How can I prevent it from sliding off the roller? As soon as I got it up against the cake it all started to fall with gravity and start to unravel 😮 I felt like I couldn’t wrap it any tighter either as the fondant would have dented more etc.
thanks!
Hey Kelsie. Oh no, that’s definitely not ideal! There are a few things that can contribute to the icing sliding down off the rolling pin. I think the main one usually is not rolling the fondant tightly enough – as long as you’re thinning down the end of the fondant as I do in the tutorial, then you won’t get much extra denting by rolling it tighter. And the dent is at the back, so anything that doesn’t smooth out with the fondant smoothers is hidden anyway.
Also, making sure that you keep the roll of fondant close to the cake will help it not to slip. You should literally be unrolling it straight against the cake, rather than having it too far away from the cake and using your hand to push it against the cake, if that makes sense? It basically means that the fondant is trapped between the rolling pin and the cake, so it’s harder for it to slip.
Sometimes it can be the fondant making things tricky too, if it’s a particularly soft fondant then it is more likely to slacken and slip. If that’s the case it might be a good idea to try a firmer fondant.
And lastly, I think (as much as I hate saying this!) it really is a practise thing. After you’ve done it a few times you’ll know how tightly to roll it, and if you’re anything like me, the whole process will be less daunting and you won’t panic so much if something starts to go wrong.
Anyway, I hope you’ll give it another go and that something in there will help it go much more smoothly for you! 💜
will give it a try, as covering a cake is my weak point.
Thank you so much for such a brilliant tutorial! I so relate to the way you’ve learnt to cake (and issues with fondant lol), I haven’t spent a cent on a lesson and just use the internet… So I tried covering a tall cake for the first time in fondant (buttercream is more my thing) and both tries were a fail, so I ended up wrapping it (not nearly as well and neatly as you do), but definitely learnt a lot from this tutorial and first off I’m going to cover the cake in ganache instead of IMBC or any other buttercream.
The only thing that is nearly impossible to get or too expensive is Crisco shortening, would refined coconut oil work as a substitute?
Thank you again for your brilliant tutorial! 🙂
Hi Tashreeqa, I am so, so sorry for the delayed reply to your question, your comment was buried in my spam folder and I have only just found it, along with some others 🤦♀️
You’ll definitely have an easier time wrapping a cake in fondant if you have ganache as a base, as it’s much firmer and more forgiving than buttercream.
Yes, if you can’t get Crisco then in this case I think coconut oil should work, just do a very thin layer on the ganache. You could also just brush the cake with a little water or sugar syrup, but as I think I mentioned in the post, that can make it a bit trickier if you need to peel back the fondant to adjust it, and it’s definitely messier if you end up getting it on the front of the fondant. So I would try the coconut oil first, or if you can get any other type of shortening other than Crisco, that would work too.
Hope that helps, and again I’m so sorry for the delayed reply 💔
Thank you so much Natalie, very much appreciated and definitely going to give it a try with the coconut oil first and see how it works out and your reply is perfectly timed, thank you☺️💜
You’re most welcome, lovely. I hope it goes well for you! 😊💜
Hi Natalie,
I made my very first wedding cake and fondant cake using both your tutorials on how to ganache a cake and how to wrap a cake in fondant and it came out lovely!
The coconut oil worked well enough in place of crisco, but if I can get my hands on it, I’d love to try it out and see the difference between the two.
Oh, and those sharp edges…in love! I’m definitely going to be making more fondant wrapped cakes! 💜
Thank you so much for sharing your tutorials in so much detail that made it so easy to replicate, it is so very much appreciated! 💜
Yay!!! I’m so happy to hear it worked well for you 🎉 If you do manage to get the Crisco I’d love to know what you think of the difference.
You’re so welcome, I’m so glad you found the tutorials helpful 💜💜 xx
Loving your detailed no nonsense approach – am making a wedding cake in October (I’m all good with the throw the fondant on top, smooth and trim option) and wondering if Crisco would be a good ‘glue’ for wedding cake lace?
I’ve done a lace practice it went great – just tried Swiss butter cream on an orange cake but going to go with a white ganache instead after reading all of this. Thanks in advance 😊
Hi Deb! I hope I’m right in thinking you’re talking about edible lace, not fabric lace, so I’ll answer that way (but I’m wrong let me know!). It’s been a long time since I’ve worked with it, but when I’ve used cake lace in the past I’ve attached it with a thin brush of vodka. A lot of decorators attach edible lace with water, but I often use vodka instead of water because it dries faster doesn’t leave as much of a mark if it ends up somewhere on the fondant that you don’t want it to be. I talk a bit more about that in this post on edible glues . If you find that the edges of the lace are lifting, I’d suggest dabbing a little bit of edible glue onto the back of the edges with a (new and clean, of course!) makeup sponge. Sponges are great for making sure you don’t add too much and make it squish out.
Hope that helps!