How to Ganache a Cake
This post may contain affiliate links to products I recommend. I receive a small commission at no cost to you if you make a purchase using my link.
Learn how to ganache a cake with this step-by-step tutorial! Including how to make ganache for a cake, how to use acrylic ganache boards to get perfect straight sides and sharp edges, plus all my favourite tips and tricks!
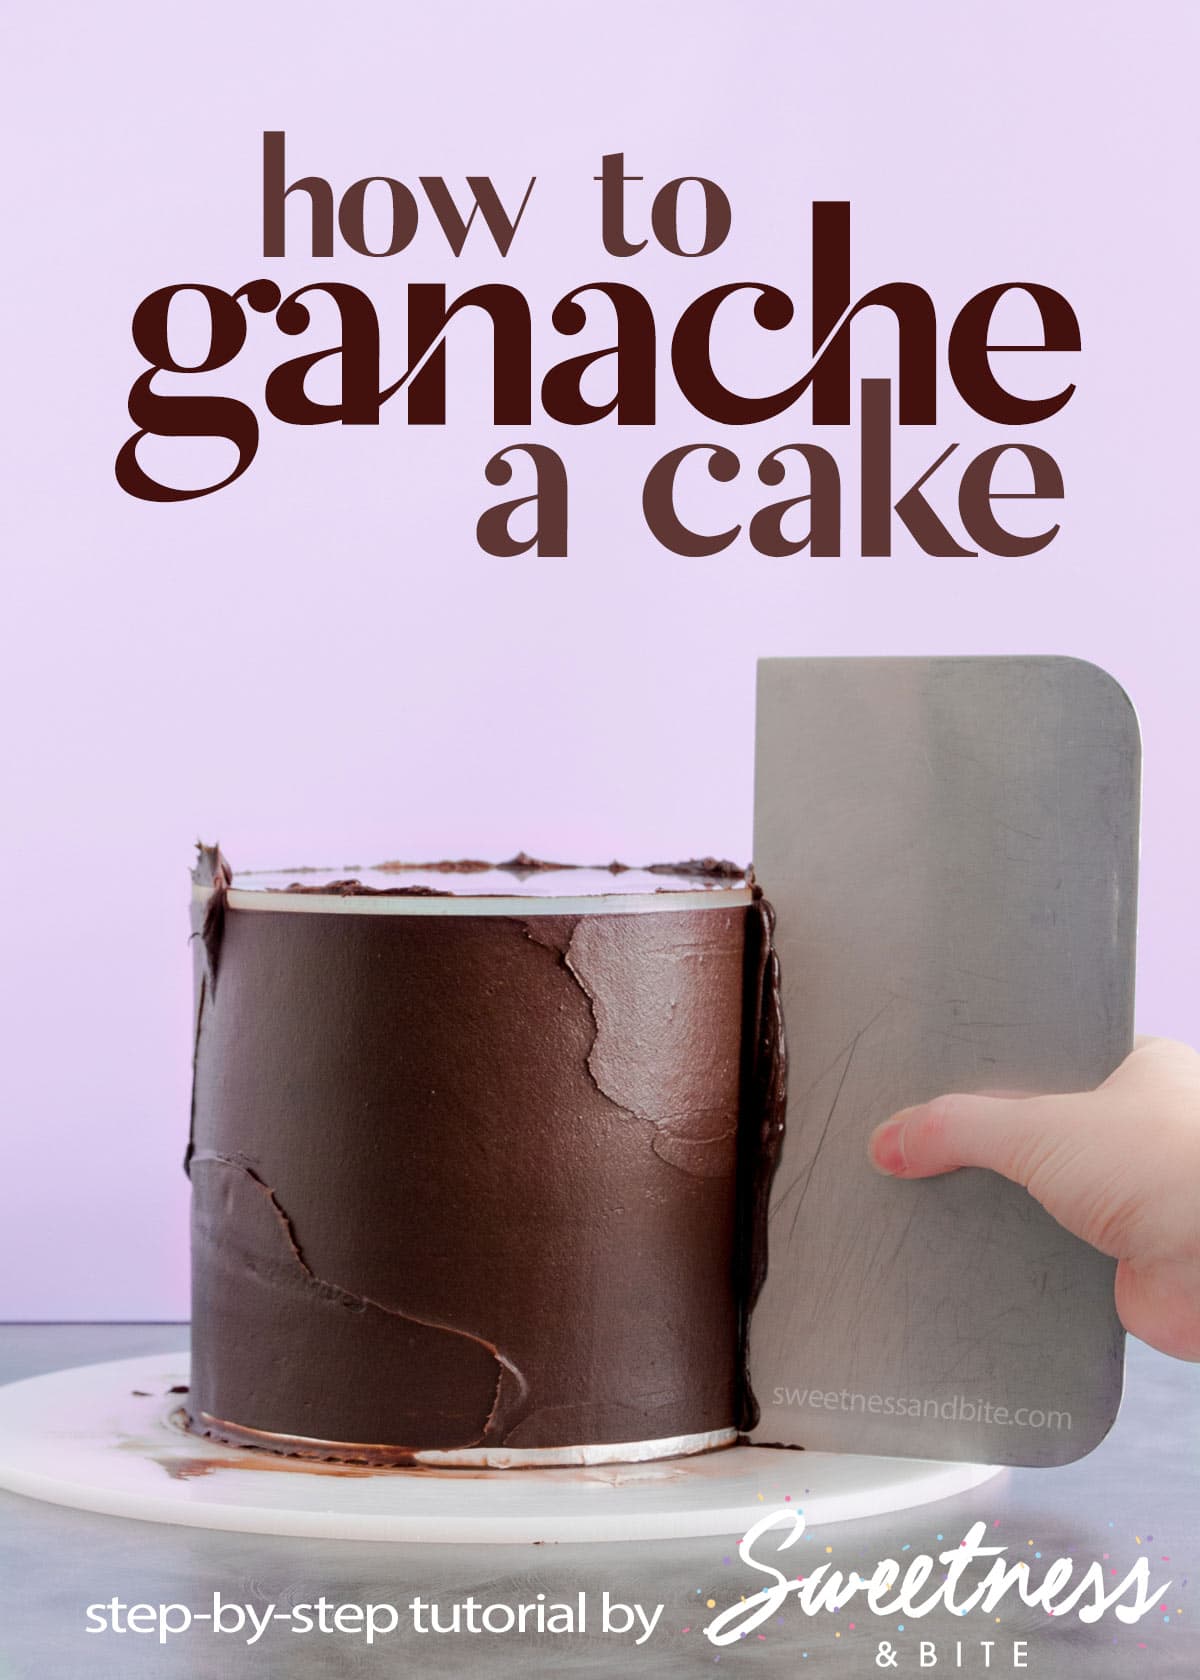
Ahh, ganache. Perfector of cakes and creator of sharp edges. And the cause of thrown spatulas and angry, frustrated curses.
When it comes to cake decorating I am most definitely a ganache girl. I do love me some buttercream, but when it comes to getting super straight sides and sharp edges, especially under fondant, ganache is my go-to.
It took me quite a while to become confident at ganaching cakes. I tried a few different techniques that were around at the time, but it wasn’t until I got some ganache boards and started doing my own hybrid method that I’m about to tell you about that it finally clicked for me, and I began getting consistent results every time.
If you’re brand new to using ganache, then this is the place for you! I will break down the benefits of using ganache on your cakes, how to make the ganache, how to prepare your cake, how to ganache your cake using ganache boards, how to store your ganached cake, and everything in between!
It takes a bit of practice, but before you know it, you’ll be ganaching cakes like a pro.
Because this is a detailed tutorial, I’m providing a table of contents below if there is a particular section you’d like to check out first. But if you’re new to decorating cakes with ganache, I definitely recommend grabbing a cup of whatever you enjoy drinking (tea… coffee… vodka, I don’t judge), and having a good read through the tutorial before you start on your cake.
I also have a follow-up Ganache FAQ post that may cover your questions if you don’t find the answer here.
Don’t let the length of this post put you off, I’ve simply broken everything down to make sure you have all the info you need, and each of the steps is easily achievable. You can do this. Promise!
Let’s get started!
Table of contents
Why Use Ganache on a Cake?
There are many benefits to using ganache rather than buttercream, but the main one as far as I’m concerned is this: stability.
Ganache, when made properly with the appropriate ratio for the weather conditions (don’t panic, I will explain all of that soon!) is firm at room temperature, which means it doesn’t need to be refrigerated. It is perfectly fine at cool room temperature for at least several days.
This means that if you cover your ganached cake with fondant you don’t need to worry about “cake/fondant sweating” as a refrigerated cake comes to room temperature. I’ll talk more below about how best to store your ganache covered cake.
In my opinion, there are two keys to successfully (and easily) ganaching a cake.
The first is to use a second cake board (or “ganache board”) on top of your cake while you ganache the sides. This ensures the sides will be perfectly straight and will help you get a nice sharp top edge when you flip the cake over after ganaching the top (please don’t panic if your eyes have crossed at the thought, I’ll be explaining the whole process step-by-step in just a few moments, and it will make much more sense!)
About Acrylic Ganache Boards
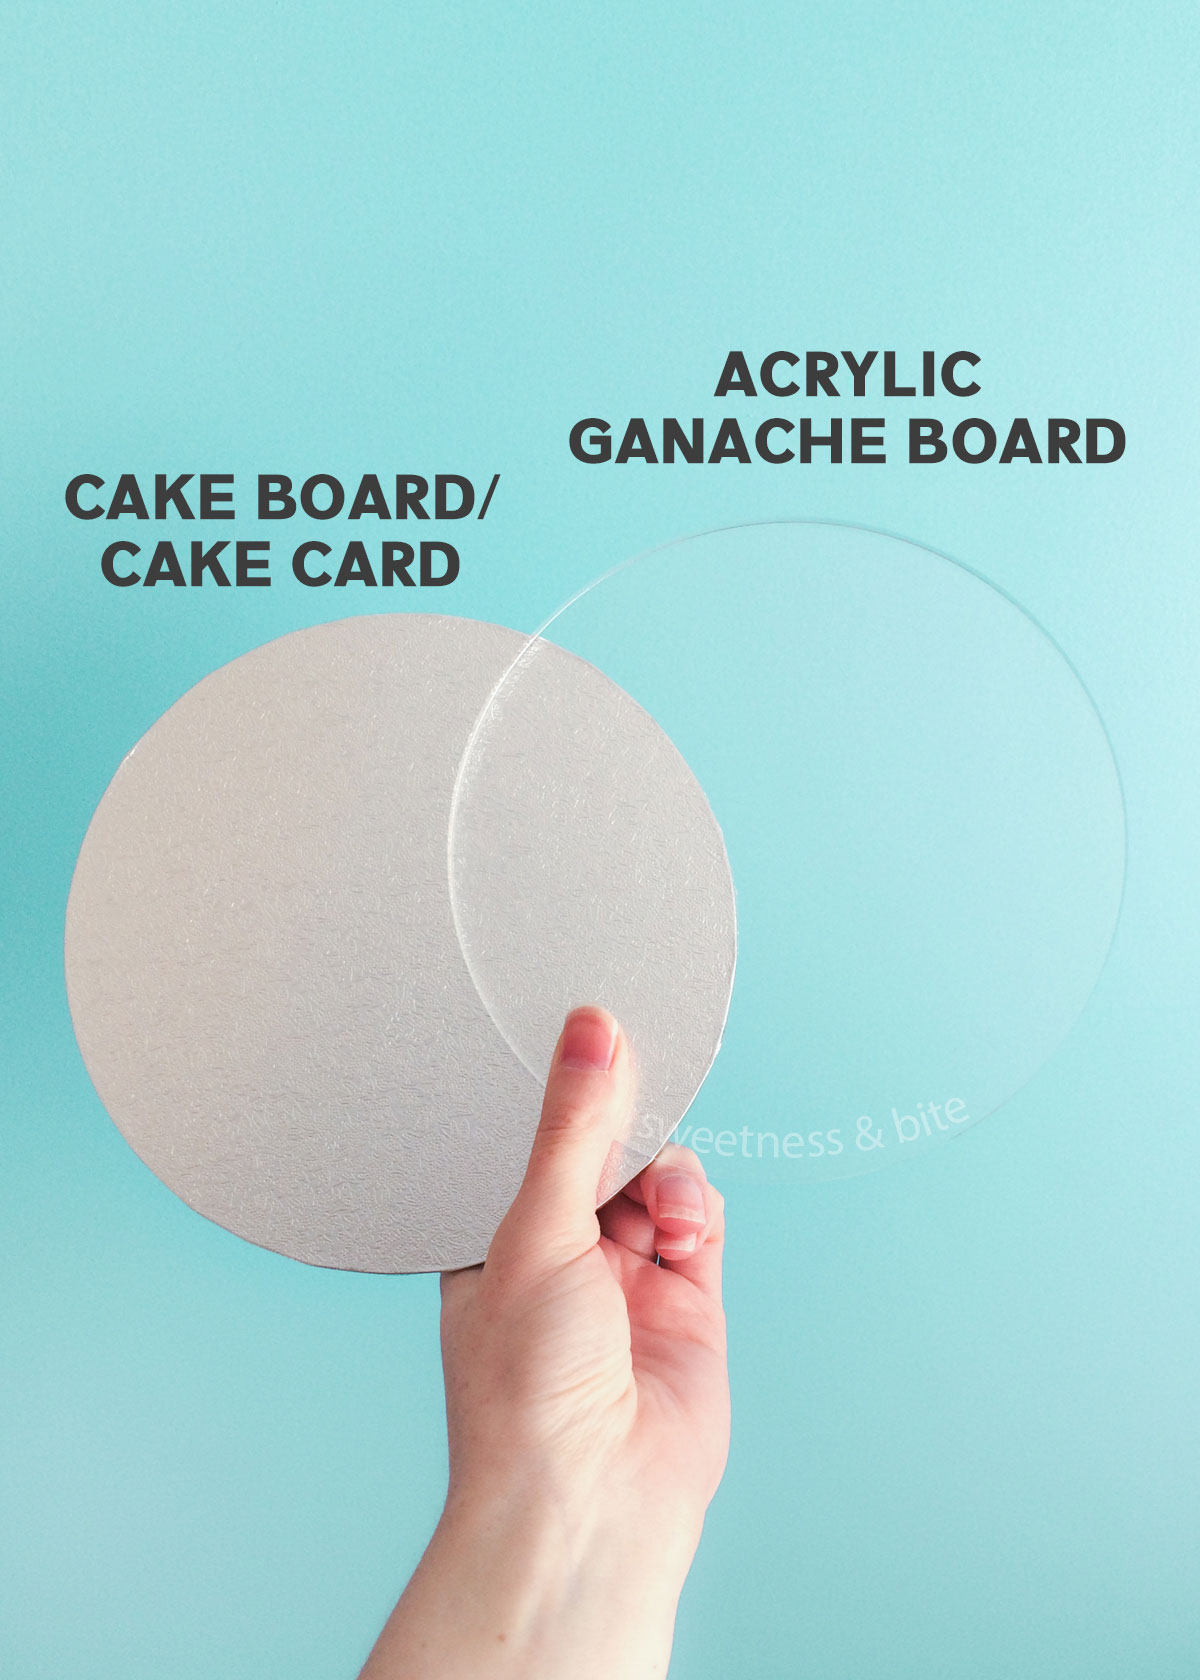
“Ganache boards” are acrylic boards that you place on the top of your cake, with your regular cake card or board underneath the cake. Then we apply ganache around the cake and use a scraper pressed against the two boards to scrape the excess ganache away, leaving perfectly straight sides.
Ganache boards should be the same size and shape as the cake card or board that you will be using on the bottom of your cake. While it’s helpful to have these acrylic boards because they are reusable, if you are just trying out this technique and don’t want to invest in ganache boards just yet, you can simply use a second cardboard cake card, the same size as you will be using on the bottom of the cake.
I have a set of white acrylic ganache boards that I used when I first shot the step-by-step photos for this tutorial in 2014, which I was kindly given by a friend in Australia and I’m unsure where she bought them from.
I have a second set of boards which are the ones I use most often and the ones pictured above, and I got them from Design at 409. I love Stacey’s boards, they’re super smooth on the edges, and I highly recommend you check them out if you’re in NZ, or happy to pay postage from NZ.
Ganache boards are pretty readily available in most countries now, so a quick Google search for “acrylic ganache boards” and the country you live in should find you some near you.
When you’re buying your ganache boards, make sure to check the measurements and compare them to the cake cards/boards you will be using and make sure they match. I use boards and cards that are whole-size measurements (6″, 7″, 8″ etc.) whereas some boards and cards are 1/4″ bigger (6.25″, 7.25″, etc.) for people who don’t want to trim the crusts off their cakes (these give space around the edges of the cake for the icing).
My preference is to buy the whole-size boards and trim the cake crusts. Whichever you choose, though, just make sure your cake cards and acrylic boards are the same size. And again, if you don’t want to buy the ganache boards, just use a second cardboard cake card instead.
Please note that my images from this post are being used by many online retailers to sell their ganache boards, but I do not endorse any of those products. The images are being used illegally and without my permission, so just keep in mind that even if you see images from this tutorial being used to sell these products, I haven’t used any of them, so I don’t recommend them. The only boards I use and can recommend from personal experience are the ones from Design at 409.
Ganache Consistency for Covering a Cake
The second key to great results when ganaching a cake is to get your ganache to the right consistency. And ‘right’ is a slightly subjective term – some decorators prefer a firmer ganache, and some like it really soft. I’m somewhere in between, so I tend to leave it a bit firmer for filling and then soften it a little more when I coat the outside of the cake. Once you’ve done a few cakes you will work out what the perfect consistency is for you.
As you’ll see below, there are two consistencies I like to use, one is similar to peanut butter, and one is a little softer, more like Nutella.
How To Make Ganache for Cake Decorating
If you’ve never made ganache before, then here is a quick intro on how to make it. There is no ganache ‘recipe’ as such, there are only two vital ingredients – chocolate and cream, and a ratio of how much of each to use.
The ratio controls how firmly the ganache will set – the higher the ratio of chocolate, the firmer it will set. More choc = firmer ganache.
Types of Chocolate For Ganache
To make ganache, you can use either compound chocolate or couverture chocolate (or, as I like to call it, “real chocolate”). Couverture choc is made with cocoa butter, whereas compound choc is made with various types of vegetable oil.
In my opinion, couverture tastes better, but compound makes a more stable ganache (less likely to split or separate). I often use a combination of both types of chocolate. I cover this in a bit more detail over in the ganache FAQ post.
Here in New Zealand, I like to use a combination of Whittaker’s chocolate and Nestlé compound chocolate buttons. I like the flavour of the “real” chocolate and the stability of the compound chocolate. Best of both worlds, y’all.
Ganache Ratios for Cake Decorating
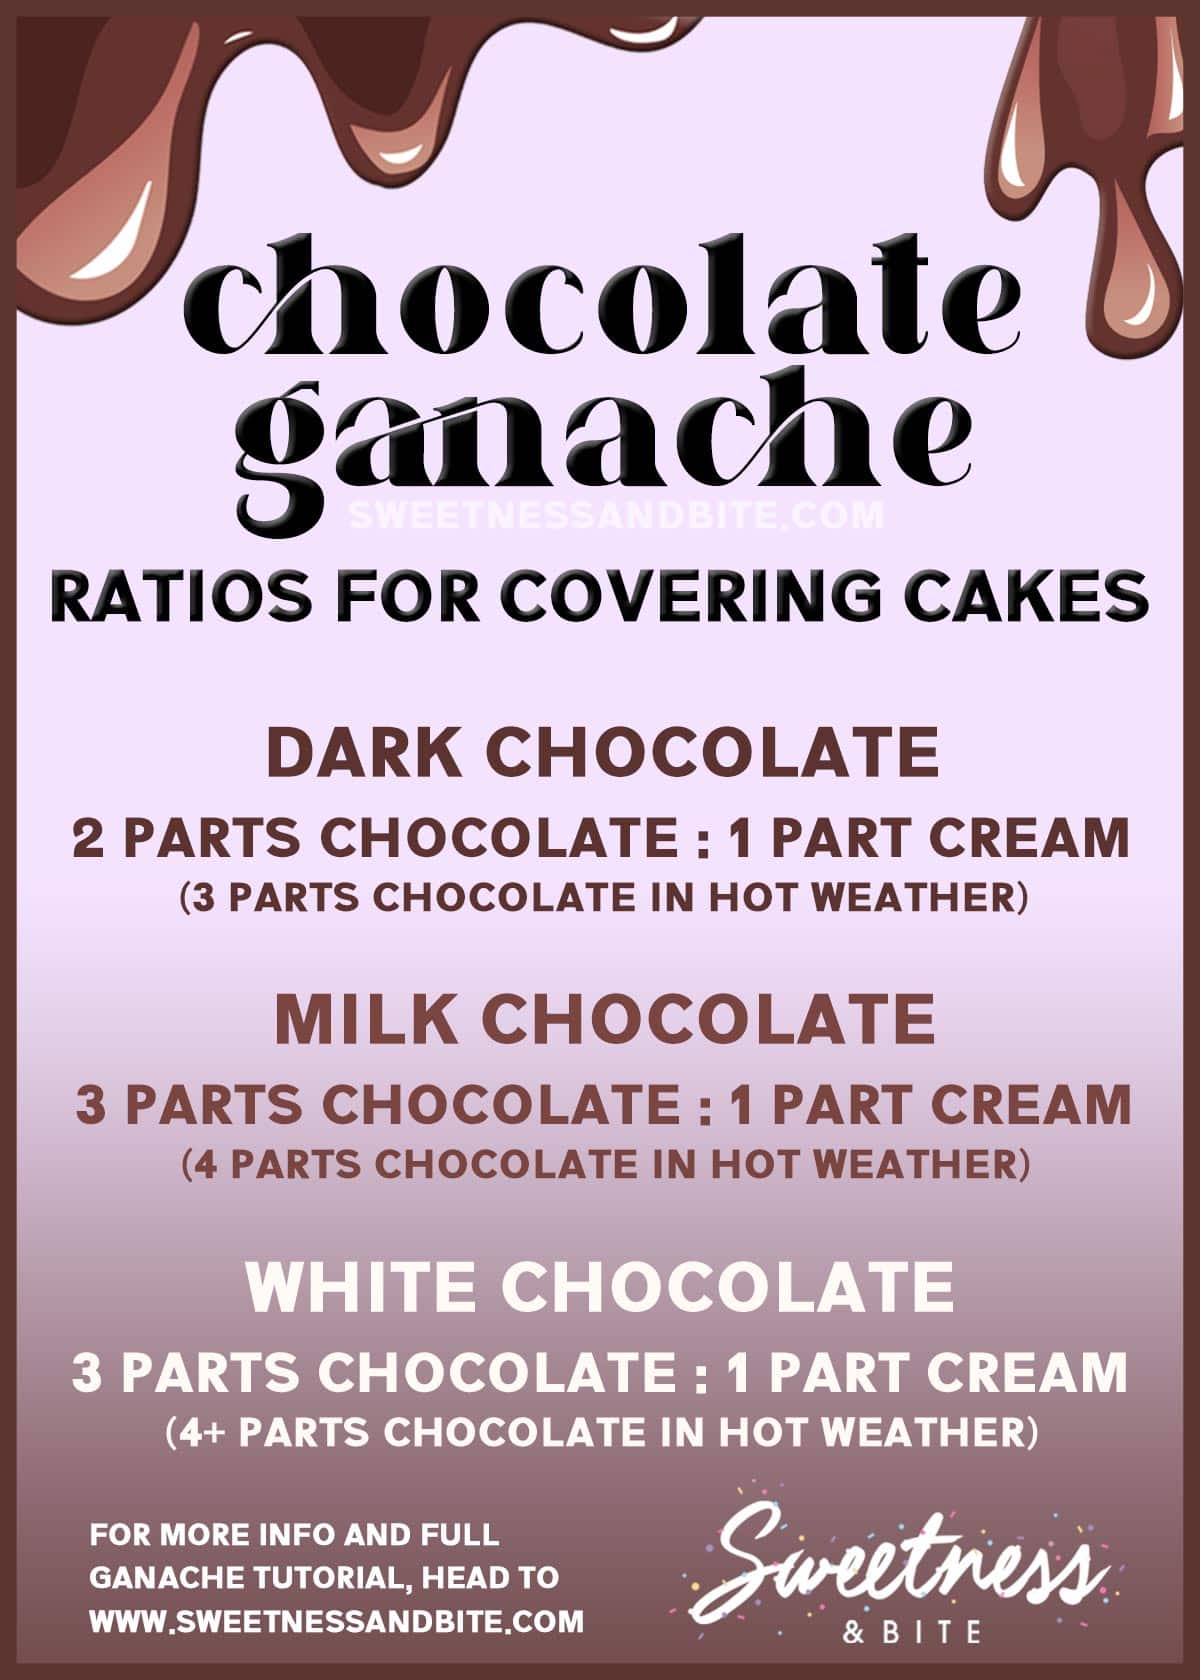
For Dark Chocolate Ganache (chocolate with 50-60% cocoa solids is ideal) you need two parts chocolate to one part cream. In very warm weather you may need to increase this to two and a half or even three parts chocolate.
For Milk Chocolate Ganache (many milk chocolates don’t state the cocoa content, but around 30% is good) you need three parts chocolate to one part cream. In cooler weather – two and a half parts chocolate may be enough, and in warmer weather, you may need to increase it to three and a half or even four.
For White Chocolate Ganache you need three parts chocolate to one part cream. As with the milk chocolate ganache, in warmer weather, you may need to increase the chocolate to 3.5 – 4 parts in order to get a firm setting ganache. In super hot weather you may need to go as high as 5:1.
How Much Ganache Will I Need for My Cake?
To work out how much I need for each, I use the Ganacherator. There used to be a Ganacherator spreadsheet, which unfortunately doesn’t seem to be available to download anymore, but the website I linked to has the basic function of the spreadsheet.
Below is a screenshot example of the calculator. I used it to calculate the amount of ganache needed for a 7″ round cake, 4″ high with 4 layers of cake.
You simply input (1) the height you want the cake to be when finished, (2) the number of cake layers*, and the size of your cake. If it’s a round cake, just put the size in the first box (a) and leave the second box (b) blank. For a square or rectangle cake, you’ll put the second side measurement in the second box.
*If you’re not filling your cake, or filling it with something other than ganache, then put a “0” in the layers box, or a “1” if you want to make sure you have a bit of ganache left over for touch-ups.
Hit “calculate” and it will give you the total amount of ganache you need.
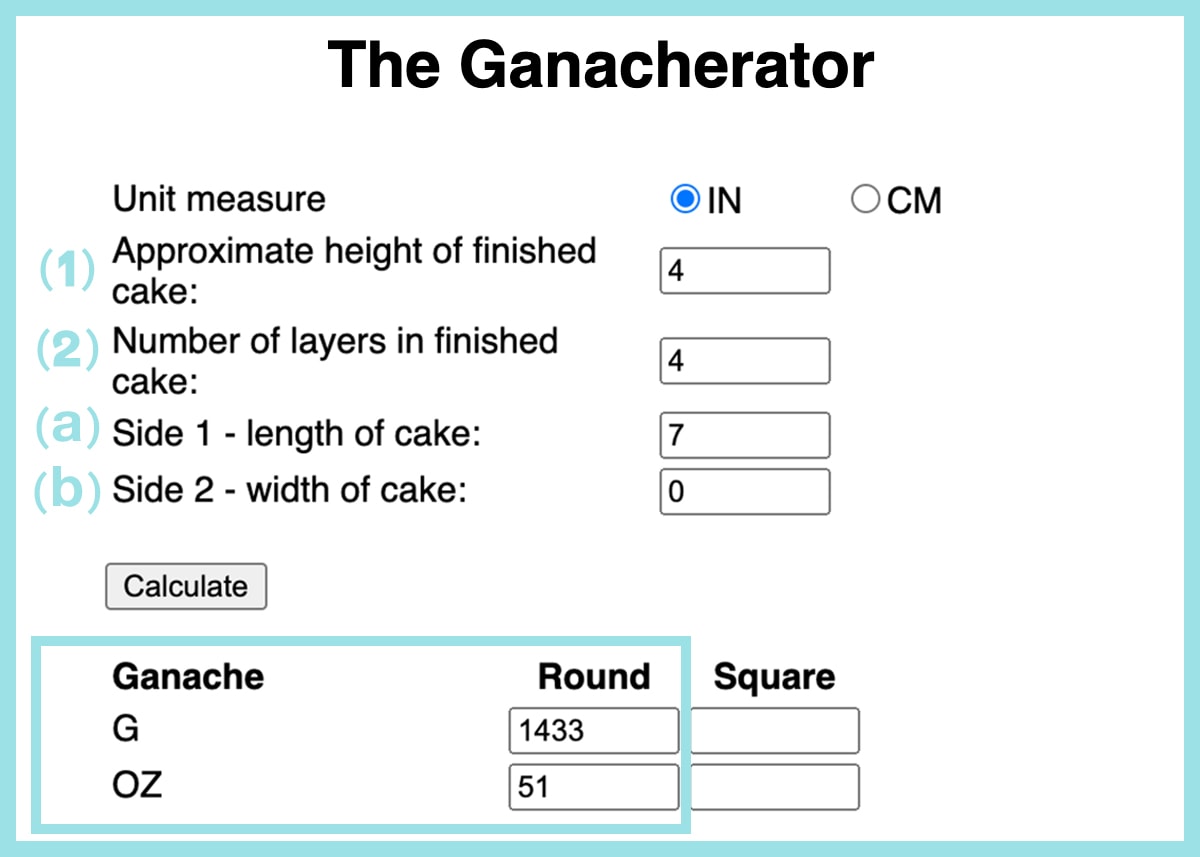
Below that it also has boxes to tell you how much chocolate and cream you’ll need, but it uses different ratios than I recommend, so I prefer to just ignore those boxes altogether and use the total ganache amount and the ratio chart above to work out how much cream and choc I need.
Here’s an example of how to work out the amount of chocolate and cream needed:
EXAMPLE: If you were making an 7″ round cake with four layers of cake (and therefore 3 layers of ganache filling) you would need approximately 1430g (1.43kg) of ganache to fill and cover it. I’m rounding up to 1500g for ease of calculating, plus it’s better to have too much ganache than not enough. The ganache needs to set after being made, so if you have to make more ganache while in the middle of ganaching your cake, you’re going to have to take a pause while your ganache sets.
Dark chocolate ganache is a 2:1 ratio, which is 3 ‘parts’ in total. To work out how much chocolate and cream you need, you just divide 1500g by 3, which is 500g, so that is how much cream you need (one ‘part’ cream) and you need twice as much chocolate (2 ‘parts’ chocolate), so 500g times 2 is 1000g.
So for 1500g of dark chocolate ganache, you will need 1000g of chocolate and 500g of cream.
There are many methods for making ganache, but this is what I do:
Chocolate Ganache For Cake Decorating
Ingredients
Dark Chocolate Ganache
- 2 parts chocolate
- 1 part cream
Milk Chocolate Ganache
- 3 parts chocolate
- 1 part cream
White Chocolate Ganache
- 3 parts chocolate
- 1 part cream
Instructions
- Chop the chocolate into smallish (roughly half an inch or less) pieces.
- Find yourself a saucepan big enough to hold all of your cream and chocolate, and weigh the cream straight into it. Place the pan over a medium-high heat and bring it just to a boil. The bubbles should cover most of the cream’s surface. Make sure you watch it carefully, once it comes to the boil it can quickly boil over. Remove from the heat and leave it until the bubbles stop.
- Add the chopped chocolate to the pan, and gently shake the pan until the chocolate is mostly covered by the cream. Don’t stir it yet, just leave it to sit and melt for a few minutes.
- Gently stir with a silicone spatula (or use a wire whisk for dark chocolate ganache, as it is softer). Keep stirring until the chocolate and cream fully combine and become smooth.
- If there are still unmelted pieces of chocolate in the ganache, place the pan back over a very low heat, and stir constantly until no lumps remain and the ganache is glossy and smooth.
- If you happen to own a stick mixer/hand blender, then you can use that to give the ganache a quick blitz to ensure all the chocolate is melted and that the emulsion is smooth.If you want to colour the ganache, you can do that now.
- Pour the ganache into a microwave-safe bowl, leave to cool then cover with plastic wrap on the surface of the ganache and leave overnight at room temperature to set.
- If you don’t have time to let the ganache set at room temperature then you can speed it up by putting it in the fridge – just make sure you stir it often so that it cools and sets evenly.
- You can store the ganache at room temperature for a couple of days, or refrigerate it for a month or so, or freeze it for a little longer. These time frames are an indication only and could vary depending on the ingredients used and storage temperatures, so you will need to use your discretion when storing.
Notes
- The first thing to try to correct it is to use a stick mixer/hand blender, just place it in the ganache and blend it until the ganache has come together and is smooth. Once it is smooth, stop blending, otherwise, you will incorporate too much air.
- If that doesn’t work, there are a couple more things you can try. The first is to add a splash more cream and mix, this may bring the ganache back together. You may need to add even more cream, in which case just bear in mind that your ganache will not set as firmly.
- You can also try popping the ganache into the fridge, stirring every 10 minutes or so, and the ganache may emulsify again.
Nutritional Disclaimer: Any nutritional info provided is a computer generated estimate and is intended as a guide only.
Once you’ve made your ganache and it has set overnight, you can move on to the fun and messy bit, ganaching your cake!
If it is your first time ganaching a cake and this all looks like it will never click, and you think you’ll never be able to get these super sharp edges, then I am here to tell you that you most definitely can. All it takes is practice.
How to Ganache A Cake
In this tutorial, I have shown how to ganache a round cake. I use the exact same method when ganaching a square cake, it just takes a little more time and effort at the corners to get them perfectly straight and square.
What you’ll need:
- Your cake
- Ganache
- Two cake boards the same size as your cake (or one cake board and one acrylic ganaching board)
- 90° angled cake scraper (stainless steel, acrylic or rigid plastic)
- Baking paper/non-stick parchment
- Offset spatula
- Pencil & scissors
- Cutting board, bread knife (or whatever you like to use to split your cakes into layers) and small serrated knife
- Turntable
- Two setup boards or masonite cake boards several inches larger than your cake (to keep your turntable clean)
- Pieces of non-slip mat – one piece to go between your turntable & setup board, and one piece slightly smaller than your cake board
- Spirit level
During this tutorial I will refer to the board on the base of the cake (the one your cake will stay sitting on once you’re done ganaching) as the “cake board”, and the board that starts out on top of the cake as the “ganache board”. If you’re using a second cardboard cake card instead of an acrylic ganache board, then I recommend writing “ganache board” onto the bottom of that board the first time you do this technique, so you’ll be able to keep track of which board I’m talking about when we flip the cake over.
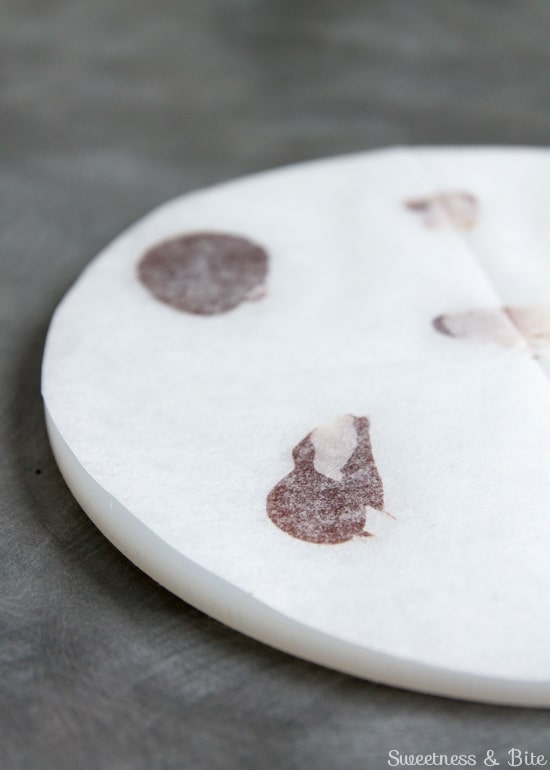
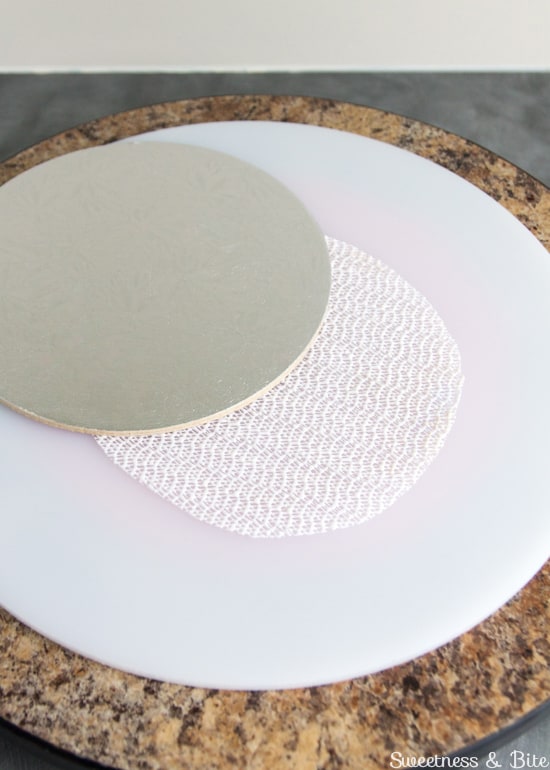
Trace around your ganache board onto a piece of baking paper, fold it into quarters and cut out the circle. Unfold it and attach it to the ganache board using a few dabs of ganache and put this in the fridge to set the ganache. This board will be the ‘lid’ that helps to give perfectly straight sides to your cake, and the paper will make it easy to remove the board when you’re ready.
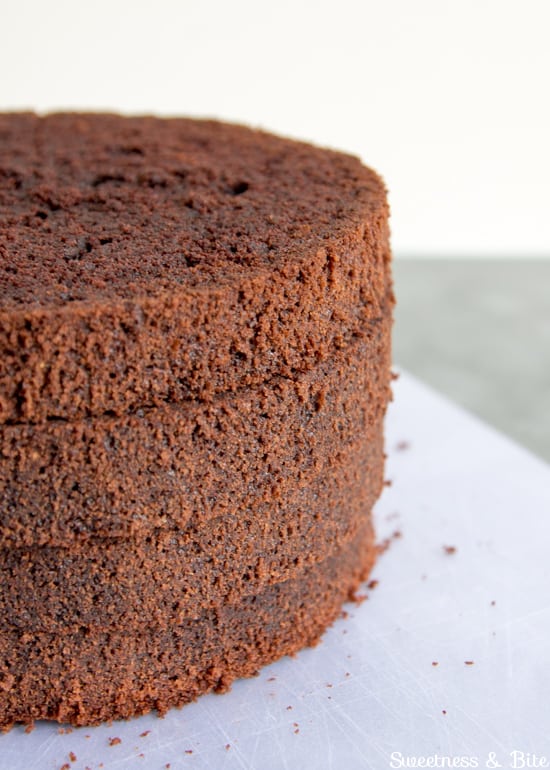
Split your cake into layers. You can do this any way you like. I recently invested in an Agbay cake leveller, but up until then I used the toothpick method: Just measure the height of the cake and use toothpicks to mark the height of the layer you want to cut, then go around with the bread knife, resting it on the toothpicks and slowly cutting through to the centre. Repeat for each layer.
I generally split my standard height cakes into four layers, and for this particular cake, the layers were just a little under one inch thick. I usually aim for between ¾ -1” thick cake layers.
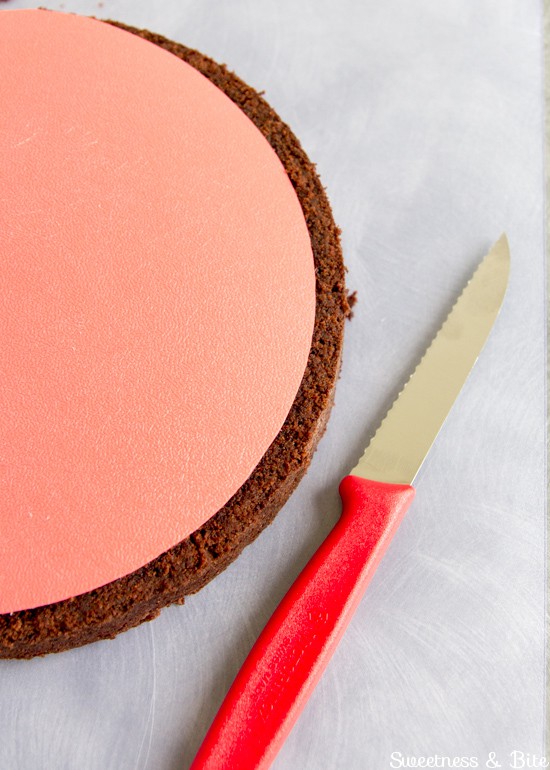
Use a small serrated knife to trim the edges of each layer so that the layers are 1/2” smaller than the size of your cake board. I now use trimming rings to make this faster, but prior to that, I used plastic templates that I made and show in the picture below.
To make these, I just drew around cake boards onto some thin plastic cutting boards, and cut out the circles 1/4″ inside the lines.
Trimming your cakes will make sure you have an even 1/4” layer of ganache all around the cake, and no chance of any cake protruding through the ganache and ruining your perfect finish (and possibly compromising the stability of your cake).
This also removes any crusty or dark edges from your cake, making it prettier when sliced. (Of course, if you’ve used baking strips on your cake, you shouldn’t have any crusty edges!)
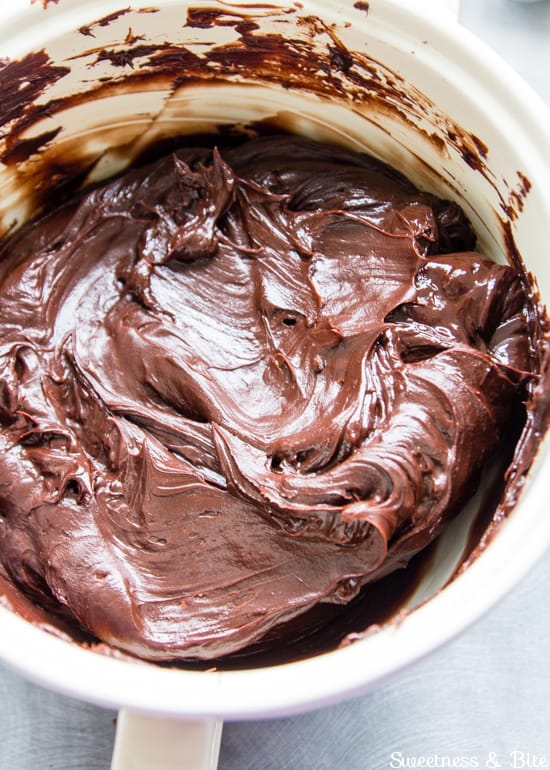
Gently warm the ganache in the microwave, stirring regularly, until it softens to the consistency of peanut butter. I like to use low-medium power so the ganache doesn’t accidentally melt too much.
Place a piece of non-slip mat between your turntable and setup board, and then place the cake board on top, securing with the smaller piece of non-slip mat.
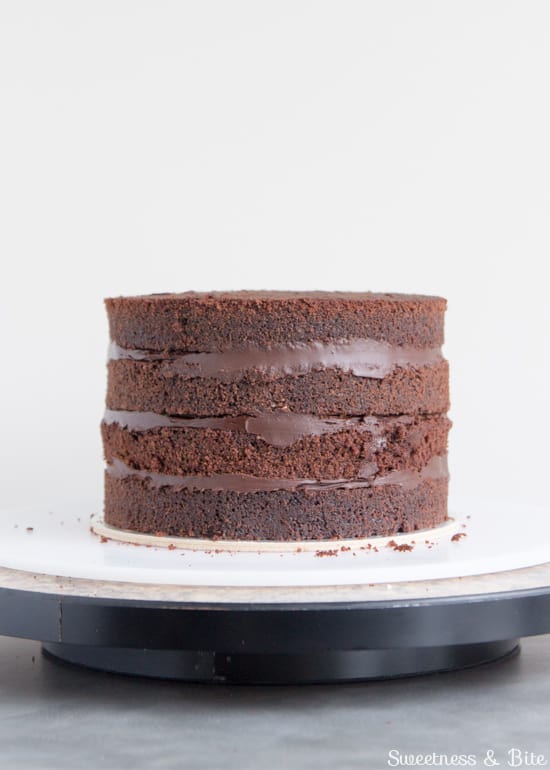
Attach your first layer of cake to the board with a dab of ganache, then fill and stack all your cake layers. Obviously, if you’re filling with something other than ganache and just ganaching the outside, then just do whatcha do with your chosen filling.
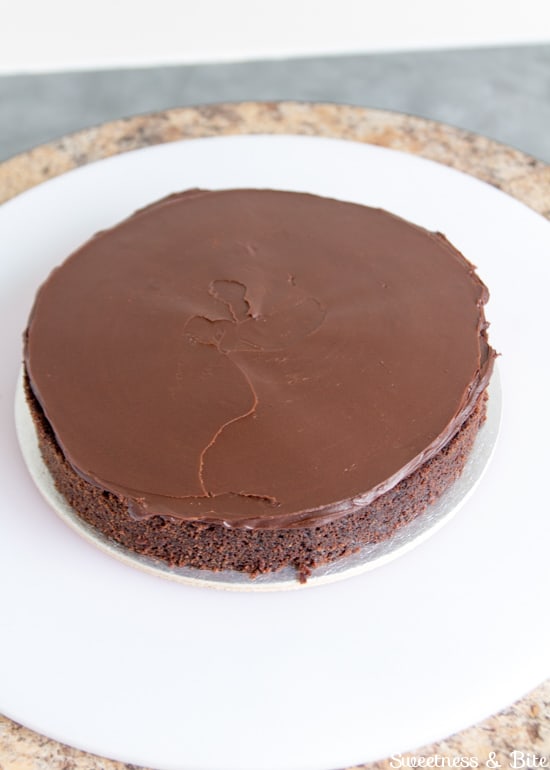
Try to keep your layers of filling even, but don’t panic if the cake isn’t perfectly level on top when they’re all stacked, we’ll make it level later.
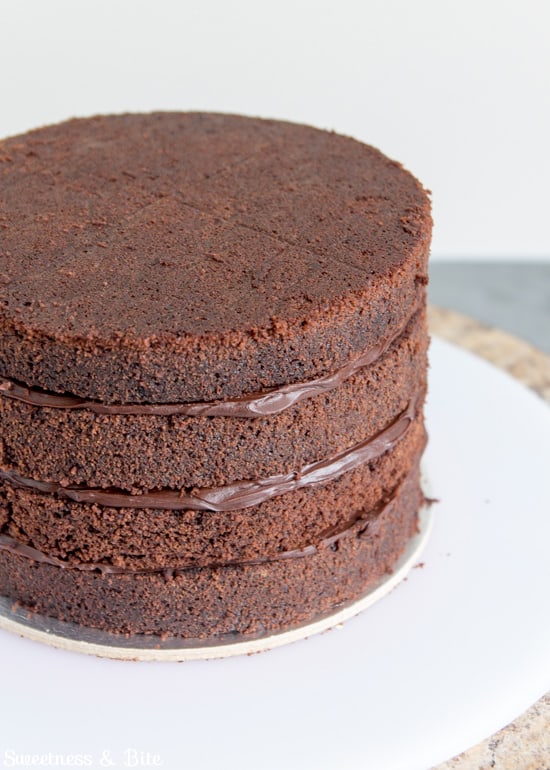
Get down to eye level with your cake and turn it around slowly to check that your cake layers are reasonably well lined up, and none stick out too far out the side (if they stick out, then the ganache layer won’t be even and you can have issues with bulging. Trust me, just check they’re all lined up, and if they’re not – either squish ‘em back into place or trim them down with a knife.
Add a few dab of ganache to the baking paper covered ganache board, then place it on top of your stacked layers, and gently press down to settle the cake. Use a right angle or scraper to make sure the board is centred and lines up with the bottom board and to check that your cake layers don’t stick out any further than the boards.
Have a look at the gap between the cake and the ruler in the image below. You want it to have that nice gap there that we will fill in with ganache.
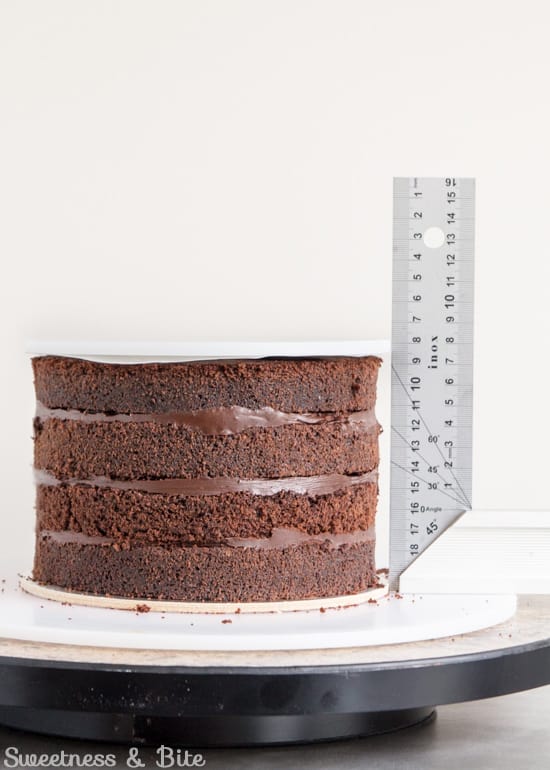
Brush off the worst of the crumbs from around the cake, then refrigerate the cake until the ganache layers firm up slightly and the top cake board doesn’t move.
It’s also a good idea when you put it in the fridge to place a bit of weight on top of the cake. This helps settle the cake layers and the filling and can prevent the cake from bulging later on. I find that using a couple of plates (dinner size for big cakes, small/side plates for smaller cakes) will evenly settle the cake. Just pop them on top of the ganache board after you’ve put the cake into the fridge. (I say ‘after’ because there was this one time that I put them on first, and then they almost slid off the cake and onto the floor as I carried it to the fridge. Don’t be like me.)
Once it’s firm, we can move on to ganaching the sides.
Warm the bowl of ganache up again, if necessary, and start applying the ganache to the sides of the cake. Start at the top, holding the top board with one hand and press the ganache up against the board, then continue around the whole top edge of the cake, being careful not to let your spatula touch the cake or you may pick up crumbs.*
*If you want to, you can do a “crumb coat” of ganache – just spread a thin layer of ganache around the cake to seal in any crumbs, let it set for a bit in the fridge, and then add the rest of your ganache. I skip this step because I’m lazy… and like to live on the wild side.
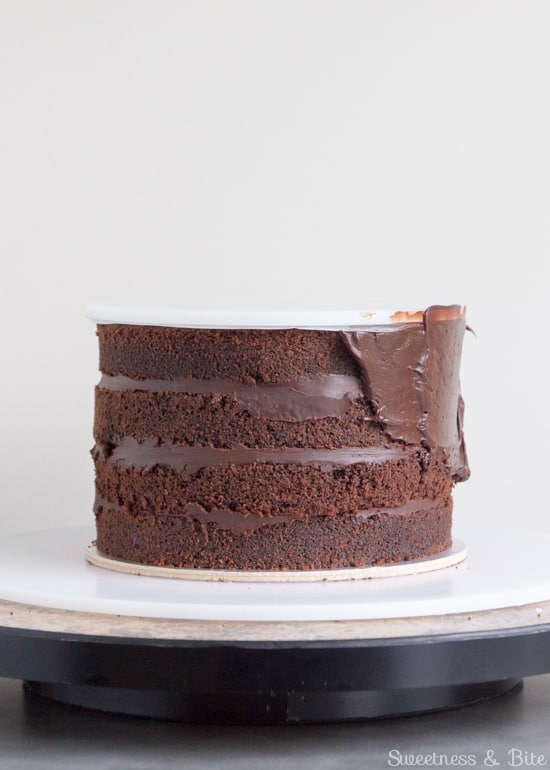
Add more ganache so that the layer is very thick, coming out past the cake boards. Yep, really slap that good stuff all over.
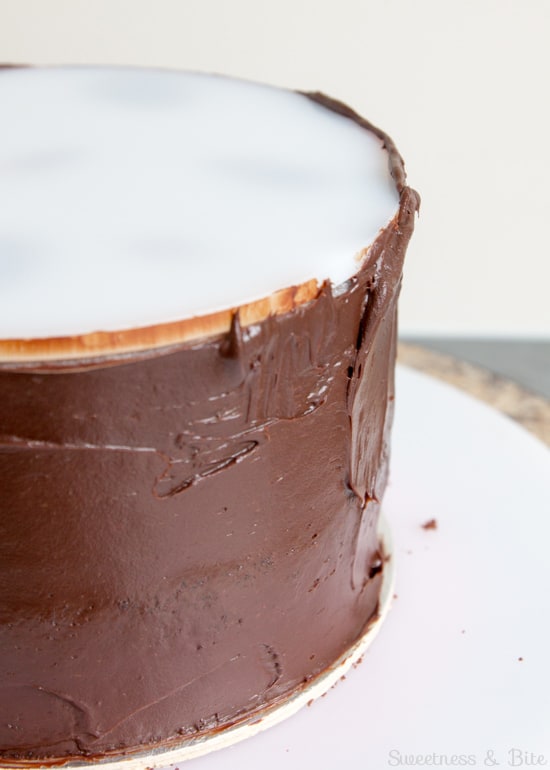
(You can still see the lip of the bottom board, needs more ganache!)
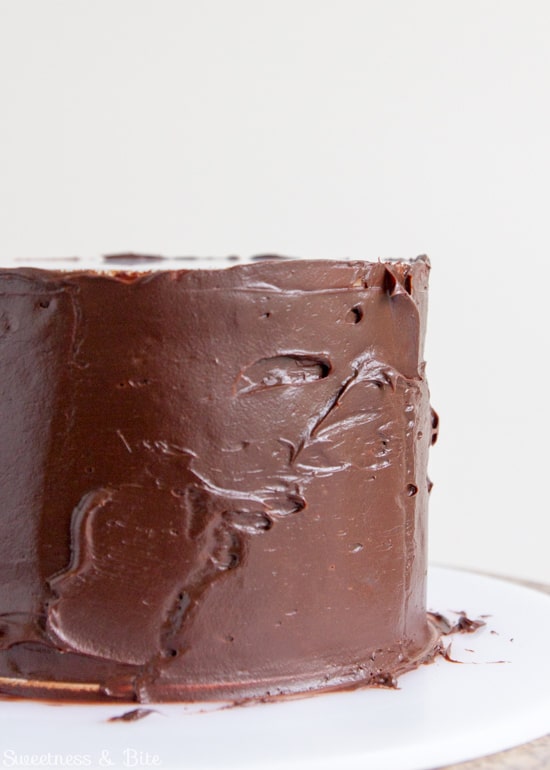
That’s better.
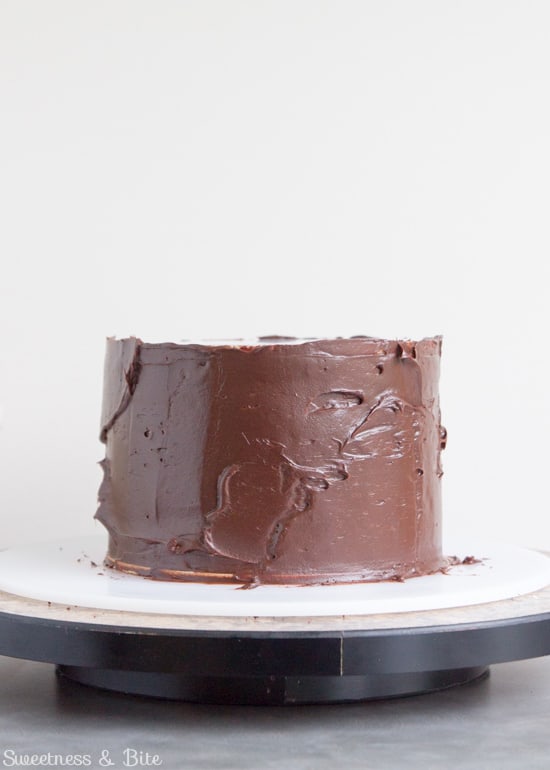
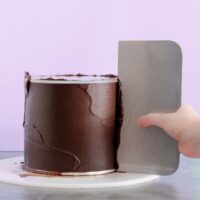
Hold a scraper against the cake so that it rests on both cake boards. Scrape gently, turning the turntable with your other hand, until you’ve removed the excess ganache. Remember to just leave your hand where it is, and let the turntable do the work.
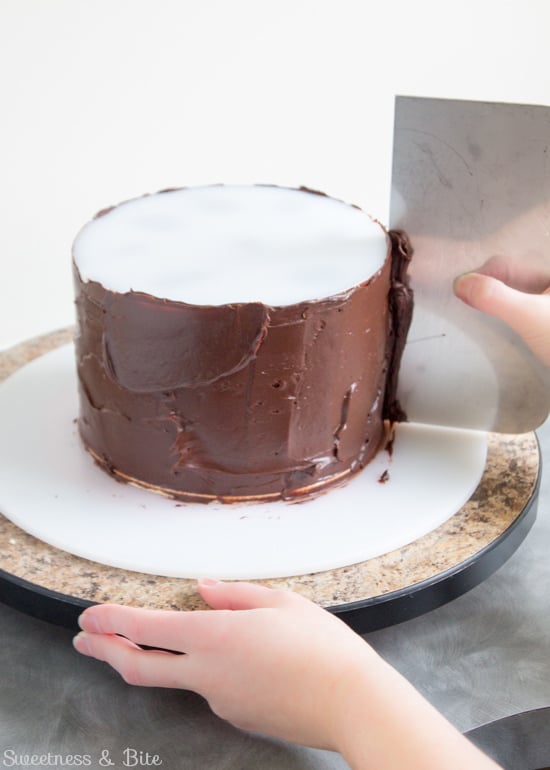
Put the excess ganache back into the bowl, then rinse and dry your scraper and scrape again.
There may be some little air bubble holes (you can see some on the left side of the cake in the picture below), so just fill them in with some more ganache and scrape again, rinsing and drying the scarper each time. Keep going until you’re happy with the sides.
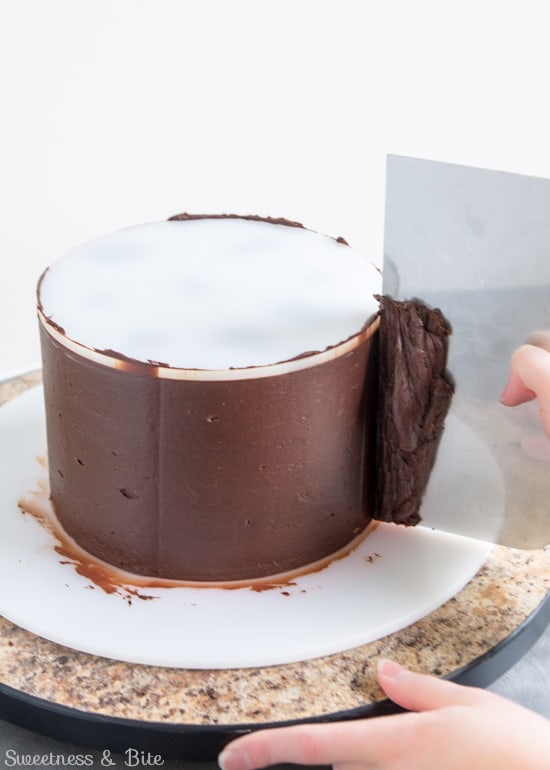
Once the sides are smooth, pop the cake in the fridge until the ganache is firm. It should feel firm and set when you press it lightly with your finger.
Slide a spatula between the ganache board and the piece of baking paper. Glide the spatula all the way around the top edge of the cake until the board pops off.
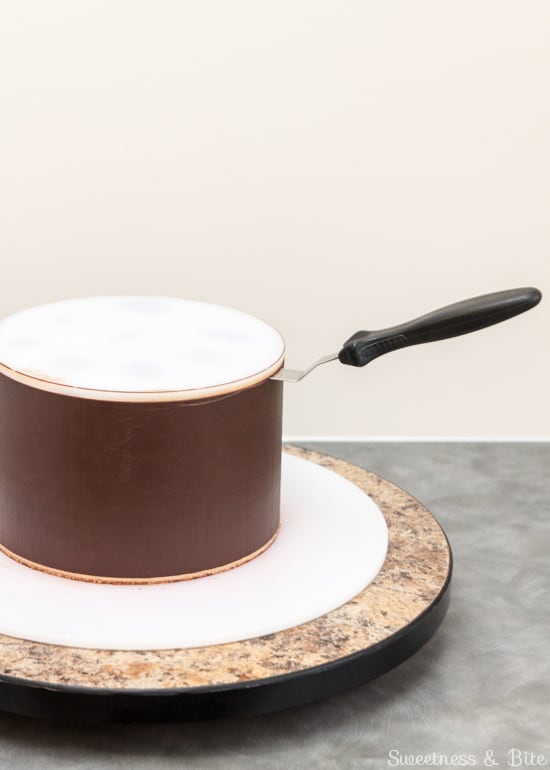
Find a spot on the cake where the baking paper is lifted up (or flick up an edge with your finger or spatula) and peel off the circle of paper.
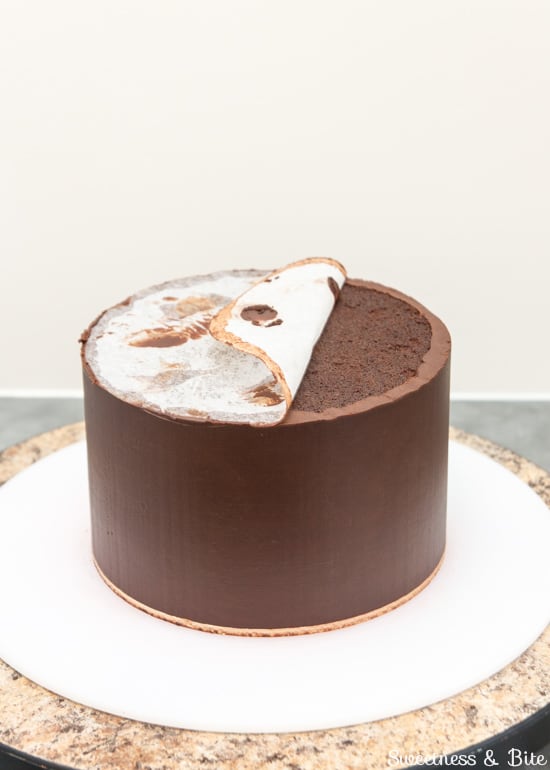
Warm the bowl of ganache again until it is quite soft, like Nutella (y’know, like smooth peanut butter that’s been left in a hot kitchen. Kinda smooshie. Very technical, I know). We want it soft enough that it will squish out a bit when you flip the cake over.
Spread a thick layer (at least ½”/1cm) of ganache over the top of the cake, spreading it so it goes a little over the edges of the cake.
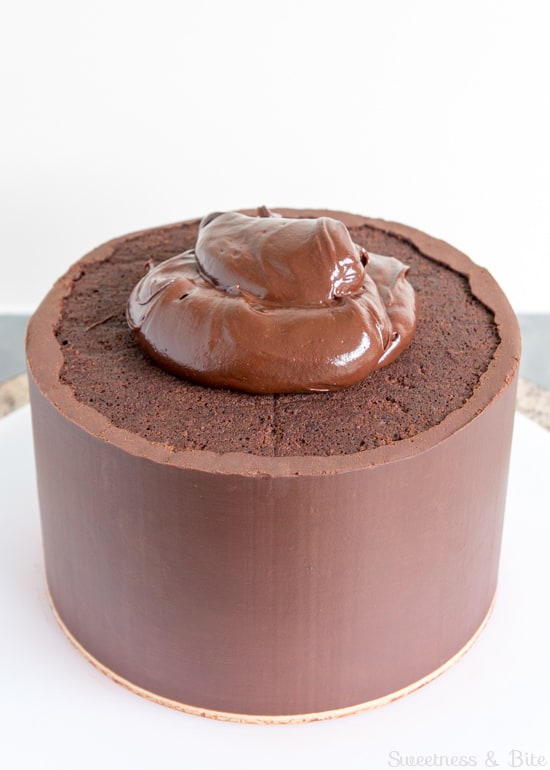
You don’t need to make it perfect but just try for a somewhat even layer of ganache across the whole top surface.
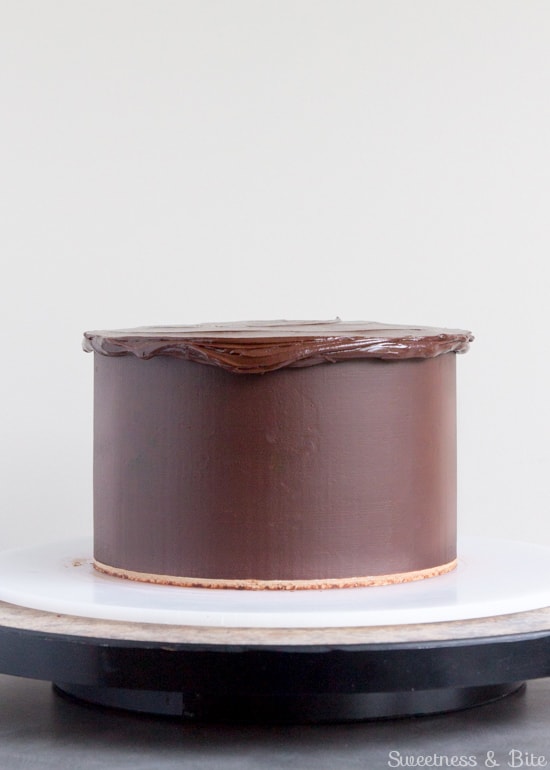
Place a large piece of baking paper over the top of the cake, starting at one edge and smoothing out as many air bubbles as you can.
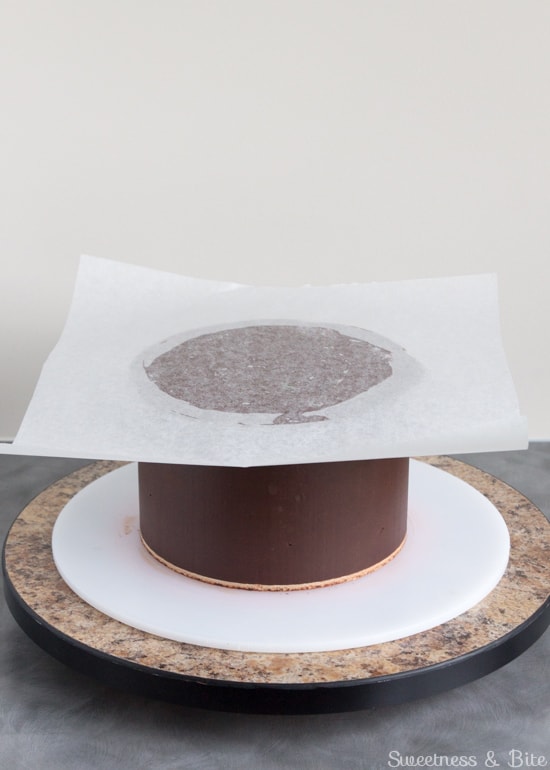
Place another setup board on top, and carefully flip the cake upside down.
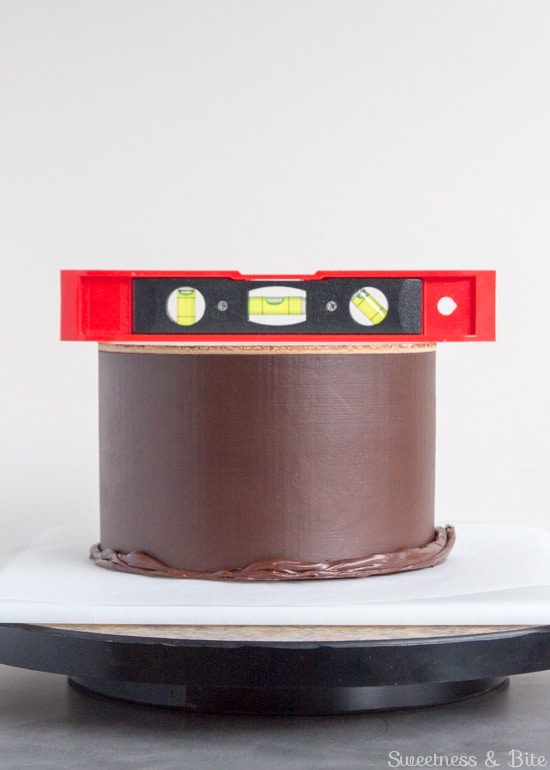
Pop a spirit level on top of the cake and gently press on the cake until the cake is level and the ganache squishes out the bottom a little.
I like to take this opportunity to clean any ganache off the bottom of the cake board (which is now on the top, stay with me now). This saves getting it smeared onto your display board or another tier of cake if you need to shimmy it over when you assemble the cake later.
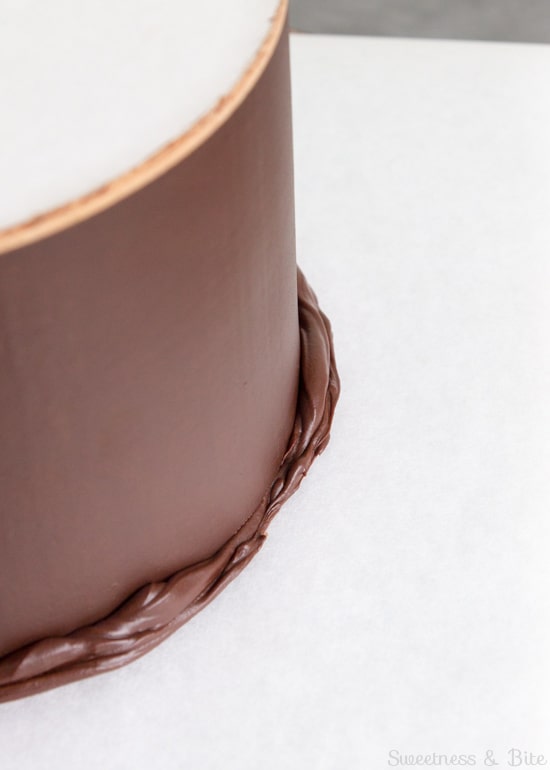
Warm the scraper slightly under warm water, place it gently against the cake and scrape away the excess ganache. Make sure you keep the scraper straight or you will scrape away those lovely straight sides!
If there are any gaps along the edge you can just dab in a bit more ganache, and scrape it again.
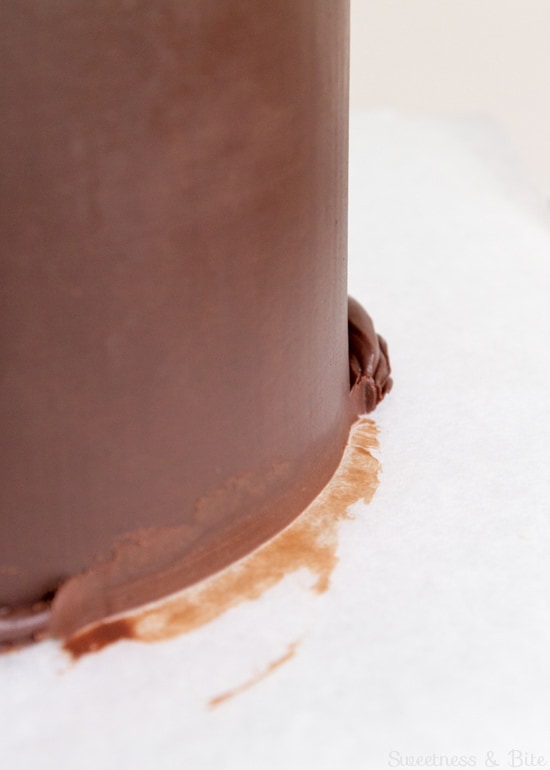
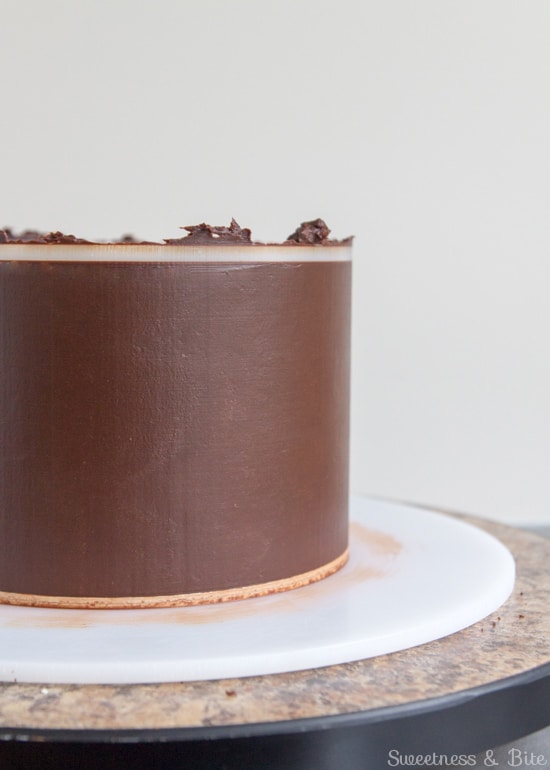
Check out that sharp edge we’re getting!
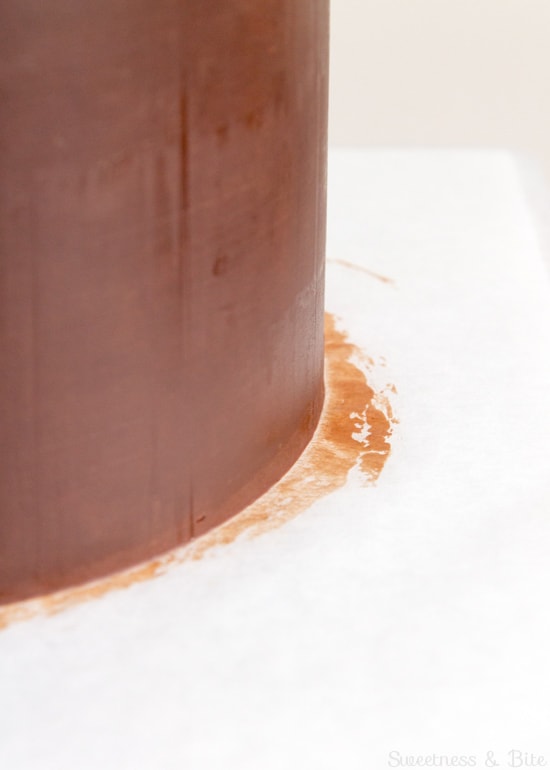
Refrigerate the cake again until the ganache is nice and firm.
Flip the cake back over and peel off the baking paper. Fill in any little holes on the top of the cake with more ganache and smooth with the spatula.
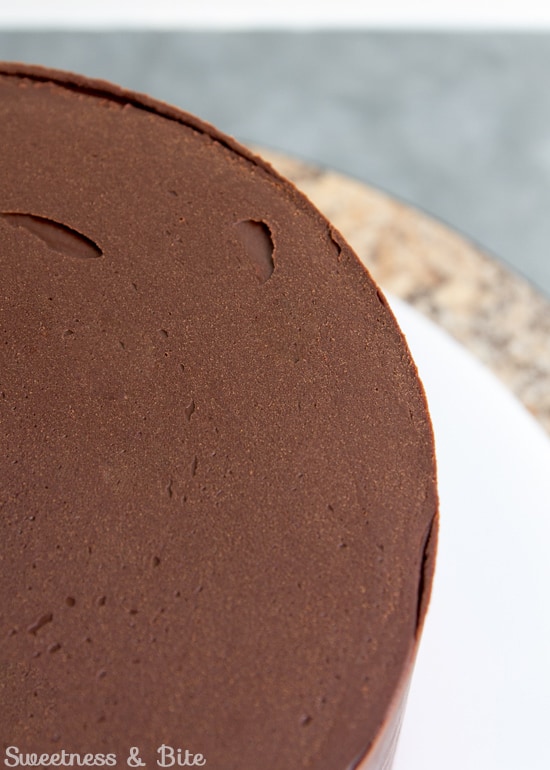
Warm up your scraper and scrape once more around the sides of the cake.
You may end up with a little ridge of ganache along the top edge which you can either carefully scrape off with your metal spatula, or warm up the spatula and smooth the ridge of ganache back across the top of the cake. Make sure the ganache is still cold and firm when you do this, so there is less chance of accidentally messing with the sharp edge.
Alternatively, you can let the ganache set completely, then lay a metal spatula or a small sharp knife flat against the top of the cake and slice the ridge off.
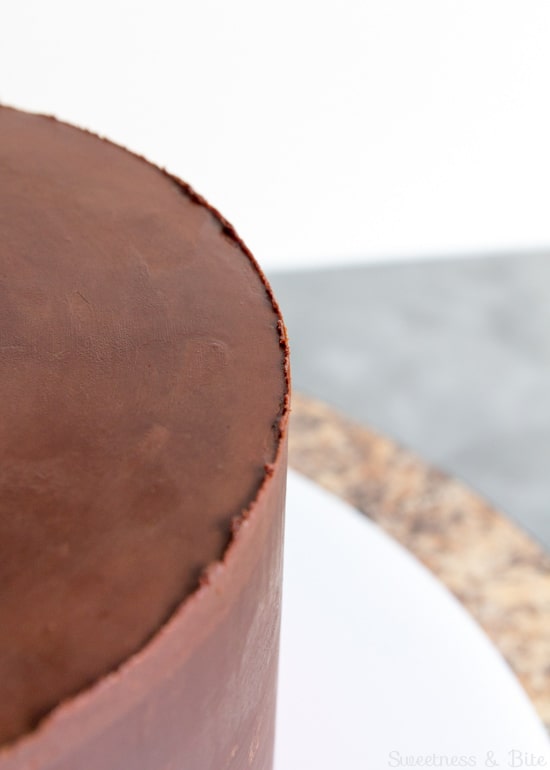
Warm the spatula in hot water one last time and use it to smooth any imperfections.
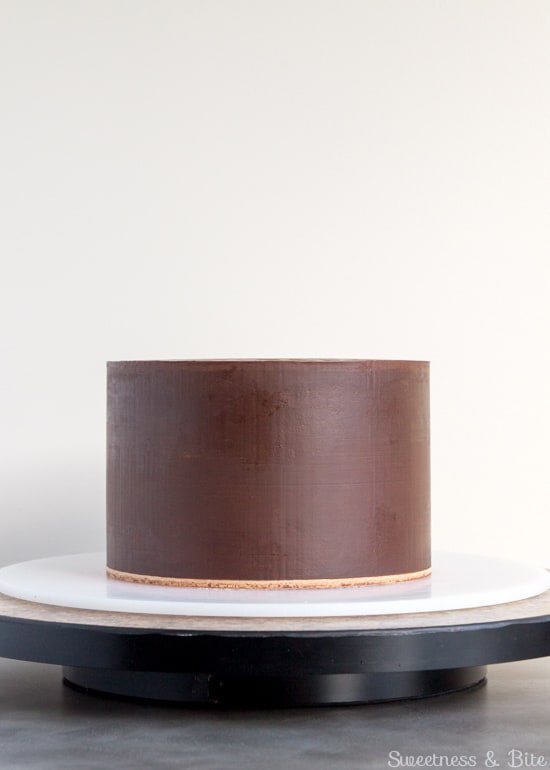
Leave the ganached cake to fully set before decorating. When covering with fondant it’s best to let the fondant set overnight.
How to Store a Ganache Covered Cake
Exactly how you store your cake will depend on the specific cake and filling recipes you’re using.
A ganache-covered cake does not need to be refrigerated unless you have filled it with some kind of perishable filling, such as fresh fruit or a fruit compote, or if you live in a particularly hot climate and don’t have air conditioning.
As a rule of thumb, (unless you’re using a perishable filling) you can store your ganached cake at cool room temperature, ideally in a cake box or clean cardboard box to keep dust (and pets, and children) away from it. Putting it in a cupboard works too.
If you do need to chill the ganached cake and you want to cover it in fondant, make sure you bring the cake back to room temperature before you try to cover it, otherwise, your fondant will get sticky with condensation (and you will get sad).
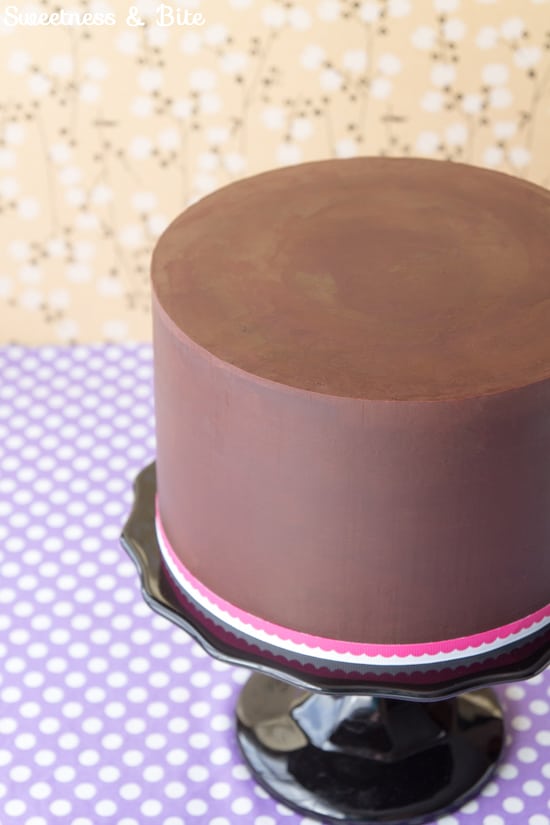
So that is how to ganache a cake and get sharp edges. Now you can go off and cover it in fondant, or simply sit back and admire your ganache handiwork!
If you’re not sure what to use to make your fondant stick to your perfect ganache, then check out this little mini tutorial, where I wrote a list of things you can use, with pros and cons of each to help you make your choice.
If you have any questions you can check out my Ganache FAQ post, where I’ve rounded up all of the questions I’ve been asked most about this technique, but if your question isn’t answered there then feel free to ask me in the comments below 🙂
~Natalie
xx

Love it love it LOVVVVVE IT! I have been using ganache for about a year and was considering switching back to BC because even though I can get nice edges, I couldn’t seem to manage a straight, flat top. You have lit the way to a happy ganache future! Thank you for taking the time and effort to make this tutorial – it’s simply awesome!
Hi Julie, you’re so welcome! I hope it makes that bit much easier for you 🙂
Hi Natalie,
I was wondering if you can use a fondant stencil on Ganache as I HATE working with fondant. I’m hoping to do a cake with the diamond print around it but not sure if you can do that on fondant and more importantly how?
If you could help me I would greatly appreciate it. I’m just a home baker who makes cakes for my kids birthdays.
Hope to hear from you soon.
Samantha
Hi Samantha. Do you mean the kind of stencils you’d usually use with royal icing onto fondant? It may be possible to use those on ganache, although fat can break down royal icing so you’d need to keep that in mind. If that’s not the kind of stencil you mean, if you can post a link for me so I can see then I might be able to make more suggestions 🙂
Hi Natalie,
Can a cake covered in ganache be frozen? I want to make a victoria sponge, cover in ganache and then freeze for a week before decorating and using.
Thanks
Hi Tracey. Yes you can, if you check out my Ganache FAQ post, I cover it a bit in that 🙂 It’s down towards the bottom of the post. Hope it helps!
Thank you for another way of applying ganache. I love covering my cakes with ganache then fondant. I have a question though. I have never done this so I was wondering if it would work….he goes, I have a small wedding cake to make and they want red velvet cake. I guess I have to use a bit of cream cheese frosting. In order for me to get the sharp edges I want to use ganache. Can I make the cake, fill it with cream cheese frosting, crumb coat with cream cheese frosting and then ganache over the top finally fondant over it? Would you use white or dark ganache? Please help. I want the cake to be beautiful. I live in florida and it’s an outside wedding reception. I am afraid if I use just cream cheese frosting the fondant will slide right off.
Hi Colleen. You can fill the cake with cream cheese buttercream and cover in ganache. You’d need to pipe a dam of ganache around the edge of each cake layer and then fill inside it with the buttercream, that ensures that the buttercream won’t ooze out. Then you’d cover the outside in ganache (don’t crumb coat with the cream cheese frosting – just use the ganache. The ganache will stick better to the cake than the frosting.) The only issue with doing that is that cream cheese buttercream really needs to be refrigerated (I think 4 hours is the total limit that it can be out of the fridge, although don’t quote me on that) and fondant doesn’t always react well to being in the fridge.
What a lot of people do for red velvet cakes is instead of cream cheese icing they do white chocolate ganache and add cream cheese flavouring to it. Lorann is the most popular brand, and is available from most cake decorating suppliers. It gives you a similar flavour to cream cheese frosting, but with the stability of ganache, and it doesn’t need to be refrigerated. So that would definitely be a good option if you’re concerned about the Florida heat and the cake being outdoors.
Hi Natalie sorry I don’t know if I’m asking in the right place but in going to try your technique it makes so much sense. One question how long can a fondant covered cake stay out I’m making a 3 tier wedding cake and wanted to start on it from 2 days before
Hi Sabrina, anywhere that I can see your question is a good place to ask it ? I generally say that a ganached and fondant covered cake will last for at least a week. I usually start making a cake three days out from the event, I bake the cake and make the ganache on day 1, ganache the cake on day 2, cover the cake in fondant and decorate it on day 3. Often I will add an extra day at the end for decorating (day 4), if it’s a really detailed cake. This timeline means you should have plenty of time to get the cake finished, plus give the recipient several days to finish eating the cake after the event. Of course, all this relies on using a cake recipe that keeps well, a chocolate mud cake or a cake like my devil’s food cake keep exceptionally well, other cakes like vanilla sponges and vanilla butter cakes don’t keep quite as well so I’d definitely limit those to 2-3 days before the event.
So, long story short, in general a ganache and fondant covered cake will keep for 3-7 days, at cool room temperature.
Thanx so much that was a great tutorial 🙂 very helpful 🙂
Hi Bek, you’re very welcome, I’m so glad you found it helpful 🙂
The most simple and straightforward tutorial I have ever come across about ganaching a cake..answered all my doubts..,truly superb
Hi Naz, I’m so glad you liked it, straightforward was exactly what I was going for 🙂
At long last…a comprehensive, factual, practical approach to ganache get cakes. One question when do I whip it? Or doesn’t it need whipping?
Hi Suzanne. To use it like this it doesn’t require any whipping 🙂 You can whip it to use as a filling though, just let it cool and whip it with an electric mixer. I prefer not to whip it simply because when you incorporate air you reduce the keeping ability slightly, and if you use the whipped ganache on the outside it won’t be quite as firm and stable. Really depends on what you want to do with it, it’s delicious either way!
Thank you so much for this tutorial, it is brilliant. I was wondering though can the parchment covered board work for BOTH boards? I ask because I want to place my ganached cake on a coloured drum (neither the cake or drum wil be covered in fondant) and so I dont want the bottom board showing so was going to try and remove it like the top one but dont no if I can do that successfully? Im afraid that if i ganache straight on the drum (without a thin ganaching board) that i will leave scrape marks on the drum. Sorry for such a long comment 🙂
Hi Lisa. I haven’t tried it with both boards covered in parchment, but I suspect it would work just fine 🙂 When you take the bottom ganaching board off, I would flip it upside down to take it (and the parchment) off, then place your coloured drum on top and flip it back over. That way you won’t damage the ganache or the cake, trying to lift a cake up that doesn’t have a board underneath. Does that make sense?
Yes that makes sense. Thank you so much for taking the time to reply. I will give it a go 🙂
Wow!! This is perfection!! Absolutely amazing!! Thank you!
Great tutorial. I have a few questions. What type of cakeboards are you using. The ones I purchase are the typical cardboard style and when I work with them (whether with BC or ganache, they loose some of their edge shape because they get saturated with the different oils). Second, I ganached my first cake with white ganache and it was soooooo hard because as soon as I would spread the ganache it would start hardening to the point that when I would try to smooth it with the scraper, it was not smoothing easily. I had to continue to dip my scraper in very hot water to try and smooth it, but I had to do this about 100 times because the heat on the scraper would only work on a very, very small section at a time. Did I do something wrong? I followed the 3 white chocolate to 1 part heavy whipping cream ratio recipe.
I would appreciate any assistance you can provide me on the above the questions.
Thank you so much.
Hi Maggie 🙂
I use silver paper covered cake boards, either the thinner (3-4mm) cardboard ones for smaller cakes, or 5mm Masonite ones for bigger cakes. I’m not sure where you’re from, but I gather in some countries most cake cards are plain cardboard with no covering, so that could be the problem. If you can get your hands on some of the silver paper covered boards then you shouldnt have any problems with oils soaking in as the paper provides a barrier.
With the white chocolate ganache, did you warm and soften it first? It usually needs a burst in the microwave (30 or 50% power is best so you don’t completely melt it) and a good stir, you want to soften it until it’s a similar consistency to peanut butter. It can take a bit of practice to work out the consistency that works for you. Also if you’ve chilled your cake first, that will make the ganache set a lot faster as you apply it to the cake, so it’s better to ganache a cake at room temperature, and just pop it into the fridge during the stages of the ganaching process where you do want the ganache to set a bit faster.
I hope that helps, and just let me know if you have any other questions 🙂
I made your dark chocolate mud cake and used all your fantastic steps and instructions to use the baking strips and cover with the chocolate ganache, I then covered with fondant and made into the hungry catapillar cake, my first attempt at covering a cake.. To see my grandsons face and reaction when he saw it was worth all the effort. The chocolate mud cake was a hit with everyone. This as enspired me to attempt another for my granddaughter who would like a rainbow cake.
Thank you for posting all this information
Christine
(Have not tried with coconut sugar yet)
Hi Christine, thanks so much for letting me know how it went! I’m so glad it all worked so well for you, and it sounds like your grandson had an awesome birthday 🙂
Oh my goodness, this looks delicious! I’m definitely making this! thanks for sharing!
can you just eat the cake with the ganache or do you have to cover it with fondant?
Hi Terry. Absolutely, you can just eat the cake with ganache 🙂 The ganache does the work of sealing the cake to keep it fresh, the fondant is mainly just for show.
I saw a ganache covered cake that looked smooth but like it had bloom or something to make it look woodsy or organic. If you add a little water to the outside ganache layer do you think that will change the look? I know it’s a vague description, sorry.
Next, do you cover a wedding cake in dark ganache and then cover it with white fondant? I generally use Fondx and can roll it thin, but I’m sure the dark ganache would show through. Am I not getting something?
Thanks so much for your entire blog! Awesome read and great pictures!
Hi Jenniffer. Yep you could adding some water, and if you get the surface quite wet and then leave it to dry, it can get a bit patchy. You could also try letting the ganache set and dry overnight, or at least for a few hours, it gets almost like a crust on it so you could warm up the scraper and scrape it again, which roughs up the outside a bit and those patches tend to look a bit lighter. I find if I get distracted while ganaching and it dries a bit, then when I try to continue it gets a bit rough, so that could get you that kind of look. Does that make sense?
Putting white fondant over dark ganache seems to be a personal thing, some people can do it no troubles, whereas other people find that they can see the ganache through the fondant, often particularly along the top edge of the cake. It also depends on the fondant, some can be almost a little transparent. So you can try either rolling your fondant a little thicker than usual, or use white chocolate ganache instead, which obviously wouldn’t show through so much. I tend to go with the white chocolate ganache option, because I’m not always that good with fondant! If someone particularly wants dark ganache, you can fill the cake with the dark ganache and then cover the outside in the white before the fondant, so you get the best of both worlds. You just need to avoid the white chocolate if the weather is very hot, as it can be harder to work with and soften too easily in the heat.
Hope that helps 🙂
Omg amazing im going to try this i havent ganached a cake to then be covered in fondant but would like to do this for the reason of sharp edges you make it look so easy and i no its not.
Hi Nina, it does get easier the more you do it. Which is what I tell myself about covering cakes in fondant, the ganache I do find easy now but flawless fondant still stumps me somewhat!
I hope you give the ganaching a go, and best of luck 🙂
Do you think i could practice this technique on a styrofoam cake dummy?
Hi Autumn. You could do, if you can find a cake dummy that is half an inch smaller than your cake board, or if you can cut one down to the right size. That might be a little messy though! Might be better to cut down a bigger cake board instead 🙂
Make a cake at least you can eat it!
Hi.. Thank you for a great tutorial.. I am very keen to know where you got your scraper from please? It looks simple and uncomplicated.
Thanking you
Iris
Hi Iris. I actually got this scraper from another decorator, and I’m not sure where she got it from! Basically all you’re looking for is a stainless steel scraper with a right angle 🙂
great tutorial will be trying this for my first ganache attempt!
Hi Catherine, good luck and I’d love to know how you get on! 🙂
This technique is brilliant! Just tried it with a chocolate chip pound cake and the results are perfect! Thank you for sharing!
Hi Natalie,
I have just discovered your website and i am hooked – thank you for what you do.
Could you please tell me approximately how long the mud cakes will keep. I was hoping make some cakes a week in advance of my sisters baby shower in order to decorate them, however my experience with GF cooking is that it is a little drier already. Do you find this is the case?
Thanks.
Hi Amy,
If the cakes are stored airtight (either in an airtight container or covered in ganache and fondant) they can keep quite well for a week or so. My gluten free dark chocolate mud cake is pretty much identical in texture and moisture to a regular mud cake, so I’m quite comfortable in treating it exactly the same. Just quietly we have eaten gf mud cakes that are over a week old, and they’ve been perfectly fine. I wouldn’t leave it that long as a matter of course (and certainly not if I was selling cakes!) but for us it was totally fine, in fact they tend to get more flavourful and dense the longer they’re left. Of course it all depends on the gluten free flours you use, the temperature and humidity that it’s kept in, etc. but I would say up to a week is a good rule of thumb. You can use a simple syrup on the cake layers to add more moisture, but in general as long as the cake hasn’t been overcooked, it’s not necessary.
When working on decorated cakes I usually use a three or four day timeline, Day 1 – Bake, Day 2 – Ganache, Day 3 – Fondant, and Day 4 – Decorate (if I haven’t finished decorating the day before.) That gives a good few days after the event for the remaining cake to be consumed.
Also, if you want to bake well in advance you can freeze the cakes, wrapped well in plastic wrap and in an airtight container.
So, long story short (!) I find that with these mud cake recipes I can treat them exactly the same as I would a mud cake made with wheat flour.
Hope that helps 🙂
Hi. Love the help…only issue is when I tried to download the spreadsheet it took me to facebook. There was no sheet I could see to download 🙁
Hi Zara, I think the link may have been just in a post on the Facebook page, but it is probably quite far down the page now! Hopefully you should be able to download it from this link… https://dl.dropboxusercontent.com/u/28726919/The%20Ganacherator.xlsx
Let me know if that doesn’t work.
Hi! great tutorial and very helpful.. I only have one question to ask.. what am I gonna do if I over heated the chocolate chips and it become more oily..? Do I still have a chance to survive it and make a firm ganache? Thank you
Hi Ariane, I’m sorry if I’m a bit late to answer this question! I think if the chocolate is overheated (and slightly burnt) then you may not have any choice but to start over. If the ganache has simply separated because it hasn’t emulsified properly with the cream, then gently whisking or stirring it over a very low heat may bring the ganache together. I hope that helps!
Great tutorial, thanks so much for taking the time to post. I have a wedding cake for next weekend I’m going to try it with. My question is how far in advance do you ganache? The cake will be strawberry with fresh strawberry filling. It’s a hectic week for me so I’d like to do as much as I can in advance.
thx
Hi Cheryl. A cake filled with just ganache can be kept at cool room temperature for several days. And even that is a conservative estimate, in reality they can be kept for closer to a week. Generally when decorating cakes, I follow a three day timeline: Day 1 – bake (and make the ganache) Day 2 – fill and cover the cake with ganache, Day 3 – cover the cake with fondant (and decorate). Another day can be added for more decorating if necessary. This gives the recipient several days after the cake is cut in which to finish any leftovers.
However, I don’t have experience with fresh fruit fillings so I can’t tell you for sure how long they can be kept. I will say though that I would be very, very reluctant to keep a cake with fresh fruit filling for any longer than a day before serving. The strawberries will likely continue to ripen and the juice will begin to leak from the fruit into the cake. The cake would need to be kept refrigerated until serving, and even then I’m not sure what state the filling would be in when the cake is cut.
I would be more inclined to fill the cake with plain ganache or buttercream and make a strawberry compote or sauce to serve with the cake. Or if you have access to freeze-dried strawberry powder, that would also be a good option as it has the pure flavour of the fresh strawberries, but can be added to white chocolate ganache or buttercream without the worries of fresh fruit as it doesn’t have any of the moisture. I love adding it to Swiss meringue buttercream, as with the lovely light texture of the buttercream it ends up tasting like fresh strawberry mousse.
I hope that helps 🙂
Hi so I’m sorry I’m just not understanding do you cut the boards a 1/4 in or a 1/2 because I see that the ganache comes all the way to the edge so I just didn’t understand that part please let me know asap I’m making a cake today
Ignore my comment I just figured it out 🙂
Hi Jacquie, my apologies I only just saw your comment. Glad you got it sussed 🙂
Hi, what kind of cream you use? Im from México, and I’ve been looking heavy cream and whipped cream and I couldt find them. Can I use regular cream? or Half and half cream?
Hi Bianca, you can use heavy cream for this. I wouldn’t use half and half, I don’t think it contains enough fat for the ganache to work properly. Basically any pourable cream (the kind used either as a ‘pouring cream’, or that you would whip to make whipped cream) with a fat content of around 35% should work well 🙂
I am happy that i tumbled upon your page. Have been struggling to get a sharp edge with ganache. Now i am going back to my kitchen with all these tips!!
Hi Bhargavi, I’m glad you stumbled upon my page too 🙂 Good luck with the ganaching!
This by far has been the most informative and easy to follow tutorial on this technique right down to covering with fondant. Love all the suggestions thank you so much!
I am just about to do a chocolate cake (I am also not good at icing sponge cakes) so was looking for an alternative, you have given it to me. I loved your tutorial, very informative and so glad I found your site. Thank you.
Two questions, one-after covering cake with ganache can it be covered with plastic wrap and stored in fridge?
Two-have you ever painted on ganache (preferably white)…
thank you
Hi Karla. Yes, once you’ve ganached the cake you can cover it with plastic wrap and store it in the fridge. I haven’t yet tried painting on ganache, but if I was to give it a go I would probably try it with powdered food colour mixed with melted cocoa butter. I suspect a water based colour would probably separate on the ganache rather than going on smoothly. Hope that helps 🙂
Hi there Natalie. Just wanted to thank u so very much. This tutorial has saved me so much time, effort and cleaning up. Just awesome.
Hello. All this looks amazing. I just want to ask for some advice. I’m going to make a cake with mascarpone/fresh cream filing. Then i would like to cover it with ganache and stick fondant decorations onto it. Not covering all of it with Fondant. decorations only. And the questions are: is this going to work? I mean i have to refrigerate the cake (because of filling) and if i take the cake out of the fridge to serve it what’s going to happen to fondant? The cake will be taken in and out of the fridge multiple times. I have no experience i really need help…Please please please.!
Hi Teresa, it can work, but I would suggest not adding the fondant decorations until the last minute, if possible. If you put the decorated cake in the fridge then the fondant components will get sticky with condensation once the cake comes out of the fridge as it comes to room temperature.
But if you can’t wait to put them on at the last minute, then when you take the finished cake out of the fridge just try to avoid touching the fondant pieces until the moisture has evaporated off them. Nothing truly terrible should happen (as in, it shouldn’t all melt off or anything) but the fondant will just look a bit shiny and if you touch it then it will leave fingerprints.
Hope that helps 🙂
Greetings from Texas, USA!! You are a master at making easy to understand tutorials!! Thank you so much!! My question, if you use a small fan to “dry” the fondant when it comes out of the fridge, will it do anything to the ganache. RE: using ganach as the icing with fondant decorations.
Hi Charlotte, nope the ganache should be absolutely fine if you put a fan on the cake to dry the fondant. If it gets very wet from the condensation, you may possibly get a few watermarks on the ganache (I haven’t seen it happen but it is possible) then you should be able to just put a dab of shortening on your finger and rub it over the marks.
It helps a lot and thank you so much for a super fast reply! This is going to be a construction cake so ganache would work for me as i don’t really have to have perfect smooth finish and just add some fondant rocks, diggers and dump trucks around. .i won’t have time to decorate at the last minute though. And I’m going to take the cake to the park which is only 2 minutes drive from my house. Btw this is going to be my first cake:) Thank you for sharing your knowledge & experience!
I love cakes where the finish doesn’t need to be perfect! Plus if you wanted it to look like ‘dirt’ you can also press some crushed up chocolate biscuits into the soft ganache before it sets. If you’re just taking it down to the park (and depending on the temperature, obviously with a perishable filling you wouldn’t want to do this if it’s really hot!) you could just take the cake out of the fridge a little bit before you want to take it, so it has time for the fondant to come to room temp and dry out. But even if you can’t do that and the fondant bits gets a little shiny, I’m sure it will still look great (and to be totally honest, no one else will really notice anyway!)
Good luck with the cake, and let me know if you have any more questions 🙂
I am now considering making a filing that will last at the room temperature. One worry less!
I was wondering if you could also give me some advice on fondant. Do i stick it to the ganache that is set? just like that or have to use Tylose glue or water? And if I make a cake topper a week or two in advance how should i store it? And the last question after i finish decorating my cake should i put it in the box or can leave it on the bench? Will it dry out?I’m a first timer everything is new to me…. The cake is due on 24th of May..Not long to go!
Sounds like a good plan, I’m all for limiting the worries! Once the ganache is on the cake and has sat for a few hours (or overnight is best) then it gets very firm and almost dry on the surface. So when you go to apply the fondant, you need to brush the surface of the ganache with water or a sugar syrup, or you can rub the surface with shortening like Crisco. Any of those will give the fondant something to stick to.
If you make the topper in advance you can just store it in a cardboard box, pretty much as long as it is not in something airtight, it will be fine. It just needs air circulating so it doesn’t get soft and sticky.
Same goes for the finished cake. You can store it in a box, or on the bench, obviously as long as no insects/children/pets can get at it! The fondant will dry on the surface, but the seal from the fondant (and also the ganache) protects the inside of the cake, stopping it from drying out 🙂
Thank you so much Natalie!
Great tutorial. I have have only ever ganached my cakes, planet cake style but I really like the idea of the top board for lovely straight side. I’m from Australia and it gets really humid here so I always refrigerate my ganached cakes and cover them cold so the ganache stays sharp. I just wanted to say that I have recently had the sticky fondant problem from cold and comdensation, but have discovered that if you leave the fondant for a few hours or overnight that it does dry back out. Just have to work a bit quicer to get your fondant on. 🙂
Hi James, thanks for your comments, and your tips! I’m lucky it doesn’t get too hot and humid here but I have heaps of sympathy for those of you who make cakes in more tropical climates! 🙂
Thank you for this FAB tutorial. May I ask where to purchase masonite cake boards? I am in the U.S. Also, the plastic ganaching board? MANY THANKS xx
OMG!! It’s perfect!
Thank you for the step by step picture tutorial! I managed to ganache my cake smoothly and really happy with the results! Thanks again!!!
hi
this looks great
can you please tell me the measurements?! like 3 parts chocolate you mean how many ounces? sorry not great English
Hi Stella. The actual measurements depend on how much ganache you want to make. So if you need 52 ounces of white chocolate ganache (which is about enough for a three-layer 8″ cake) then you will need 39 ounces of chocolate, and 13 ounces of cream. Hope that helps 🙂
Hi, what a great tutorial! Can’t wait to try 🙂 do you have a favourite recipe for both vanilla and chocolate cakes? You might have already posted the link and I’ve missed it
Hi Megan, the devil’s food cake that I have on the blog is by far my favourite chocolate cake recipe, although the dark chocolate mud cake is a pretty close second. They can both be made either with regular flour or gluten free flour. I’m still searching for the perfect vanilla cake recipe though, it seems to be one I just can’t settle on. I do like the Sky High cakes one, which Smitten Kitchen has a version of on their blog 🙂
Hi.. Thank you for a great tutorial. It was a secret that u revealed for me.I learned a lot and tried,It worked for me even at first attempt
Hi Saly, I’m so glad to hear that 🙂
Hi Natalie, thanks for a great tutorial! Can you tell me when you have made white chocolate ganache 3.1 ratio and left it on the worktop overnight…..when you go back to it it in the morning, should it have set hard or still be a bit soft? Thanks so much!
Hi Joan, it should have mostly set, with perhaps just a little bit of give in it when you poke it with a finger. Then you can microwave it gently to warm it to a kind of peanut butter – Nutella type consistency to use it. If the 3:1 ratio isn’t setting firm enough then you may need to up the chocolate a bit.
Thanks for the quick reply Natalie, it has set quite a bit, to a thick consistency that would be easy to spread without the need to microwave it. Is it ok to use like that ?….or useless to use as it never reached that very firm stage.
Hmm, unless the air temperature is reasonably cold where you are I would be wary of using it if it’s that soft without being warmed. Just because it’s hard to know if it will set firmly. I wouldn’t worry so much if you’re not going to cover it in fondant, but if you are then having soft ganache will make it difficult to cover.
You can try spreading a little bit of the ganache on a plate, popping it in the fridge and seeing if it sets firm. Then leave it at room temp for a bit and see if it stays set. If it doesn’t, then I would suggest melting a bit more chocolate, warming up the ganache and then adding the melted chocolate. If the chocolate and the ganache are at a similar temperature they should blend together without splitting. If you need to use it soon then you can speed up the firming of the ganache by putting it in the fridge just until it’s that spreadable consistency before you use it on the cake.
I’ve found that with all the varieties of chocolate available and different temperatures it can be a bit of trial and error trying to work out what works best for you.
Ok I will give that a go and see what happens. It is for a fondant covered cake, so I need everything to be perfect with the ganache as I don’t want problems later!! Thanks again for your help.
No worries, and I hope it goes well for you! I’d love to know how you get on with it 🙂
Hi Natalie, just to let you know I added some more white chocolate, which brought it up to 3 1/2 parts chocolate to cream and we have success! It went really hard after just a few hours….and that was just sitting on the worktop not in the fridge. I thought I was going to have to take a chisel to it! Lol! So at least I know now that when I soften and use it – it will set nice and firm. Thanks again!
Hi Natalie this is a very lovely tutorial. Please I am really scared. I have this wedding cake to do 12″, 10″, 8″, 6″. And have been trying to get sharp edges with buttercream but no luck. Please can I use dark chocolate Ganache with all butter vanilla cake? The client isn’t a fan of chocolate. Thanks
Hi Nora, if the client isn’t a fan of chocolate then I would suggest you fill the cake as you usually would with buttercream, but use ganache just for the outside so you can get the sharp edges. That way the people who aren’t so fussed on the chocolate can leave it behind when they eat it. But for those that do like it, the ganache will taste just as good with the butter cake as the buttercream will. Best of both worlds 🙂 Good luck with the cake, I hope it all goes smoothly for you.
Thanks Natalie. Would it be best if I use white chocolate since its going to be a white fondant covering? Also could I just use ganache to keep the boards together if I do not have a grip mat? Thank you.
Yep, if it was me I would use white chocolate ganache under white fondant. I know a lot of people do use dark chocolate under light-coloured fondant, but I prefer to use the white chocolate, it just prevents any dark marks that may get on the fondant, and if the fondant stretches a bit then with the dark chocolate it can show through. For me it’s more peace of mind.
You can use whatever you have to stop the boards slipping around. You may find that the bigger cakes don’t slip so much anyway since they’re heavier, but the smaller cakes will need something to stop them moving around. Even some double sided tape could work, as long as you can get the boards separated again when you need to flip the cakes. If you use ganache to stop them slipping, then I’d suggest sticking the boards together and putting them in the fridge for a few minutes to set the ganache, then layering up your cake as usual. Then when you need to separate the boards you can just slide your spatula between them to separate them.
Thanks Natalie. Will surely be sending you feedback by weekend.
No worries, and I’ll look forward to hearing how it goes 🙂
wow this is absolutely beautiful!
Thanks very much Natalie. I need to translate the text to my language (Persian) to better understanding. I can’t COPY/PASTE the text to google translate. Could you please help me.
Thanks again.
Hi Manijeh. I’m happy to paste the text into Google translate and email the Persian translation to you if you’d like? Just let me know if you’re happy for me to send it to the address you used when you posted your comment 🙂
Hi Natalie. Yes, It’s very nice you send the translation of the text to my email address I used when I posted my comment. Would you please attach the photos?
Thanks and have a nice day!
Ok, I’ll send you the email now. I’m afraid I wouldn’t know where to put the photos in the text since I can’t read it, and I’d probably put them in the wrong places! So you may need to just pop back and have a look at the photos on the blog 🙂 Let me know if you don’t get the email and I’ll send it again.
Hi Natalie,
Thanks for your effort.
Sorry for delayed reply.
I can understand your English text better than google persian translated text!
I try to use and understand your original text.
Best wishes!
I used this tutorial yesterday for my first ganachhe attempt! The results were amazing 🙂 I can not thank you enough for taking the time to do this. I am onto my second cake now and will be using this technique in future for all my cakes 🙂 You have changed my caking world 🙂 🙂 xx
Hiya 🙂
I’m not sure if you will get this question in time before I completely ruin my cake 🙁 but worth the try…
I used your white chocolate genache recipe (before using the comments, doh) and because of how warm the weather is its too sticky. I out it in the fridge, it set solid, I got it out and still tacky again now. I’m worries about putting the icing straight over it now, but haven’t got enough time to start over as it’s needed for tomorrow.
Am I best to bite the bullet and just ice it now or if you have any tips I’d be amazingly grateful.
Thanks
Laura x
Hi Laura, not sure if this is in time, but your best bet would be to re-melt your ganache and add some more melted chocolate to it to take it up to a higher ratio. If it’s super warm you probably want to be up at a 4:1 ratio (or even 4.5:1) for white chocolate. It is the most fickle of the chocolates for ganache, but usually if you can use a higher ratio then it will work even at higher temperatures.
To add more chocolate you can very gently warm the ganache until it’s melted (doing this in a pot over a very low heat while stirring constantly is probably the best way to do it), melt your chocolate and then stir the two together. If they are pretty close in temperature then you shouldn’t have any splitting problems, but if you do then you can use the tips I’ve got in the recipe for fixing it. Then to firm the ganache up quickly so you can use it, you can pop it in the fridge, and stir it every 10 or so minutes until it has firmed up to a useable consistency.
Hope that helps, and isn’t way too late!
Oh I just re-read your question, I didn’t realise you had the ganache on the cake already when I replied this morning! (That’s what I get for replying just after waking up, while still in bed, and before my first cup of tea!) I wanted to reply quickly in the hope you got it in time, but clearly that wasn’t my best work 😉 I hope it worked out for you in the end.
Thank you so much for this fantastic ganache tutorial. I have used it three times in the past couple of weeks for the first times I have ganached a cake and I LOVE the results. I mean, still not quite as perfect looking as the one in your tutorial, but NOT BAD, even if I say so myself.
Your page is bookmarked and I will be using it regularly!
Thank you!
Hi Zoe, I’m so glad you love it and that it’s working so well for you. (And remember when I first started doing it, my results weren’t quite what they are now!) I’m sure that the more practice you get, the happier you’ll be with your ganache finish 🙂
Hi, Can you freeze the cake after you have ganached the outside. I would like to make the cake now and apply the fondant in like 2 weeks time.
Hi Chris, my apologies for the delayed reply, I hope I’m not too late. I haven’t done it myself but I had heard from other decorators that it is possible. You just need to make sure the ganached cake is wrapped really well in plastic wrap, then put it in an airtight container and into the freezer. When you take it out you need to let it defrost completely while it is still fully wrapped and in the container. That way the condensation will form on the outside of the container and not on the cake itself. That will stop the cake board getting damp, which could potentially cause it to grow mould once the cake is sitting at room temperature being decorated etc. Hope that helps 🙂
This was amazing! Thank you so much for posting. Where do you buy your thick cake boards?
Hi Angel, you’re very welcome. The thick cake boards are pretty readily available in New Zealand and Australia (I buy mine from a few different places here in NZ, http://www.kiwicakes.co.nz is one of them). If you live elsewhere though they may be a bit harder to find and you may need to consider ordering them from Aus or NZ. I think some people have luck using double sided tape to tape two thinner American style cake boards together though so that may be an option for you. It will depend how smooth the edges are though, as having smooth-edged boards is part of the key to getting smooth ganache. Hopefully these kinds of boards will be popular and easy to get worldwide in the future!
Thank you for an amazing tutorial! Your cake looks flawless.
I am making (or attempting to make) 3 white chocolate ganached cakes (not stacked) for my sister’s engagement party and had a few questions:
1- can I make white chocolate ganache even whiter by using white colour paste? (fondant isn’t very popular in my family!). I’m worried anything added might make it seize.
2- Also I want to apply fondant leaf decorations painted gold directlyto the Ganache and then refrigerate it as it is warm and humid where I live. Is it possible? Do I have to keep it in the fridge until serving time or is it better to take it out an hour before and keep it in a air conditioned cool room because of condensation?
3- finally I’d like to paint a gold rim all around the base of 1 of the cakes but can’t find cocoa butter here. Can I substitute it with something else? Or can I mix the gold powder with a bit of vodka to a thick consistency and apply it directly to the firm cold ganache.
Im sorry for all the questions but I’ve never attempted anything like this before and I’m quite nervous that too many things will go wrong. I’d really appreciate your input on this.
Thanks
Zeina
Hi Zeina. You’re most welcome for the tutorial and I’ll try and answer your questions as best I can 🙂
1 – Yes, you should be able to whiten the ganache with while gel colour. I would start off with a small amount and build up, as too much may cause the ganache to split.
2 – You can refrigerate the ganache covered cakes, but be aware that when you take them out of the fridge, the fondant decorations will become very sticky and wet. If you can take it out and pop it in an air conditioned room for an hour or two then it will give the fondant time to dry out a little. Make sure that while the fondant is sticky you don’t touch it, as it will leave fingerprints behind.
3 – I’m not sure that vodka and gold powder would work painting on ganache, as the oil in the ganache will likely repel the water in the vodka. If you can’t get cocoa butter then you could try mixing the gold powder with a little vegetable oil and paint with that, but I would suggest spreading a bit of ganache onto a plate or some paper, letting it set and then testing out the gold paint mixture on it before trying it on your cake. I have a white chocolate ganache covered cake to make for the blog this week so if I remember I will give it a go with some paint and see if I can come up with a better suggestion for you 🙂
And no need to apologise for all of the questions, I’m happy to help! If you’re nervous then I would suggest testing out as much as you can before you need to make the cakes, as if you’ve tried it before you’ll be much less nervous. Even if you can just make a small cake, cover it with the ganache and test out the various decorations you’ll be doing, then you’ll be able to iron out any problems in your own time, with much less pressure!
Thanks Natalie for all the great advice. You are right about a test run cake, I will definitely have to do that now. I’ll let you know how it turns out.
Thanks again:)
You’re very welcome, and I hope it all goes smoothly for you 🙂
After your done adding the ganache to the cake and freezing it can you cover it with a buttercream frosting instead of fondant?
Hi Jade, yes you could apply buttercream over the ganache if that’s the finish you were going for.
Simple and brilliant thanks so much for your Ganache tutorial. As a Ganache virgin I found it really easy to follow. I baked a large single layer chocolate cake and left it in the tin to cool. As I was making a variety of different cakes at the time decided it would be best to use the a Ganache as a topper so while the cake was still in the tin I poured the cool mixture over the cake in the tin and left it to set. It looks great the tin is off everything stayed where I wanted it. My question is can I now freeze the whole thing for use at a later date or does it need to be eaten fairly smartly before the cake becomes stale as it’s not completely covered? Im going to do the whole thing next time it looks so good x looking forward to the answers to my questions Thanks again. Lin x
Hi Linda, my apologies for the delayed reply, I wasn’t well yesterday and wasn’t on my computer all day – very rare for me! So I’m very sorry if my advice is far too late! You’re right, ganache sealing the cake is what keeps it fresh so if it’s not covered completely you’ll need to keep it fresh in other ways. Freezing is a good option if you wrap the cake very well in plastic wrap and then pop it in an airtight container and into the freezer. If you’re just keeping for a day or two, then you could wrap it the same way and put in an airtight container and keep it in the fridge or at room temperature if you don’t live somewhere too hot. Some of this also depends on the cake recipe as well, some will keep just fine at room temperature, while some really need to be frozen.
Thanks for your response and please don’t apologise for a ‘late’ reply I’ve have waited much longer on other sites lol. I returned home from shopping yesterday and hubby had already helped himself to a slice so he has dictated which cake gets eaten first. Men! 😉
Hahaha, I guess you should take it as a true compliment on your baking, it just looked too delicious to resist… 😉
Thanks for the great tut! I would LOOOOOOOVE to see a video of you flipping the four-layer cake with the somewhat squooshy ganache on the top!!! I guess you have to be very careful not to press too hard when it’s between your two hands in the air…. Seems to me that would be VERY hard to do, no?
Hi Janet, next time I ganache a cake I’ll try and remember to get someone to video me flipping it! It can be tricky, especially when flipping bigger cakes. Definitely best to practice on smaller cakes. The thing is though, it is ok if it squishes around a little bit, as long as not so much squishes out that you can’t make the cake level (when you press on it to level it out). I think the key is to have your dominant hand underneath once you’ve flipped, which seems counterintuitive but it’s better to have your stronger hand supporting and guiding the cake once it has been flipped. That way you can get it safely back down on the bench without it sliding around too much. I have very little upper body strength though and generally I can manage it, so if I can then most other people probably can too 🙂
I’ll be waiting for that video….:-)….
Dear Natalie,
I made you’re chocolat mud cake (absolutly fab btw :D) and started with coating it in ganache but then I turned around and THE CAKE FELL ON THE GROUND. After having a heartattack I managed to fix it (so glad I didn’t layer it) and started over with “ganaching”. The cake stil looks fab and tasts delicouis. Thanks for you’re great recipes and tips!
xx Emma
Oh my gawd, cakes falling are my worst nightmare! I’m so glad it turned out ok for you! One of my worst caking moments was two years ago when I put my best friend’s daughter’s two tier candy house cake in it’s box, on a trestle table while we were setting up the cake table, and whoever had used the table before us hadn’t put the lock on the table. I heard a bang, and my best friend shouting expletives then “OHMYGOD THE CAKE!!!!” I actually had to take a moment before I could convince myself to turn around and look. Luckily only one end of the table had collapsed, the cake slid down the table and had come to rest against a chair. A few of the sweets had fallen off the cake, and a few of the fondant roof tiles broke off (at the back, thank goodness!). I managed (with ridiculously shaky hands) to put the bits back on the cake. I still have nightmares about how much worse it could have been!
First, thank you for an Awesome tutorial! I used it to successfully ganache a HUGE 10″ round cake. My question is “Do you recommend using the plastic circles?” Luckily, I had a foiled wrapped 10″ thick cardboard but they are pretty pricey! I couldn’t re-use it after all of the ganache I got on it. Tried to wash it off which just made it wet 🙂
Hi Kim 🙂 I do really, really love the acrylic circles. They’re so easy to use, and to clean. Sometimes I can get the cardboard ones quite clean using vodka or cake decorators alcohol (rose spirit) on a paper towel, but I don’t like to do that too often as it’s not the most hygienic clean. So yep, if you can get your hands on some acrylic circles I highly recommend them. One thing I have heard from others though is that sometimes, depending on the acrylics and the cake cards/boards that you buy, it can be hard to find ones that match. One or the other can be a few millimeters smaller, which obviously stops the sides of the cake being completely straight. I’ve been lucky with mine that all the boards I use are the same size as my acrylics, but it is something to keep in mind.
Fantastic tutorial! Can I please check a couple of things for 3 (or 4) day preparation: after you make the ganache (on day 1), do you keep it in the fridge or on the bench? (actually, same question for the baked cake? Also – should I defrost a frozen cake in the fridge or on the bench?); after the cake is filled and ganached (day 2), can you keep it on the bench? (I assume that is better than putting it in the fridge if it’s going to be covered in fondant); before covering with fondant (day 3), do you need to do something to make sure the fondant sticks? – I have seen some tutorials that suggest spraying/brushing the ganached cake with simple syrup.
Hi Julia. I keep my ganache on the bench after I make it. It’s probably easiest to say straight off that I don’t refrigerate my cakes, apart from the few minutes to set the ganache while I’m in the process of applying it. So I bake the cake and make the ganache on day 1, the cake and ganache both sit at room temperature until the next day, when I apply the ganache. Once the ganache is finished, I don’t put them cake back in the fridge at all. The cakes I use (usually chocolate mud cakes or devil’s food cake) keep very well at room temperature for several days. BUT, having said all that, I live in a climate that is pretty moderate, we don’t get extreme high temperatures, so you’ll have to take your climate into account and do what you think is best. Also, I don’t tend to use any perishable fillings, if you were to fill the cake with, say, a fresh fruit or cream filling and then coat the outside in ganache, you would need to treat the cake in a way that keeps the filling safe.
Many people successfully refrigerate their cakes at all stages of decorating, I just don’t find that I need to for the kind of cakes I make. I have heard a lot of tips for refrigerating cakes, including storing them in a cardboard box in the fridge (the cardboard stops the moisture from condensing on the cake) and leaving the cake fully boxed until it has come to room temperature (which stops condensation forming on the fondant) and not touching the fondant until it has fully dried (to stop fingerprints in sticky fondant).
So basically how you treat your cake will depend on the temperature, the kind of cake you’re making (you’ll need to consult the particular recipe to find out what it suggests there), and whether you’re filling the cake with anything other than ganache. Cakes can be thawed at room temperature, you should wrap them well in several layers of plastic wrap and store them in an airtight container in the freezer, then leave them fully wrapped and in the container until they have fully thawed – this will stop condensation forming on the cake and making it soggy and damp.
Yep, you will need to apply something to the ganache to make the fondant stick. There are heaps of options here, water, vodka, simple/sugar syrup, corn syrup or shortening. I tend to use vodka or shortening, usually vodka when I’m doing a regular round or square cake, and shortening when doing a carved or shaped cake, as the shortening can easily be rubbed all over the ganache, and helps to smooth it out a little more.
Hopefully that’s answered your questions, if there is anything I’ve missed or you have any other questions, just let me know 🙂
Thank you so much for your quick and detailed response – that’s very helpful. I’m going to be doing my first 3D cake – I’m in Australia and we don’t have shortening so I might try simple syrup; or slightly melting the closest shortening substitute (copha).
You’re most welcome. Simple syrup it a good choice, nice and sticky. Side note though, you should be able to buy Crisco shortening from cake decorating suppliers in Aus, somewhere online like Cakes Around Town should have it. I’m not a fan of using it for what it’s made for – replacing butter in buttercream (I’m an all-butter girl!) but I buy it just for jobs like sticking fondant, and for softening fondant and for using when making flowers. Sugar syrup will definitely do the job though. Best of luck with your cake 🙂
This is a wonderful tutorial! Where do you get your acrylic ganaching boards from? Thank you!
Hi Nancy. My boards were a gift from a friend in Australia and I’m not sure where she got them from. I do know of a couple of places that sell them, where abouts do you live? If you happen to be in Australia then I’d suggest you check out Kelly’s Cake Toppers https://kellyscaketoppers.com.au/product-category/accessories/ganache-lids/ .
I live in the US! Thank you for the link!
Kelly might be able to ship them there. I’m not sure how much it would cost, but couldn’t hurt to ask! I’m on the lookout for a US supplier of acrylic boards so I can suggest them to people, if I do find one I’ll post a link at the bottom of the tutorial 🙂
Amazing job…..totally enjoyed reading and can’t wait to try your suggestions!
hi great tutorial. i m in Australia and currently we have mild summer over here. i have to decorate a cake for saturday, which i have baked it already on Monday. now i am really busy on wednesday and thursday nite. so my question is can i fill and cover my chocolate cake with ganache on tuesday nite and keep it out on bench top till friday. then i will cover it with fondant that nite. or should i put it in fridge and take it out on friday morning then cover it with fondant friday nite.
Hi Pinky. If the weather isn’t terribly hot, then yes you can ganache the cake tonight and cover on Friday. Ganaching the cake seals it, so air can’t get in and this keeps the cake fresh. You could refrigerate it if you have any concerns with the room temperature being to hot, but in general if the temperature is mild then the cake should be fine at room temperature.
I have ganache cakes before, but found that it tends to break my sponge, so I stopped using ganache, and went back to buttercream. What am I doing wrong with the ganache? Why does my sponge fall apart when I icing with Ganache..
Hi Astrid. Do you mean it breaks the cake when you’re applying the ganache? If so, it sounds like maybe your ganache is too firm when you’re applying it and that’s why it pulls at the cake. So I’d suggest you try warming up your ganache a bit more, so that it is easier to spread onto the cake. You could also increase the amount of cream slightly, so that the ganache doesn’t set so firmly 🙂
Hi,
I love this tutorial, a friend made a set of disks made of synthetic material for the sharp edges, just a tip.
Ganache to fill a cake or to cover a cake has that different consistenties? a if not if you fill the cake won’t it be to hard? thanks rina
Hi Rina. When the ganache is at the right ratio it is firm at room temperature, but still soft enough to eat. It’s definitely firmer than a butter-based icing. You can make it softer for filling if you want, and use a firmer consistency on the outside, but I find it perfect just the way it is. Hope that helps 🙂
Hi Natalie,
Incredibly helpful post!
Just one quick question, once the cake is ganache’d and set is there anything you need to do before covering in fondant to ensure it bonds? I’ve seen some tutorials previously and they seem to spritz the ganache with something before covering to help the two stick together.
Thanks,
Laura
Hi Laura, yep you’ll need to apply something to the cake to make the ganache stick. Water, vodka and simple sugar syrup (equal parts sugar and water boiled together until the sugar dissolves, and then cooled) sprayed or brushed onto the ganache are all good options. Lately I’ve been using a very thin coat of soft shortening (like Crisco) rubbed all over the ganache, this is good for a few reasons, it fills in any tiny little dents in the ganache (which can cause air bubbles under the fondant) which is particularly useful if you’re doing a carved cake and it helps to smooth things out. It makes it easier to pull the fondant off if you have problems like tearing when you’re applying the fondant (I’m pretty awful at fondant so often have to remove it and try again). Once the fondant is on, the shortening basically absorbs into the fondant so you’re not getting a mouthful of shortening when you eat the cake. I also like that it doesn’t evaporate like the water or vodka will do, which means I can put it on before I start rolling the fondant, and I don’t have to leave the fondant sitting and drying out while I wet the cake. They’re all pretty good options though, so it’s more about what you like and what you have on hand. As long as the fondant sticks, that’s all that matters 😉
This is AWWWESOME.
Where did you purchase those white boards? I’ve never seen boards like those. They almost look like a thinner version of a cutting board.
Hi Rebecca 🙂 Do you mean the round boards I use on the top of the cake? They’re acrylic boards, sold as “ganaching boards” or “ganaching lids”. I was actually given my set by a friend in Australia, so I don’t know where she got them from, but you can get similar boards from Kelly’s Cake Toppers https://kellyscaketoppers.com.au/product-category/accessories/ganache-lids/ .
Hi there, Im super worried because i want a perfect fondant cake and really dont know what to do… I have a couple of questions, it would be great if you could guide me…
Can i use tub icing mixed with ganache for this method, because i have some betty crocker devils chocolate icing i need to use before it goes out? How can i stop my cake from breaking or all the layers slipping when I try to flip the cake, also what if all the icing oozes out when i flip it over and when i turn it back the right way up there is no icing on the top of the cake… :P,
thank you
Hi Selis. I wouldn’t suggest adding any other icing to your ganache, it will change the consistency of the ganache and prevent it from setting firmly. Tub icing like the Betty Crocker ones tend to be soft and not set at all, so that would make the ganache too soft to be a good base under fondant.
As long as the ganache is made with the correct ratio of chocolate to cream, and is warmed up just to the right consistency when you go to use it (like peanut butter) then you won’t have any issues with the cakes slipping or the ganache oozing out when you flip the cake. If you are at all worried at any point that the ganache is a bit warm and too soft, you can put the cake in the fridge for a bit to firm it up before you continue.
Once you’ve done it a few times then it becomes much less scary, you’ll learn to recognise when the ganache is the right consistency. And you’ll trust that it’s all going to turn out ok 🙂
Fantastic tutorial Thank you! I just have a couple of questions that I would love an answer to if you dont mind? Firstly I am making a wedding cake (12″, 10″, 8″ & 6″ tiers) and am really worried about flipping a 12″ filled cake, is it easy enough to do? I have a week off work just over two weeks before the wedding and wondered if I could freeze the completely ganached cakes (ganached inside and out) and as the wedding is on Friday when would you take them out? How would you defrost and then cover with fondant and decorate? Am scared as this is my first wedding cake ever!!! Your demo is fantastic – I am sure with your expertise you will know the answers to my questions. Basically the most important thing I am asking is how long can you freeze a completely ganached cake so it still tastes fresh and lovely for a wedding. Thanks so much in advance for your help.
Hi Catz. I haven’t ever had to freeze a ganached cake before, so you’ll have to take my advice with a grain of salt as it comes mainly from reading other people’s questions in cake groups online and the answers they’ve received. First of all, the main issue with freezing ganached cakes seems to be that the moisture from the cake defrosting can mean that the cake is more likely to go mouldy. Obviously that wouldn’t necessarily happen every time, but if you’re anything like me you’ll want to take every step to avoid that possibility! The worst culprit seems to be the moisture that forms between the cake board and the cake when the cake is defrosting. Therefore it seems to be best if you remove the cake board before you freeze the cake, and when you defrost it, you can attach a new cake board before you cover the cake in fondant. To freeze the cake, I’d let the ganache harden completely, then pop off the cake board (you could line the cake board with baking paper like I do with the ‘lid’ board, to make it easier to remove), wrap the cake really well with plastic wrap, then put it in an airtight container and freeze. When you come to defrost the cake, leave it completely wrapped up and in the container, until it is completely thawed. That makes sure that the condensation that forms as it thaws will do so on the container and the plastic wrap, rather than on the cake itself. I would be inclined to defrost the cake at room temperature, unless you live somewhere really hot and humid. I can’t say though how long it will take, obviously longer for the 12″ and 10″ cakes than it will be for the smaller ones so you may want to take the bigger cakes out sooner. Then once the cakes are thawed, attach a new cake board with a bit of ganache and patch up any dents in the ganache before you apply the fondant. I should also say that it also depends on the actual cake as well as to whether it freezes well, so that depends on the recipe you’re using.
Having said all of that, if it was me, I would bake the cakes, split them into layers, wrap them (as I described above) and freeze, then in the days before the wedding, thaw them (same as above) and then ganache them (after work, if you’re working). You could take a couple out and ganache them one day, then do the others the next day. If you’re using a cake that keeps well, like chocolate mud cake, then they will be ok at room temperature for several days once covered in ganache and fondant.
As for flipping a 12″ cake, it really depends how strong you are! I can’t do it (I’m a weakling 😉 ) so the couple of times I’ve had to ganache larger cakes I’ve just asked someone stronger to flip it for me. But you can skip the flipping altogether, it just makes it a little more fiddly to get it level. It’s easiest to do this if you use the spirit level to make sure your cakes are pretty level as you fill and stack them (pop a cake board on top and check with the level, then push the higher side down so the ganache oozes out the side a little until the cake is level). Then apply ganache to the top of the cake, trying to keep the layer as even as possible. Make sure you go right to the edges and a little over. Use your scraper to scrape around the sides of the cake, which will push some of the excess ganache up above the top edge of the cake. You can either- with a steady hand, scrape it off towards the centre of the top of the cake, or chill the cake until the ganache is firm, then use a warm knife or metal spatula to trim that ganache off. Then you’ll need to check the cake is level, and add more ganache to any spots where it isn’t. It’s just a matter of applying more ganache where the cake is too low, or scraping it off where it’s too high. It’s a bit hard to describe, but mainly it’s just a matter of tweaking it until it’s level.
That’s all probably a scarily long answer, but don’t let it add to your first-wedding-cake-panic! As long as you are organised (make lists, if you’re a list person) and know what you need to do at each stage, and you’ll be fine 🙂 And if you have any more questions, you know where to find me.
Hi Natalie. Once my cake is ganached as above, can I freeze it for a couple of weeks? If so, can you advise how I should wrap it and how to defrost it. I have a wedding cake coming up and doing the baking and panache part this week would save my heaps of time.
Ganache….not panache?
Hi Danel. I don’t know, a bit of panache is never a bad thing! ? If you check out the comment just above yours, I wrote a bit about freezing ganached cakes. It can be done, but there are a few precautions. Hope it helps 🙂
Roger that. Thanks, great advice.
Hi Natalie, loved the tutorial! I have been asked to make a white chocolate mud cake with white chocolate ganache. The wedding is end April in Australia so shouldn’t be hot. The photo I have been given has ridges around cake as in combed buttercream and top cake has swirly rosettes also as in buttercream. My question is can this type of finish be done with white chocolate ganache? Stressing big time as only used to doing fruit cakes with fondant
Hi Dianne. You should be able to get the combed effect with ganache, just make sure you work quickly to get the ganache smooth on the sides of the cake, then use the comb over it while the ganache is still soft. To do the rosettes it may be better to use a whipped ganache, to make that you’ll need to use a higher ratio of cream in the ganache. It will depend on the air temperature as to the ratio you need so I’d suggest making a small batch to check close to the time of the wedding, but a good starting point would be equal parts chocolate and cream, make the ganache as per the recipe, then let it cool completely in the fridge. The cooling is important as it tend to split if it’s still warm when you whip it (speaking from far too much experience!) Then just whip it until it’s a pipe-able consistency. Once you whip air into ganache it can affect the keeping quality, so it’s probably best to pipe the rosettes on the day of the wedding (or the night before may be ok if the air temp is cool). Whipping the air into the ganache will mean that it is a slightly lighter colour than the non-whipped ganache, so if that’s likely to be a problem then you can always ganache the bottom cake smooth as in the tutorial, and then when you whip ganache for the rosettes you could whip extra to use on the bottom tier, add that over the top of the smooth ganache and then use the comb on it.
Hope that helps, and try not to stress to much! 😉
Hi Natalie! This may be a silly question, but is there any difference between using natural/pure cream or thickened cream? Thanks x
Hi Nicky, I’ve never made it with thickened cream myself, but I have heard from some Aussie decorators that they use it for ganache all the time as it seems to often be easier to get than natural/pure cream. When the cream boils it basically destroys the gelatine used to thicken the cream, so it doesn’t affect the finished ganache. I would just say keep a close eye on the cream as it boils, as I’ve noticed on the rare occasions that I’ve had to use UHT cream (which is a bit thicker than normal cream) that as it comes to the boil it tends to bubble and splurt everywhere, so I imagine that thickened cream may do the same. And no one wants to have to clean burnt cream off the stove 😉
Hope that helps 🙂
Hi please I need to ask you I don’t have heavy cream I have only whipping , so it will work or it will not?
Hi Farah. Different countries have different names for cream, but you can use any runny (pourable) cream that is about 35% milk fat. I don’t know where you live, but you can check out this Wikipedia page which gives the different names for different creams in various countries. But long story short, if it is sold in a pourable form, isn’t labelled as “light” or “low fat” and is designed to be whipped, then it should work for ganache. Hope that helps 🙂
Hi Natalie
thanks a lot I have problem to smooth my chocolate ganache , will try as your suggestion . hope I can do it .
Hi Natalie
Awesome tutorial!!! Thank you!!! I’ve just covered a 9″ round cake using the boards I bought from Stacey at Design409. Very very happy with my sharp edges and i managed to flip the cake both times without it ending up on the kitchen floor!!! I did however have a few air bubbles on top of the cake and I had to do a bit of work to fix it up (all good though as this is my 1st attempt using this method and I’m pleased with the outcome). Any suggestions on how to remove or avoid the air bubbles under the baking paper?
Thanks
Sam o:)
Hi Sam. I’m so glad you love Stacey’s boards as much as I do! The easiest way to minimise bubbles under the baking paper is to try and get the ganache in a smooth-ish layer on the top, then when you put the paper on, start on one side and slowly press it down onto the ganache, trying to smooth the bubbles out as you go. You can actually use a fondant smoother to do that rather than your fingers, if you find it easier. It takes a bit of practice, but I usually only get one or two small bubbles now when I do it (more if I’m lazy or in a hurry and don’t smooth properly!). If/when you do need to fill little holes in the top, as long as you do it while the ganache is still really firm from the fridge, you can fill them without damaging the rest of the ganache too much, just adding a bit into the holes and gently scraping the excess away with a spatula. The paper thing is just practice though, so hopefully it will work even better for you next time 🙂
Thanks Natalie for your very quick reply!! I can see now why I ended up with a few air bubbles. Will be more careful next time (def looking forward to trying again soon). Thanks heaps and thanks for your awesome tutorial!! Sam :o)
No worries, and you’re very welcome! 🙂
I do love you!
How did I not find THIS tutorial before…? I watched another one doing a similar technique but nowhere NEAR as clear as this!! I feel (hope) my faffing days are numbered and ganaching times cut from here on in… My acrylic boards can stop being used as reusable cake cards and now stand duty in their proper function. Thank you.
I particularly admired your brave admission that you struggle with fondant… don’t we all? I watch footage of masters ‘popping’ the stuff on and deftly smoothing it down without a wrinkle and want to scream. But I’m now convinced it’s a lot to do with the fondant itself and confidence.
Anyway. Who need s fondant? With a finish like that on ganache, let’s start a trend for ganached cakes huh? They taste infinitely better anyway. Think I’ll just boycott fondant from now on… wish me luck.
Thank you again and greetings from the UK 🙂 x
For sure, I’ll jump on the anti-fondant bandwagon with you! I’ll get a t-shirt made and bang a drum as well. Seriously, the stuff drives me crazy. I agree that it is a lot to do with the fondant, I certainly have better luck with some than others (and even differences between two buckets/packets of the same brands). And confidence is important too, I’m sure the fondant can smell my fear. I’ve literally given up on the traditional over-the-top method of applying fondant, and I wrap or panel my cakes whenever I can. I’d rather have seams in the fondant than big rips/elephant skin/tear stains from my constant crying. I’m planning some tutorials on wrapping and panelling for others who have the same issues as me, but I would much rather just have ganached cakes, both for decorating ease and for eating. If we start the movement, everyone will follow, right? 😉 xx
So here’s an expression I just know will make you break out in a sweat…. extended height fondant cake…! Yeearghhh!! The stuff of nightmares!
Yup. I feel the way to go is ganache. I’ve just put in my order for some extra plates and I guess bulk chocolate is next. I’m gonna go fer this one. The fondant can be demoted to decorative purposes only. And even that could be chocolate paste now I’ve sourced the corn syrup and got that in the bag!!!
I feel a new wave of chocolaty optimism..and do you know? It’s be such a relief NEVER too have to roll fondant again..!
Good luck with your beautiful and supremely useful endeavours. I thank you so much for helping me find my true calling! (I sound like something out of Monty Python…!)
Peace and prosperity and Happy Baking! x
Well there really is no such thing as too much chocolate, so full-on chocolate covered cakes are the way to go, right?! Especially if you can colour white chocolate ganache. I did a post about it on here a while back with a bit of an experiment, I must try it again. But then we won’t even need fondant for the nice colours 😉 May the cakes be ever in your favour (sorry, I went a bit Hunger Games there). x
Hi there i didnt really all the comments so I hope you have not had to answer this question yet. How much chocolate did you need to use to cover the cake in this tutorial? with the 2:1 ratio?
Hi Amanda, this was a 7″ round cake (about 4.5″ tall), and I used 1kg of dark chocolate and 500g of cream to make the ganache 🙂
This is the best tutorial I have ever seen..step by step ….u r making cake decorating techniques more easier to us.. Thanks a lot..god bless u and to ur hands…
Hi Nishi, thank you so much for your lovely comment, you’re very welcome and I’m glad you enjoy my tutorials ?
HI…I need a help..I bought fondant from a shop..when I’m making a figure head from that it’s not holding its shape..when I’m touching its change the shape..when I put it in my working table it’s going flat..what can I do for that pleaseeeeeee
Hi Nishi. When a figurine from fondant, you’ll need to add something to the fondant to make it set. Tylose or CMC are the usual things added to fondant for modelling, so if you can get your hands on some then that will help greatly. You should be able to buy it from cake decorating shops, or it is also readily available online 🙂
So much thanks … I’ll try that way..
Hi..again me.. 🙂 … As I’m a new cake baker I have many problems ..so you became my life saver now.just u r replying for my questions that’s y I’m troubling u always ;).. I asked some questions from some other bloggers but no reply 🙁 .. Now my question is I made a cap cake for my father in lows birthday cake.and it was my first experience in fondant cake and a figure.. All things went good..he loved the cake also.but thing is I used chocolate ganache under fondant.ganache sticked to fondant not to cake…when my hubby peel the fondant ( actually he doesn’t like fondant) ganache also peeling with that .. Finally we had to eat just cake no ganache…So what’s wrong happend?? Plz help me
Hi Nishi, I have had this problem before too. Try warming up your ganache a little more to make it a bit softer before you apply it to the cake, which will make it stick a bit better to the cake layers. I’ve found that when it’s firm it doesn’t stick so well. Also if the ganache was really hard when you cut the cake, you could try increasing the amount of cream in your ganache a little bit which will stop the ganache from setting so hard, so hopefully it will stick more to the cake and not the fondant. Hope that helps 🙂
Thanks for ur kindly reply..actually ganache was soft not hard..when I cut it also it was soft.so I’ll try to warm ganache a bit before apply to cake…thanks a lot
Hmmm, if the ganache was soft then that probably wasn’t the problem. The only other thing I can think of is to try using something different to attach the fondant to the ganache. I don’t know what you did use, but I find that if I use shortening (Crisco) to attach the fondant, it tends to come away easier than if I use sugar syrup or something super sticky like that.
Actually I didn’t use any thing to attach ganache to fondant,..first I put ganache then chilled.after 2 or 3 hours took from refrigerator ..then left it at room temperature for a hour ( actually air condition and fan were on.otherwise we can’t stay in here Dubai 🙂 )… After that just apply fonadnt…
If you can get your hands on some shortening (maybe you can buy it online?) then maybe try that, it might help the fondant peel away from the ganache a bit easier. Could be worth a try! 🙂
Yes for sure..I should try crisco to attach it..I have crisco with me.but I ddnt know Abt this,.thats y I didn’t use it
Enjoyed reading this, very good stuff, regards.
Your link didn’t work for the different methods you use to stick the fondant on your cakes…brings you back here.
Hi Zane, thanks for letting me know, the link should be fixed now 🙂
Hi, I love your tutorial, it is the best I’ve come across. I wondered if you had any tips for doing a square ganache cake 🙂
Hi Sheila. I’m planning a tutorial on how to ganache square cakes but in the meantime I’ll try and describe what I do. It’s pretty much the same process for me as ganaching a round cake, I set the cake up with the boards on the top and bottom of the cake. The only difference is the little bit of fiddling you need to do on the corners. I find I easiest to put plenty of ganache around the corners, and then scrape from the corner, back along one side. So hold the scraper against the corner, and then scrape it back along the side. Then do the same for each side of the cake. Don’t panic though if it’s not perfec yet, pop it in the fridge to set a bit, and then you can add more ganache to the corners to finish building it up. I usually find that once the corners are fully covered in ganache, I can scrape back around the whole thing much like I do with a round cake.
After you cover the top of the cake and flip it upside down, you need to scrape along the corners from the outside in again, to get the sharp top edge.
It’s a bit fiddlier than a round cake, but with a bit of practice it’s not too bad. If there’s anything there that doesn’t make sense, just let me know. Good luck! 🙂
Hi Natalie
I’m a beginner hobby cake maker and this is about the third time I’ve used this tutorial to help me prep a cake for fondant. Thank you so much for this tutorial, it’s helped me create cakes far smoother and sharper than I thought I would be able to! Please keep posting new things! 🙂
Thank you, thank you, thank you! I’m making a gf wedding cake and have used your recipes, ganacherator, tutorials… You’ve made it so simple! I can’t say how lovely it is to find all the info and help I needed in one place, much appreciated.
Hi Kitty, you’re so very welcome, and I’m glad you’re finding it useful! 🙂
Hi there! I’m not new to cake decorating but I am to ganache…
After you ganache a cake how do you prepare it for fondant? Do you just leave it at room temperature? Will it become hard this way? Or do you have to put it in the fridge? I made a ganched cake last week for an order and I put it in the fridge and then covered it in fondant. This didn’t go so well and even after an hour in the fridge it still wasn’t completely hard on the outside! I think the problem may have been that I used equal parts of cream and chocolate, this time I’ll try 2 parts chocolate to 1 part cream, but I’m still not sure if I should refrigerate it or just leave it at room temp?
Hi Monica, you don’t need to refrigerate a ganache covered cake, as it will be solid at room temperature (that’s what makes it so awesome!) You definitely need to increase your ratio of chocolate to cream though, equal parts will never set firm enough. 2:1 is the correct ratio for dark chocolate, if you live in a warm climate you may need to increase the chocolate a little more. Then let the cake set at room temperature.
Hope that helps, and I’d love to know how you get on 🙂
I knew I was doing it wrong haha! Thank you though!! Also another issue I’m having is that this cake I’m making for this weekend is having the party outdoors, and I live in Phoenix AZ so it’s about 90 degrees at best during the day! How do I keep the cake from melting and collapsing?!? It won’t be in direct sunlight, it’ll be under a structure but it’s still outdoors and still very hot!
In that case I would definitely do dark chocolate ganache as it sets firmer than milk or white chocolate, and use a 3:1 ratio of chocolate to cream. If you’re really worried you could even increase it to 3.5:1. If you happen to have time, then I’d suggest doing a small batch of ganache at the 3:1 ratio, spread some onto a plate and leave it at room temperature to check how well it sets. Once the cake is covered in fondant it will help protect the ganache, and as long as it doesn’t end up in direct sunlight then it should be ok. I also forgot to mention in my last reply that you should check out {this post} if you need tips on what to use to make the fondant stick to ganache.
If you’re used to doing buttercream covered cakes that are refrigerated then you can treat ganache covered cakes the same way, refrigerating it until delivery and then making sure it’s not touched while it’s sticky with condensation. I don’t do cakes that way so I can’t give specific advice (I prefer to keep all my cakes at room temperature, but then I don’t live in a super hot environment) but if that’s how you usually do things then it should work ok. Does that make sense?
Yes that makes sense! I actually have never refrigerated my cakes after being covered and decorated in fondant…is that bad? I typically will cover them and decorate the night before delivery and they stay at room temp all night. I’ve never had any complaints or issues, so I think it’s ok. Back to the ganache though, is it ok if I use milk chocolate…maybe i can just up the ratio of chocolate to cream? I’m thinking it would taste a lot better than dark chocolate because I will also be filling the cake with ganache.
No, that’s not bad! It’s all just different ways of working. I know a lot of decorators in America who work with buttercream refrigerate their cakes, but there are also a lot who don’t. It’s whatever works for you. I only even refrigerate my cakes for short periods while ganaching, and once it’s covered I don’t put it back in the fridge at all, and I’ve never had any issues.
Yes you can use milk chocolate, I’d suggest starting with a ratio of 4:1, and tweaking it from there if you need to. The only reason I suggest dark chocolate in hot weather is because the higher amount of cocoa solids in the chocolate mean that the ganache sets more firmly, but if you increase the amount of chocolate then it will still set firmly with milk chocolate. Another option (if you’re happy to make two separate batches of ganache) is to use milk choc ganache to fill the cake, and use dark chocolate ganache on the outside. Then you get the sweeter flavour of the milk choc as a filling, but the stability of dark chocolate on the outside.
Ok! I really want to make sure I do this right and not mess up again! After making the ganache, do you let it sit at room temp until it thickens, or do you let it set in the fridge? Last time I let it set in the fridge and it look probably 2-3 hours.
Never mind I just read over the recipe again and answered my question!
Haha, cool I’m glad you found it. Good luck! 🙂
Hi Natalie. Your instructions for ganaching a cake were fanatastic. I have promised to make a cake for my sister’s wedding and was worried about how to do a smooth finish with ganache and other frostings. I found that your ideas work for any of the icings I have tried in my experiments. I am amazed with the results and now feel confident that I can create a nice looking finish for the wedding cake. Thanks so much!
Hi Sharon, thank you so much for your comment, it’s totally made my day! I’m so pleased that the technique is working so well for you, and I wish you the best of luck with your sister’s wedding cake. I hope it all goes smoothly (pun totally intended) and I would absolutely love to see a picture of it when you’re done if you’d like to share it! 🙂
Here’s a picture of the finished ganached cake following your instructions! My sister loved the cake!
Hi Sharon, I can’t seem to see your picture but you’re welcome to email it to me at natalie(at)sweetnessandbite.com (make sure you put the proper @ in there, I just didn’t want the spambots knowing my email address 😉 ) I would really love to see your cake! 🙂
Oh my gosh! You would have to be the BESTEST blogger on tutorials EVER! I forever pin all you post. You’re instructions are great and you make me feel confident enough to give it a go. Thankyou Thankyou soooooo much
💜
Awww Lucy, you’re gonna make me blush! (or cry 😉 ) Thank you so much, I’m really glad you find my tutorials useful. I’ll try and keep ’em coming!
Hello did you use dark or milk chocolate in this tutorial ? Thanks in advance
Hi there, I used dark chocolate ganache 🙂
Thank You Thank You Thank Youuuuuuu!!!!
When I agreed with my fiancé to make our wedding cake I thought how hard could it be, several attempts later at ganaching and I found myself regretting that decision. BUT ……Finally a BRILLIANT tutorial on how to ganache a cake that even a novice like me can follow.
Can’t wait to try this method later this week for my Nan’s 80th birthday cake before attempting it on our wedding cake next year.
Also looking forward to reading some of your other tutorials, especially the gluten free ones, I might actually be able to successfully bake my Mum something delicious.
Hi Matt, you’re welcome, you’re welcome, you’re welcommmmmmmme! I’m glad you find it easy to follow and it’s awesome that you’re making your own wedding cake! I hope it all goes smoothly for you (pun totally intended) 🙂
Hi Natalie,
I bake cakes for fun and really good at it! But never get perfect edges like you and your tutorial is awesome!! I am going to make a cake soon for my sons birthday and it will be a soccer cake:) I am going to make a round base cake for the soccer ball and thanks for the tutorial! You are awesome very detailed!!! Love your work!!Once I do my cake I want to show it to you too:) how can I do that?
Hi Susanthri, I would absolutely love to see your cake when you’ve finished! You could email me pictures to natalie(at)sweetnessandbite.com, or post them on my Facebook page http://www.facebook.com/Sweetnessandbite . Good luck with your cake, and I look forward to seeing it 🙂
Hi Natalie,
I am planning to use your method, but I don’t have a microwave- any suggestions as to how to reheat/melt the ganache the following day? I’m thinking if I do it over a pot of slightly simmering water it will melt unevenly?
TIA
JULIE
Hi Julie, yep if you melt it over simmering water it will likely just melt at the edges and still be cold in the middle. What you could try is putting your oven on it’s very lowest heat and placing the bowl of ganache into the oven, and let it slowly warm up. It does take a while, but I’ve done this before and it worked quite well. You have to keep a close eye on it though to make sure it’s not getting too warm. Another option is to make the ganache a couple of hours before you need to use it, and just use it once it firms up to the right consistency. I find I get fewer issues with the ganache splitting when it’s had time to set overnight, but if you only stir it gently before applying it to the cake, it should be ok. Good luck, I hope it works for you 🙂
Hi Natalie! I was wondering where you bought the round boards that you used on the top and bottom of the cake that you used as the template for the thickness of ganache?
Never mind I just fount it!
🙂
The cake looks so delicious. Amazing techniques. I wanted to ask whether I can use fresh cream in place of heavy cream? Also is there any substitute for icing scraper? And finally is this cake frosted with ganache eaten hot or at room temperature or cold?
Hi Dhatri 🙂 Fresh cream is generally just another name for heavy cream, so yes you can use that. If you check out my Ganache FAQ post I talk a bit about the different names for cream in different countries. There are many different tools you can use as an icing scraper, but pretty much any tool that can scrape around the cake at a right-angle will work. And cakes frosted with ganache are generally eaten at room temperature. Let me know if you have any other questions 🙂
Thank you for the fast reply. It was very helpful. And here fresh cream is available from only two or three brands so the best brand offers a fresh cream of low fat of 25%. The same company offers whipping cream also.Can I use the fresh cream as it is cheap and easily available or should I use the whipping cream itself?
I would definitely go with the whipping cream if it has a higher percentage of fat. 25% is a bit low and there will be a higher risk that the ganache will split. The higher fat content one is the better option 🙂
Thanks. I will definitely go for whipping cream
Unfortunately as it turns out, whipping cream is not available. Is there any substitute for heavy cream?
Hmm, I’m not sure. You could give it a go with the lower fat cream, but just keep in mind that it may be more likely to split. I’ve got tips in both of the ganache posts on how to save split ganache, so give those a go if it does split. Also, if your local shops sell UHT (heat treated or “long life”) cream in cartons (they’d be on the shelves not in the chiller section) then then that could be an option too. I often keep cartons of the UHT cream in the pantry as they last for ages and are good if I forget to buy fresh cream.
Thank you so much for the help.
You’re most welcome, I hope you can find something that works. Good luck 🙂
Thank you so much for such a great tutorial! Truly, helped me tons while making my cake! Two thumbs up!!!
How do you work out the ratios with choc as a solid in weight and cream as a liquid in mls?
Thanks
Gail
Hi Gail. I weigh my cream rather than measure it, it’s more accurate for ganache ratios and I also find it easier. I just weigh the cream straight into the pot I’m going to heat it in. Saves washing up a measuring jug 🙂
I just found this blog and I think I am in love! This is an amazingly methodical approach dressing a cake, thanks so much for the tutorial. I’ve recently discovered a love for baking and cake decorating and this tutorial was very helpful. Thanks again for posting!
Hi Jamie, you’re so very welcome, I’m glad you found it helpful 🙂 🙂
Hello: Good tutorial so straightforward ? Do you happen to have a recipe for salted caramel ganache for covering a cake? (Crumb coat????) The cake then needs to be covered with fondant.
Thank you so much for your help
Hi Jenny. I haven’t had much luck with making a caramel ganache, mainly because the extra sugar in the caramel tends to absorb moisture from the cake, which ends up kind of making the ganache dissolve. I actually had a bit of a disaster with my best friends wedding cake for that very reason. I’d suggest doing a salted caramel meringue buttercream (I just add my salted caramel to finished Swiss meringue buttercream) or just drizzling the caramel over regular white or dark chocolate ganache as a filling. If you did really want a caramel ganache, you can add some caramel sauce to white chocolate buttercream, but I would definitely suggest doing regular caramel-less ganache as the crumb coat, just to make sure it sets firmly enough for fondant. Hope that helps somewhat! 🙂
Awesome tutorial …thank you. Am going to order the ganache boards. for a beginner which set would be good to get? http://www.designat409.com/products.html
Hi Ronda, if you’re just starting out I would suggest buying a couple of the ganache boards in the size of the cake you usually make. So say you make mostly 8″ round or 10″ square cakes, buy those sizes, plus a 12″ round and 12″ square board, which you can use as setup boards like I do in the tutorial. You could buy a full set of boards if you think you will use them, but if you’re a beginner and mainly do the same sized cakes all the time, then starting out with those sizes is a good way to go, and you can either add more individually as you go or buy a full set once you’re using them more. In terms of thickness, Stacey makes 3mm and 4.5″ mm thick boards, I prefer the 4.5mm thick ones.
Hope that helps, and if you have any more questions just let me know 🙂
thank you for your advice and tips. Going to order the 4.5mm then. Getting excited to give things a go 🙂
Yay, I’m excited for you too! Let me know how it goes, and if you have any more questions you know where to find me 🙂 x
i tried using cocoa powder in place of chocolate, my ganache never turned out right i had to take it off, what did i do wrong and how can i make it set as it dries
Hi Anderson, it’s the cocoa butter that is in chocolate that makes the ganache set. Cocoa powder doesn’t contain cocoa butter, so it won’t set. You really need to use chocolate to make ganache 🙂
WOW! i have seen and watched many tutorials! but none left my big mouth open! its jus a wow….this is so great great with the sharp edges
Aww, thanks Ameena! I’m glad you enjoyed it! <3
Thanks for this awesome tutorial. It’s my first time and I loved.
Thanks for sharing your knowledge.
Hey Natalie, do you not make video tutorials??? I love this method, but would prefer a video, personally.
Hi Aja, I don’t have a video for this at the moment, but it’s definitely something I’m considering now that our kitchen has been renovated and the bench is suitable to set a camera up on 🙂
Simply gorgeous Natalie…. I love ur blog 🙂
Thank you! 🙂
Hello Natalie,
I am still fairly new to baking. I’ve been self teaching so far. I’m making a red velvet cake for a friend and everyone loves my cream cheese frosting. However, for the design I want to attempt, I know it’ll be impossible to paint on cream cheese frosting. I wanted to fill the cake with the frosting and coat the outside with white chocolate ganache. So it will definitely need to be refrigerated with that filling. Never made or used a ganache by the way. How do you go about painting luster dust onto a ganache? And if I wanted to paint stripes, how will I be able to attempt very straight lines? And one final question sorry. Can you insert a topper into ganache or will it be too hard? Thank you for your time and your description above is soooooooo helpful! Looking forward to attempting it with white chocolate.
Hi Sheryl. You can paint lustre onto ganache, you can mix the powder with high strength alcohol or if you want to make sure it won’t rub off, you can mix it with confectioner’s glaze (I have a post on making metallic paint with glaze, you can do the same with any lustre powder). Using glaze also means you can do multiple coats without the previous coat coming off. For straight lines you can use masking tape, or if you want something that’s 100% food safe, you can try using shortening to stick strips of waxed paper to the ganache, like I do for buttercream stripes. Just be careful not to get too much shortening on the areas you’re going to paint, as the paint may not stick so well with shortening under it. I would suggest sticking the strips on while the ganache is still fresh (let it set until it’s firm to the touch, then apply the strips). If you leave the ganache for more than a couple of hours it tends to get a bit of a crust and it will be harder for the shortening to stick. Does that make sense? And yes, you can definitely insert a topper into the ganache. If the topper seems a bit fragile, you can poke the holes first with a skewer and then insert the topper. Hope that helps, and let me know if you have any further questions 🙂
Thank you Natalie for your reply. Super helpful!!! 🙂 Will the ganache firm up at room temperature or should I refrigerate it for a few minutes and then apply the strips? And would I need to refrigerate it once painted and then remove strips afterwards like you did in your buttercream tutorial?
Because I’m using cream cheese frosting as the filling, the cake has to be refrigerated until the next day. Will the appearance of the ganache and luster dust painted on change? Thank you again you cake wizard!! 😀
The ganache will firm up at room temperature, but you can speed it up a bit by popping it in the fridge for 20 minutes or so, and then applying the strips. You shouldn’t need to refrigerate it after you’ve painted the stripes as the paint will dry, but if it takes a while to paint them and the ganache softens and looks like it might come off you can pop it back in the fridge for a bit. That’s probably not likely to happen though.
The appearance of the ganache and lustre shouldn’t change after being stored in the fridge, but I can’t 100% guarantee it. Ganache itself won’t have any issues in the fridge, but there is the possibility that if you use alcohol mixed with lustre when you take the cake out of the fridge to serve the condensation that forms on the cake may cause the paint to run. I haven’t done this myself so I can tell you for sure. If you can get your hands on some glaze to mix with the lustre then that is probably the safest option, as glaze won’t run. As I said, it’s probably not likely to happen, but I don’t want to tell you it will definitely be fine and then have it not be! I’m sorry I can’t tell you for sure.
Awesome! Thanks so much Natalie! Can’t wait to make my first attempt at ganache and using luster dust.
No worries, I hope it goes well for you! If you want to share a picture when you’re done, I’d love to see it 🙂
How long does the cake typically have to be in the fridge in order to firm up the ganache between steps? I want to attempt this, but I want to make sure I plan accordingly and give myself enough time. 🙂
Hi Katrina, I’d say about 10 – 20 minutes each time? Sometimes a little longer for the top, as it needs to be quite firm in order for the paper to peel off easily. It’ll depend on a few things, the temperature of your fridge, and how thick the ganache is, etc. But it’s definitely minutes, not hours, if that helps 🙂
That definitely helps! Thank you!
Hi Natalie,
This may be a silly question. Please advice me. If I use dark chocolate to make ganache will it have a sweet taste? I don’t like it to be bitter taste.
Hi Randi, not a silly question at all! It will all depend on what kind of chocolate you use. Have a look at the packet, if you get something that has around 50% cocoa solids, it will generally be slightly sweet. Dark chocolates that are 60 – 70% or more cocoa tend to be more bitter. Also if the packet says ‘bittersweet’ or ‘unsweetened’, obviously it will be bitter, if it says ‘semi-sweet’ then it will generally be sweet but not sickly-sweet. If you use one that is very dark and you find it too bitter, then you can add a small amount of icing/confectioner’s sugar to sweeten it up. Just whisk it in while the ganache is still runny. As a general rule of thumb, if it’s a chocolate that you would enjoy eating, then you will enjoy it as ganache. Hope that helps 🙂
Hi Natalie,
Thank you for your reply. Yesterday I made chocolate ganache using milk chocolate. Actually now I don’t like the taste of it. I live in New Zealand and bought Pams milk chocolate. I think taste is not good because of the brand I bought. Is there a way I can adjust the taste of the ganache? I think of adding Everglades Chocolate Liqueur 13.9%. Will it be alright? Please advice.
Hi Randi, my apologies for the delayed reply, I’ve been having issues with comments on here. I’m not a huge fan of Pam’s chocolate, personally, it tends to be quite sweet. If you don’t like the taste of it once it’s made it’s pretty hard to improve it. You could add an oil-based flavouring or some vanilla extract to try and cover up some of the chocolate flavour. I’d suggest next time you try a different chocolate like Whittaker’s or Cadbury, you may prefer the taste of those 🙂
Thanks Natalie 🙂
Thanks for sharing this. I have a workshop in Cameroon and I was thinking about the ganache ratio in warmer weather. I have my answer!
Thanks for your tutorial! It was so helpful and so easy to follow. This was my third attempt using ganache and it was a huge FAIL. The first two times were fine, but this time I used just cadbury and it completely split. In my attempt to fix it I burnt the chocolate. So I tried again using half cadbury and half compound chocolate and it didn’t set properly (I didn’t even have to warm it I just used it straight from the pantry). I had made fondant tools to place on top of the cake. When we took them off the cut the cake I noticed the base of the fondant tools were all oily from the ganache. Where did I go wrong? Is there a certain (NZ) brand use that you have the most success with? I love using buttercream and am still to be convinced about ganache 🙂
Hi Janna. The oiliness sounds almost like the ganache split, but it’s odd that it only happened once it was on the cake. It could possibly have been from a fluctuation in temperature, but it’s not something I’ve seen happen, so I’m afraid I’m not 100% sure. Sometimes with compound chocolate you need to increase the ratio of chocolate to cream, because compound chocolate tends not to set as firmly (the oils they use to make it must have a lower melting point than cocoa butter). Lately I’ve been using a combination of Whittaker’s chocolate and Nestle melts (not chips) and it’s been working quite well. I use about 1/4 or sometimes 1/3 melts, and that seems to be enough to stabilise the Whittaker’s and make it less likely to split, but it still tastes like Whittakers since I’m not a fan of the taste of the melts. Might be worth a try? Ganache can be a pain sometimes (I’ve been using it for years and it still gives me trouble sometimes!), but it’s definitely worth persevering with 🙂
Hi Natalie,
I have recently tried my hand at baking and I am LOVING your website. I have learnt so much in the last hour that I have been clicking away.
I have a question that may seem a bit silly, but I’m really new to this. Could I cover my cake with ganche (just like you have in this tutorial, and once it is set, cover it with swiss meringue buttercream, rather than fondant? Is that something that is commonly done? or would you recommend covering the cake in SMBC as a crumb coat then covering in SMBC again once it has set.
Any advice would be greatly appreciated!
Hi Karina. There are no silly questions 😉 I would recommend just covering the cake with a crumb coat of buttercream and then the final coat of buttercream over that. You could do a ganache layer first but the buttercream may not stick so well to the ganache. I do have a tutorial on how I do buttercream (it’s pretty much the same as how I do ganache, just a couple of little tweaks). You can check it out here: Buttercream Tutorial Hope that helps, let me know if you have any other questions 🙂
Hi. Do you have tutorial on how to get perfectly fine smooth silky poured chocolate ganache/glaze on cake? I have tried 3times to glaze the cake perfectly but i never succeed. I always end up with wavy bulgy chocolate ganache at the side of the cakes. I hope you can help me
Hi Natalie, this tutorial looks totally doable! I’ve volunteered to bake a cake for a low key beach wedding next weekend and was thinking of baking a chocolate cake with Ganache so this is perfect. Just like you, Fondant-ing isn’t one of my strong suits so I’m planning on just leaving it as is. I do, however, want to add something to it to make it look a little special. Was thinking of using stencil or mould for some designs. What kind of frosting do you recommend for that? How about ganache on ganache? And how? Thanks a bunch in advance!
Hi Meera 🙂 You can use ganache to stencil onto ganache. I don’t stencil often so I’m probably not the best to give advice on it, but one important thing is that you’ll just need to make sure that your ganache on the cake is really smooth and the sides are straight, as that will make the stencilling much neater. Any kind of dips or bumps in the ganache on the sides of the cake will make the stencilling harder to get neat. So maybe just make sure you give yourself plenty of time to ganache the cake and make sure those sides are as nice and straight as you can get them, and then make sure they’re set really nice and firm before you start the stencilling.
You could do something like Rosie’s Dessert Spot does in this video on Youtube , the metallic paint on the top would really make the design pop against the ganache. You’ll also want to make sure your stencil is secured well to the cake before you start stencilling – Evil Cake Genius has a good video on how to do that if you’re not sure.
Hope that helps!
Question, why is the dark chocolate 2 parts Chocolate to 1 part cream, but the milk chocolate is 3 parts chocolate to 1 part cream. It seems that milk choc would have more cream. I only know how to make 1 kind of ganache so I really would like to know. Btw really beautiful works of art.
Just in case you reply my email was wrong
Hi Cynthia. Milk chocolate ganache needs a higher ratio of chocolate because milk chocolate has less cocoa butter in it, so it is naturally softer than dark chocolate, which has more cocoa butter in it. Adding extra milk chocolate to the ganache makes it set firmly enough to be used under fondant 🙂
Hey!
So I’m making a chocolate ganache cake and I need to place fondant figurines on top of it. I wanted to know how to store the cake with the fondant figurines on top of it, and would the colours start leaking because fondant will be in touch with the ganache?
Hi Liesel. Fondant figurines will be absolutely fine on a ganache covered cake 🙂 Once the ganache is firm, there won’t be enough moisture to cause any damage to the fondant. Just pop the cake in a clean box or cake box, and keep it at room temperature.
I have been having terrible trouble with my cakes lately, the more I try, the worse they get! This is a brilliant tutorial and as soon as I return home from my hols, I shall try it in the next cake I do. Don’t think I can go wrong now.
Hi Natalie,
Your tutorials were really helpful, just needed to ask tho, what type of measurement is “part”? Is it cups?
Sorry for the silly question, I just wanted to try using your ganache recipe..
Hi Trece, it’s a ratio of ingredients rather than an actual measurement. So for a 2:1 ratio of chocolate to cream, you need twice as much chocolate as you do cream, for a 3:1 ratio you need three times as much chocolate as cream. Because the total amount of ganache you will need will completely depend on the size of your cake and how many layers it has, I can’t give amounts in the recipe for every sized cake.
I’ll try and explain how to work it out below (I’m usually pretty terrible at explaining maths ?) but if you prefer you can just download the Ganacherator spreadsheet that I use and link to in the post – you just put in the size of the cake you’re making and how many layers it will have, and the Ganacherator will tell you how much ganache in total you need, along with the exact amounts of chocolate and cream. It makes things so much easier!
So, for example, if you were making an 8″ round cake with four layers of cake (and therefore 3 layers of ganache filling) you would need approximately 1800g (1.8kg) of ganache to fill and cover it. Dark chocolate ganache is a 2:1 ratio, which is 3 ‘parts’ in total. To work out how much chocolate and cream you need, you just divide 1800 by 3, which is 600, so that is how much cream you need (one ‘part’ cream) and you need twice as much chocolate (2 ‘parts’ chocolate), so that’s 1200g. Does that make sense? The 2:1 ratio is 1200g:600g
I always make ganache by weight, not using cups, as you can’t get an accurate measurement of chocolate in cups. Like if you had a cup of chocolate chips, and a cup of roughly chopped chocolate from a block, and you weighed each of them they would weigh a completely different amount – because the pieces of chopped chocolate would be much bigger than the chips. And if the chocolate amount isn’t right, the ganache may not set properly. So it’s always better to weigh the ingredients.
Hopefully that makes some sense! If not, the Ganacherator really is the easiest way to do it and I highly recommend it. It does all the hard work for us. I have had this question about ratios a couple of times this week though so I should add a few notes about it in the post.
Thank you so much for such a clearly set out description.
How long would you provision for the entire process (excluding baking the cake)? I want to give it a go and I always end up rushing things at the end when its late and everyone wants dinner.
Thank you!
Hi Shakti. I usually decorate my cakes using a three-day timeline, bake on day one, ganache on day two and fondant and decorate on day three (sometimes I’ll add in another day for decorating depending on how detailed it will be). Ganaching seals the cake and keeps it fresh, so you have time to decorate. Now that I’ve had a lot of practice it doesn’t take me long (maybe an hour or so) to do the actual ganaching, but it did take me quite a bit longer when I first started so I definitely recommend giving yourself plenty of time to do it so you don’t end up rushing. I have a post on cake decorating timelines which you may find helpful, you can check it out here: https://sweetnessandbite.com/how-to-write-your-own-cake-decorating-timeline/
Hope that helps 🙂
Thank you so much – super helpful! 🙂
hi
thanks for the wonderful tutorial.
can we use half compound and half coverture choclate ganach for filling? kindly help
Hi there, yes you sure can 🙂
Hi
I would like to know if I use the chocolate ganache as coating and filling for 2 tiers fondant cake can sit out how many hours if without refrigerated ?
Hi Jiajia, a ganached cake is fine to be left out of the fridge at cool room temperature for at least several days 🙂
Hi Natalie!
I have a ganache recipe which I’m using to frost a cake, it asks to put it in the fridge to set then take it out and whip it for a few minutes
It doesn’t say to leave it at room temp before whipping, but do you think it’s better if I do ?
Hi Dana! I’m so sorry for the delayed reply, I’m having issues with comment notifications not arriving. I’m probably far too late, but yes I would think the ganache should come out of the fridge before you whip it, otherwise, it will be too firm to whip. It will really depend on that recipe though, I don’t tend to whip my ganache before using it. Sorry again for not replying sooner ❤️
Hi. I love the photo-torial on how to ganache a cake. I want to do the same for 12″,10″,8″ and 6″ cakes. However, I live in a hot climate and was wondering if I have to refrigerate the ganache so that it could set up. I fear when removing from the refrigerator, the ganache might melt.
Would appreciate your advice.
-Amelia
Hi Amelia, in warm weather it’s best to increase the ratio of chocolate to cream when you make your ganache. I give info about the ratios in this post and also in my Ganache FAQ post as well. Increasing the chocolate ratio will make sure your ganache will set more firmly. If you’re concerned about it then I would suggest doing a small sample batch of ganache and making sure that it sets properly for you. If it doesn’t, you’ll need to increase the chocolate a bit more. I would suggest choosing dark chocolate ganache if possible, as it tends to be more stable and set better than milk or white chocolate.
Alternatively, you can treat the cake as you might with a buttercream cake and store it in the fridge. How well that works will depend on the rest of your decorations though, if you’re decorating with fondant then you may have some condensation issues so you’ll need to keep that in mind.
Hope that helps 🙂
Why can’t this work for me? what am I doing wrong? the ganache hardens too much by the time I try to scrape to make it smooth. Then it’s impossible to work with.
Hi Adriana. If your ganache is too firm when you try to scrape it, you may need to increase the ratio of cream to chocolate, to stop the ganache from setting as hard. Also, try and make sure your cake isn’t cold when you apply the ganache. If you’ve had the cake in the fridge then the chilled cake will make the ganache start to set as you’re spreading it on the cake. Warming up your scraper in hot water should also help.
Hopefully one or more of these tips will do the trick, if not then let me know and we can brainstorm some more 🙂
Thank u so much. This tutorial is really of great help .
Hi Natalie, in the recipe you say to put the ganache in the fridge overnight. Do I need to do this or can I just wait for it to cool and then use it? I’m running out of time to leave it another day to ganache 🙁
Cheers
Pauline
No probs! Just saw your reply to another person saying you can use it after a couple of hours – phew!
Hi Pauline, phew, glad you got it sussed! I’ll add a note about that to the recipe in case anyone else has this question too. Hope it went well for you! 🙂
Hi Natalie,
Love this post 🙂 I am terrified of sliding the spatula between parchment and the board as i feel i will ruin the sharp edge. Is there a specific technique you would recommend? I know having the cake really cold will help as the ganache wont move. But any other tips would me helpful.
thank you,
anuja
Hi Anuja. Don’t be scared! When you’re flipping the cake over to ganache the top as I do here, it doesn’t actually matter at all if you mess up the edge when you remove the board. Once the top has been spread with ganache and then the cake flipped upside down and the excess ganache scraped, that gives you your sharp edge back. Then once the cake is chilled again and flipped back, you can easily peel off the paper to reveal your lovely sharp edge 🙂
Hi There , I would like to try this out for a birthday cake .is it possible to do a ganache drip over firm ganache ?
Thankss
Aadila
Hi Aadila, yes you can absolutely that. Just let the ganache on the cake set, then do the drip 🙂
Thank you so much ?
Hi! I love your tutorials. They are amazing! I have a few questions. I live in Texas and use whipped cream with fresh strawberries as my filling on most of my cakes and this weather is crazy. One day it’s 100 degrees and the next day it’s raining cats and dogs. Heat and humidity are my worst enemies as a baker in Texas. How can I use chocolate ganache to keep my cake from oozing out cream? Should I pipe out a ganache dam instead of doing a buttercream dam to keep my filling from oozing out? Also can I crumb coat my cake in buttercream and then use ganache? Or should I just crumb coat in ganache?
Also, I read that you use satin ice fondant and I’ve been making marshmallow fondant from scratch. Does marshmallow fondant work well with Chocolate ganache? Or should I start using satin ice? Sorry for all these questions.
Hi Marissa! Yes you can use ganache to stop the cream oozing out, and yes you’d pipe a dam of ganache and then fill it with the cream. You don’t need to crumb coat the cake in buttercream, you can crumb coat it in ganache, let it set a bit (I usually just do 10-15 minutes in the fridge until it’s firm, don’t leave it in too long) then do your final coat. If you’re storing your cake in the fridge until serving (which I’m assuming you would if it’s filled with cream and strawberries) then just remember that ganache is quite firm when it is cold, so if you can leave it out for a bit before serving it will let that ganache soften up a bit. You could play around a bit with the ganache ratios and increase the cream a little bit to stop the ganache setting as firmly, but I would suggest trying it out first and seeing how it goes, and then tweak from there if you need to.
Marshmallow fondant should work fine with ganache, just keep in mind that if you’ve got quite a sharp top edge with the ganache you will just need to make sure you secure that top edge when you cover it in fondant, as the edge can make the fondant start to tear. I haven’t worked much with marshmallow fondant so I’m not sure how much stretch it has, so just keep an eye out on that top edge. I often had that issue when covering cakes with the satin ice, so I tend to just wrap my cakes in fondant now. I love sharp edges, but they can wreak havoc on fondant sometimes ?
Anyway I hope that helps, and that it works well for you ?
Hi Natalie!
Such a great tutorial, I follow it religiously! I just have a quick question- I have a client who wants a gold tier and isn’t so crazy about fondant. Is it possible to paint the ganache (white chocolate) the same way as I would fondant with lustre diluted in extract or is there something different I should be aware about?
Thanks!
Brad
Hi Bradley, my apologies for the delayed reply. Yes you can paint ganache, I highly recommend the Sweet Sticks edible art paints, they work really well on ganache. Lustre mixed with alcohol tends to be a bit streaky on ganache, but as the edible art paint is glaze-based you can do multiple coats and it doesn’t rub off. If you can’t get your hands on some of the paint, I have a recipe for paint made with lustre and confectioner’s glaze that works great on ganache too.
Hi Natalie,
so much enjoy your tutorials, they are fantastic 🙂 I’m going to be using these techniques to make my wedding cake in summer time. Do you think it would be ok to use buttercream as a filler icing, then use a ganache dam and cover the cake in ganache? Or will the butter cream leak out through the cake (gets around the 40s in summer)? Thanks again! x
Hi April. Congrats on your upcoming wedding! Ganache is a good option to hold buttercream in warmer weather, but to be honest, 40℃+ weather isn’t ideal for any cake, so I’ll start by saying that I don’t suggest any cake be left out in that kind of temperatures for any length of time. Having said that, if the reception is somewhere that will be indoors and (preferably) airconditioned, then a cake filled with buttercream and covered in ganache should be absolutely fine.
If the wedding and/or reception is outdoors, then I would recommend keeping the cake somewhere cool for as long as possible. I know for some summer weddings, people will do the cake cutting before the main part of the reception starts, and then the cake gets taken into the kitchen to be cut up for later on. It’s a good way to make sure the cake doesn’t sit out in the heat too long. Just something to keep in mind, whatever you do – the cooler you can keep the cake, the better (for both the cake and your wedding-day stress levels!).
As far as the ganache goes, dark chocolate ganache always holds up much better than white or milk chocolate ganache so I would recommend using that if possible, and you can increase the dark chocolate ratio to 4:1 or even 5:1 to make sure it stays firm.
Hope that helps!
Great post.
Hi there, just wondering if you can use this ganache recipe to pipe with on cupcakes?
Thank you!
Hey Demi, yes you’ll just need to let the ganache cool and thicken to a pipeable consistency. You can also whip it slightly before piping. Just make sure the ganache has cooled down before whipping, and don’t overwhip it, as it can split. Hope that helps! 🙂
Thank you so much for your reply.
Would I use the 3:1 ratio when using this for white chocolate ganache?
Yes, 3:1 should work the best 🙂 If you’re making it for a particular event I would suggest doing a trial run first, just to make sure it sets enough for you, if it’s warm where you live and the ganache is too soft you may need to increase the chocolate a bit, or vice versa.
I could not find the step where you removed the bottom acrylic. Do you remove it, or do you leave the cake on it?
Hi Connie. There is only one acrylic board, which is removed before ganaching the top and flipping the cake over. The other board is a cardboard cake card, and the cake stays on that board 🙂
Hi, cheers from California and thank you so much for this incredible guide, just what I was looking for.
My question is can you use Candy Melts (the melting chocolate discs for molds, cake pops, dipping etc) in white chocolate ganache? Main ingredient Palm Kernel Oil.
I have the good couveture white chocolate but it is ivory in its natural color and Candy Melts come in bright white (like white fondant color) which is what I need for my cake’s optimal look.
Thank you!
Hi Olga 👋🏻 You should be able to use candy melts for ganache, although I personally have only used them for a ganache drip rather than for ganache for the whole cake. You may need to experiment with the amount of cream used – as candy melts don’t tend to set as hard as proper chocolate does, so I would start with a 4:1 ratio.
If you prefer to use couverture chocolate, you can still get it to look white using white colouring, I actually have a whole blog post on colouring ganache (including a section on whitening white chocolate ganache) that you may want to check out https://sweetnessandbite.com/how-to-colour-ganache/.
I hope that helps! 💜
Hi Natalie,
I’m not too sure if you still reply to these comments looking at the dates but I really love your ganache tutorial, it’s wonderful and extremely helpful. Could you please help me with any advice on white chocolate ganache? I made a cake last year using your technique and my ganache was very firm. This time round I can’t seem to get my ganache firm to set hard. Could it only be a ratio issue or is there anything else I should consider?
Thanks so much Natalie
Hi Odine. It could be a ratio issue – if the room temp is too warm, or it’s a hot/humid time of year then it won’t set properly unless the chocolate is increased. However sometimes it can be to do with the type of chocolate used as well. Did you use the same chocolate both those times that it’s turned out differently? What kind did you use? Hopefully we can get to the bottom of this 🤞💜