How to Make DIY Cake Strips
This post may contain affiliate links to products I recommend. I receive a small commission at no cost to you if you make a purchase using my link.
If you’ve ever been disappointed by a cake with dry crusty edges, and you’d love to bake level cakes that require less trimming, then you’re definitely going to want to learn how to make DIY cake strips!
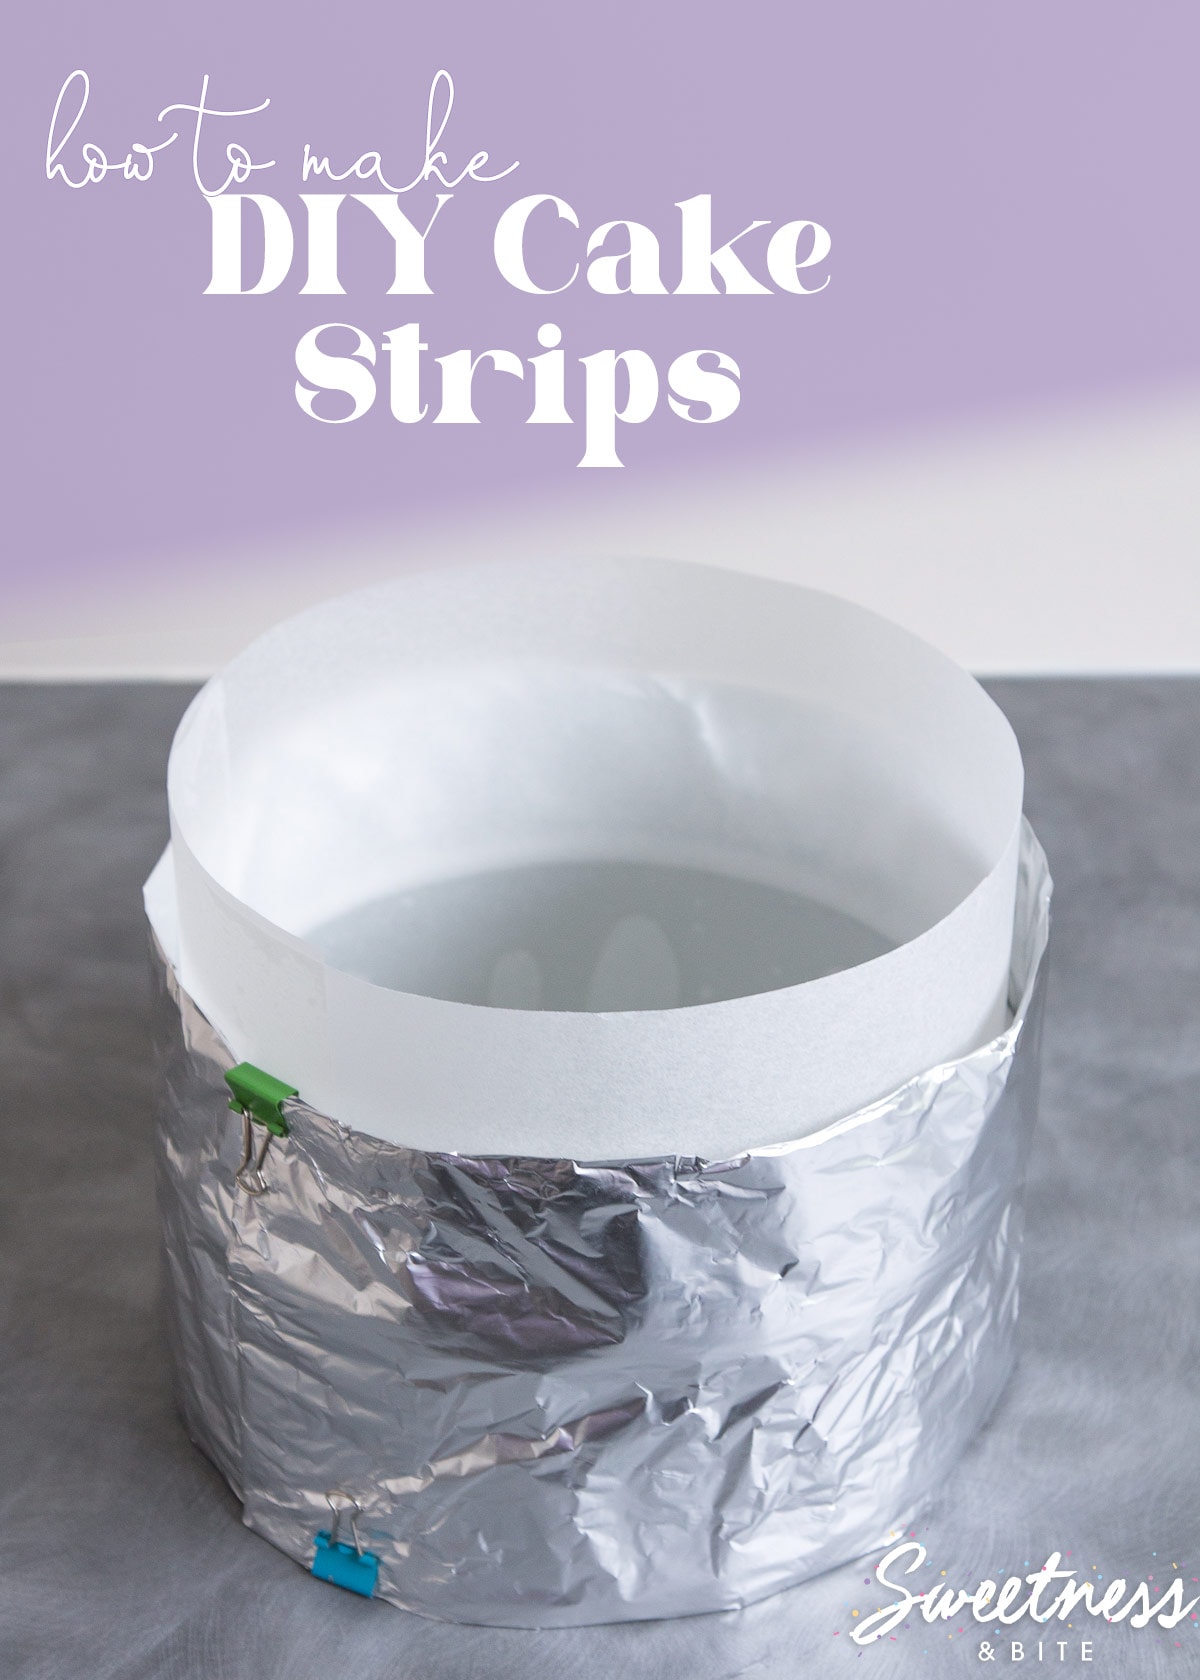
How do you feel about dry cakes? It’s the worst, right? You don’t hear someone come back from a party and announce that they really enjoyed that lovely dry cake with crusty edges that needed to be washed down with a litre of electrolyte water. Ugh.
So I think we can agree that no one likes a dry cake, and one handy technique to prevent dry cakes is to use baking strips on your cake.
If you’ve never used cake strips before then don’t worry, I’ll tell you what you need to know, and show you how to make DIY cake strips with foil and paper towels.
What Are Baking Strips?
Baking strips, also known as cake strips, are strips that you dampen and then wrap around the outside of your cake pan to insulate the cake, and help to slow down the browning on the edges, allowing them to stay soft. They also help the cakes rise evenly and stay flat on top, making levelling the cake much easier!
There are ready-made cake strips available to purchase, or you can easily make your own cake strips at home.
DIY cake strips can be made from many different materials. Some people like to just cut old towels into strips and wrap them around the cake pan, others use strips of other fabrics. To do this you just wrap the damp fabric around the outside of the pan and secure it with safety pins.
While the wet towel method is a bit quicker, I don’t like the smell of wet material in the oven, so I like to make my homemade baking strips with damp paper towels wrapped in foil, which is what I’ll be showing in this tutorial.
DIY cake strips are also great because you can adjust the size and length to fit any cake pan, and to accommodate odd-shaped pans as well.
When Should I Use Baking Strips?
Baking strips are especially useful when baking cakes that require a lower oven temperature and longer baking time. I use them mostly for chocolate mud cakes (including my white chocolate and caramel mud cakes) and rich fruit cakes. But any cake that browns quickly on the edges can benefit from cake strips, for example, cakes with a high ratio of sugar or those with fresh or dried fruit, which can burn easily on the edges.
The cake strips give the cake more time to bake in the middle before the outside of the cake dries out.
Foil Lids for Cakes
Another useful trick to prevent over-browning of a cake is to make a little foil ‘lid’ to protect the top of the cake.
I used to just place a flat piece of foil on top of the cake, but the fan in our oven would blow it off. Then I realised I could form the foil around the base of a cake pan, and make a perfect little foil hat to adorn the tin and protect the cake from the sun. Er, oven.
For denser cakes, like mud cakes, you can use a foil lid right from the start of baking, and it will help your cake rise more evenly and helps prevent cake doming. Cake domes happen when the top crust of the cake forms before the middle of the cake is finished baking. Steam tries to escape as the cake bakes, and it has to push up the top of the cake, often cracking the crust to escape.
Or you can slip it on later in baking if you check the cake and it looks like it’s getting a bit dark.
I don’t recommend using a lid for the full baking time for lighter cakes, as they can end up with a steamed-pudding kind of texture if they’re covered for the whole time. But those cakes can often brown quickly on top, so it’s handy to have a foil lid on hand to pop on for the last 5-10 minutes of baking.
Making the strips and hats adds a little extra time to the baking process, but is so worth it to avoid trimming off half of your cake to get rid of the dry bits!
How to Make DIY Cake Strips
Make sure you do these steps to make the cake strips and line your baking pan before you start mixing up your cake batter. Once the cake batter is mixed it should go into the pan and into the oven as soon as possible.
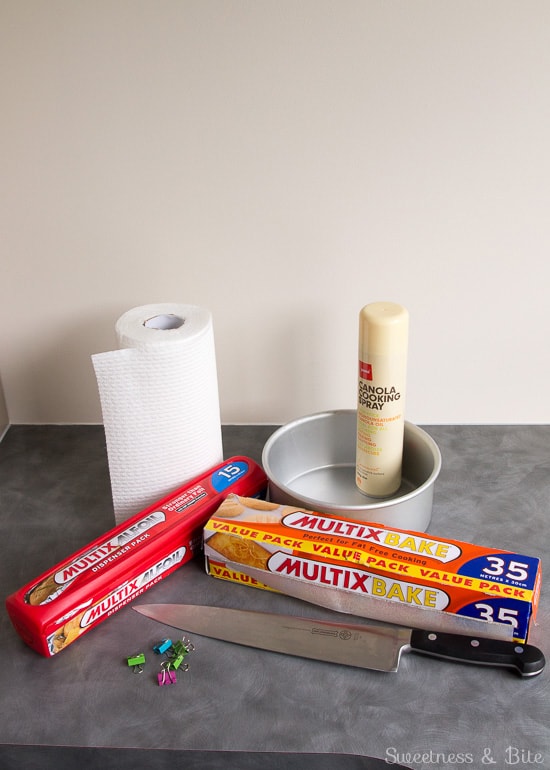
What you’ll need:
Non-stick baking paper (baking parchment)
Aluminium foil (aka tin foil, or aluminum foil, if you’re in the US)
Paper towels (choose heavy-duty ones that won’t break down when wet)
Oil spray
A large knife
Metal binder clips
Scissors
To Make a Foil Lid
If you’re making a foil lid then do this first, before lining the tin.
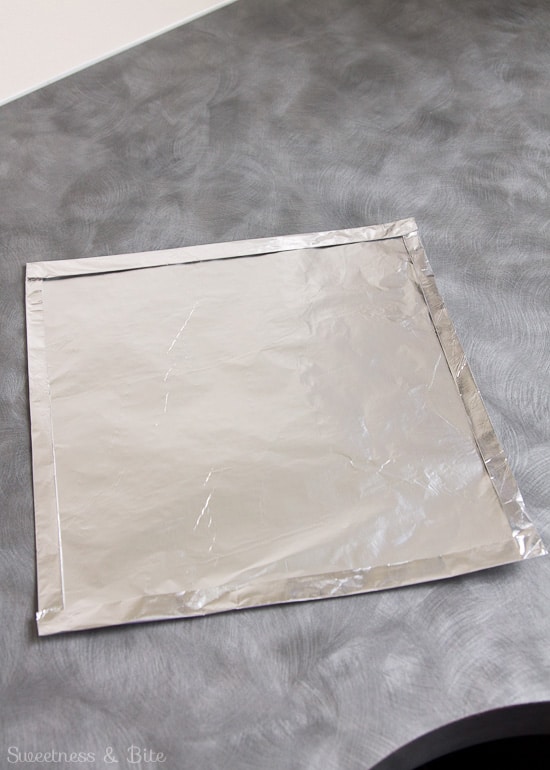
Take a square of foil that is large enough to cover the tin with an overhang on the edges. For larger pans, you may need to use two overlapping pieces of foil.
Fold over each of the edges of the foil.
Place it over the upturned cake tin and press down to form the foil over the tin.
If you’re making these for a square cake pan, do the same, but fold down the edges over the sides of the pan, and then fold the corners around to the side.
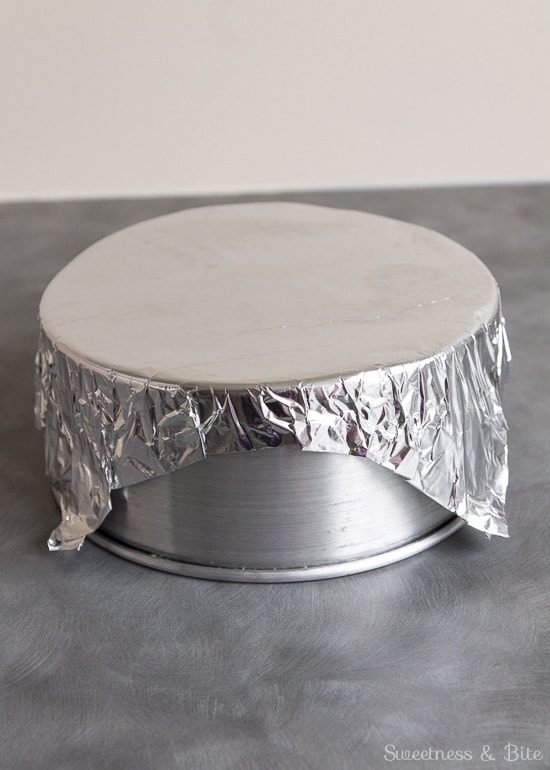
Remove the lid from the tin and set it aside for later. Or wear it so that the aliens can’t read your thoughts while you bake. Whatever floats your spaceship.
Line the Cake Pan
Start by measuring out a piece of baking paper long enough to fit around the circumference of your tin. (Tip: If you are lining two tins that are different sizes, make the strip long enough to fit the larger tin, and when you split the paper into two then you can trim one piece down to fit the smaller tin.) Tear off another piece of baking paper big enough to fit the base of the tin.
Take the long strip and fold it in half lengthwise. Run your fingernail along the fold. Slide the knife between the two sides and slide it along the fold to cut it. You’re basically just using the knife to split the paper along the fold.
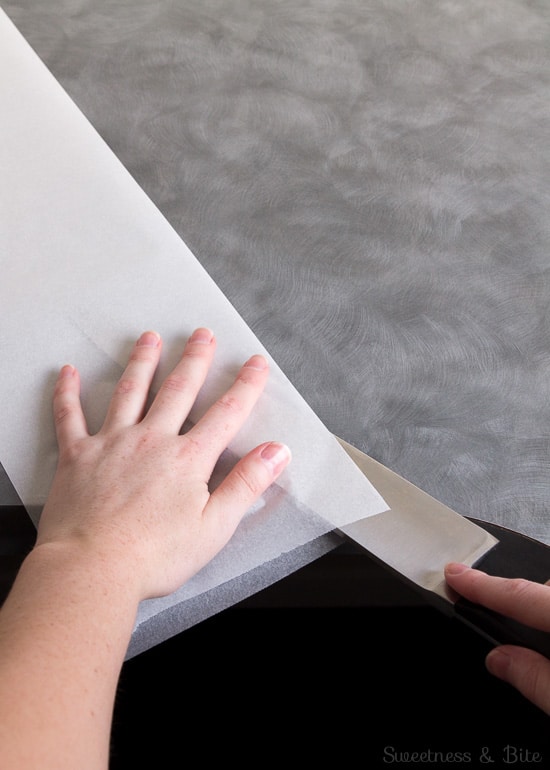
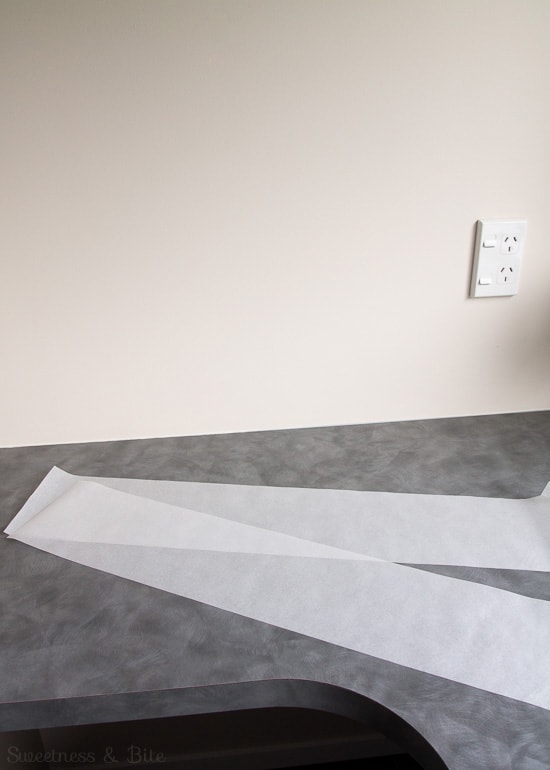
If you are only lining one tin then set aside the other length of paper for next time.
Draw around the base of the tin onto the smaller piece of baking paper. Fold the circle into quarters. If you have trouble seeing the lines to line them up, try placing the paper onto a white or light-coloured surface, the pencil lines should show up better. Cut along the line and unfold the circle.
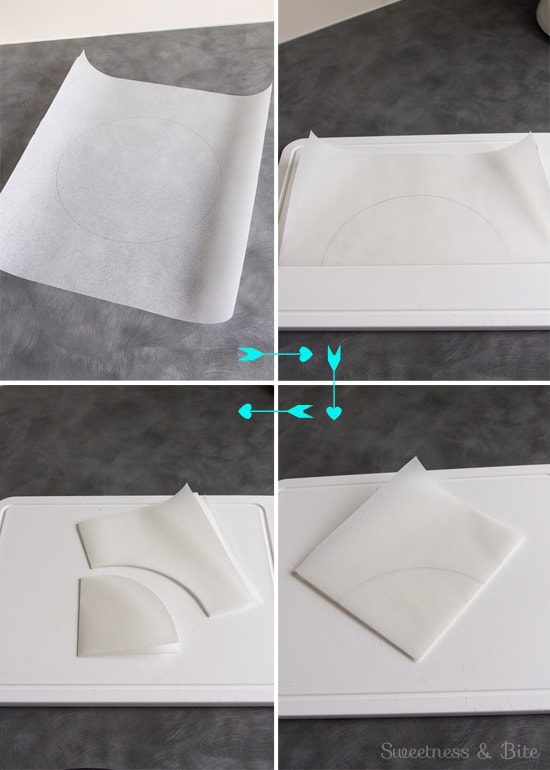
Spray the tin lightly with oil (or rub with softened butter). Place the long strip of baking paper into the tin and unroll it around the sides of your cake pan, adjusting it up or down as necessary.
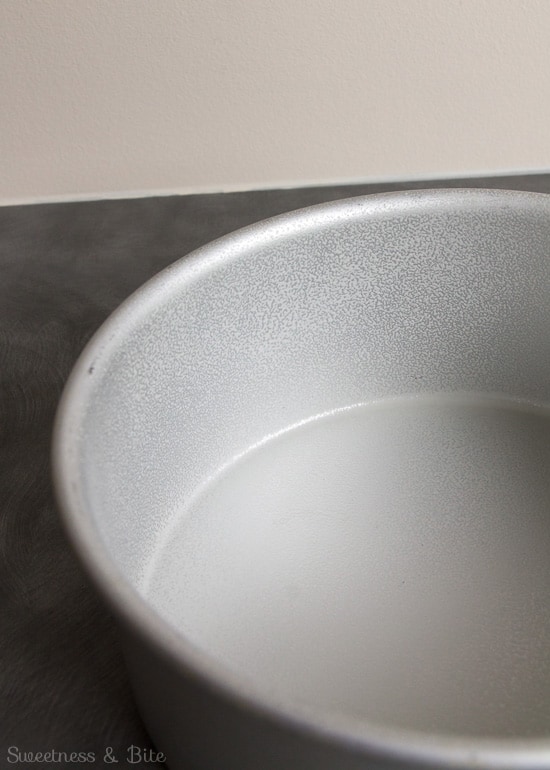
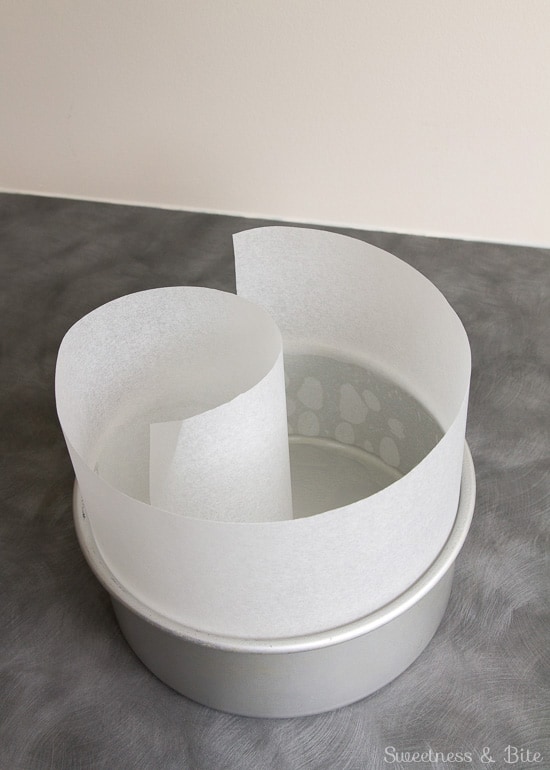
Spray the overlapping end with oil to adhere it. Place the circle of baking paper on the bottom of the tin and smooth out any air bubbles.
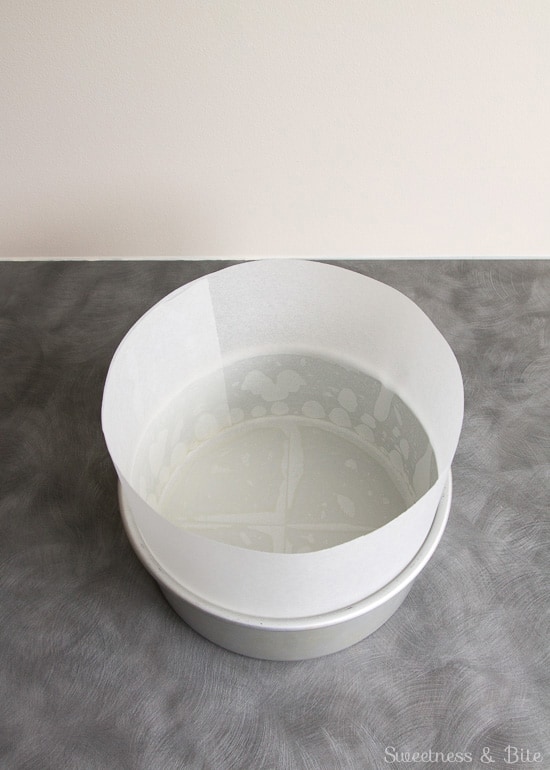
Make the Baking Strips
My cake pans are 3″ tall, so I like to use tall baking strips. If you are using shorter layer cake pans, you can adjust the width of the cake strip to match the height of your cake pan by cutting down the foil and paper towels to suit.
Tear off a piece of foil long enough to wrap around the tin with a 10cm or so overlap. Tear off (or cut) two strips of paper towel the same length.
Fold the foil in half lengthwise and then unfold.
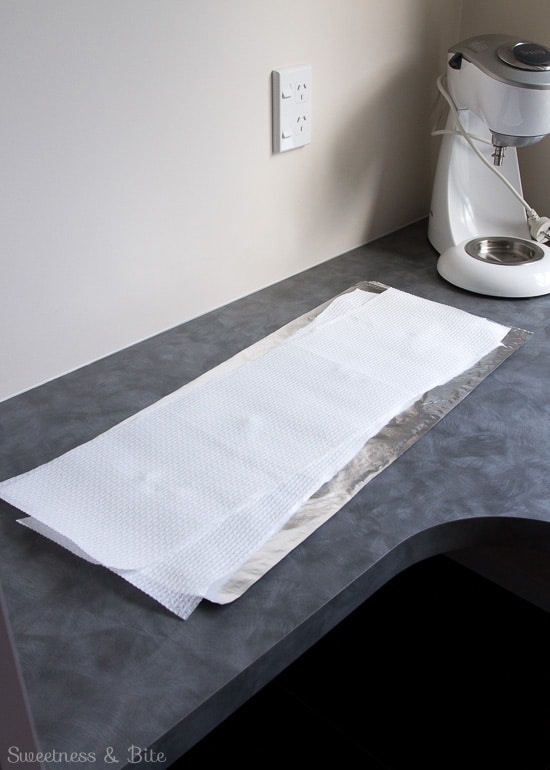
Lay one strip of paper towel on top of the other and fold it in half lengthwise.
Roll or fold them up, then saturate the towels with cold water and squeeze out the excess water very lightly – just until they no longer drip all over your bench and/or floor. They should still be quite wet.
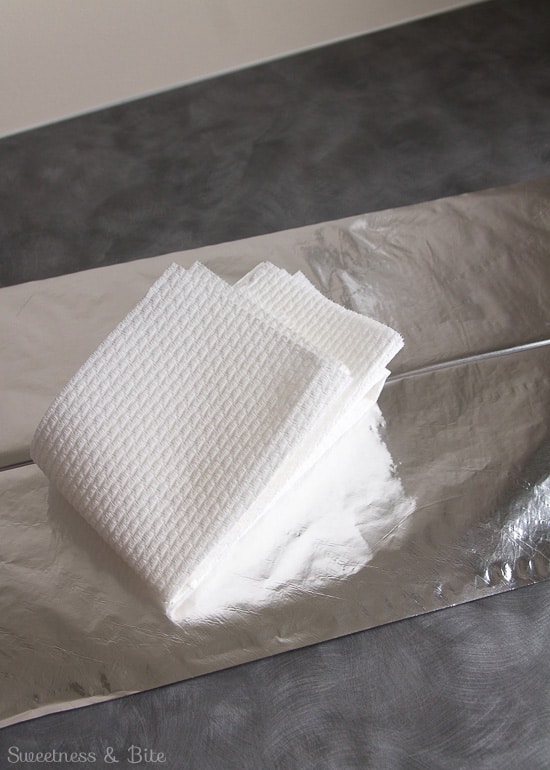
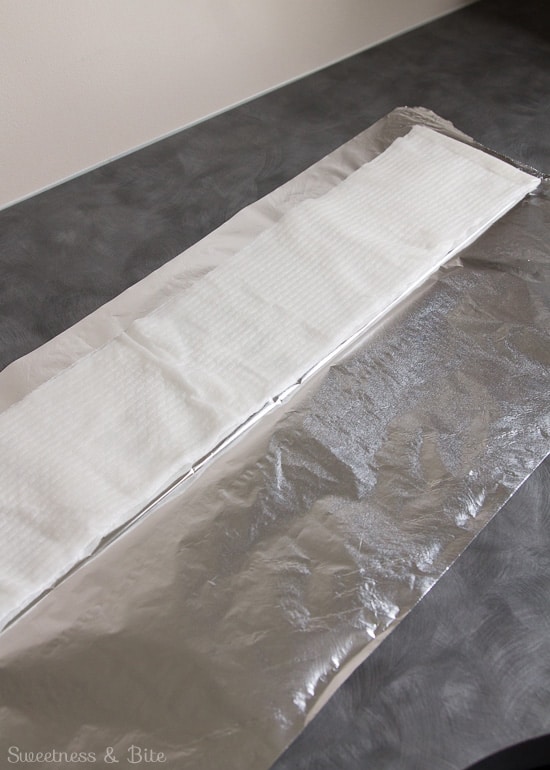
Lay the towel along one side of the foil, and fold the other side of the foil over.
Fold the edges in (trim or fold the paper towels if they stick out too far, you should be able to fold the foil over at least once.)
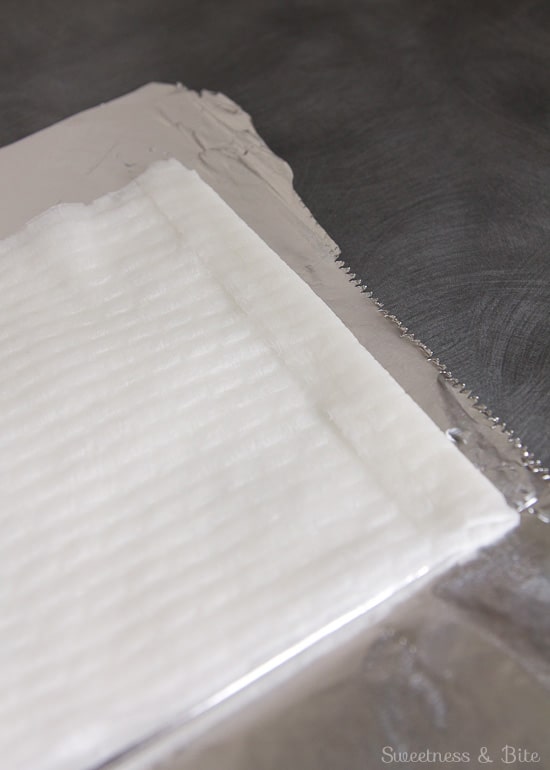
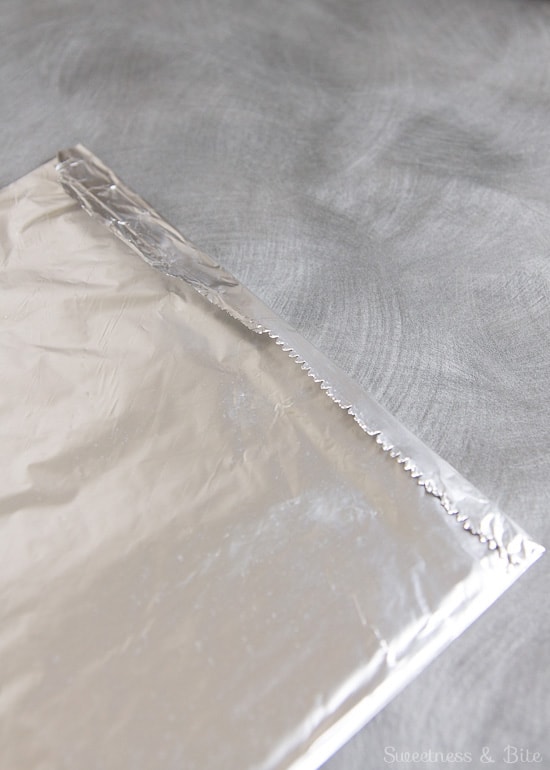
Fold over the top edge of the foil, and then fold it over again to seal. We’re done folding now, promise. It’s not origami….
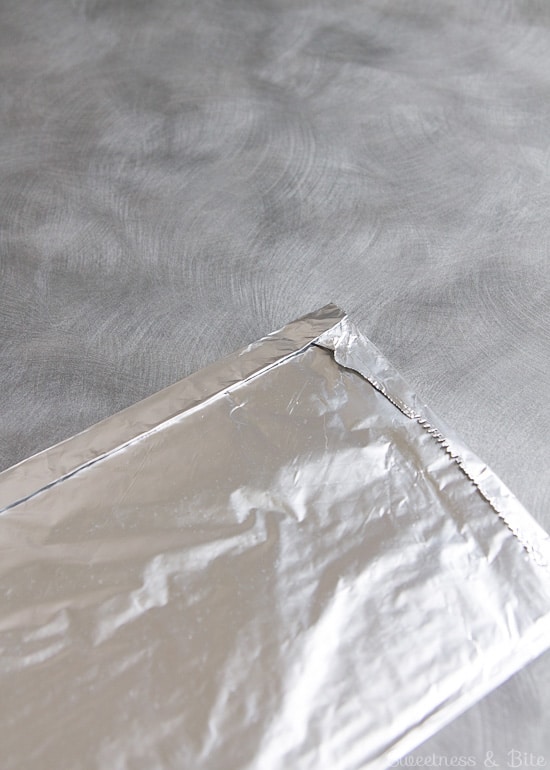
Place the baking strip with that folded edge on the bottom and facing towards the tin, and wrap the strip around the tin.
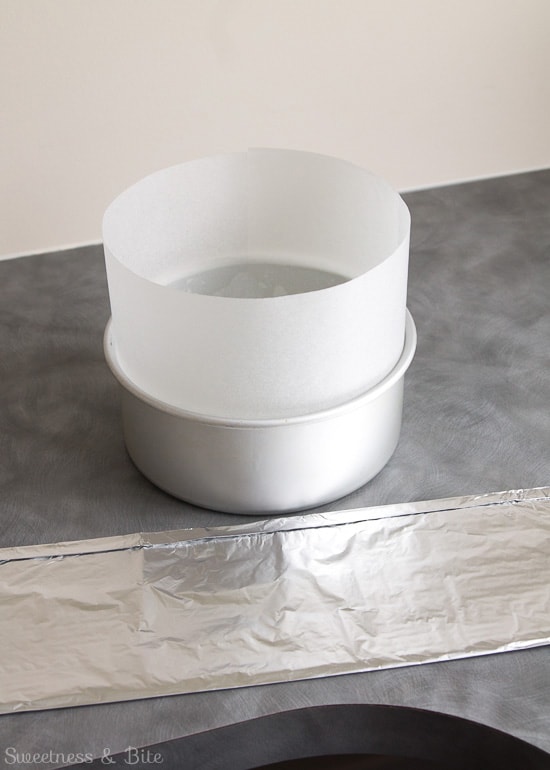
Pull the strip tight and secure it in place with the metal clips. If you don’t have binder clips you could use a large paper clip (just not one coated with plastic – it’ll melt!)
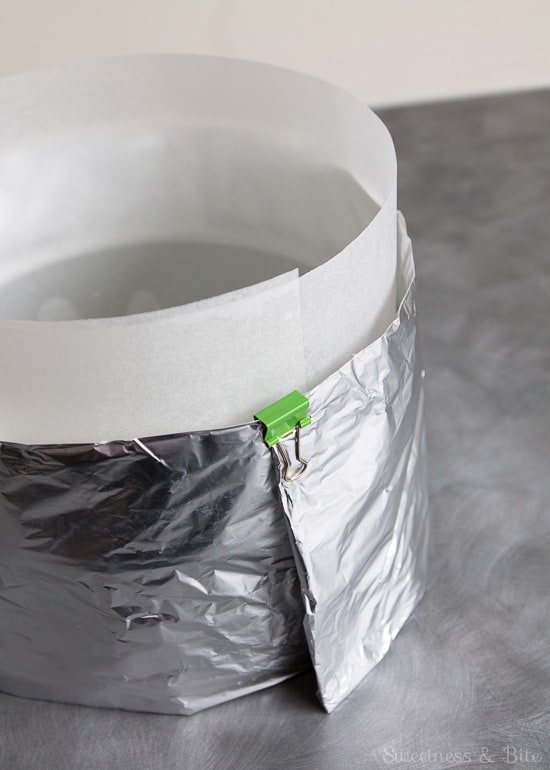
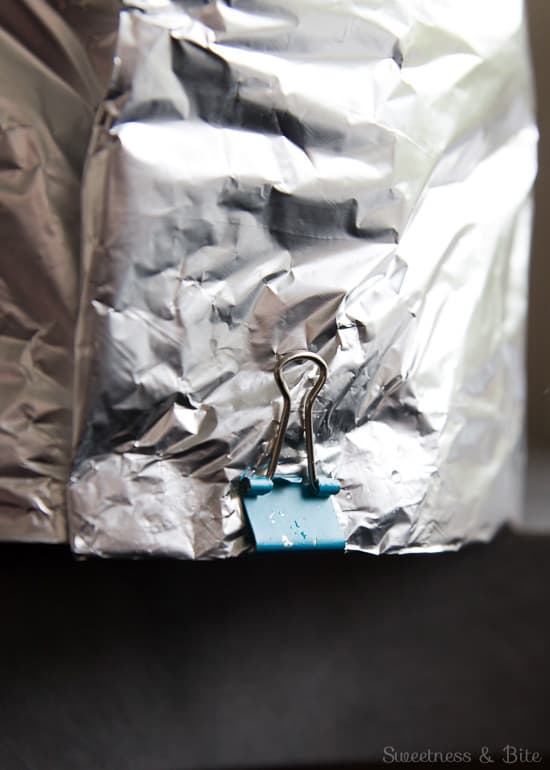
If you are lining a square tin the concept is basically the same, but you will need to crease the strips at the corners. Make sure you crease it all the way up above the tin – if your cake rises above the edge of the tin then the strip will help it keep its shape.
Run a finger around the top of the cake strip to smooth out any lumps and bumps. If your cake rises above the level of the tin then it may take on any odd shapes the strip makes.
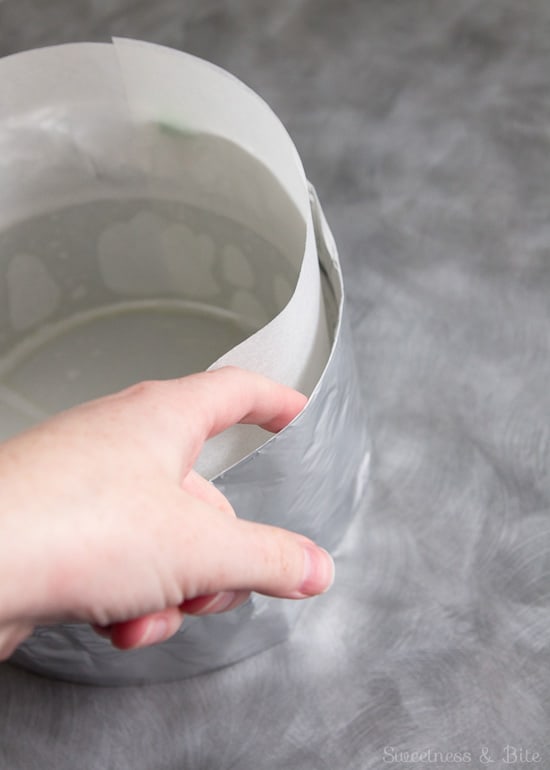
Snip the top edge of the strip in a few different spots around the tin, this lets a little of the steam out as the moisture in the paper towels evaporates and stops the strips from puffing out due to trapped steam, and distorting the top of your cake. Trust me on this one, it took me a few wiggly cakes to realise it.
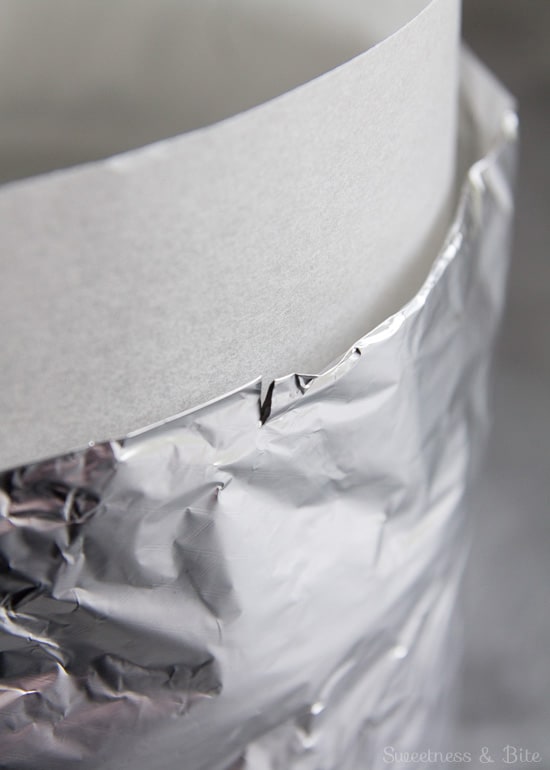
Now you can make your cake batter and fill the tin. If using the foil lid then place this over the top before putting the cake in the oven.
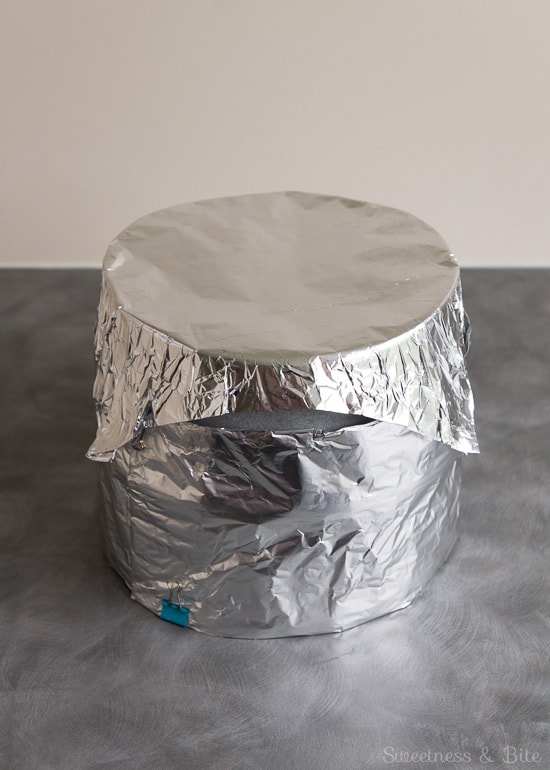
Ok, ok, it looks a little ridiculous, like the Tin Man is baking Dorothy a birthday cake, but I’m sure Dorothy hates dry cake almost as much as tornadoes and will appreciate the effort!
Once your cake comes out of the oven carefully remove the clips (they’ll be hot!) and remove the cake strips.
If the strips dry out completely during cooking and start smelling burnt, then you can remove them before the cake is done – they will have done most of their job protecting the cake by the time they dry out. If you suspect the cake has a lot longer still to bake then you can put new strips on, or re-wet (or replace) the paper towels in the strips – just use oven mitts to remove the hot metal clips, and let the strips cool a bit before you handle them! (And the cake should go back in the oven while you refresh the strips).
Baking Time
Keep in mind that when using these strips your cake will most likely take longer to bake than the recipe states and you will need to use your best judgement on when to start checking it. If you’re having trouble working out if the cake is cooked all the way through, then check out this post for tips.
Reusing DIY Cake Strips
You can re-use these foil cake strips more than once, just carefully open up the foil and either re-wet the same paper towels or replace them with fresh ones.
Need More Cake Tips?
My How to Keep Your Cakes Moist post has more tips for keeping your cake moist during and after baking.
How to Tell if a Cake is Done shows you three ways to test you cake to make sure it is baked all the way through.
And my Ultimate Guide to Sugar Syrup will tell you all about using simple syrup on cake layers, to add moisture back into a cake, and also to add heaps more delicious flavour! It’s the baker’s secret to ensuring a moist cake.
As always, if you have any questions you know where to find me (hint: the comments below are a good place to start looking. I don’t camouflage well. It’s the ginger hair, I suspect.)
~Natalie
x

Awesome Natalie – great read and great advise. I love the tin hat – would this also stop say a lemon pound cake from getting a hard brown crust on top?
Hey Suzette, yes it sure would! I make a lemon sour cream cake and use the lid on it to stop it getting too dark. You can either put it on right from the start, which slows cooking a little bit but (depending on the recipe) it can make the cake rise mostly flat with not much dome, or you can just put the lid on later in cooking if you check the cake and it looks a bit brown but not cooked through yet.
Hello! Thank you so much for your tutorials. I have thoroughly enjoyed reading them (I’ve read your three tutorials on butter cream stripes too) and you’re a pleasure a read and learn from. I can’t wait to try out the new techniques I’ve learned today. Thank you so much.
Lauren Smith Xxx
Hi Lauren, you are so welcome and thank you for taking the time to leave such a lovely comment! 🙂
Hi Nat….Such a fantastically detailed & entertaining tutorial as always…you are such a legend :)) I always use baking strips for mud cakes, but read your tutorials for the sheer pleasure of it! Thanks. Jen
Aww thanks Jenny. I should really thank you, it was talking to you about gluten free cakes ages ago that made me want to share these recipes, and since I used baking strips I had to write this post, so it’s all filtered down from you! It just took me a while to get myself into gear 😉 Hope you guys are well 🙂 xx
Could you please also show the paper lining method for muffins and cupcakes.. if dont want to use the ready liners and want to have those muffins big enough for areal bite..Appreciate the work you have uploaded here a real good read..
Hi Natalie,
Very, very informative and practical. Question: how high above the tin should the lining be?
Hi David. I like the lining to be a good few inches higher than the top edge of the tin. It provides a bit of protection for the cake, and also gives it plenty of room to rise. I find by splitting the baking paper in half lengthwise it gives me the perfect height. The paper I buy is just a little under 12 inches wide, so when I split it each strip is about 6″.
Hi – Brilliant tutorial thanks…it might be exactly what I am looking for?!
If I use the liners will it stop my Victoria sponge from forming a thick hard crust on the outside? The actual sponge is great but you need steal teeth to bite through the biscuity crust :/
I have been asked to make a baby shower cake next week but don’t want to choke anyone!
My cake tin is 24cm and today it was in the oven (fan) at 180 for nearly and hour and a half. Your advice would be very much appreciated!
Thanks
Hi Natalie. You could definitely try this out on your Victoria sponge. It will take a bit longer to cook, but the outsides will be protected from getting to dry.
There are a couple of other things you could try too. If the sponge crust isn’t too dark and burnt looking, you can brush freshly boiled water onto the crust when the cake comes out of the oven, then cover it and leave it to cool. The moisture and steam should soften the crust.
Another thing you could do is bake the cake a little higher than you need it, and just trim all of the crust off the top, bottom and sides, it’s a little more wasteful, but you will end up with a perfect slice of cake. I generally trim the crusts off the top to level it, and then trim the sides to make sure I get a nice even layer of butter cream or ganache around the cake.
I would like to thank you for your knowledge on wrapping your cakes I will definitely try this it looks very interesting and I am definitely going to try your Gluten Free cake I’m so happy I found your website… Thank you again…
Excellent tutorial, I can’t wait to try it out. Thank you…
I really enjoyed reading this tutorial (your sense of humour is a VERY nice touch). I have tried this method and now have cakes with no hard crusty bits. BUT, I now have the problem that my cakes are rising beautifully and then collapsing once they are out of the oven. I realise this will be because I need to increase the cooking time. Do you have any suggestions for how much longer the cooking time should be? If the original time is 1 hour 30min would you expect it should be an extra 30mins? Any suggestions most welcome.
Hi Adrienne, yes the only downside of this method is the extended cooking time. I would suggest 30 minutes extra is a good starting point, check it and leave it longer obviously if it needs it. If you haven’t already, check out this post for some tips on checking if your cake is baked all the way through, since muds are notoriously hard to check for done-ness. And also it’s a good idea to take note of how much extra baking time your recipe needs, then you’ll know next time when you need to start checking it. Hope that helps 🙂
Hai. Your tutorial was so so helpful for a beginner like me. Just one question If I am.using a towel do I still need to put the paper liners inside and can I still cover my cake??
Hi Bobby. If you’re using a towel yes you definitely do still need the paper inside, that’s what will stop your cake sticking to the pan. And yes you can still put the cover on top, as it will sit on top of the paper liner 🙂
Omg where have I been as usual I turn up late to the party so glad I found your little piece of the Internet loving the tips!
Happy blogging love Kelly xx
Thanks Kelly! I’m always late to everything on the internet. But don’t worry, if I was giving out loot bags at this party, I would save you one 😉
Hi Natalie
Thank you so much!
What a helpful great read! You are funny too 🙂 Bek
Thanks Bek, I’m really glad you enjoyed it! 🙂
Hi! I just recently found your website and love everything about it! I can’t wait to use all of your tips and tricks to make my son’s 2nd birthday cake!
Could you please tell what the size of the pan in these pictures is? I’m guessing maybe a 8”X3”??
Thanks so much!
Jeevan
Hi Jeevan, thanks for your lovely comment. It’s a 7″ x 3″ pan in these pictures 🙂
Hi Natalie,
I’m about to bake a 10″ Madeira cake, which will be in a deep pan. I want quite a deep cake, so looking to use a recipe based around 11 medium eggs. Because it’s such a large cake I want it to bake evenly and not to rise too much. The recipe suggests a bake time of 2.5 hours without any lining. What would you expect the bake time to be when using these baking strips + lid? I have read online that baking strips should not increase bake time, but I’ve found this not to be true when experimenting in the past. Also, do you find that the lid increases baking time further? Most other blogs don’t suggest using a lid and the cakes apparently still come out evenly baked and flat, so wondering if the lid is necessary? I would appreciate any help you can give =)! Thanks in advance xxx
Hi Sarah. I’d say that the baking strips maybe add half an hour or so on to the baking time. It really depends on how thick the paper towels are, how much water they hold (and how much you squeeze them out) so it’s hard to tell for sure but I’d say about half an hour, give or take. If it’s a recipe that bakes evenly then you can do without the lid, I find with cakes like chocolate mud cakes that are very high in sugar the top crusts really quickly so it’s better to slow that crusting down with a lid. For some cakes I make a lid but don’t put it on straight away, I just leave it aside in case the cake starts browning too quickly and then I’ll just pop it on to protect the top from drying out. I don’t think the lid itself makes the cake take much longer to cook, it just stops the top from crusting so I guess it makes it look like the cake is taking longer, when in actual fact the inside is cooking at a similar rate, if that makes sense? But it’s definitely not necessary for all cakes. Hope that helps 🙂
Thanks Natalie, I’ll give it a try with the lid as well then as I don’t really want it to crust on top. Much appreciate your help!
No worries, I hope it goes well for you! 🙂 xx
Hi Natalie!
Thanks so much for this! I am so excited to try it out and test my results. One question though, when using the lid, is it fine if I just put it right on top of the cake pan? I don’t have any baking paper right now and am using a mixture of shortening, flour, and oil to prevent my cake from sticking. Will the lid still work?
Hi Krystal. The main reason for putting the lid on top of the high collar of baking paper is so that the cake doesn’t rise up and stick to the foil lid, so if you’re baking short layers in tall-ish pans and the cake isn’t likely to rise up to the top of the cake pan, then yes you can do that. If that’s not the case (and if you’re not using the baking strips, which would do the same job of holding the lid above the cake) then I’d suggest making the lids but not putting them on until the cake is mostly baked, and if it starts to brown too much before it’s completely cooked through you can pop the foil lid on then. It will protect the cake from the heat until it’s done, but because the top crust will be set the foil won’t stick to it. Hope that helps 🙂
Fantastic idea- what a fab idea, just annoyed I didn’t find it for my simnel cake last week. Looking forward to baking a fruit cake without that slightly burnt smell on the outside whilst waiting for the middle to cook.
Thanks,
Ali
Hi Alison, that burnt smell is the worst, right?! Hopefully this will help you next time 🙂
Hi
So glad I found your post I’m having trouble with crusty cakes because my oven is a fan oven I can’t control it oven is very hot. I normally bake around 130 Celsius. Do u think this kid and strips will help me I want to try it and see. So the baking temperature is the same or do I have to increase it?
Thanks a lot
Thanusha
Hi Thanusha, yes I think your cakes could definitely benefit from baking strips and a foil lid. It sounds like perhaps your oven is heating to higher than 130 degrees (many ovens will run hotter than the temperature it tells you on the controls) so I would still bake it at 130°C with the baking strips and lid and see how it goes. If it takes a really long time to bake then you could turn the temperature up a bit the next time. If you can then I’d definitely suggest buying an oven thermometer so you can check how hot the oven really is, so you can adjust the temperature if needs be. But in the meantime then the baking strips will help stop those crusty edges on your cakes 🙂
Hello Natalie!
I’ve just read your post and loved it!
I’m brazilian and love to bake cakes; today, tried to bake a cake in a high tin (10 cm) and I used a wet towel baking strip…it didn’t work for me…it took 1 hour and 15min and the cake came out “raw”…well, I’ll try your advices for the next try!
Thank you very much ♡
Priscila
Oh goodness!! Where have you been all of my life?! I have just baked two PERFECTLY flat and soft-edged cakes! I have been struggling horrifically with dry and crusty edges. Thank you SO SO much for this. ?
Yay, I’m so glad it worked so well for you, Heidi! Hopefully you’ll never have to suffer with nasty crusty edged cakes ever again! 🙂
Hi. Love your tutorial, so detailed! Thanks! How do I modify this for a 4” high cake tin instead of 3” though?
Hi Jay, I have some 4″ high cake tins and these fit those tins too. The baking paper and foil I use are about 12″ wide, so by the time they’re cut (paper) or folded (foil) the strips are about 6″ high. So you shouldn’t need to modify them at all 🙂
This looks fab! Two questions; is it potato flour, or potato starch that you use for your mix? Second question is, do you line the bottom of the tin with foil? Worried about the bottom burning!
Hi Sylvia. I use potato starch. Sometimes potato starch is mislabelled as potato flour, but you should be able to tell if it’s really starch – the starch is a pure white colour and has no real smell, whereas the flour is a dull cream colour and has a strong potato smell.
And yes you can make a baking strip for the bottom of the cake as well. I usually only do it for fruit cakes since they take extra long to bake. I just roll out a sheet of foil that’s twice as long as the baking tin is wide, place the wet paper towels on one half, and fold the other half over. Then I just fold the edges in to seal in the paper towels, and it kind of makes a foil pad for the cake to sit on. I also stab a couple of steam holes around the edges just so it doesn’t puff up. Hopefully that makes sense, let me know if it doesn’t! 🙂 Alternatively, you can place either an empty baking tray or a baking dish half-filled with water on the oven rack below the rack you put your cake on, and that will help insulate the base of the cake from the heat.
Amazing! I’m just baking the third layer of a cake……wish I’d read this earlier! One to try next time!
Cool information tools Natalie. They offer tried and tested steps that create wonderful results. With a great deal of expertise and TLC all combined into one delicious perogie. Wishing you a peace filled day!
Sincerely,
Christopher.
Hello!
I’m planning on making my first fruitcake this year! I love fruitcake but since I have had to go GF I have been unable to find any safe for me to eat. So this year I am making one for Christmas, I have never made a fruitcake before and your tutorials are pure gold. I love that they make me laugh. I am curious if you have a recipe for Marzipan fondant, I have been looking at a few recipes and it seems pretty straight forward for the most part (I will also be making my own almond paste because I find most of the stuff in the stores has tons of crap in it and is often super hard and difficult to work with) Thank you again for the recipes and tips. I am sure they will be most helpful. WIsh me luck on my first boozy fruitcake and have an amazing holiday full of extra glace cherries (I confess I also have a weakness for these and a disgust for burnt raisins!) All my best.
Hey Nikki, so sorry for the delayed reply, I was away this past week. I’ve actually only ever made homemade marzipan once, and it was many years ago so I can’t even remember what recipe I used. I have recently saved this recipe by the Daring Gourmet to try, as it looks really good. I’m just not sure how much you would need to make to cover a cake though, I’m guessing probably double or even triple. I’ve been hoping to give it a go on our family Christmas cake this year, although I’m not holding my breath as I plan to decorate our cake every year and then we just end up eating it plain becauseI get too busy and don’t get around to decorating it 🤦♀️So we will see what happens this year 😂
Anyway, I hope that helps and if you give it a go I would love to know how you get on!
I used an old bed sheet, cut into strips then folded them lengthwise 5 times, sewed the ends together. I then wrapped my tin tightly and used nappie pins to secure. They can then be easily slipped on and off repeatedly and work a treat.
I’m just a girl, baking in my kitchen, wearing my tin foil hat
😂😂😂
And I’m just a Nana, baking in my kitchen, wearing my tinfoil hat too, but………. the cake strips I made and wrapped around my caketin produced a beautifully soft edged, no dome (yay!) chocolate cake for the first time ever!! Thank you so much Natalie. I am thrilled to have found Sweetnessnadbite and am happily reading through your easy-to-understand and follow (not to mention often hilarious) instructions, plus the information you provide on the “whys” is invaluable. Keep on doing what you’re doing, and I wish you every success and much happiness.
Hi Karen. Thanks so much for your comment, that’s so sweet of you to say, I really appreciate it. I’m also very glad you found S&B and that you’re enjoying the tutorials 💜 And hooray for soft-edged, dome-free chocolate cakes!! 🙌🏻